Every photographer wants to create stunning photographs. New camera technology, editing software, lighting gear, photo accessories, and other equipment all help in providing every shooter the chance and ability to enhance their images. However, because of our excitement to learn cool things with our new camera or that new post processing technique, there is also a tendency for us to neglect developing some of the essential skills.
If you’ve been a photographer for some time now and feel that you’re one of those who’ve skipped something, don’t worry, it’s really quite normal. All you need to do is go back and start learning again. There are also things you may need to unlearn.
If you’re new to photography, then this is good news since you can start with a clean slate without having to unlearn anything.
The purpose of this guide is to help you discover the seven basic skill areas of study in photography. Each of these seven study areas is essential in learning how to make photographs stand out. All the skills necessary for a photographer to create stunning images will fall under one or several of these categories. As you continue your photography journey, it is important to assess yourself in terms of these seven skill areas. Let’s begin.
Skill Area 1: Camera Knowhow
Every photographer begins their photography journey by learning how to use their camera.
This is actually quite a given. There are some, however, who choose to skip this process by keeping their settings on Auto or only learning a fraction of what their gear can do because they want to focus on the art side of photography rather than the tech side. This is actually alright. We need to understand, though, that your ability to control your shots will be limited to how well you know how to use your camera. Knowing how to use it involves different things: how to handle your camera, what your camera can do, your camera’s limitations, using buttons and dials, basic and special features, knowledge of settings, etc. Camera knowhow will also involve knowledge of lenses and the use of other camera equipment.
There are also a number of camera skills that you need to master, including exposure and focusing. Mastery of camera skills and settings should be top priority for beginning photographers because it directly affects the result of every image created. You can try to compose the best photos, but if they turn out to be underexposed or blurry, then it ruins the shot altogether.
Note to Beginners: You don’t need to just learn about your camera when you’re starting out; you can learn composition and lighting simultaneously, although I do suggest you cover the basics of exposure before you do so. Also, if you’re serious about learning photography, choose a camera with manual settings so that you will learn how to produce shots that are within your control.
Steps for Improvement:
- Head over to our Free Ebooks Section. In the category picker choose Fundamentals. Read or watch the guides about camera use and settings. Begin with exposure, metering, and focusing.
- Learn how to shoot under low light conditions. Understanding long exposures will also help you master the basics of camera settings.
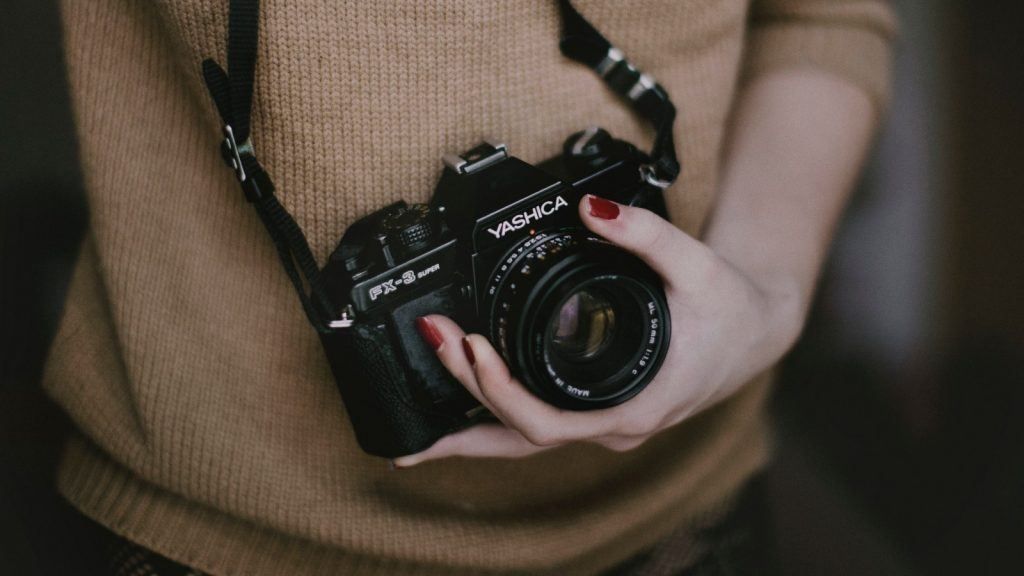
Photo from Visualhunt
Skill Area 2: Composition
The truth is that the camera is so much easier to understand than composition, because although composition has a technical component, it is mostly intuitive in nature.
It’s very similar to how we treat food or music. Was your lunch the other day delicious? How did you know? Did you have to attend a class to know what is delicious from what’s not? I’m guessing that the answer is, no. It’s all intuitive. You don’t need to learn music to know what good music sounds like. Somehow, we know it intuitively. Of course, intuition can be strengthened. If your mom was a top chef and you grew up eating delicious food, your standard of what’s delicious will be different from the boy next door who grew up eating instant meals daily. For that boy to get to your standard of delicious, you need to invite him over daily and dine with you. You are essentially teaching him what delicious tastes like.
Intuition is learned differently from technical knowhow. Most photographers learn composition through a technical approach—using rules and guidelines. The Rule of Thirds, Leading Lines, and the Golden Triangle are some of these rules. This has helped many to understand composition better. A lot of beginners, however, have reduced composition to learning some rules that they can follow.
Composition is more than just following a set of rules. Rather, it is the ability of the photographer to arrange elements in a frame that is pleasing and interesting to the eyes of the viewer. This involves being able to recognize each element and how it affects the photograph as a whole.
Observe the image of a jetty on the next page. Do you “feel” anything off in the photo? Don’t you want to somehow move it a bit so it would look perfectly symmetric? That’s the power of intuition at work, and it is important in composition.
Note to Beginners: I encourage you to learn the rules of composition, but don’t stop there. Get yourself to that level where you’re no longer following rules but where each shot just “feels” right. Knowing how to intuitively compose elements in a frame is an invaluable skill.
Steps for Improvement:
- Join a critique group. Critique groups usually focus on composition more than any other skill area. Lightstalking’s Shark Tank is a good venue. Actively get critique for your work and learn to give critique to others too.
- Go through Photzy’s Advanced Composition book and practice the concepts. If you’re a new photographer, get the Understanding Composition book first.

Photo by Visualhunt
Skill Area 3: Lighting
If painters have paint, photographers use light to create their art. The basic study of lighting is two-fold. First, it involves learning the properties of light. This is called understanding light. Second, it involves taking advantage of those properties so we can use it in a photograph. This is called controlling light.
Understanding light is the first step to understanding lighting and what it does. The use of light in photography isn’t just so that we would see objects or scenes. Light allows us to shape our subjects. It can create mood, drama, and emotion. It can make a subject look edgy or beautiful. It can make a scene look dark and eerie or pleasant and bright. It can create depth and also make our photos dull.
The ability to control light requires us to see light. Seeing light includes being able to recognize the type of light available, how it falls on objects, how it affects shadows, and how it relates to composition. Lighting and composition go hand in hand because of how light affects elements in a frame.
Some new photographers confuse lighting with exposure. Although lighting affects exposure, exposure is more of a camera skill than a lighting skill. These two are very different. Lighting isn’t simply about brightness or contrast either, although lighting involves those two.
There are a lot of topics under the subject of lighting: lighting setup, lighting design, lighting ratios, using light modifiers, etc. Study them all because lighting is one good way to make your photos pop without having to do heavy post-processing.
Note to Beginners: Learn the concepts of lighting in this order: (1) lighting properties, (2) observing light, and (3) how to control light. There are resources in your digital locker that cover these topics.
Steps for Improvement: Download these three free guides on lighting from your locker and learn and practice the concepts:

Lighting can dictate drama and depth, and can make 2-D art look 3-D. The lighting makes the photo look edgy. If it was lit differently, the effect would also be different. Photo by Deveion Acker
Skill Area 4: Visual Storytelling
Storytelling is the ability to convey an idea or a message through a medium. Traditionally, this is done through words and gestures. In our case, this is done through photographic elements. Storytelling is not only about capturing what you see; it is also important to be able to translate the message you want to relay into something that your target audience can quickly and visually understand. An exception to this is when you’re presenting abstract art, where the message is dependent on the viewer’s interpretation.
Being able to convey emotion to make people feel what you were feeling when you took the photograph will require you to use composition knowledge and storytelling ability. Composition will tell you how to arrange a scene and what needs to be there or not there to create balance. Storytelling will tell you what the elements should look like and what needs to be there and not there so that the message is conveyed properly. If you only use composition skills, a photo may still be compositionally balanced but can convey the wrong message.
Sadly, there are not a lot of tools available in learning visual storytelling in photography. One of the best ways, however, is through feedback. Allow others to critique your work. Ask people who are not photographers if they understand the message of your photograph. You may also try learning about cinematography to develop your storytelling ability.
Note to Beginners: It is best to focus on this skill area once you already know the basics of camera use, lighting, and composition.
Steps for Improvement:
- Conceptual photography is a good genre to learn storytelling. Commit to do a creativity project that is conceptual in nature. If you need ideas, grab one of Photzy’s premium guides: The Creativity Catalog. It has a lot of conceptual projects that you can try.
- Get critique from other people. Ask your friends who are not photographers to tell you what they see in your photograph or what your photograph is about. See if their response matches with your real intended output.

What do you think this photo is about? What are the elements and objects in this photo that make the story effective? Which ones don’t? Photo by Kyle Lehhman
Skill Area 5: Subject Selection
One aspect of photography that is rarely taught to new photographers is the ability to choose subjects. Like visual storytelling, being able to recognize subjects with a high interest value is another skill that some neglect to consider.
In film-making and in theater, there’s a pre-production event called a casting call where different actors are selected to play specific roles. We do the same in photography. We use our own intuitive and technical judgment to see whether a subject is worth shooting. The focus of this skill is mostly in appraising your environment and discovering what subjects stand out compared to others. It also involves the ability of the photographer to let go and move on to find better opportunities.
Of course, this skill would vary greatly on what type of photography you’re doing. Travel and street photographers use this skill quite often. Their choice of subject will be within their control. However, if you’re paid to take photos of an event or a specific person, you don’t have enough leverage to choose subjects. This is why the skill of subject selection also involves being able to make decisions on how to increase the interest value of a subject.
The ornament in this image to the left is quite interesting. It may or may not be obvious that the object is a vase, but the broken egg shells covering it created texture that makes it look fascinating.
Note to Beginners: Like storytelling, it is best to focus on subject selection once you already know the basics of camera use, lighting, and composition.
Steps for Improvement: Read my free guide on Subject Selection called How to Choose the Right Photography Subjects for Better Images and do the practices included.

Photo by Karlo de Leon
Skill Area 6: Post-Processing
Some may argue that post-processing is not part of photography, but it’s the same as taking away the darkroom from film. Processing is in fact an important part of photography although it can be an optional activity. While actual dark rooms existed during the time of film, the digital darkroom involves computers, editing software, printers, and digital storage devices.
What is post-processing really all about? Post-processing involves altering the results of any or all of the other six skill areas to create a more desirable output. With post-processing, you can increase and decrease exposure, make sharp areas look blurry, move or remove certain objects to enhance composition, and even change the story of an image. Being good at post-processing, however, requires that you know how to use the editing software and that you also have acquired the skills in the area that you want to alter. For example, if you want to alter the composition of a photograph to make it look better, you need to develop composition skills. If you want to alter lighting, then you need to know what beautiful light looks like.
Post-processing doesn’t stop there. Even if you don’t edit anything, all your photos still go through an assessment and selection process. This is when you decide whether a photograph is already good enough, needs some editing, or needs to be deleted. Creating the final output of the photograph is the last part of post-processing. Photos are either printed, posted on social media, stored for later use, or sent to the land of no return, etc.
Note to Beginners: Learning post-processing largely involves editing. The best way to learn the editing tools is to follow someone else’s workflow. You may learn from different instructors and then you can create your own editing workflow later when you’ve become more familiar. Also, choose an editing software that you can grow with over time. I prefer using Photoshop and Lightroom and have been using these two since the beginning of digital post-processing. There’s a lot of support and tutorials you can find for these two products. There is also free editing software that you can get, but there may not be a lot of tutorials available.
Steps for Improvement:
- Go to the Free Ebooks Section of Photzy, and look for articles on Post-Processing. Read or watch the tutorials and practice the lessons.
- I highly recommend learning Mitchell K’s post-processing technique. I’ve been following him for almost a decade and have learned a great deal about post-processing through him. You may learn his technique through these two guides:
– Understanding Post-Processing
– Understanding Post-Processing Video Course

How many differences can you spot? This is what post-processing can do. Photo by Luke Ross
Skill Area 7: Specific Fields of Study (Photography Genres)
General photography only requires that you work on the first six basic skill areas, but you can go into the specifics of a genre to understand it further.
It’s similar to doctors having specializations. Any doctor can give a general diagnosis to sickness, but if you’re looking for specifics, you need to go to a specialist. You’ll be more assured that they know what’s wrong with you compared to a general practitioner.
Landscape photographers will have certain skills that are different from portrait photographers. In terms of gear, their priority will be in equipment that supports and enhances camera output like tripods and filters, while portrait photographers will include lighting equipment in their accessories. Fashion photographers would want to develop their directing skills and knowledge of posing, something that wildlife and macro photographers won’t really care about.
Photographer attitudes are also noticeable. Landscape photographers are rarely impatient. It’s also difficult to be a shy photographer when shooting portraits. Adventure photographers aren’t afraid of taking risks, while food photographers are quite meticulous.
What if you do not have a specific genre that you want to focus on? Do you still need to go into specifics?
If you want to be an expert in that area, Yes. There are actually a lot of generalists out there, even professional ones. They’re not inferior to those who choose to focus on only one genre, it’s just that they want to specialize in more than one. They are more like multi-specialists rather than general practitioners.
Note to Beginners: Don’t force yourself to choose a genre, but I suggest you try them all until you find one that suits your taste. And even if you’ve already chosen, it is still best to go through the other genres because you are sure to learn something new about photography by doing this.
Steps for Improvement: Go to the Free Ebooks Section of Photzy and find some guides that you can learn pertaining to your genre of choice.
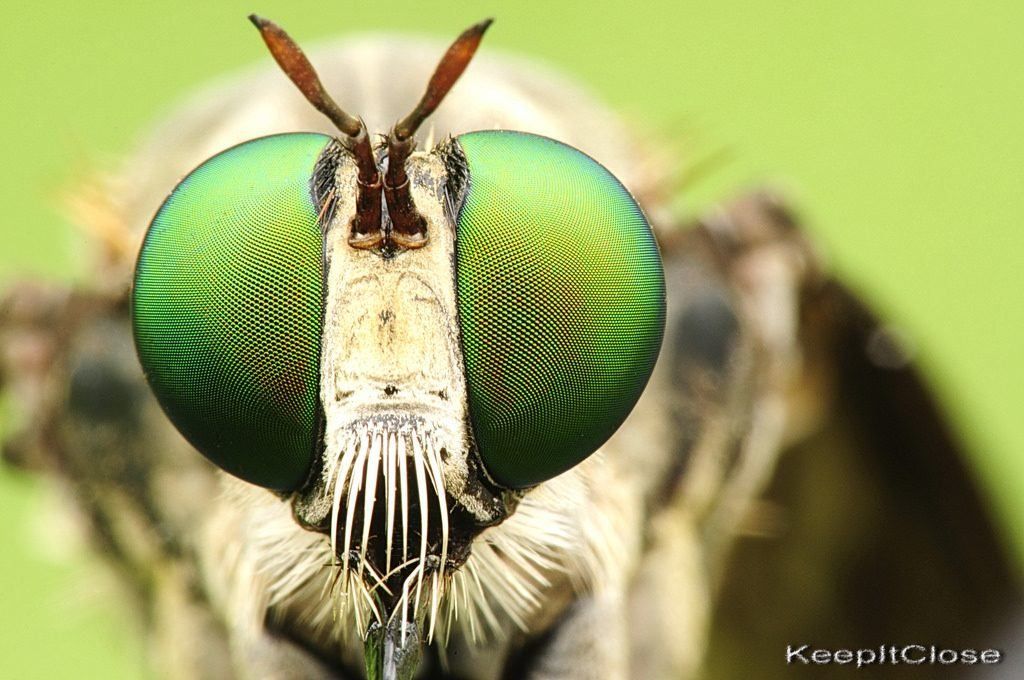
Being able to take this shot requires knowledge of macro photography. It will include which equipment is needed, which lens to use, how to set up the shot, etc. Photo by USGSBIML
Skill Areas Work Together
The seven skill areas all work together in creating stunning images. Combining these skills is the key to making your photos pop.
Here’s an illustration on how these skills work together:
Imagine you’re traveling to a culture very much different from yours. You reach the trade market because it’s a great place for travel photo opportunities. You know this because of your knowledge of travel photography, a genre-specific skill.
You observe the different things that are happening around you. Your lighting skills will help you find the right area to shoot where light is beautiful. Your subject selection skills will help you determine which subjects and activities are worth shooting.
You chance upon several scenes of interest. Suddenly, someone standing out from the crowd catches your attention—a woman with deep green eyes in local ethnic garb carrying a big basket of bread in one arm and what seems like her one-month old daughter in her other arm. She’s a great subject for travel.
Your lighting, composition, and storytelling skills will help you asses which angle is best to shoot the person and which elements should be in the scene. Your knowledge of the genre and the camera has already given you an idea of which lens is best to use. While this is happening, like second nature, you already adjust the settings of your camera: the shooting mode, the right aperture-ISO-shutter speed combination, the right metering system, and exposure compensation, white balance, etc. You’ve probably already done this as you were looking around for a good subject.
You take a few candid shots of your subject from a distance, but you want to get closer. Your travel photography skills and attitude allow you to interact with the person, ask the right questions, and do the right gestures, and that gives you access to take more photos of your subject of interest. When you get home, you simply load all your photos for post-processing to make it look even better, upload your best shot in your online portfolio, and delete the rest.
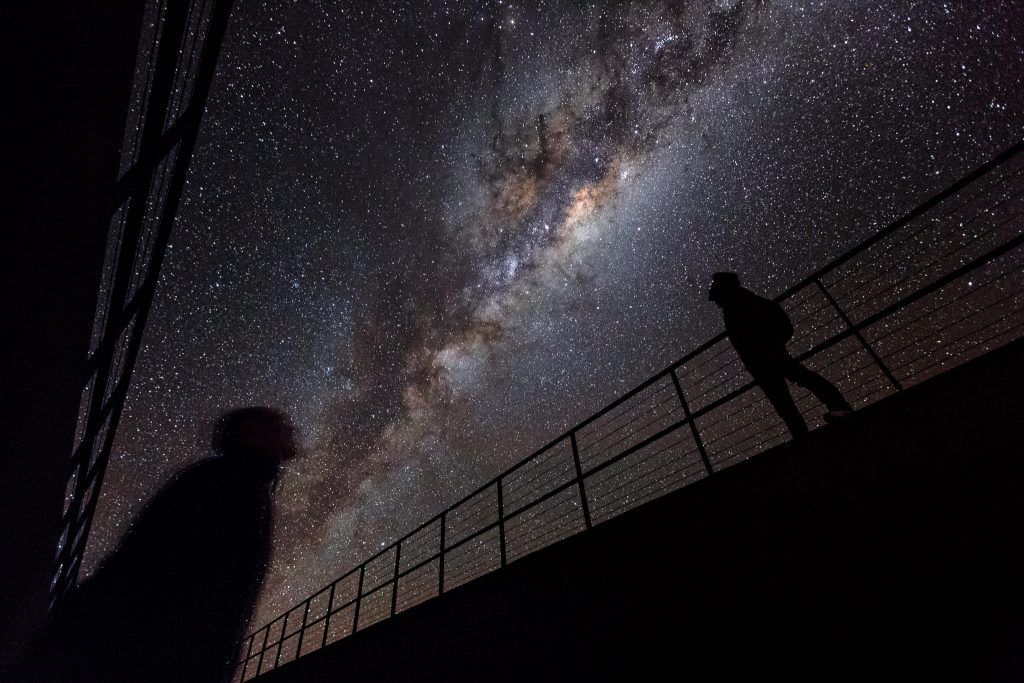
Photo by Luis Calçada
Take some time to look at this Milky Way image and see how each of the seven skill areas came into play in the creation of the shot. Look at it in terms of camera knowhow, lighting, composition, visual storytelling, subject selection, postprocessing and specific fields of study. Would you be able to create a photo like this?

Photo by Karlo de Leon
Conclusion
Your goal in learning should be to obtain as much information as you can, use what you know, and practice continuously until everything becomes second nature. Gaining skills in these seven learning areas by means of understanding concepts and applying them will increase your ability to take better photos and create eye-catching images. Learning photography is a process that should be taken with clear effort and focused intent. And for whatever reason you’re learning photography, don’t forget to have fun!


