

My first two guides, Beginner’s Guide to Still Life Photography and Lighting for Still Life Photography, covered everything necessary to set up and shoot your images.
However, what happens once you download your image onto your computer and you need to edit it?
This tutorial assumes that you are shooting in camera RAW. However, you can still edit .JPG image files in Lightroom as well.
It is recommended that you do shoot in camera RAW, as the image file retains much more data and allows more latitude for your editing.
Originally, I was quite a purist with my editing as I came from a nature and landscape photography background, and that’s just how it was done. In the beginning, I didn’t have a lot of knowledge or experience with Lightroom or Photoshop and that limited my options.

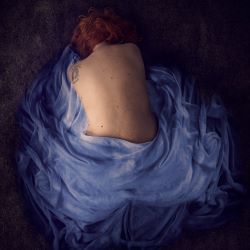
My image “popped” after basic editing in Lightroom. Photo by Stacey Hill
Eventually, frustration set in with the fact that my images weren’t as bold and vibrant as others online, and I realized that my lack of editing skills were having a negative effect on my work.
Slowly, I started learning and experimenting with different techniques and styles, and my still life photography has been a big part of that learning process.
Before still life photography, I hardly ever used presets in Lightroom, but now they are my first consideration.
Having embraced the benefits of different editing styles and ways of processing images, presets allow me to apply them creatively in a non-destructive editing environment.
Processing my images is now lots of fun as I can edit the same image in several ways. Sometimes it can be hard to choose between completely different edits.
There are no hard and fast rules about the right or wrong way to edit your images. Whatever your creative vision ends up looking like should make you happy.
There are some boundaries that you might choose to stay within to be more aesthetically pleasing (HDR, looking at you here), but beyond that feel free to dabble and experiment.
If you have presets available, that makes it really quick and easy to do. It’s very addictive!
Here are the stages of post-processing a still life photograph:
- Basic standard edits in Lightroom (exposure, contrast, color, crop, etc.)
- Apply a preset
- Tweak the edit further
- Apply textures in Photoshop
- Add extra finishing touches
Recommended Reading: If you want to learn how to enhance your photos and create better images, grab a copy of Photzy’s premium guide, Ultimate Guide to Fundamental Editing.
Note: I use Lightroom 6 and Photoshop CS6 myself. This isn’t a step-by-step howto guide; I’m going to assume that you have a basic understanding of Lightroom and can at least add a layer to your image within Photoshop.
OK, let’s get started!
Basic Standard Editing in Lightroom
Once you have imported your images into Lightroom and you have one to work on, stop and have a good look at your image. Try and be as objective as possible.
Consider these things:
- Is it straight?
- Should it be cropped?
- Is the white balance correct?
- Is the exposure correct?
- Are the highlights blown out or the shadows too dark?
- Are the colors vibrant or are they washed out?
Then think some more about the mood, or the story, behind the image when you shot it – how does the mood/story affect the way that you will edit it?
Now that we have considered the variables, let’s make the changes. This is the order in which I edit:
- Straighten the image if necessary and then crop the image if necessary.
- Adjust the white balance (color).
- Adjust the exposure (too light? too dark?).
- Add contrast. I almost ALWAYS add more contrast to my images. I like the dynamic feel of increased contrast in my images.
- Tweak the highlights, shadows, whites, and blacks sliders to suit my style and objectives (watch the Histogram).
- Add a touch of Clarity (for some “pop”).
- Add a very small amount of Vibrance and Saturation. I normally go with +5 Vibrance and +2 Saturation – a very little amount of these goes a long way!
There is no set recipe for editing your images!
Every image needs to be edited depending upon its own individual merits. Editing is also reliant upon the way you feel about the image, the time of day it is, and (believe it or not) how hungry or tired you are. Note that your editing choices should still be in alignment with the story/mood/feel/tone that you created when you shot the image.
Every image needs to be edited depending upon its own individual merits.
Something shot on a bright white background probably won’t be suited to a very dark, contrasty, oversaturated, editing process.
Each image edit is always done with the basic settings tweaked first, specifically to that image and for the vision that was in my mind when I shot it.
Many times the basic settings is simply moving a slider up or down a wee bit to see if the still life photograph needs that little something extra. It’s a lot like cooking, seasoning to taste, and not following a recipe.
So learn to get comfortable with mucking around a bit.
Important Note: It doesn’t have to take ages to accomplish these post-processing edits. I can quite easily edit an image to a completely finished version in a couple of minutes. It usually doesn’t take me much more than 5 minutes per image unless I’m going to do fancy stuff in Photoshop.
Key Lesson: The basic edits may complete the post-processing editing that you do on your image. Or, they may set up a solid foundation upon which you can then add further adjustments. Each image will be different and will require different settings. There isn’t a “one-size-fits-all” recipe.

This image is after basic editing that was done in Lightroom. Note how vibrant the lime green flowers are! Photograph by Stacey Hill

Using the base edit from the previous image, a preset was applied to create the muted colors in this image, which I like a lot! Photograph by Stacey Hill

I created a second variation of my flower still life photograph by applying a preset that adds a soft haze effect. Photograph by Stacey Hill
Apply Presets
What is a preset?
Remember how I said before that there isn’t a fixed recipe to applying settings to your image? Actually that is both true and a little untrue. It is true in that every image needs to be edited based upon its own requirements.
But to help you do that, presets exist.
A preset is an already saved recipe of settings that someone created in Lightroom.
You can also make your own presets and save them for future use.
You can get them for free, and you can also purchase them online.
Recommended Resources: Try out these free and premium presets from Photzy
Once you get some presets, follow the instructions to install them into Lightroom. Once you’ve done that, they sit there waiting for you to use them when you are in the Lightroom Develop Module.
I purchased some still life-specific presets. My main collection comes from Kim Klassen, and I also have some from 2 Lil Owls as well.
I greatly admire the work from both of these talented ladies; the way they process their images is completely different to anything else out there.
Clearly the trick (in my opinion) was in the presets, so I made it easy for myself and I bought some.
BEST DECISION EVER!


Here is the same image, but now edited to a different style and with a different color palette using Lightroom presets. Photograph by Stacey Hill
Because the presets that I purchased were designed by still life photographers to be used in still life photography, they offer a range of creative variations (some of which I didn’t even know Lightroom could do at the time).
Also, if you are into black and white photography or landscape photography, or another artistic variation for that matter, there are HEAPS of presets available. Don’t think of them as being restricted just to still life photography.
Remember, you can make and save your own as well!
Anyway, now that you have done your basic editing, it is time for the fun stuff by trying out different presets.
I often apply one preset, export the image, and then carry on experimenting.
Note: If you apply multiple presets, previous settings will be overwritten, but it can depend on the settings used. So if your first preset uses Clarity, Exposure, and Vignette but your second preset uses Contrast, Exposure, and Highlights, then your Clarity and Vignette will remain as per the first preset! But the Exposure will be changed to whatever the second preset was set to.
A preset is an already saved recipe of settings that someone created in Lightroom.
You can apply a preset, export the image, and then delete that preset to carry on fresh.
Or you can apply a preset, export the image (to preserve the current style), and apply another preset over the first, export that version (to preserve it), and so on.
Key Lesson: Presets save you time by applying a saved recipe of adjustments to your image. Presets offer a range of creative choices that allow you to expand your repertoire of editing options.
Recommended Reading: If you want to learn how to enhance your photos and create better images, grab a copy of Photzy’s premium guide, Ultimate Guide to Fundamental Editing.
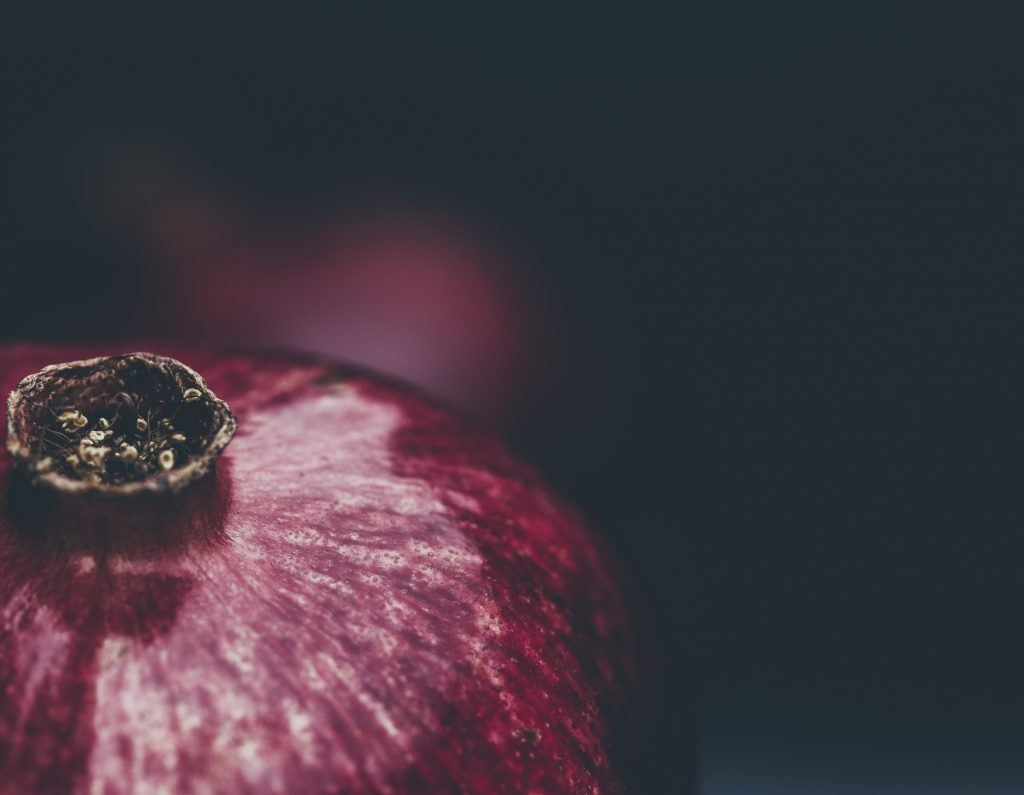
The shadows give depth to a still life photograph. Photograph by Stacey Hill
Tweak Editing Further
Once you have applied your preset, consider the effect and then decide if it needs further tweaking.
Many of my favorite presets have a low contrast setting and a muted color tone. I often enhance the color luminosity and saturation of the required color channel to make the subject pop a bit more.
It may not need further editing, but it pays to take a moment to check and consider the possibility.
You can move a slider in Lightroom while hanging on to the mouse button to see the changes, and then move it back to the original setting (remember the number it was set at) to whatever setting you like best.
Always export your image at its largest size and resolution in case you want to print it.
Key Lesson: Take time to consider if the image is complete at any given stage, or ask yourself if it could do with some subtle adjustments. Does the subject catch the eye? If not, can you tweak something slightly to improve it? Remember to export any stage that you wish to preserve!
Always export your image at its largest size and resolution in case you want to print it.
Applying Textures
Textures are applied in Photoshop. Lightroom doesn’t have layering capability, which is necessary for working with textures.
Other programs like Paint Shop Pro and Adobe Elements also support layers, so check if the editing program you have does support layers.
Bring your image into Photoshop. I work with two monitors, and I keep my file explorer open on the second monitor. There, I will browse my textures. When I find one that I like, I will drag it across onto my image.
Photoshop will automatically make it the next layer “up” in the Layers palette, and the blend mode is always set to Normal and at a 100% opacity.
On the Layers palette, you need to change the blend mode when you want to add texture to your still life photograph. The two best choices for the texturing process are usually either Overlay or Soft Light.
Drag the opacity slider up and down until you find a “blend” between the two layers that you are happy with.
You can apply as many textures as you would like; although, some images are better suited for them than others.
I will often mask the texture off of my main subject so that it has more impact.
But Where Do I Get Textures From?
Good question. If you go back to the links earlier for the presets, those companies also offer lovely textures for sale.
There are many places online where you can purchase textures.
I also use my phone a lot to take photos of all sorts of stuff to be used as texture layers: concrete floors, brick walls, cracked pavement, mossy rocks, and so on. You can change these photos into grayscale files for use as a texture with no color blend.
Key Lesson: Textures are an optional finishing step – they may not be your thing. Or you may like to experiment further. Note that it does require software that supports layers.
Extra Finishing Touches
Sometimes, I might add some other elements to my still life photo processing – some fancy French script, a flourish, or a pretty swirl in a corner.
I have a large collection of brushes that can add a little extra interest to an image.
Create a new layer and then brush onto that so that you can adjust the opacity of the layer to make the flourish or swirl quite subtle.
Note: Steps 3, 4, and 5 are optional steps. You don’t have to apply presets, textures, or extra elements to create amazing still life photos. It’s just an extra creative, and fun, step. Sometimes adding textures, or any of the other elements discussed, just doesn’t feel right, so I don’t bother pushing it.
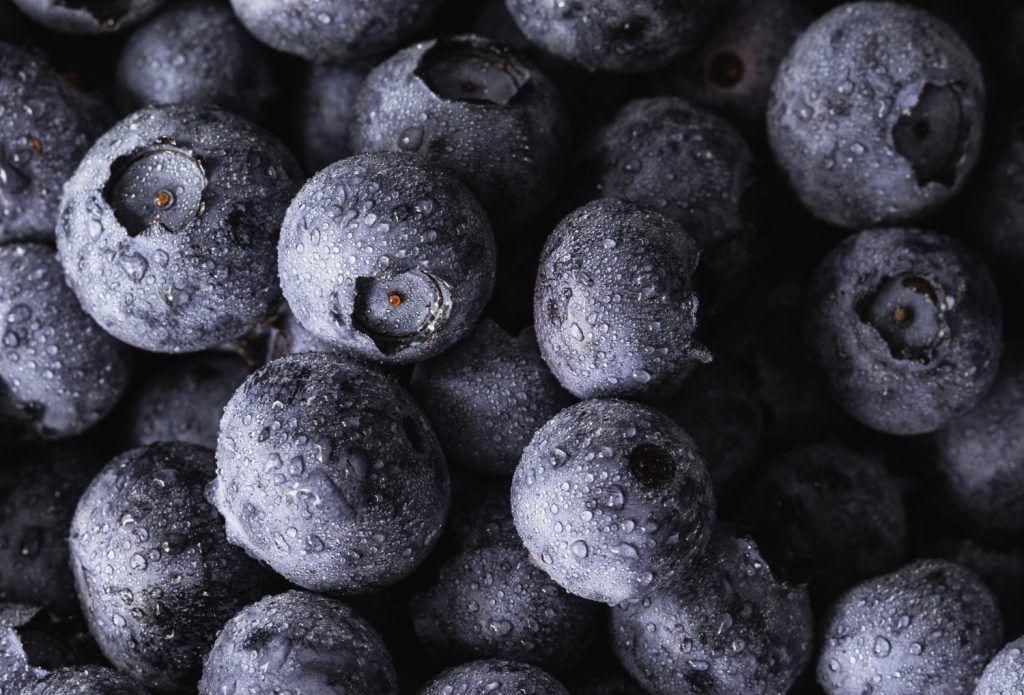
Photograph by Stacey Hill
You saw this image (above) in my previous free Photzy guide, Lighting for Still Life Photography. Now, using the techniques discussed in this guide, I added a texture layer which was then brushed using “smoke brushes in Photoshop.” The color for the brushes was set by taking a sample from the currants. I’m certain you would agree that the post-processing has pushed this image into the “Wow Category”!
Key Lesson: Adding extra depth and interest to an image allows the viewer more options when their eyes travel around your image. Not every still life image will be suited to these fancier effects. However, it’s always worth considering.
Recommended Reading: If you want to learn how to enhance your photos and create better images, grab a copy of Photzy’s premium guide, Ultimate Guide to Fundamental Editing.
Summary
Of course, the trick with great still life photography is to get as much of your image right in-camera as possible.
A good exposure and composition makes a still life image work.
Post-processing is like the icing on a cake – it makes it look pretty, but it won’t hide bad taste.
Don’t be afraid to try new styles and techniques.
Using presets can be a gentle way to experiment, and can help to see what options are out there.
Some people think that you must spend ages on post-processing an image for it to be “real” or properly done. These people clearly have too much time on their hands, and there is nothing wrong with editing lightly or being efficient and using presets to save time.
Ultimately, edit the image as it speaks to you and your vision. There is no right or wrong. Simply keep your still life post processing in line with the story and mood your image is telling.
Self-Check Quiz:
1. Can only RAW files be edited?
2. Is there a one-size-fits-all option for editing my image?
3. Should you do basic editing first?
4. Why are presets useful?
5. What do you need in order to apply a texture to an image?
Answers:
1) In Lightroom, you can edit RAW and .JPG (and .DNG) file formats.
2) No, each image will have different requirements.
3) Yes, basic editing puts a good foundation on your image.
4) Presets can save you a lot of time, and are also fun and creative.
5) A texture file, and a software program that supports layering.


