What makes a good photo? If I had a nickel for every time I have been asked that question, I could probably buy myself a nice used Cadillac.
Since photography is an art and also a commercially viable product, there are numerous answers to this question. What makes a good photo in one respect might not be so good in another. Or not be so good in someone else’s eyes.
That became a significant learning experience when I first became a professional with a camera. I was no longer shooting pictures for myself; I had to please others with my efforts.
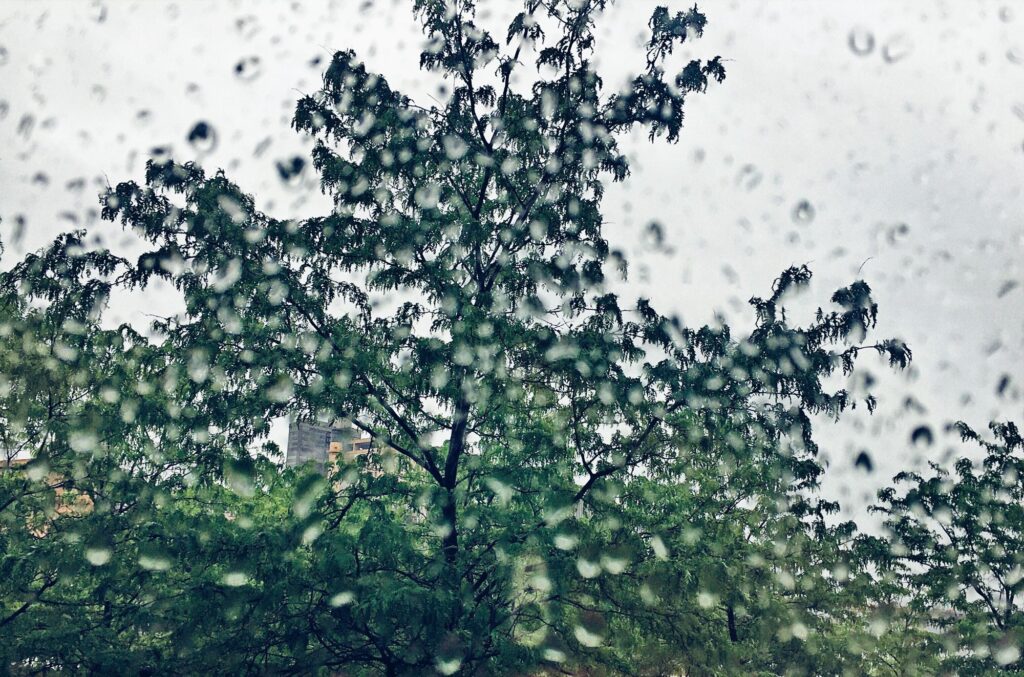
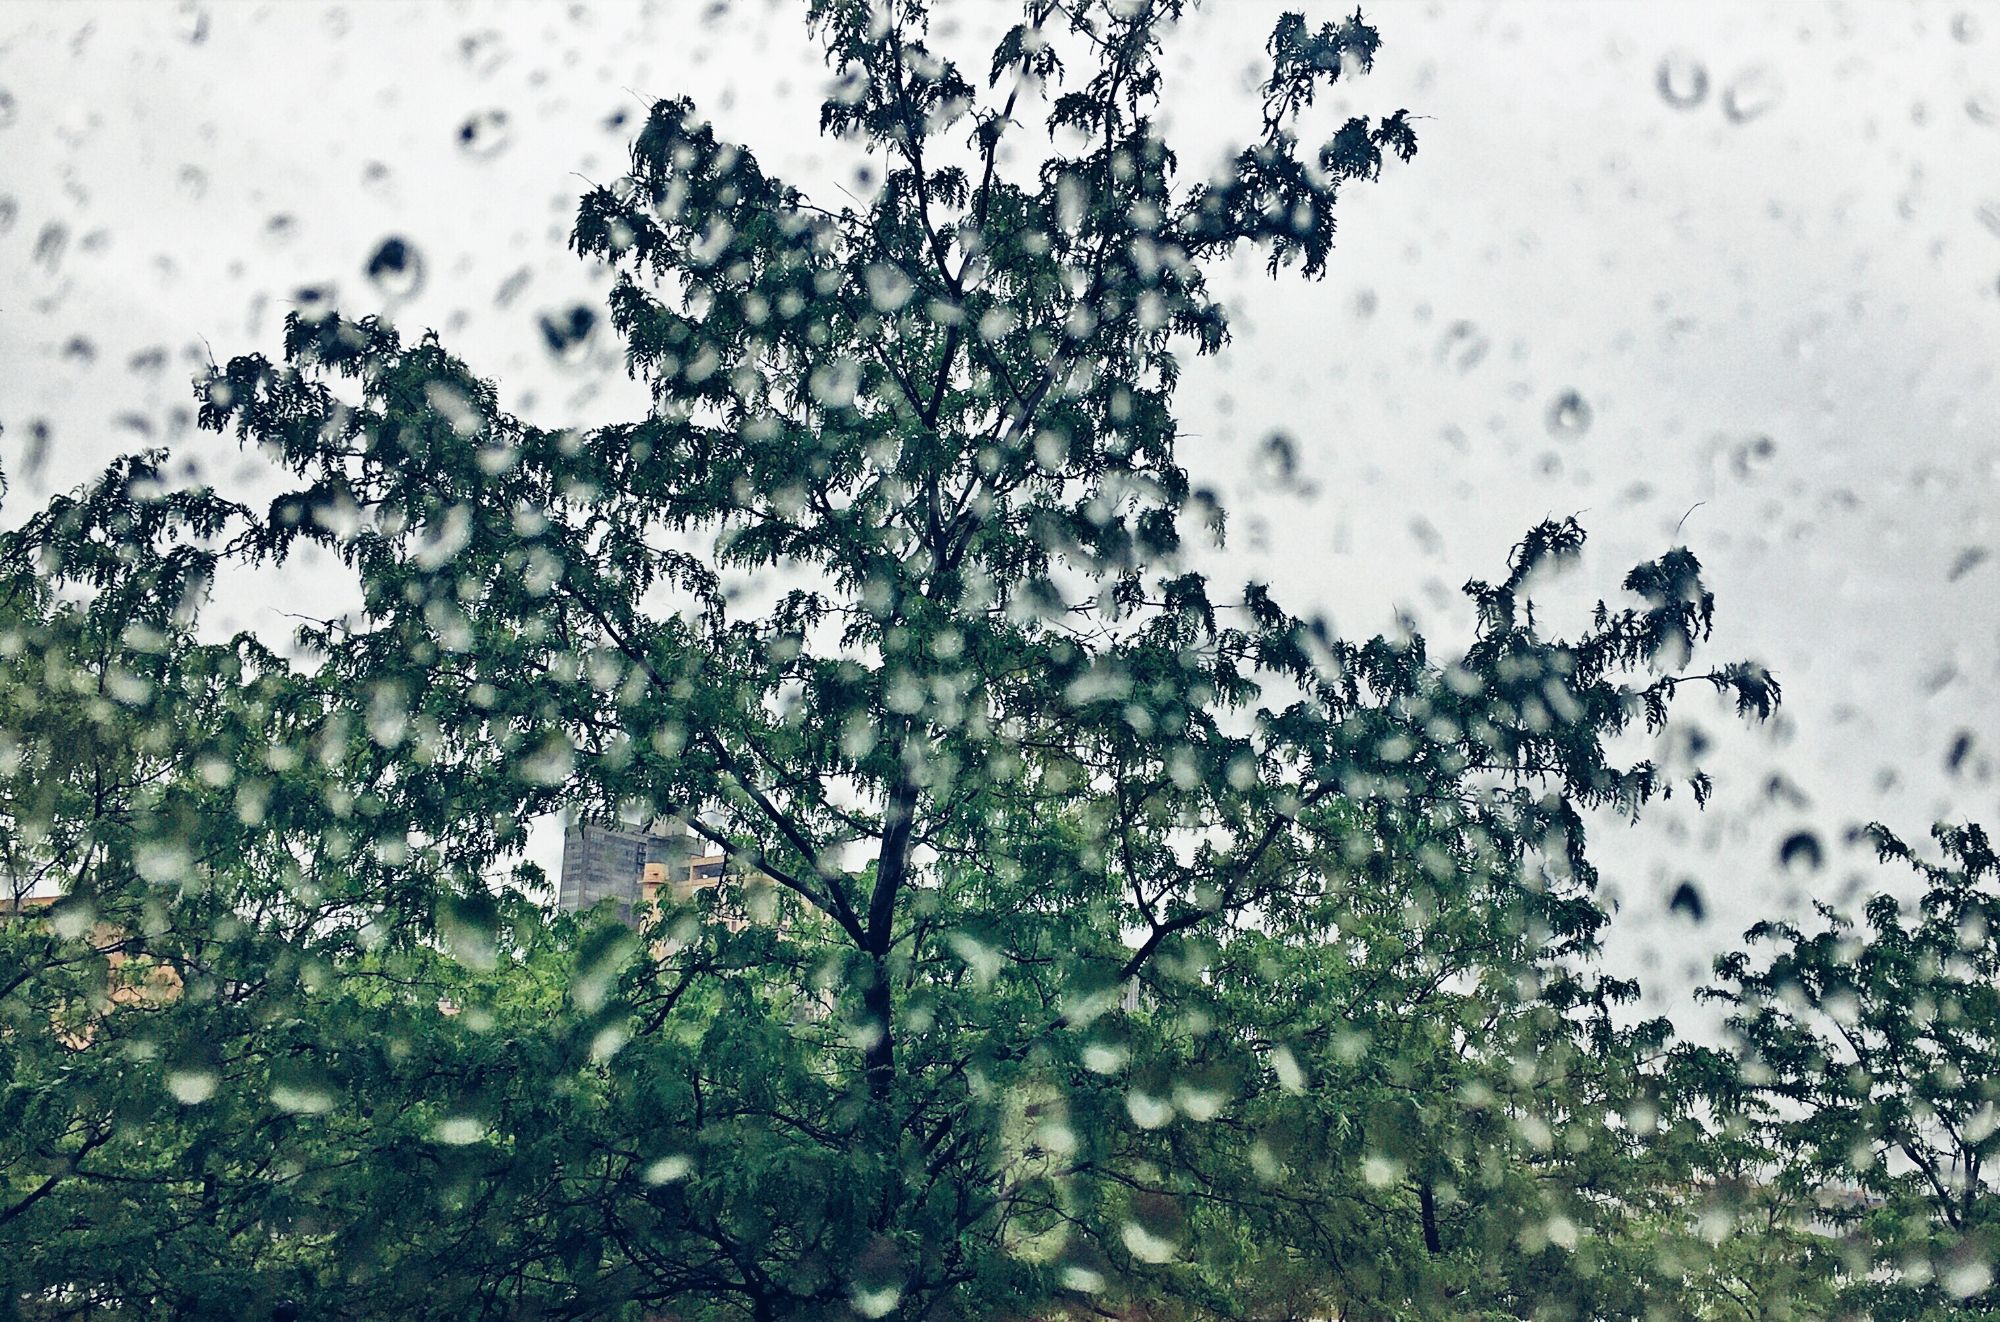
The cover photograph is one of mine. I consider it a good picture, and it has won a couple of minor awards as well as being used by several publications. But I can see why it might not resonate with some people. It’s a bit ethereal for those who are more into realism.
I love semi-abstract images. I’m also a big fan of what I call ‘the secret element,’ which is some aspect of a photograph that causes a viewer to think or find themselves searching for an answer.
In the cover shot, there is a giveaway. An element that establishes this is being in an urban environment instead of out in the country somewhere.
But it’s not obvious. You have to work for it.
This guide will examine a few important attributes of the following photography genres that help make a picture good.
- Portraits
- Street photography
- Sports
- Landscapes
- Close-up and macro
- Architecture
Recommended Reading: Want to learn how to make your photos stand out from everyone else’s? Grab a copy of Photzy’s Effective Storytelling premium guide.
Portraits
The best portrait photographs tell us something about the subject outside of what they look like. School portraits are an example. They show us what the child looked like but reveal little else.

The image above presents an excellent sense of character. The lighting is pleasing but still reveals the subject’s age.
I like that the eyes are closed and the photo is presented in black and white. These two elements force us to focus on the wrinkles on her face and her delicate gray hair.
Excellent portraiture is often defined by the potential story that it tells the viewer.
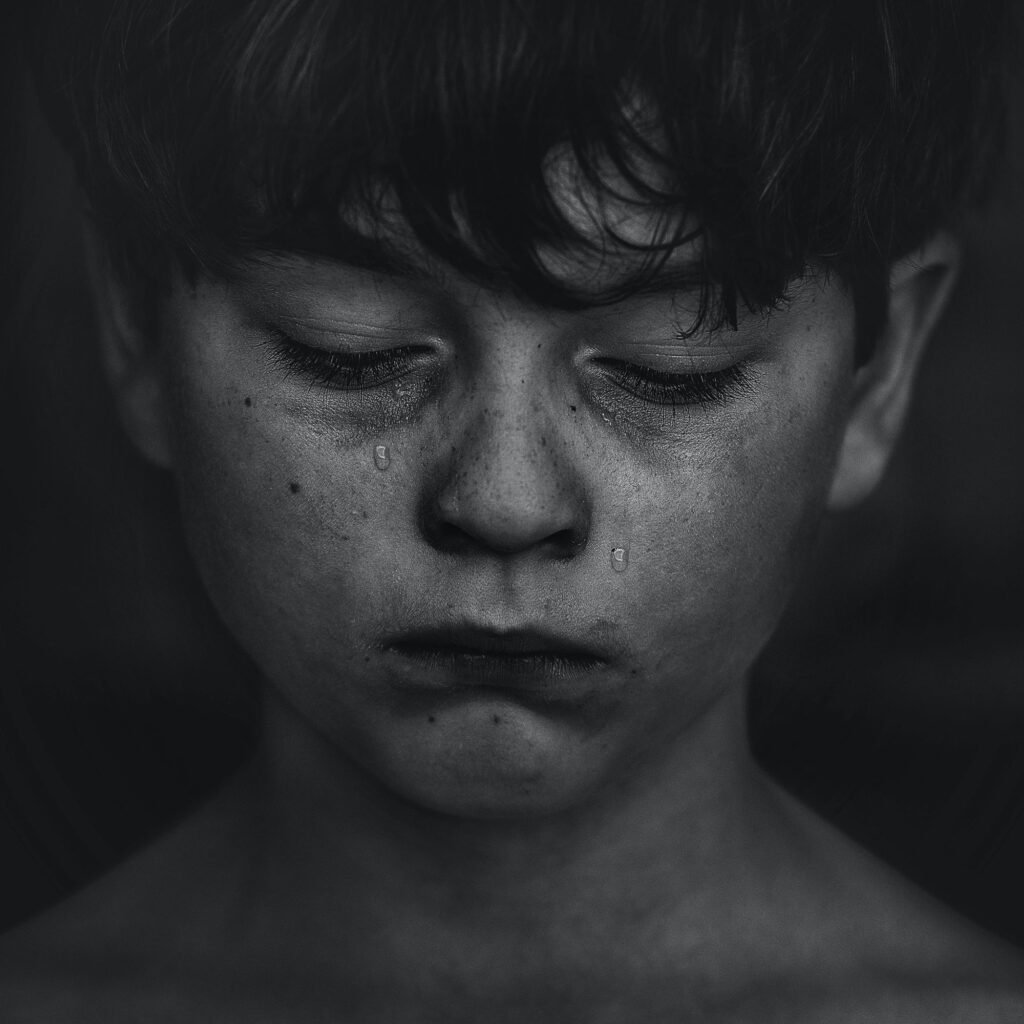
The photographer’s toolbox for storytelling includes the quality of the lighting; the direction of the lighting; the presence or absence of shadows; and the use of makeup, props, and costuming.
The image above takes advantage of all of those elements to present a story about a sad child.
The photographer’s toolbox for storytelling includes the quality of the lighting; the direction of the lighting; the presence or absence of shadows; and the use of makeup, props, and costuming.
However, they included one other element. Did you notice it? They overtly ratcheted up the skin texture to emphasize the teardrops.
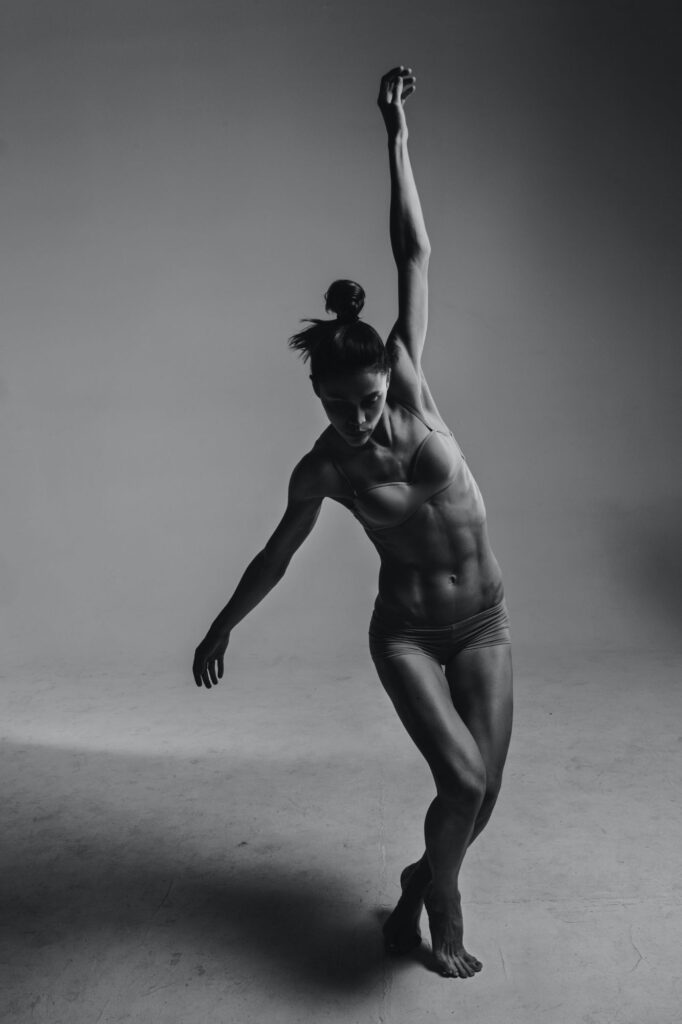
Full body portraiture is highly dependent upon the pose to gain great status.
The image above is quite dramatic in the pose and lighting. The story tells us that this woman is quite athletic. Given the pose, I would assume that she is a dancer.
Notice how the lighting was set to define her body structure with less emphasis on the face.
Key Lesson: Good portraiture requires a careful selection of lighting and how the shadows are used. Telling a story is essential and can be accomplished through lighting, background, shadow structure, hair, makeup, posing, and post-production treatment.
Street Photography
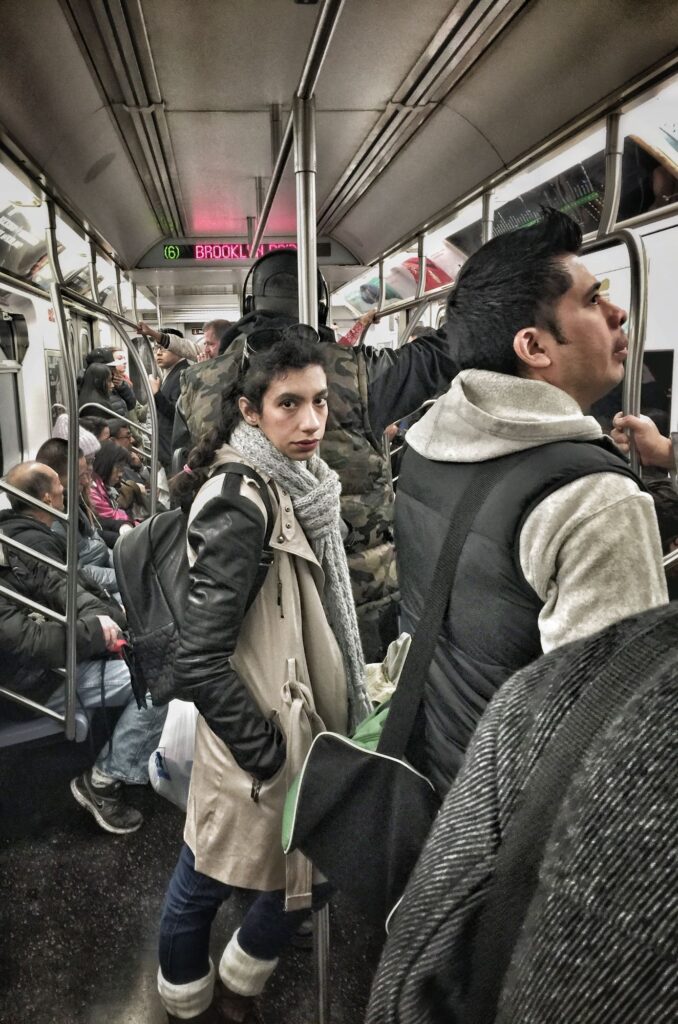
Street photography can potentially produce some of the most dramatic and memorable photos ever created. Crowd shots, in particular, can capture the dynamic aspect of life on the street.

I first saw the image above several years ago and have never forgotten it. Think about that. I look at hundreds of photos daily as part of my job. Most of them are gone from memory before the day is over.
Why is this one different? It is a combination of the camera angle, motion, color, and story. It’s an incredible image. In my opinion, it’s a masterpiece of street photography.
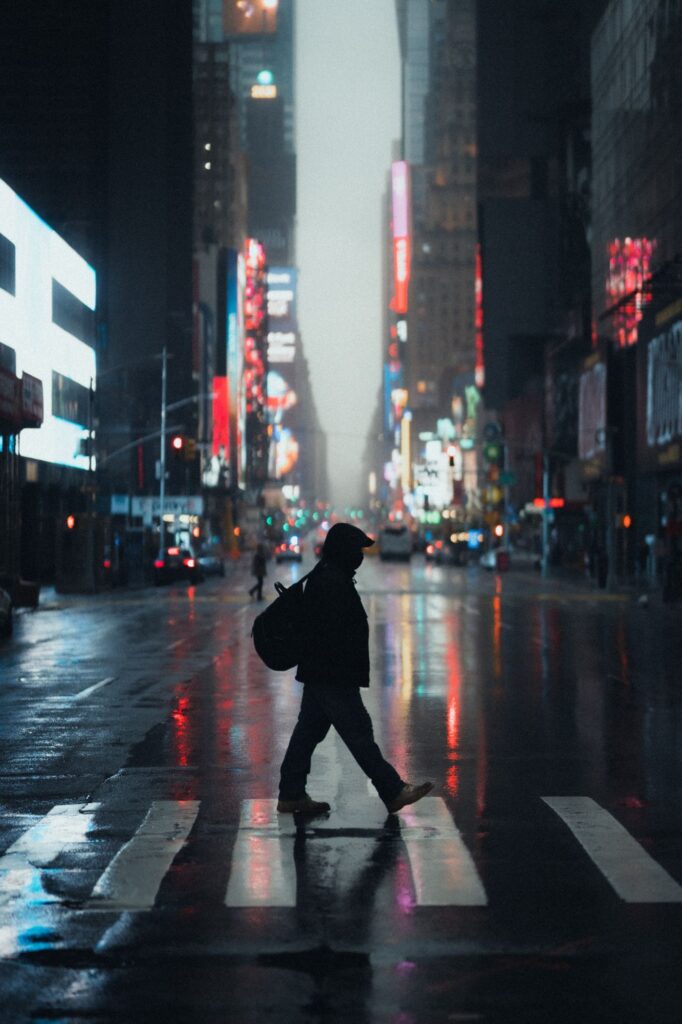
A prominent street photography technique that popped up a few years ago is positioning the camera to capture a silhouetted subject against a brighter and sometimes colorful background.
This style of street shot works best when the silhouette provides an exciting shape and the background details the location and time of day.
Photograph by Kent DuFault
While some street shots do not include the human element, the best pictures almost always include people (in my opinion). Without people, an image becomes more of a cityscape and less of a street photo.
When capturing people on the street, the best photos offer a glimpse of inclusion or isolation. Facial expressions definitely add to the drama.
Key Lesson: Good street shots are often found in a dynamic view of a crowd situation. Choosing an unusual camera angle, lens focal length, or special techniques like blurred motion can ramp up the impact.
When capturing people on the street, the best photos offer a glimpse of inclusion or isolation. Facial expressions definitely add to the drama.
A silhouette is a useful tool, especially when it portrays an interesting shape and a meaningful background. Strive to depict individuals as part of an inclusive moment or at a time of isolation. Whenever possible, capture facial expressions and body language.
Sports
I had a sports photographer roommate for about a year. He was quite accomplished and was away traveling more than he was home.
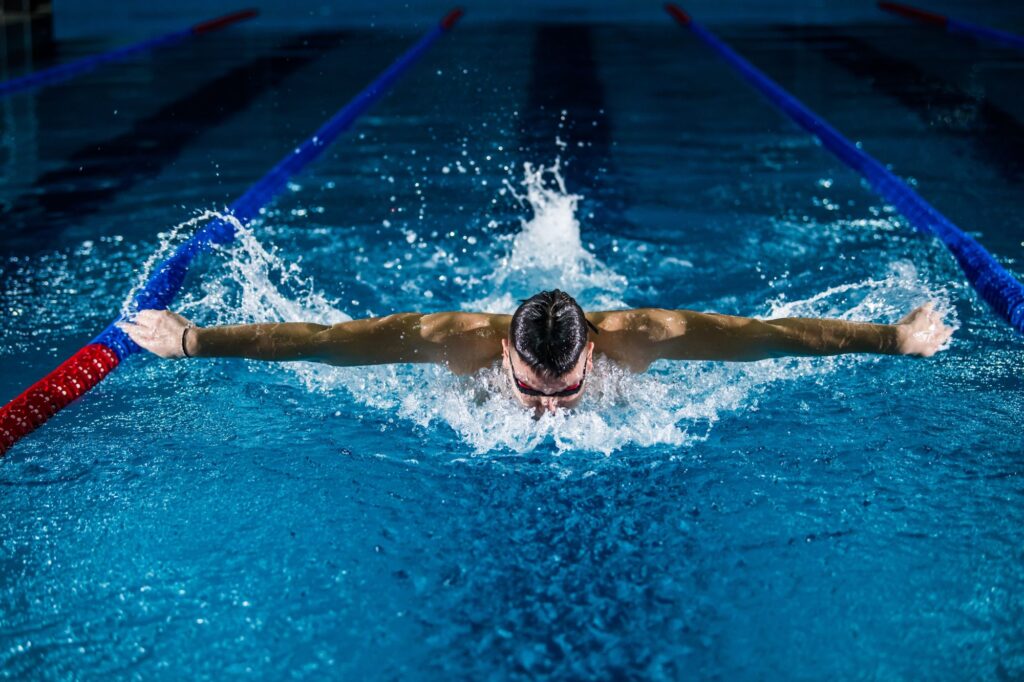
He told me that the critical skill in creating outstanding sports photography was to understand the sport well enough to know where you should be positioned to capture a pivotal moment.

He also shared with me that any time you can capture the emotion of the participants, the joy of victory and the sadness of defeat, you have a winning shot that will impress everybody.

Another unique and impressive sporting image style is the close-ups that provide insight into the sport. For example, the image above depicts the perfect form for a golfer about to tee off.
Key Lesson: To create good sports photos, know your sporting subject. Position yourself using your anticipation to capture peak moments. Whenever possible, time your shots to capture the players’ expressions and body language. Understand the mechanics of your camera so that you can freeze the action and correctly position the point of critical focus. Include close-up shots that provide insight into the intricacies of the sport.
Recommended Reading: Want to learn how to make your photos stand out from everyone else’s? Grab a copy of Photzy’s Effective Storytelling premium guide.
Landscapes
Landscape photography is likely the most popular subject matter for photographers across the planet.
I started photography at a very early age (14) and shot only landscapes for the first five or six years. I think some perceive landscape photography as being easier. It doesn’t move, and you don’t have to interact with anyone. I know that was my thinking.
But in all seriousness, I think it’s more challenging to create a good landscape photograph versus other genres of photography. It’s not hard to capture one, but it’s tough to capture a memorable one.

I think we will cover a few basics here. First of all, the time of day is important. Early morning and early evening are the best times to be out there with your camera.
Interestingly, those times of day generally serve up very different landscape opportunities. Having done both for decades, I prefer evenings. Evenings give you a chance to prepare, and you have a better idea of what is coming your way. In the morning, it’s a crapshoot.
Plus, good morning light fades fast, while good evening light generally lasts several hours.
There is one particular attribute or technique that I think deserves to be discussed in the topic of landscape photography.
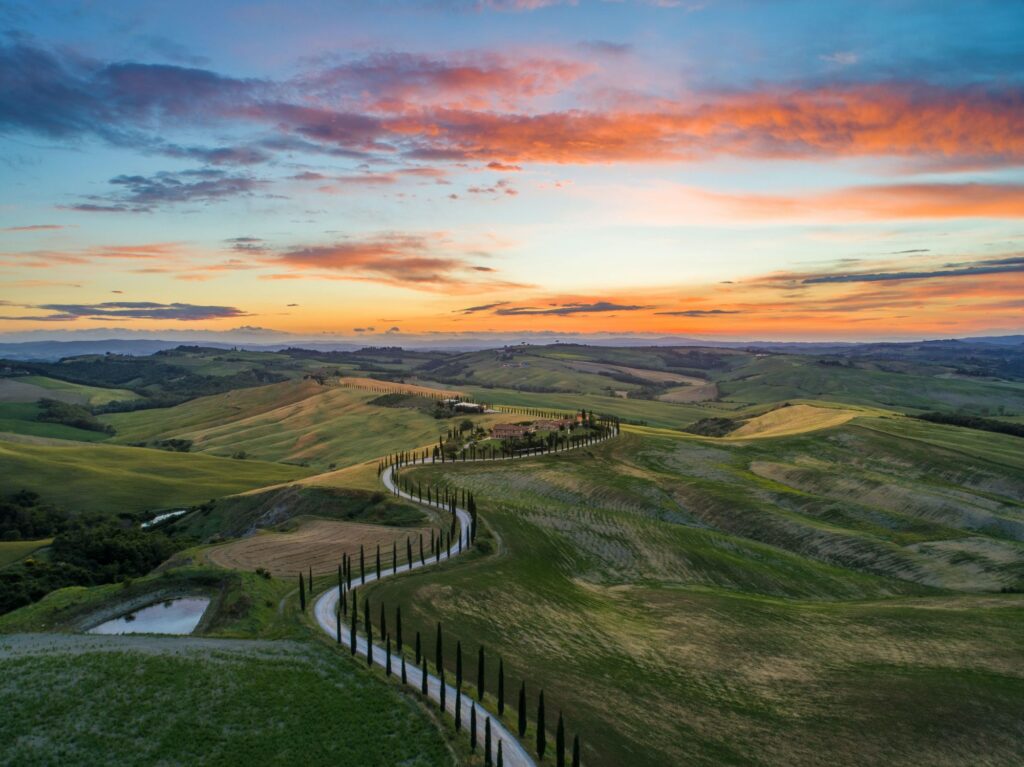
Take a moment to study the image above. It was created during the best time of day. The lighting is quite nice. It presents an excellent leading line. And yet, I would state that this isn’t a good photograph. There was an opportunity, but it was missed through one simple error, and this is a pervasive error in landscape photography.
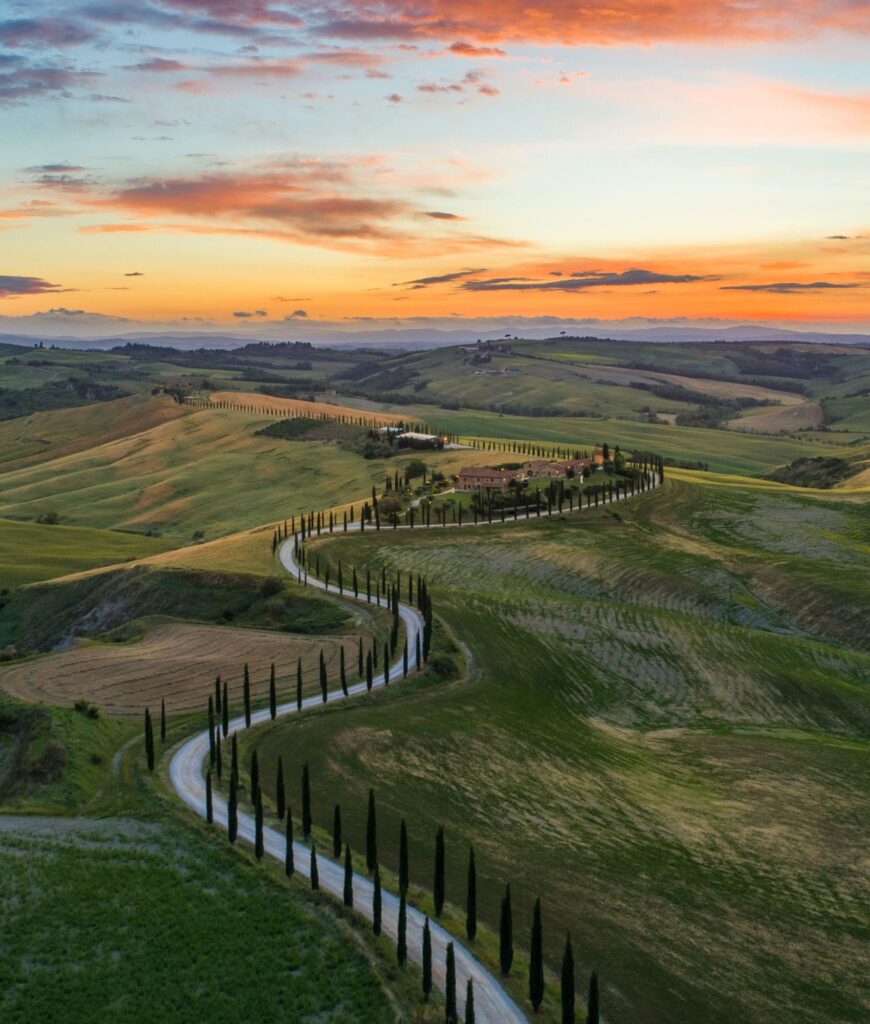
Photograph by Luca Micheli and Editing by Kent DuFault
This version presents all the positive attributes mentioned earlier but is far more dramatic and enticing to a viewer. Now, I’m thinking I would love to go to this place. When viewing image 012, I thought, “Yeah, that’s a nice sunset.”
Think about your composition. Pick out the critical elements and try to eliminate the ones that aren’t necessary.
The first version has a lot of distracting negative space that adds nothing to the composition or the story. Choose your camera orientation with thought. Should this image be vertical or horizontal? Don’t assume horizontal because it’s a landscape.
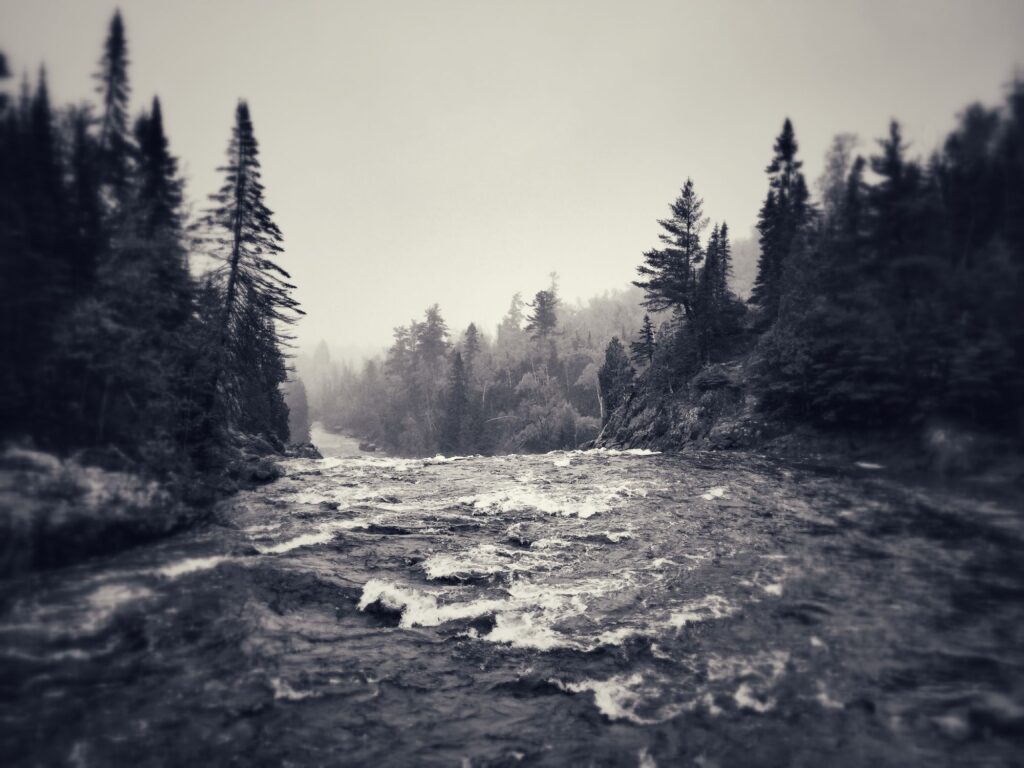
Photograph by Kent DuFault
I recently had a complete stranger tell me that upon viewing this landscape photo, they could hear the roar of the thundering river rapids in their head.
That’s about the finest compliment you can give a landscape image; that it makes someone feel something.
Everything in the photo was planned for a subject area in the center of the frame, including the rapids, river, and distant trees. On this day, the lighting was not good. There was very little light at all.
In such a situation, turn your creative eye toward contrast, shape, and texture. Don’t be afraid to use post-production techniques to emphasize your ideas further.
Key Lesson: Landscapes are generally best shot when the sun is low in the sky. Mornings offer different lighting and weather scenarios than evenings, but the amount of time you have to take advantage of the lighting is quick. Evenings will generally give you at least several hours of shooting time. Carefully choose your camera orientation and use the ‘Pick-and-Choose’ mindset. If something is essential, plan it into the composition. If it isn’t necessary, try and pick an angle that removes it. If the lighting is poor, look to contrast, shapes, and textures to create interest. Don’t be afraid to enhance features using post-production.
Close-Up and Macro
I think it’s common knowledge that the secret sauce of macro and close-up work is revealing the intricacies of a world that most folks never take the time to look at.
This genre is challenging. It requires some tangible and definable skills to master. A desire to get down close and look is the first thing toward good macro photography.
Once you’re down close to a subject, define precisely what it is you want to say about that subject by revealing the designs of nature.
But then, one must address two crucial aspects of a good macro or close-up photo.

Firstly, you will almost always have poor lighting that is low in intensity. You must work around that through your choice of camera angle, using an external light source, raising the ISO setting on your camera, or a combination of all three.
The image above is an excellent example of using lighting to reveal the delicate textures of a series of mushrooms.
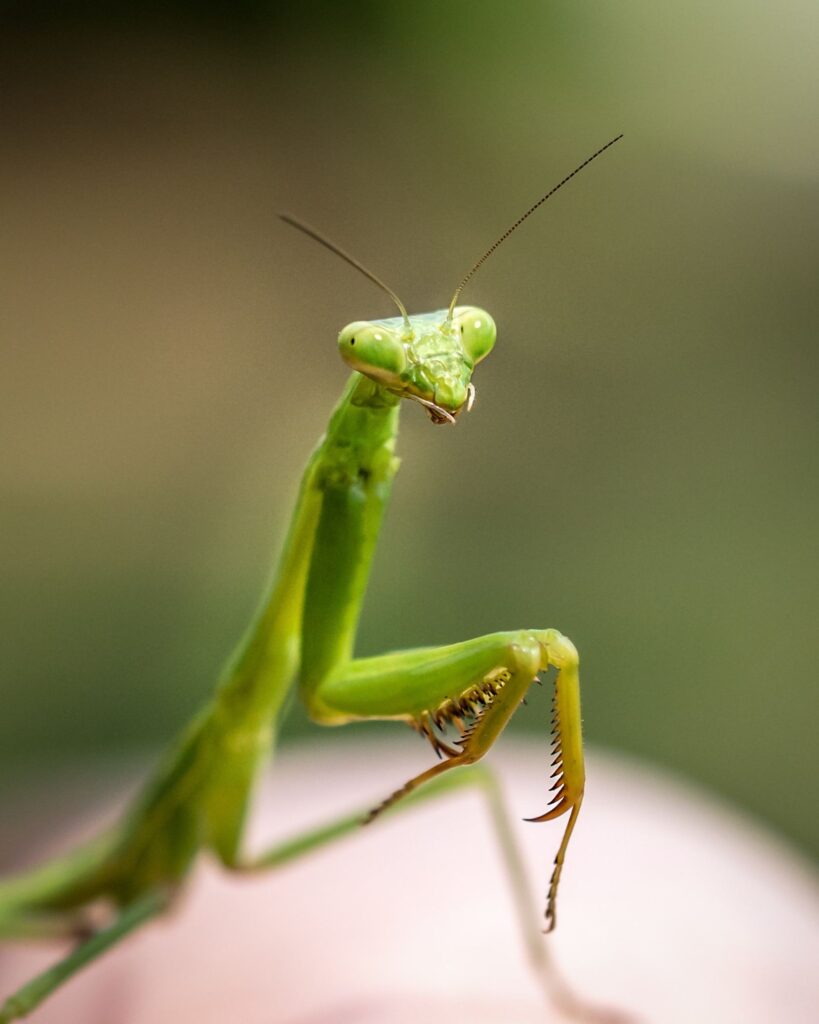
Secondly, you want your macro subjects to appear larger than life, and that means getting very close and often very low.
That, in turn, means that even at smaller apertures, your depth of field will likely be only one to two millimeters.
We all know that’s an issue, so that isn’t a problem. Here’s the problem that will challenge you to create good macro photos.
You must place the critical focus in the correct spot. Not placing the critical focus in the right spot is the number one photo killer of macro photos.
Key Lesson: In macro and close-up photography, you must be willing to get down and get dirty. Find interesting subjects and explore them through different angles to try and capture the best lighting. If you’re just starting out, avoid using an external light source like an electronic flash, but give some reflectors a try, especially a small mirror or two. Stop down for maximum depth of field and raise your ISO to keep a useful shutter speed. Practice placing critical focus in the right spot. With bugs, your best placement is on the face.
You must place the critical focus in the correct spot. Not placing the critical focus in the right spot is the number one photo killer of macro photos.
Architecture
Architecture is much like landscape photography in that you deal with a static subject, and generally, you don’t need to interact with other people.
But it brings an interesting development to the table.
All architecture has a design built into it. Even the most mundane building was ‘designed’ by an architect somewhere.
This opens up two avenues toward a good architectural photograph:
- Capture the design as the architect intended.
- Or create a sub-design as discovered with your own eyes.

The image above is an example of the latter option.
I prefer capturing architecture in a creative sense rather than depicting the architect’s intentions. It throws me off when random people will criticize an architectural photo by saying, “You should have straightened the perpendicular lines!”
Ah, no! This is a creative rendition of this building, and I don’t want the lines straightened. It doesn’t matter!
Don’t get me wrong, if you shoot images for an architectural firm, then they expect those lines to be straight.
But here, we will focus on two creative options in architectural photography that make a good image.

The first technique is a juxtaposition (combining) of old architecture versus new.
The image above is a fantastic example of this idea. You have a building that is hundreds of years old, but it is combined with a modern doorway. This juxtaposition creates interest and makes a good photo.
Photograph by Kent DuFault
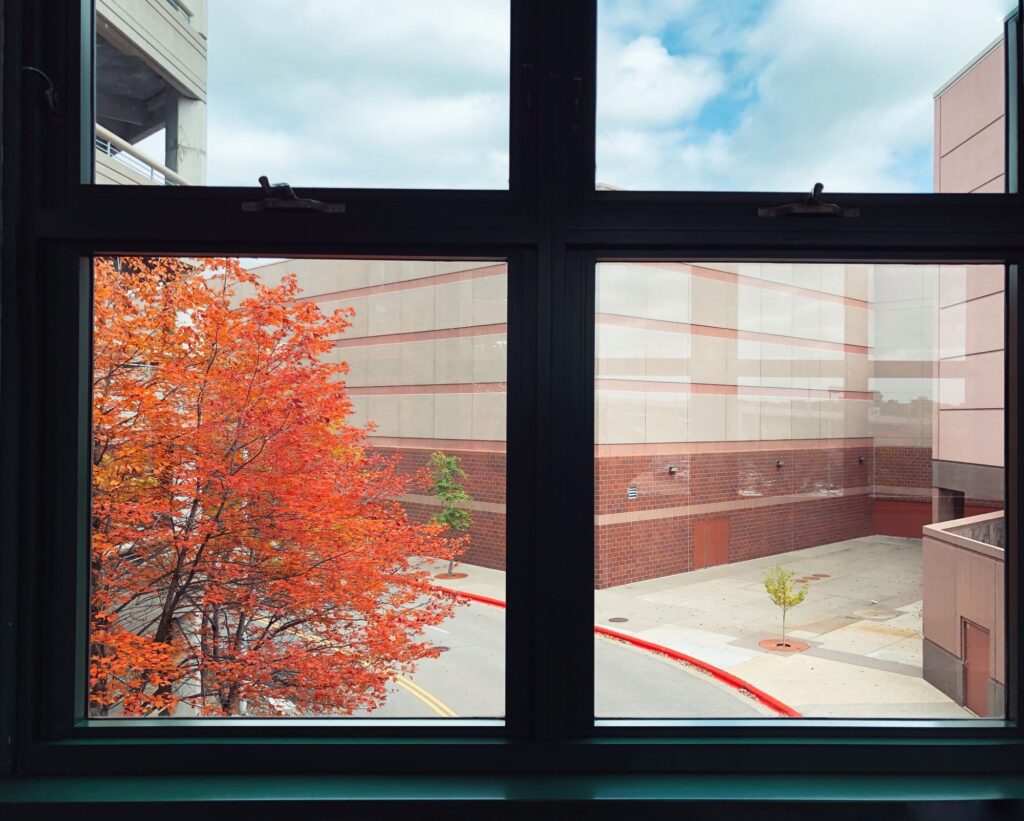
The second technique is juxtaposing architecture and nature. This is one of my favorite techniques. It can be quite jarring to a viewer to see a lonely tree in the middle of a concrete jungle.
Key Lesson: If you aren’t trying to capture the architect’s intent for a structure, look for interesting details that highlight your sense of design. Use juxtaposition (combining two elements that aren’t generally considered cohesive) to create viewer tension. Two tried and true methods are juxtaposing old architecture with new and any architecture (human-made objects) with nature.
Recommended Reading: Want to learn how to make your photos stand out from everyone else’s? Grab a copy of Photzy’s Effective Storytelling premium guide.

Photograph by Kent DuFault
Self-Check Quiz:
- Does a hidden element in a photo create interest or distract?
- True or False: In portraiture, you should give more consideration to the pose than the lighting.
- Name three tools that you could use to create a story in your portrait.
- True or False: Crowded street shots create a dynamic energy.
- True or False: Never use a silhouette in street photography because you need to see people’s faces.
- The most crucial function of a camera for sports photography is the ____________ _______.
- True or False: Close-ups never make good sports photos.
- True or False: It doesn’t matter which way you hold the camera in landscape photography.
- In landscape photography, which time of day will generally give you the most time to work?
- What is the Pick-and-Choose method, and how do you use it?
- One of the most essential aspects of macro photography is placing the _________ _______ in the right spot.
- True or False: Your architectural photos must always have straight, vertical lines.
- Name the two types of juxtapositions that produce good architectural photos.