

I began this short article as I usually do: scanning the internet doing my due diligence. The plain fact is, I hardly ever use any filters at all, and I never use an ultraviolet (UV) filter. I consider them unnecessary, potentially deleterious to image quality, and mostly useless as “protection” for your spendy lens. Together we will learn about the efficacy or lack thereof of the ubiquitous UV filter.
- What is it?
- What is ultraviolet (UV) light?
- What does it do?
- It blocks ultraviolet light from reaching the sensor.
- But is that really necessary with modern sensors?
- They are touted and sold as “protection” from drops and falls for your lens.
- They can cause “flare.”
- It blocks ultraviolet light from reaching the sensor.
- Do we need one?
- Let’s find out…
Key Lesson: This writer never uses a UV filter.
Recommended Reading: After learning about camera settings, improve your photographs by understanding how light works! Grab a copy of Photzy’s premium guide: Understanding Light Book One.
The Purpose of a UV Filter
Let’s define what a UV filter intended for photography is.
An ultraviolet filter is a faintly straw or rose-tinted glass filter that screws into the threads on the front of a camera lens. Properly made, they do not refract light. Its original purpose was to block invisible ultraviolet rays from reaching the film. The filters used to be in fact beneficial for film photography, but now most photographers use them only to (they hope) protect their lenses from sharp knocks. They’ve been convinced that a $10 UV filter will protect a $1,000 lens from fatal damage if you (shudder) drop it. But do they really? Read on.
Key Lesson: On a digital camera, a UV filter is redundant and unnecessary.
UV Light
What exactly is ultraviolet light? Long ago, my fellow students and I were introduced to a charming fella named Roy. Roy G. Biv. You may already know him since the letters of his name correspond to the colors of the visible spectrum:
R – RED
O – ORANGE
Y – YELLOW
G – GREEN
B – BLUE
I – INDIGO
V – VIOLET
Key Lesson: Ultraviolet and its opposite, infrared, are wavelengths of light that are invisible to human eyes.
Key Lesson: ROY G BIV is a handy mnemonic for remembering the order of the colors of the visible spectrum.
That’s your rainbow, but at each end of the rainbow are not pots of gold (dang), but colors you cannot see: infrared below the visible red (very long wavelength) and ultraviolet above the visible violet (very short wavelength).
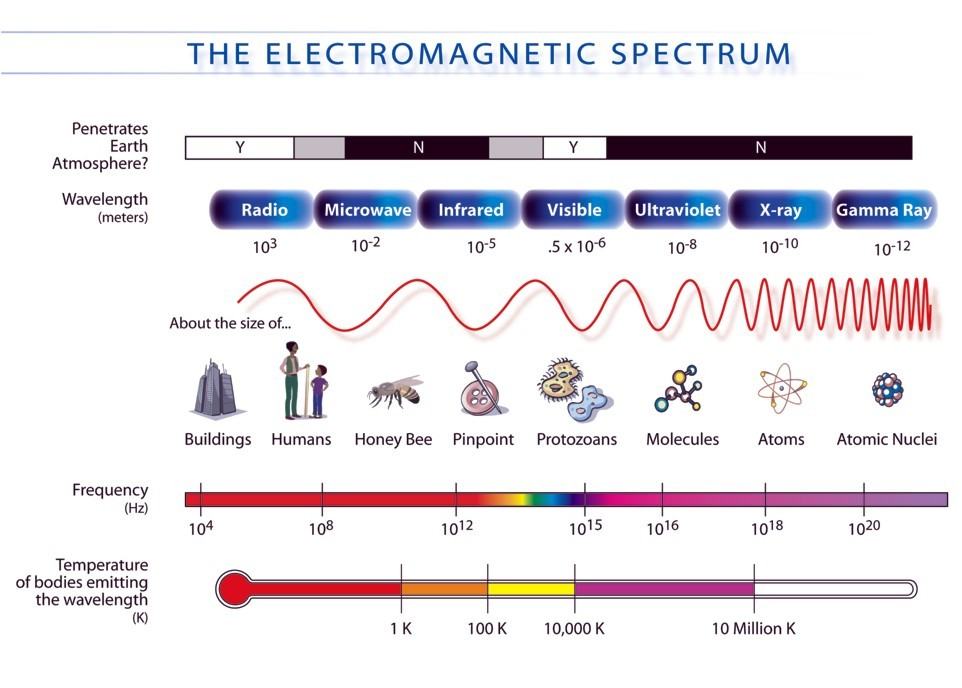
Chart by NASA
On the chart, look at the center of the frequency scale. Just to the left of the 1015 stop, you can see a tiny ROYGBIV rainbow. Below (left of) the visible red is the infrared, and above (right of) the violet is the ultraviolet. You can’t see either one, but many animals and insects can, and those wavelengths can register on certain films and sensors.
The plain fact is, I hardly ever use any filters at all, and I never use an ultraviolet (UV) filter. I consider them unnecessary, potentially deleterious to image quality...

Taken on a bright sunny day, this is what a slide might look like affected by UV. Photograph by Jacques Mort
When you go out in the sun and feel the radiant heat, that’s the infrared, but when you start to tan, it’s not the heat or the intensity of the sun, it’s not the infrared that causes tanning or burning: it’s the ultraviolet. Not only can you not see the ultraviolet, you can’t feel it either, but it can be damaging to many things, not least of which is your skin. If you’ve ever had a sunburn, you’ll want to remember the sunscreen next time (sunscreen absorbs UV before it harms your skin). Ultraviolet can even pass through a cloud layer and cause a sunburn because of its short wavelength. You don’t feel any warmth because the infrared cannot penetrate, but it is possible to get sunburned on a cloudy day.
What effect did ultraviolet light have on analog (film) color photographs in those thrilling days of yesteryear? Even though we can’t see ultraviolet, color films especially were sensitive to it, and you’d see it as a blue “shift,” an overall pale blue tint in prints. It was sometimes worse in certain slide (transparency) films.
Back in the day, we often used a UV filter to mitigate that excess blue. There were also “skylight” filters that absorbed UV plus warmed up the Ektachrome films. UV filters tend to have a barely-there straw color; skylight filters are faintly pink.
Key Lesson: Filters intended to limit UV will look nearly colorless, but they have a faint tint, which is what absorbs the ultraviolet.
Lens Drop
Many photographers then and now screw on a UV or skylight filter and leave it there, most often because they think it might protect the lens from a drop. The thinking was/is that it can’t hurt, but actually it can. Lenses have had excellent anti-UV coatings for many years, so a filter becomes redundant, but there is another potential problem with leaving a “protective” or any other filter on all the time: any filter can induce flare.

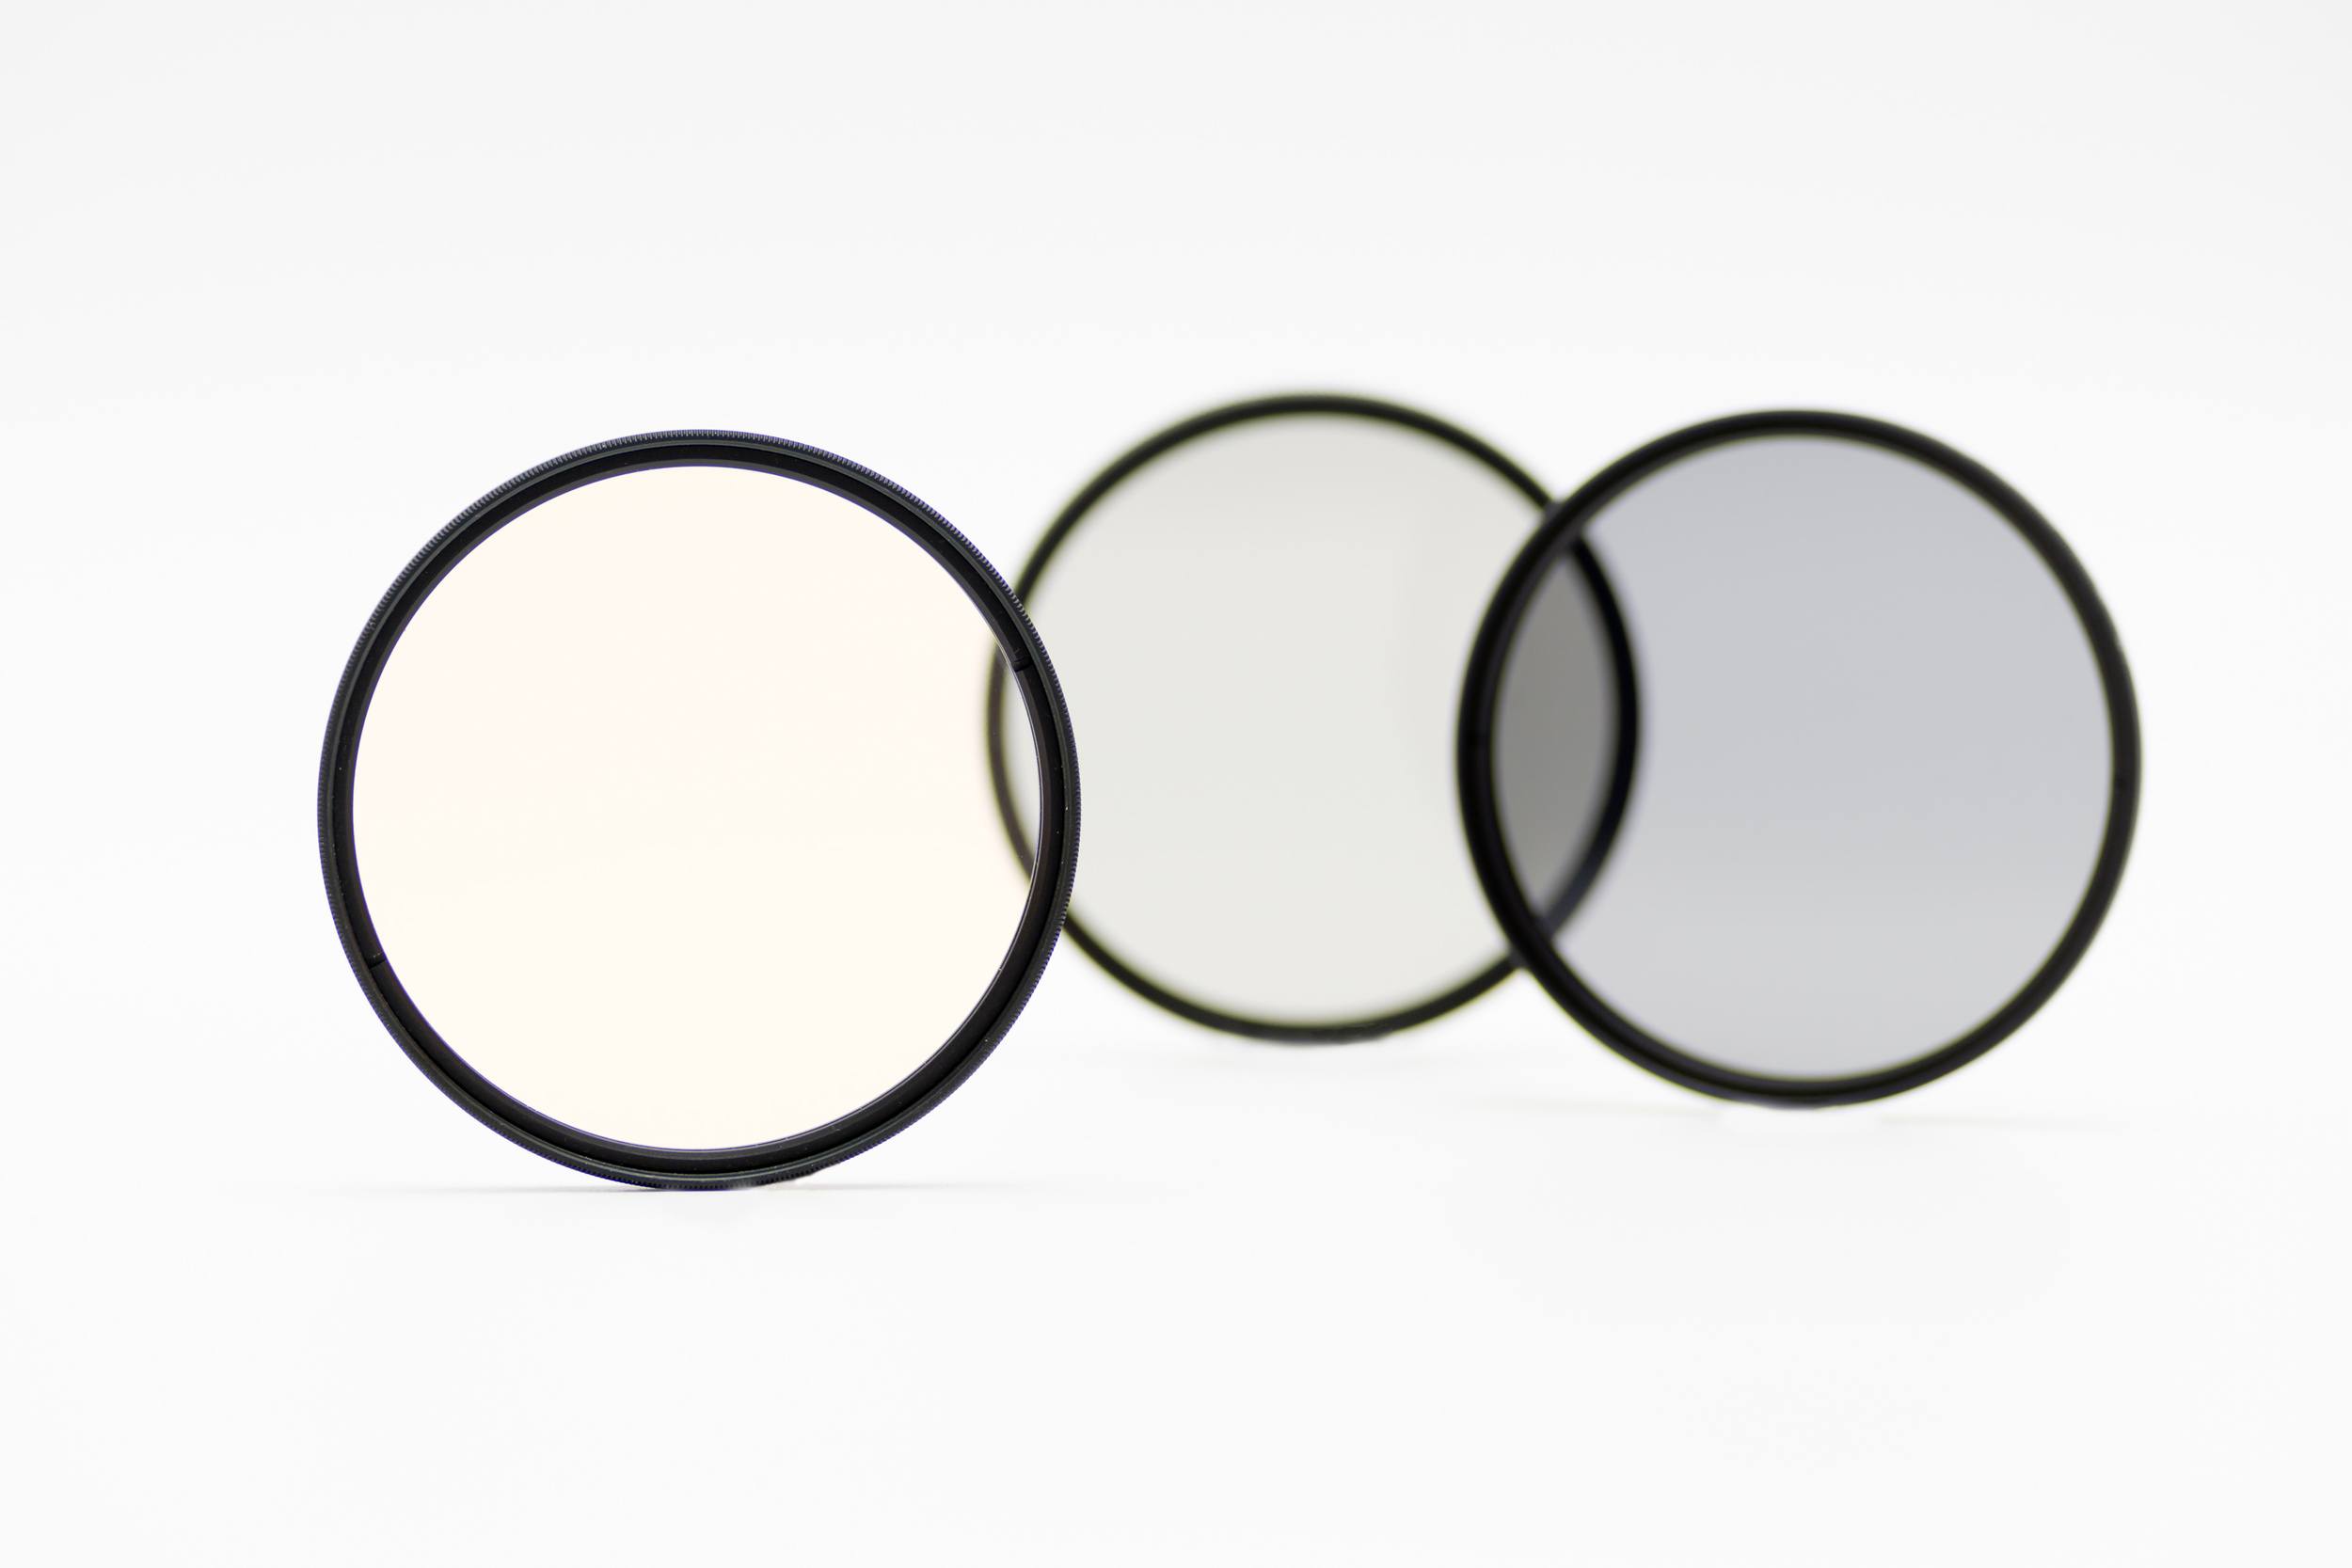
An ultraviolet-absorbing filter. Photograph by Charles Haacker
This is a 72mm UV filter that I carry, part of a typical set of three. The other two are a circular polarizer (CPL) and a 4-stop neutral-density (ND). This was shot against a white background to show the faint straw color characteristic of UV filters. Depending on the reproduction and your monitor, it may look slightly rose-colored.
I carry it as part of the set but never use it. This example is admittedly a cheap off-brand product. The only one of the three I ever use is the CPL, but I carry the set on the you-never-know principle (better to have it and not use it than to need it and not have it).
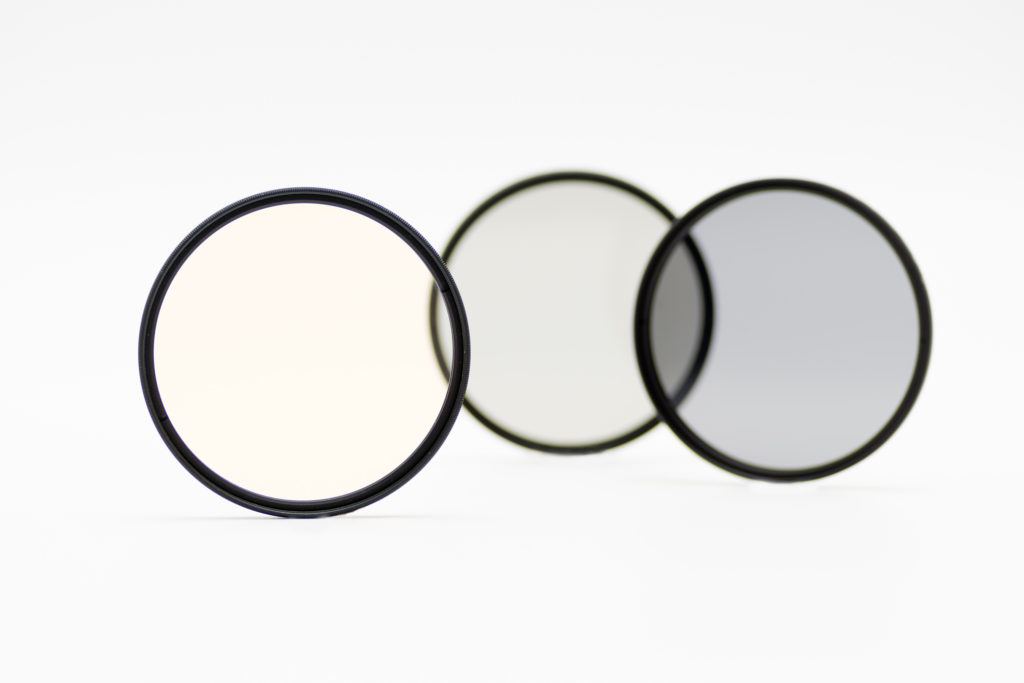
This is my actual set. The UV filter is on the left. The Center is the 4-stop ND and right is the CPL. You should be able to see the faint straw tint in the UV filter. Photograph by Charles Haacker
Flare
When I was in school, our instructors told us not to put a filter permanently on a lens because it had the potential to cause flare because of being an extra glass-to-air surface.
Flare in photography is defined as non-image-forming light or stray light from any number of sources. Some flare is inevitable, but the designers minimize it, mostly through a coating of the elements within and without.
Key Lesson: Flare in photography is defined as non-image-forming light; stray non-actinic light.
Key Lesson: In a lens, any gap between elements is a glass-to-air gap or surface with the potential to cause stray “backscatter” light that becomes flare.
Recommended Reading: After learning about camera settings, improve your photographs by understanding how light works! Grab a copy of Photzy’s premium guide: Understanding Light Book One.
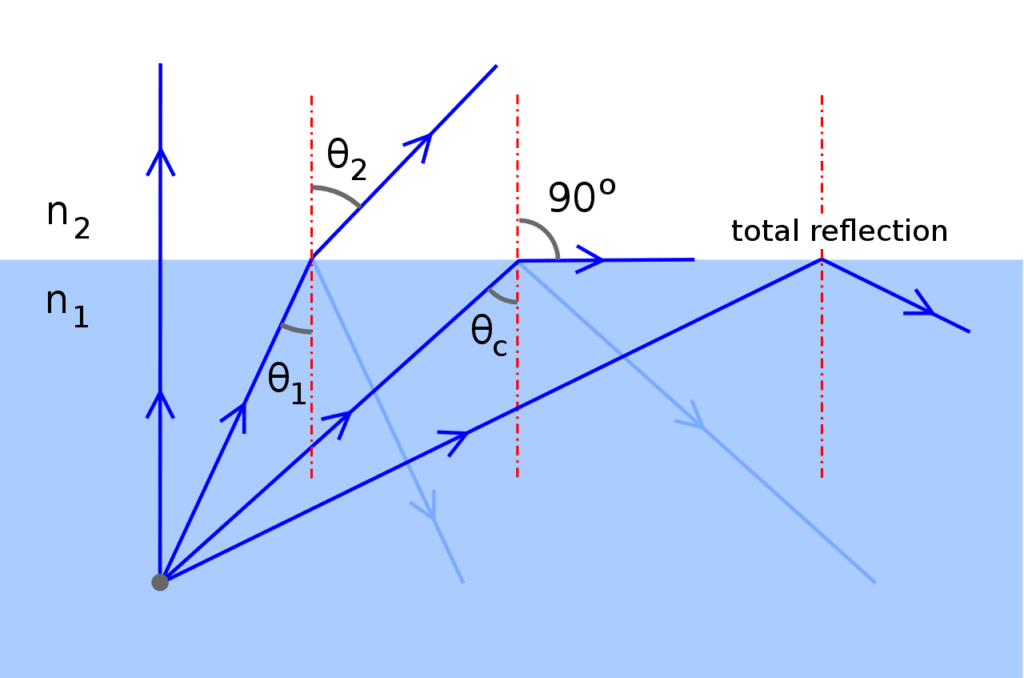
Graph by Jfmelero (adapted by Gavin R Putland)
This chart represents a filter over a lens. On the left is the probable ~99.5% of the total light entering the filter and then straight into the front element of the lens where, through controlled refraction (bending), the forming of the image begins. Other portions of the remaining ~.5% are variously overbent, refracted, and reflected; that light is non-image-forming. On the right is total reflection: light that is just mirrored off the front surface of the filter and lost. Some flare is inevitable even in the finest lenses, but by definition, if it isn’t forming the image at the focal plane, it may be causing visible problems.
Not only can you not see the ultraviolet, you can’t feel it either, but it can be damaging to many things, not least of which is your skin.
The problems begin behind the rear surface of the filter, where all those random refractions and reflections occur within the air space (glass-to-air) between the back surface of the filter and the front surface of the lens. If the filter (or even the lens) has poor antireflection coatings, the problems will be worse. Even despite the best coatings, not all of this stray light can be prevented from reentering the lens at haphazard angles and potentially causing flare, glare, haze, artifacts, loss of contrast, and even loss of resolution. This is why I was taught to only use a filter when it had an actual purpose (i.e., mitigating ultraviolet light), but that was in analog. Times have changed.
Key Lesson: Any filter can cause flare and internal reflections because light passing them can rebound, bounce from the front element of the lens, and be reflected into the lens from the back of the filter. There is normally very little of this backscattered light, but it still can and sometimes does ruin a good image; there is no good way to mitigate it in post-production.
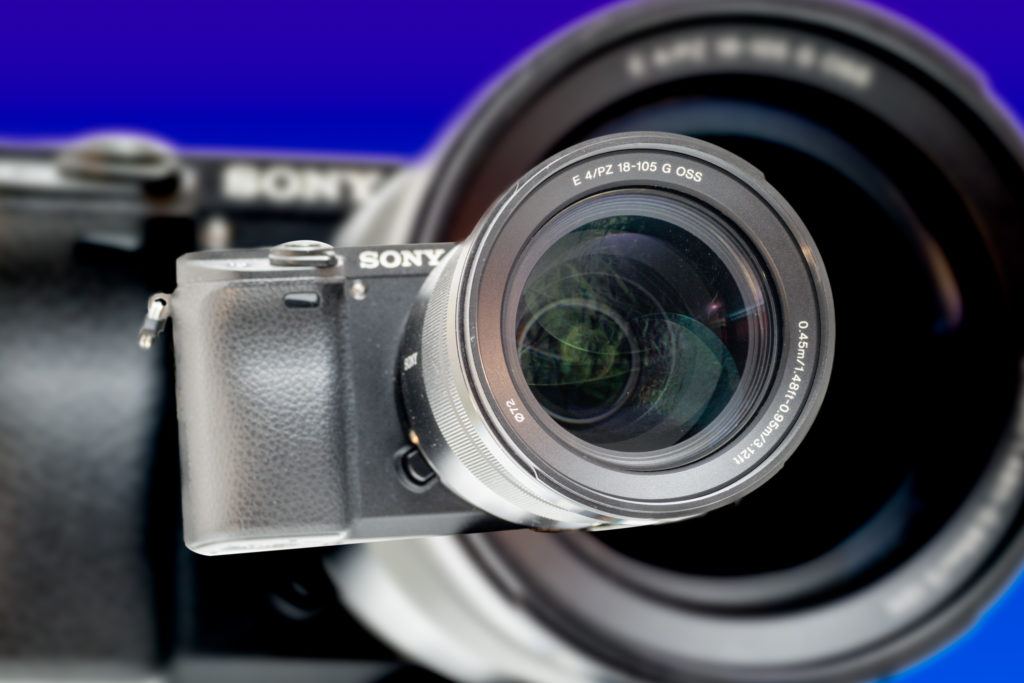
Here is my camera with my big zoom lens that takes 72mm filters. There is no filter on this lens. Photograph by Charles Haacker
My 36-inch silvered reflector was set up to redirect light into the lens to illuminate details within. You can see its barely-there reflection in the complexly coated front element.
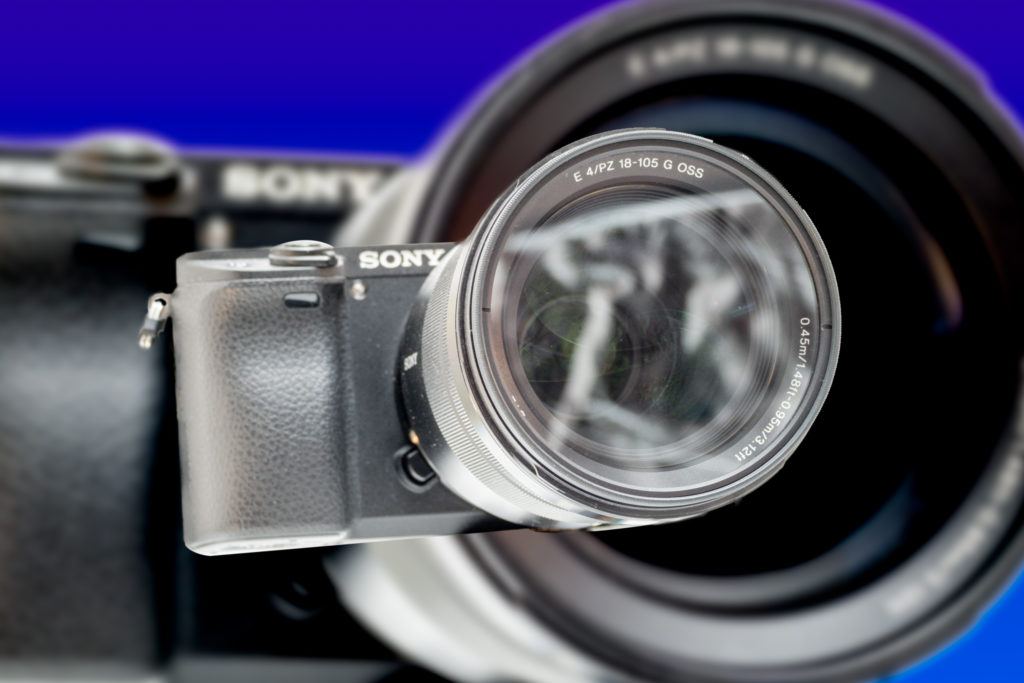
I have added the UV filter and repeated the shot. Photograph by Charles Haacker.
With the UV filter on, all you can see is the reflection of the rippled surface of the silver reflector. The flat surface of the filter acts as a mirror, despite anti-reflection coatings, but not just on the outside; it’s a mirror on the inside as well.
My cheap filter would be especially prone to flare simply because it was cheap. I can’t even be sure it is perfectly flat, and I’m confident it lacks good coatings. Good coatings are expensive. A $10 USD off-brand filter is unlikely to have high-end coatings.
Key Lesson: Inexpensive filters may be more likely to cause flare and images that are not sharp owing to having poor antireflection coatings. Good coatings cost money.
But don’t we need to keep the ultraviolet away from the sensor? No, because it is already blocked. On your modern digital sensor, a UV or skylight filter has no purpose. All those coatings on and within your lenses already absorb UV. Even the rare-earth glass in high-end lenses absorbs UV. But what is less well known is, modern digital sensors are already protected from both UV and IR! Every new digital camera comes with a bluish-green filter of IR/UV-blocking glass, factory preinstalled directly over the sensor. It’s called an IR/UV cut filter, and it is far more efficient than any redundant screw-in UV filter.
What Is the UV Filter Really For?
So, all that said, why put a UV (or even just a clear glass) filter on your lens?
For protection. Safe photography. At least that’s what they tell you.
Like most starving photography students, I worked in a camera store. We were expected to sell a UV or skylight filter with every single camera or lens. They usually retailed around $10 USD and were strongly pushed on the customers because they “protected the expensive front element of your lens.”
I will let you in on a secret: What my customers never knew was that those 10-buck filters we were pressuring them to buy were $10 in pure profit because we didn’t pay a thin dime for them.
Key Lesson: The “protective” filters that retailers try to sell you are nearly pure profit for the store while giving you a false sense of security.
The manufacturers gave us hundreds of UV or skylight filters in every size, free. I don’t know if that’s still the case, but back in the mid-1970s in the store, I worked in, every UV filter sold to “protect” the lens earned the store $10.00. That adds up.
The greater question, though, has to be whether a flimsy extra glass-to-air surface can actually protect your investment if you drop it?
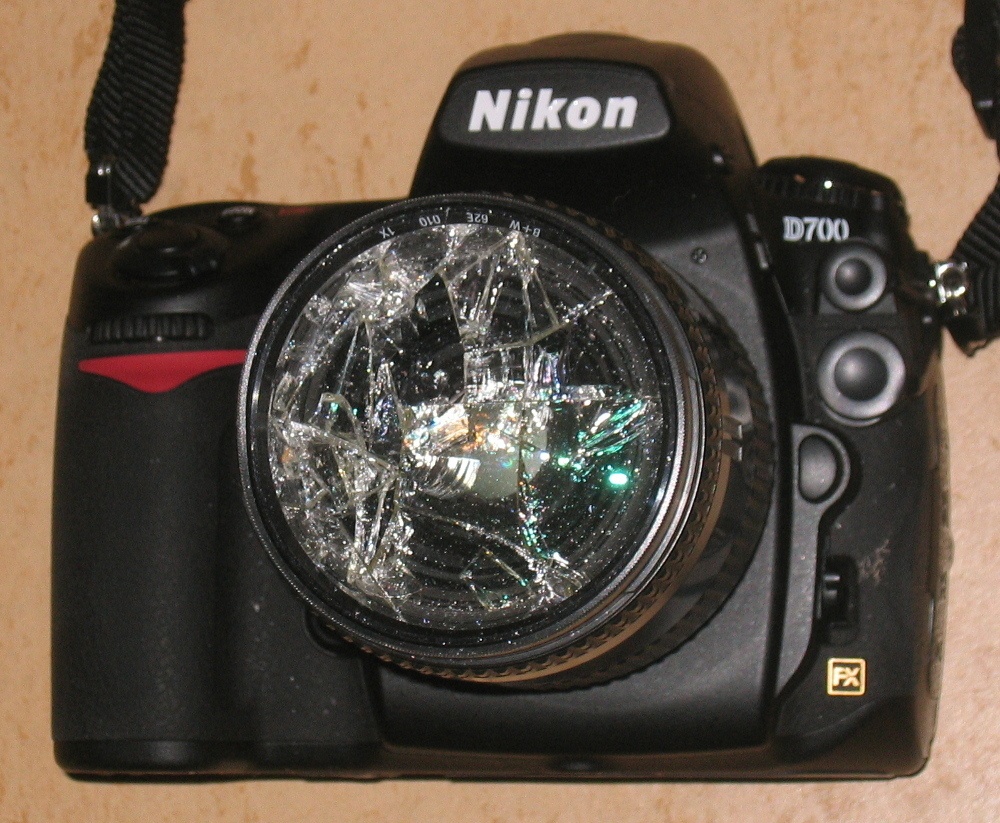
Photograph by Sven Wolter, Lizenz
We have all seen innumerable pictures like this purporting to show how the poor little filter died bravely defending the front element of the expensive lens. I don’t buy it. My first thought is, where was your lens hood? My second thought is, what in the world happened here? I am not trying to blame the victim, but how did you manage to drop that camera? Were you not using the strap? I have seen an unattended camera on a tripod catastrophically blown over by a gust of wind. I won’t say it can’t happen, but it should be preventable with an ounce of caution.
On your modern digital sensor, a UV or skylight filter has no purpose. All those coatings on and within your lenses already absorb UV.
But the true question is, would that shattered filter really have absorbed the shock and protected the lens behind it? I really doubt it, plus I am confident that there is a better solution.
As I do not subscribe to using filters as “protection,” I also never deploy a lens without its hood as that provides far better protection than a rigid filter. All lenses today seem to come with a dedicated, formulated-for-that-specific-lens hood. Mine are all a tough, thick, semi-rigid ABS plastic, more than capable of absorbing a fairly considerable knock. I was flying around an event with my usual twin bodies on a harness and managed to have one swing out and connect with a brick wall. There’s a little dent in the otherwise undamaged hood. The $1,000 lens never felt like a thing. It’s why balls bounce. They flex and rebound. A rigid filter cannot do that. It must transmit the shock throughout the system.
Key Lesson: Plastic lens hoods flex and rebound to absorb energy; a rigid filter does not.
All of my lenses came standard with semi-rigid lens hoods that bayonet onto a flange on the lens, not screwed into the filter threads. They are excellent at keeping the lenses safe from all but the hardest knocks. They bend and absorb the energy that could cause serious damage, then bounce back.
Bonus: Lens hoods used all the time protect your pictures from flare by keeping non-image-forming light off the front element. Unless you are shooting into or very nearly into a bright source, hoods, also called lens shades, do exactly that: shade the lens. I keep mine on at all times except for transport, when I take them off and reverse them to save space.
Key Lesson: Lens hoods (aka shades) increase contrast in your pictures by keeping flare-inducing light away from your lens. They protect your lens from sharp bumps, and there is no reason not to keep a hood on every lens all the time.
Recommended Reading: After learning about camera settings, improve your photographs by understanding how light works! Grab a copy of Photzy’s premium guide: Understanding Light Book One.
Is there ever a time when I would use a UV or clear filter? Yes! They are recommended at the beach to keep sand and salt away from that precious front element. They are useful on excessively windy and/or dusty assignments where blowing grit can sandblast a lens, and even in some corrosive atmospheres. If I knew I was going to be in an environment like that I would purchase good, well-coated UV or clear filters for all lenses I planned to use, plus I would also use my lens hoods to keep stray flare-inducing light away from the filters.
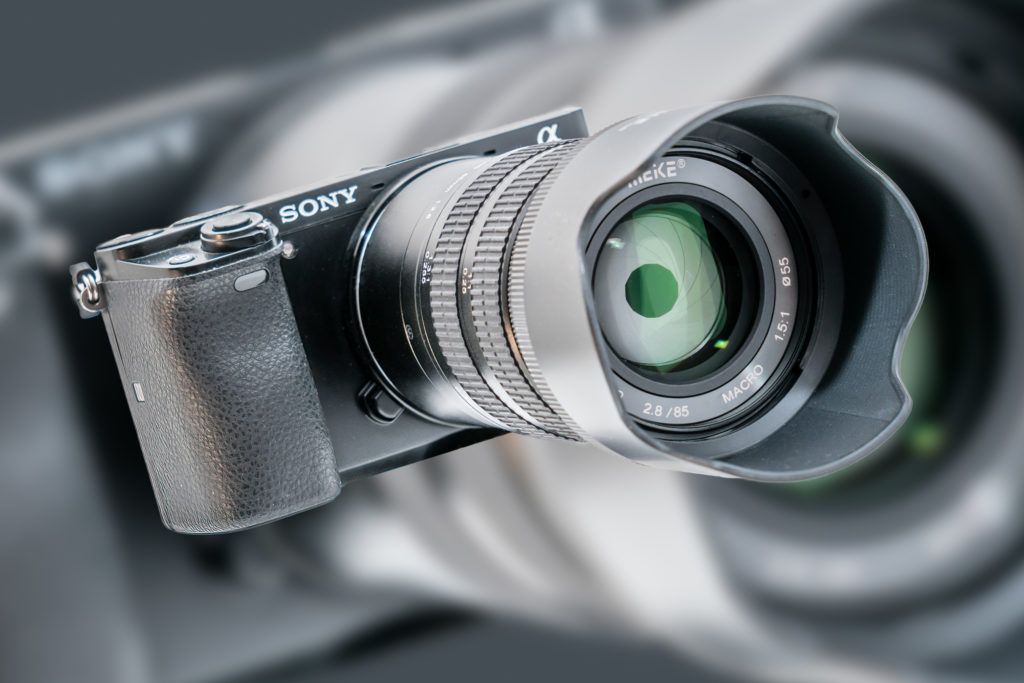
ABS “tulip” hood firmly bayoneted to my 85mm f/2.8 MeiKe macro lens. Photograph by Charles Haacker.
If I accidentally smack my lens into something hard, the hood should provide all the protection needed by absorbing the energy like a bumper and then spring back into shape. It also reduces the likelihood of flare plus increases contrast by preventing stray light from ever reaching the front element.
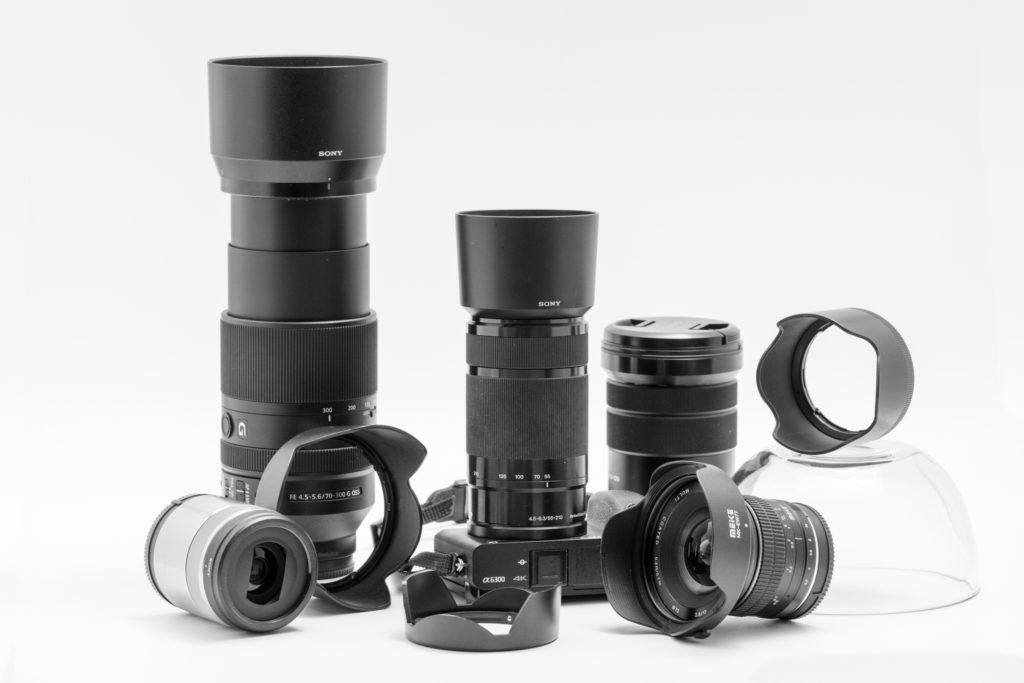
There are seven ABS lens hoods in this picture, including the little 30mm Macro on the left. The goofy little rectangular window is its lens hood, and it absolutely works. Photograph by Charles Haacker
Conclusion
If you feel more confident by having a filter on your lens, I won’t stop you. Each of us must do what feels right. There are plenty of anecdotes and apparent evidence that a cheap filter can protect a very spendy lens from irreparable damage by absorbing the shock, but I am not convinced. I’m certain that a good ABS lens hood is far more protective, plus it keeps flare away and it can even keep light rain off the lens. If you still have your hoods, use them. If you don’t, you can order replacements, or there are aftermarket hoods, but you need to know the depth of hood you need; too deep and it will vignette. The all-purpose collapsible rubber hoods have their uses but do little to protect a lens from a drop.
Self-Check Quiz:
- True or False: Inexpensive UV or glass filters are the best protection for your lens.
- True or False: A protective filter absorbs more shock than a plastic lens hood.
- True or False: Flare is shorthand for image-forming light.
- True or False: Modern digital sensors are very vulnerable to ultraviolet light.
- True or False: Roy G. Biv was the shortstop for the Dubuque Bunnies in 1948.
- True or False: Ultraviolet light can penetrate cloud cover and cause sunburn.
Shooting Assignment: Shoot a picture of anything but with the sun crossing, even a little in front of the camera. Shoot the scene with no UV filter on. Shoot it again with the filter on. Shoot it a third time adding the lens hood that came with the lens. Shoot it one last time with the filter off but the hood on. Upload all four frames and view them closely (e.g. survey view in Lightroom). What would you expect to see?


