

I started my photography journey scared to photograph people. However, my aspiration to become a professional photographer and pay for my way through life with my camera dictated that I do so.
I’m not going to sugarcoat it. It was a long process getting to the point where I was confident enough in my skills that I would take on a paid project.
Early on, I did only black-and-white photography. I learned about tone and contrast in the darkroom. Photographers today don’t have a promising avenue for learning those skills.
That’s where guidebooks like this can help you learn quickly and bypass mistakes.
Black and white portraiture is hugely satisfying, and I hope you read this guide, take in the information, and put it to use.
Here is what we will cover:
- Starting with a strong composition
- Paying particular attention to the lighting: direction, contrast, and texture
- Focusing on the eyes and picking your depth of field (DOF) window carefully
- Using shadows for drama
- Difference for style: tonal isolation
- Playing with shapes
- Printing on fine art paper
Recommended Reading: If you’d like to learn how to create amazing black and white images, grab a copy of Photzy’s best-selling premium guide: Better Black and White.
Starting With a Strong Composition
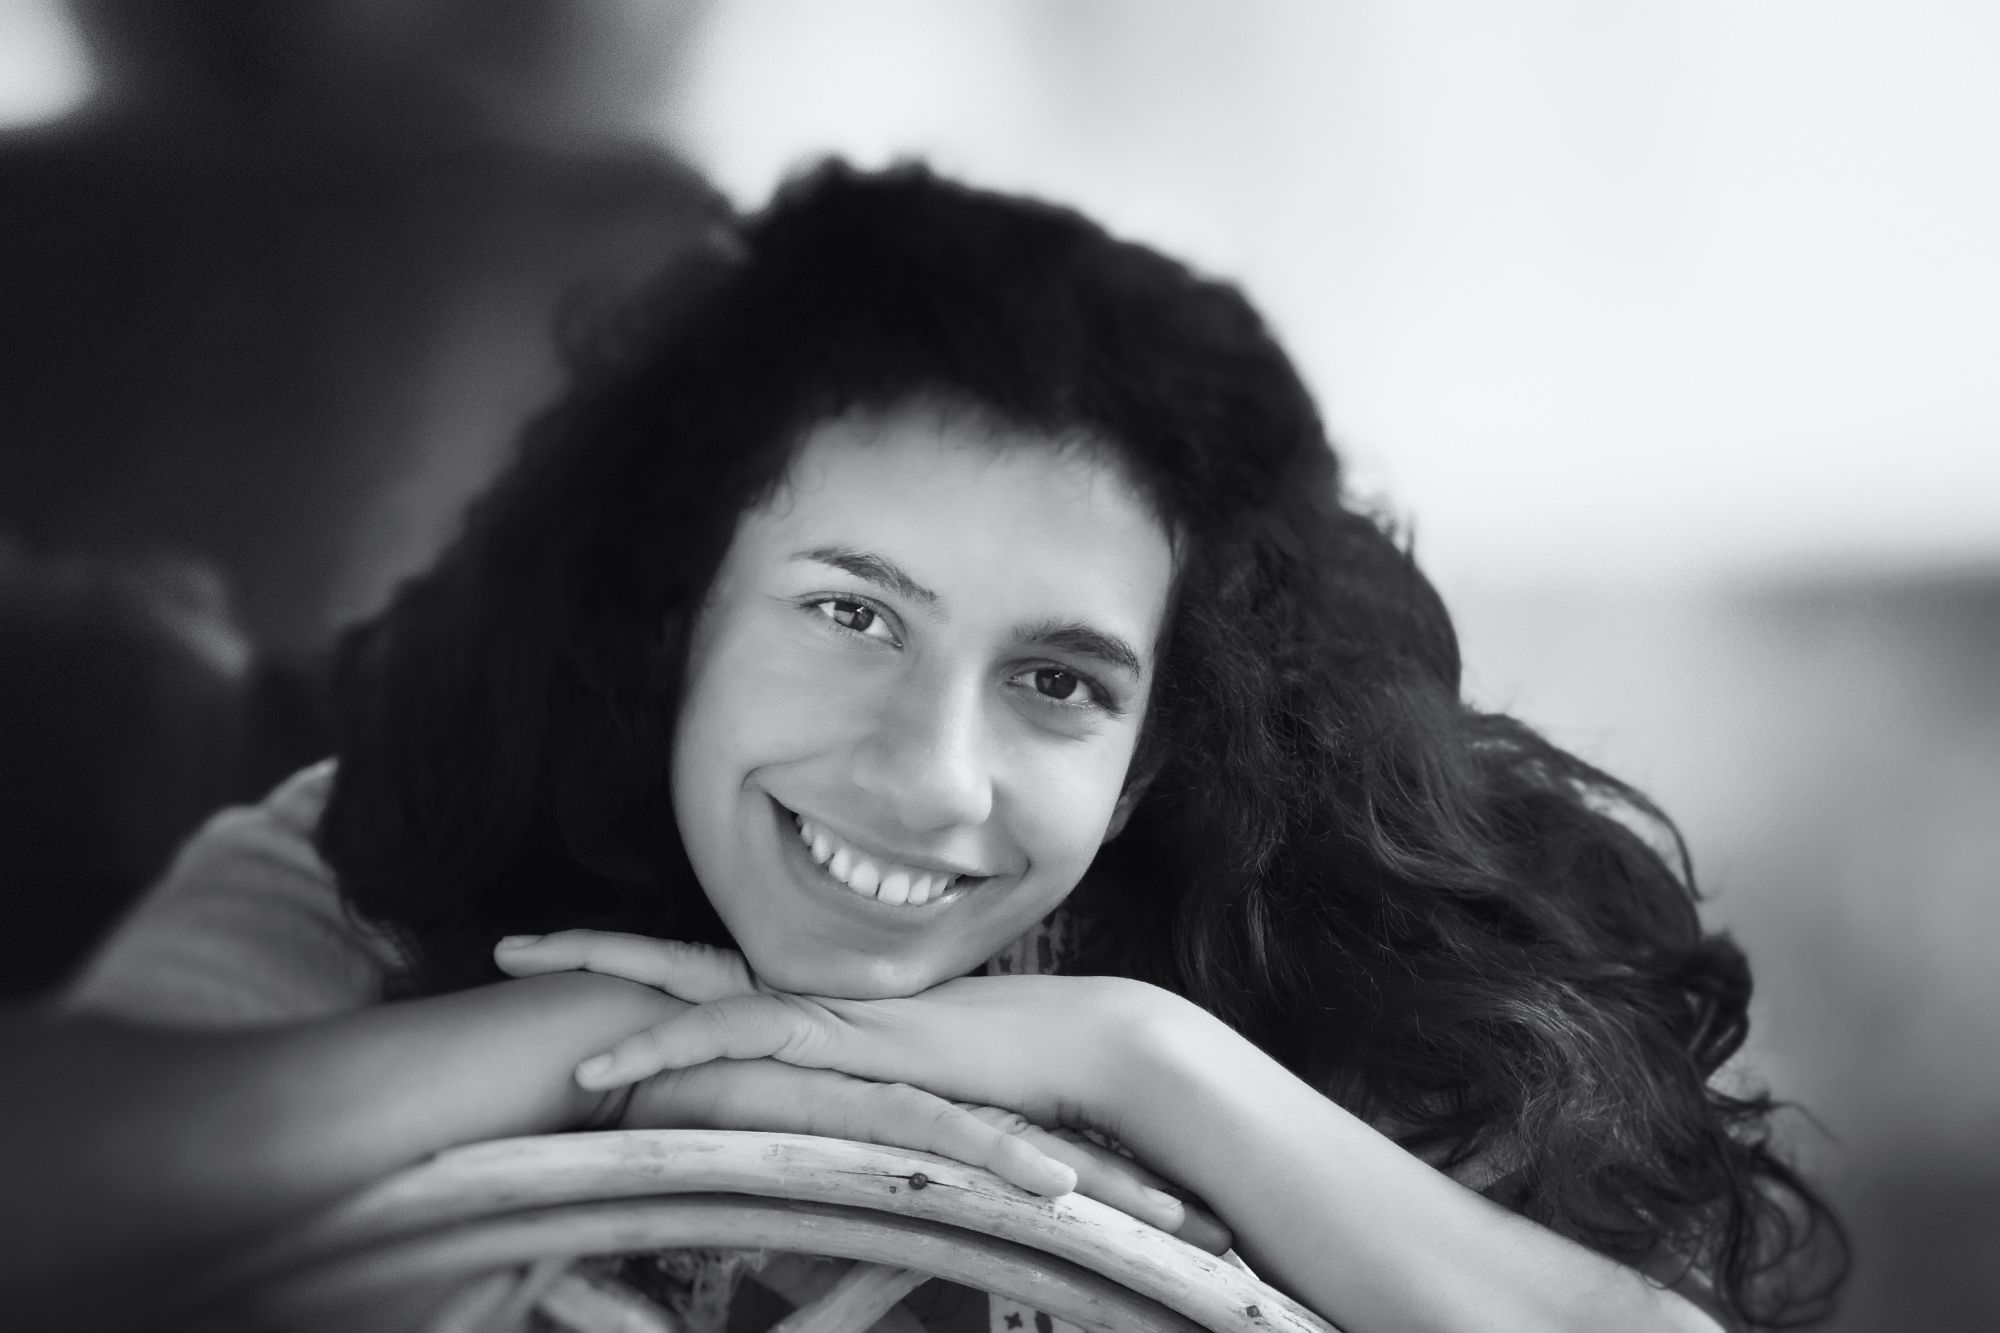
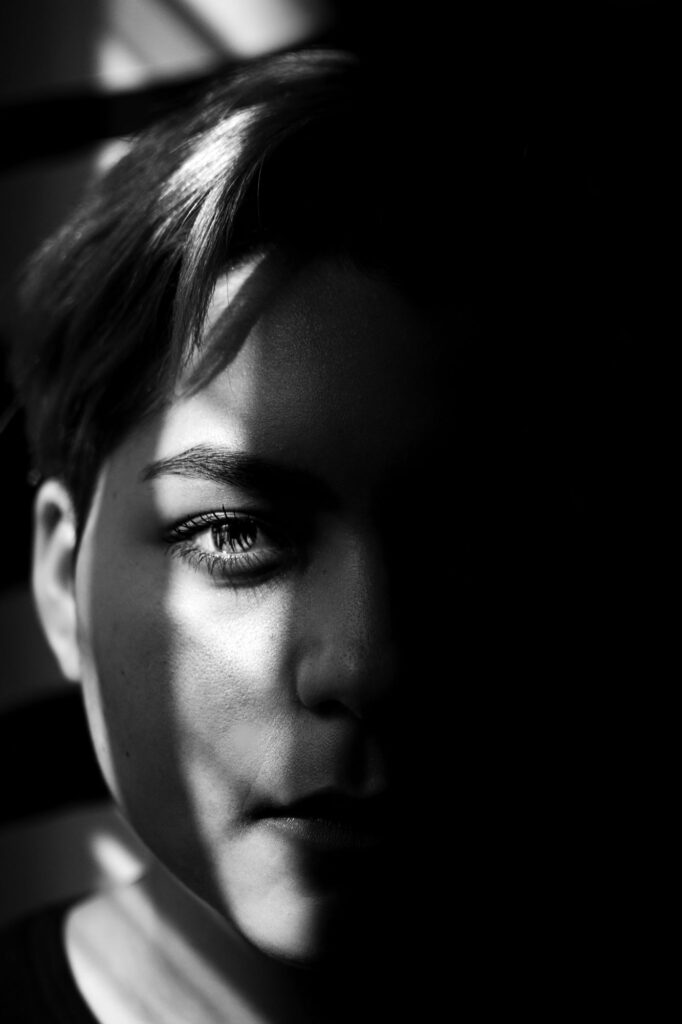
One issue that I see with portraiture published online is poor composition. Yes, a portrait is just an image of a person or animal, but remember this: what makes a black-and-white portrait compelling is the details.
Let’s take the image above, for example. It’s not a horrible shot of this young woman, but the drama is weak because of the composition and framing, which is a shame because the lighting and hair are quite dramatic.
Could this be improved with better composition?
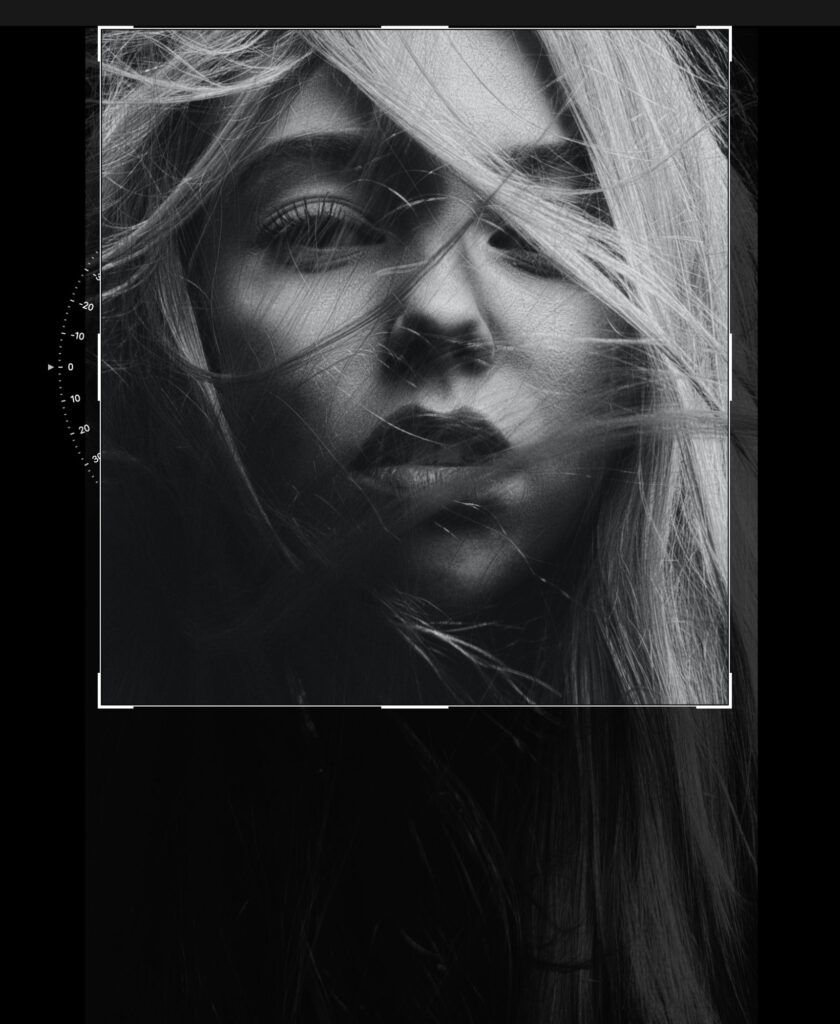
Cropping improves the composition of this stunning black-and-white portrait by eliminating areas of the original frame that were boring! Photograph by Alexander Krivitskiy and Screenshot by Kent DuFault
Key Lesson: Composition is always important. It becomes even more critical in black-and-white imaging because you don’t have color to attract attention and save the day. You must study your subjects and sculpt them with light and composition. Look for interesting angles, lines, and shapes that can create a sense of depth and dimension in the image. Remember that the subject’s position and posture can also affect the composition and overall mood of the photograph.
Paying Special Attention to the Lighting: Direction, Contrast, and Texture
Overhead lighting is generally considered taboo in portraiture. It creates strong shadows under the eyes and chin. But you can use that to your advantage depending upon the subject and the story that you wish to tell about them. Photograph by Denis Agati
Lighting is vital in creating a dramatic and striking black-and-white portrait. Consider using natural light, such as a window or open door, to create soft and flattering lighting. Alternatively, use artificial light, such as a strobe or continuous light, to create more dramatic and contrasting lighting. Experiment with different lighting angles and intensities to find the right balance for your subject and desired effect.
The light in this portrait session was almost non-existent. Photograph by Kent DuFault
The first consideration is always the lighting and your subject. Hard light might be good if your subject is an MMA fighter but not so good if it’s soft and even.
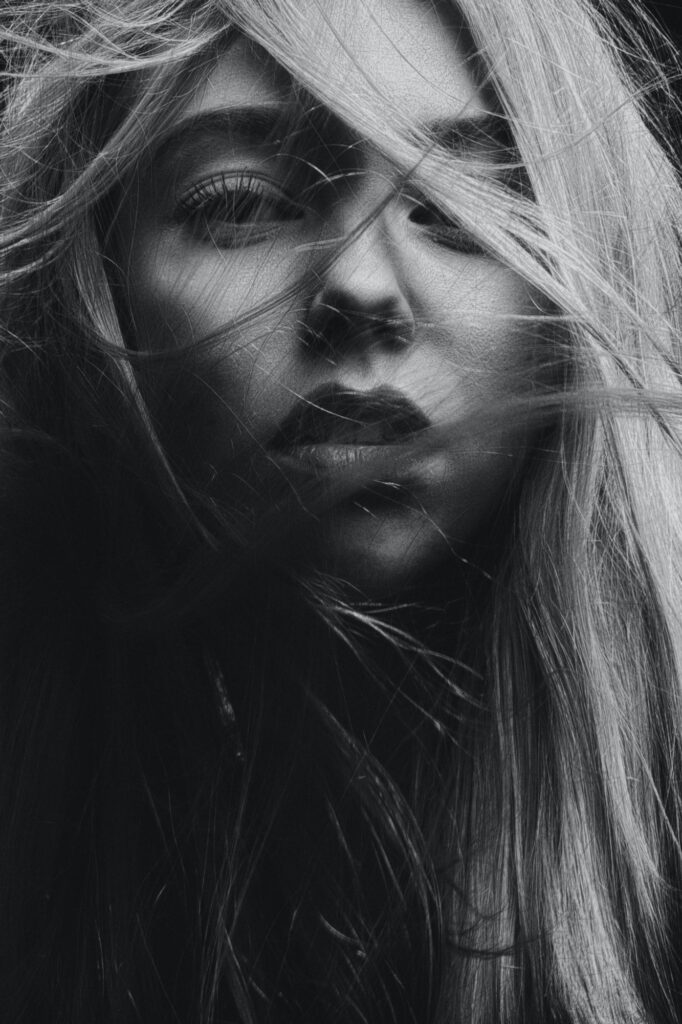
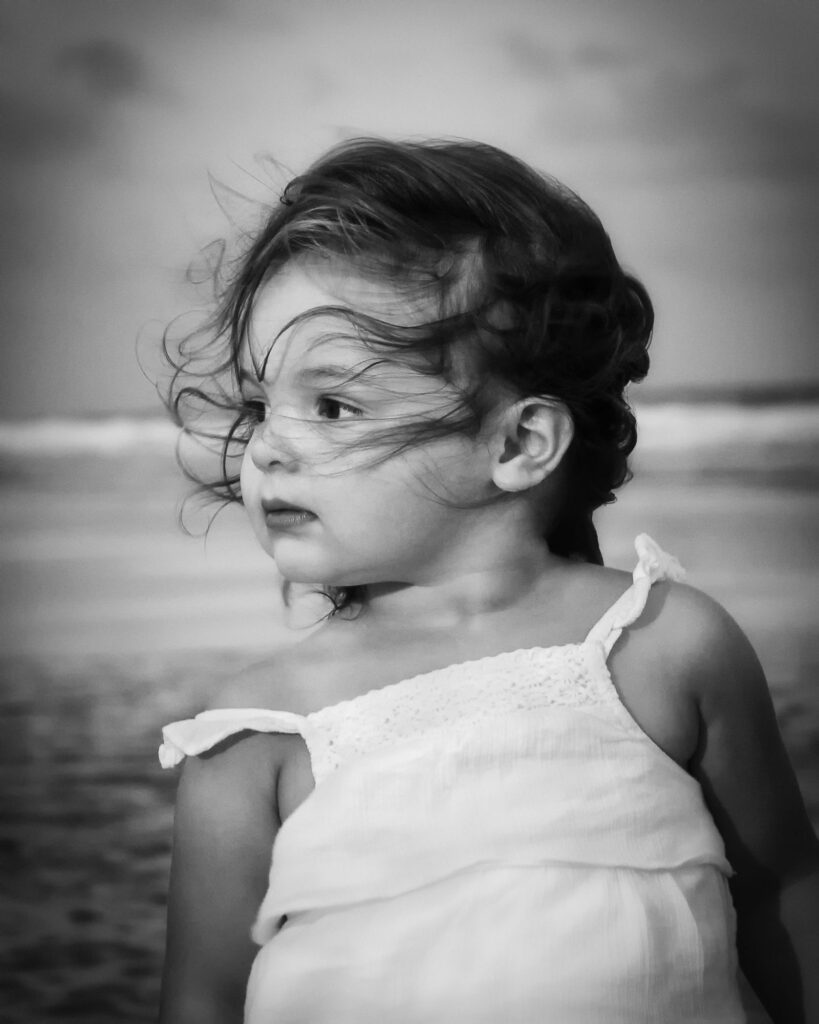
When you have no choice but to deal with the light you’ve been given, look to contrast and texture to add visual interest to a black-and-white portrait.
The image above becomes special, mainly due to the contrast and texture of the girl’s blowing hair. I also used the difference of the white top against the dull gray background to add story and shape to the subject.
Consider using natural light, such as a window or open door, to create soft and flattering lighting.
In soft, low lighting, a vignette can add some zing to what might otherwise be a flat-looking photo.

You can also use low contrast to create a mood. Photograph by Zulmaury Saavedra
Low contrast is inevitable when the lighting is flat and even. The intensity of the light source doesn’t matter.
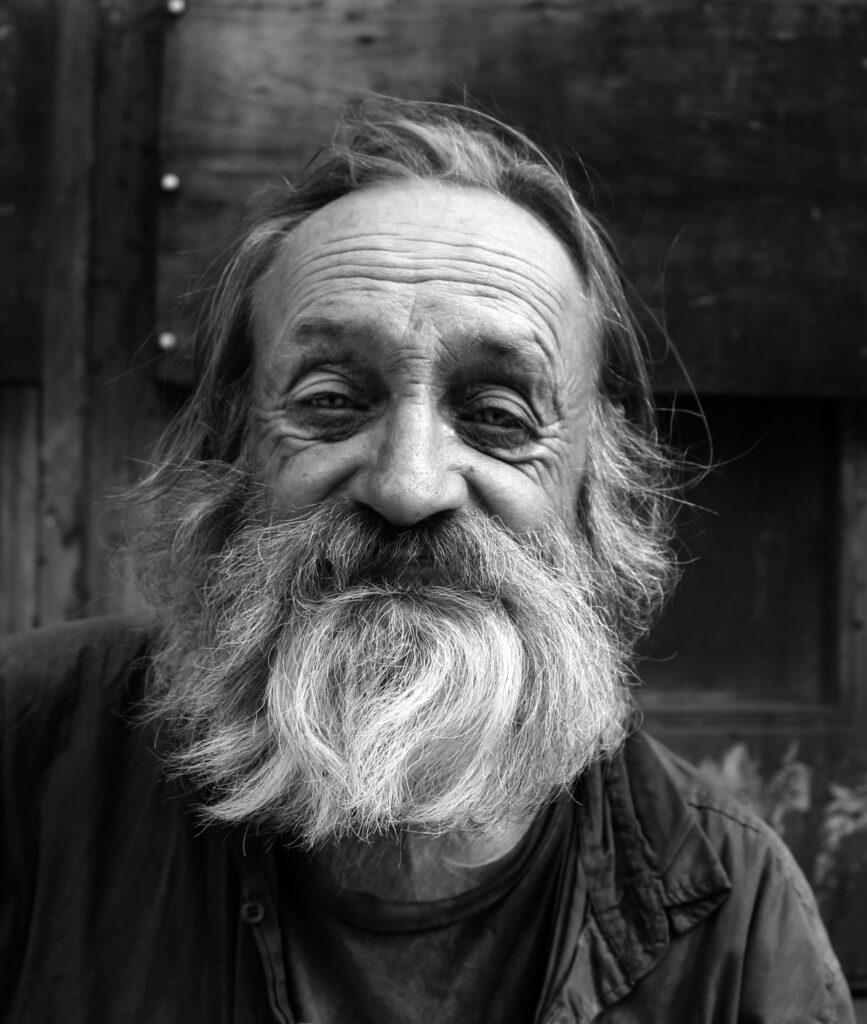
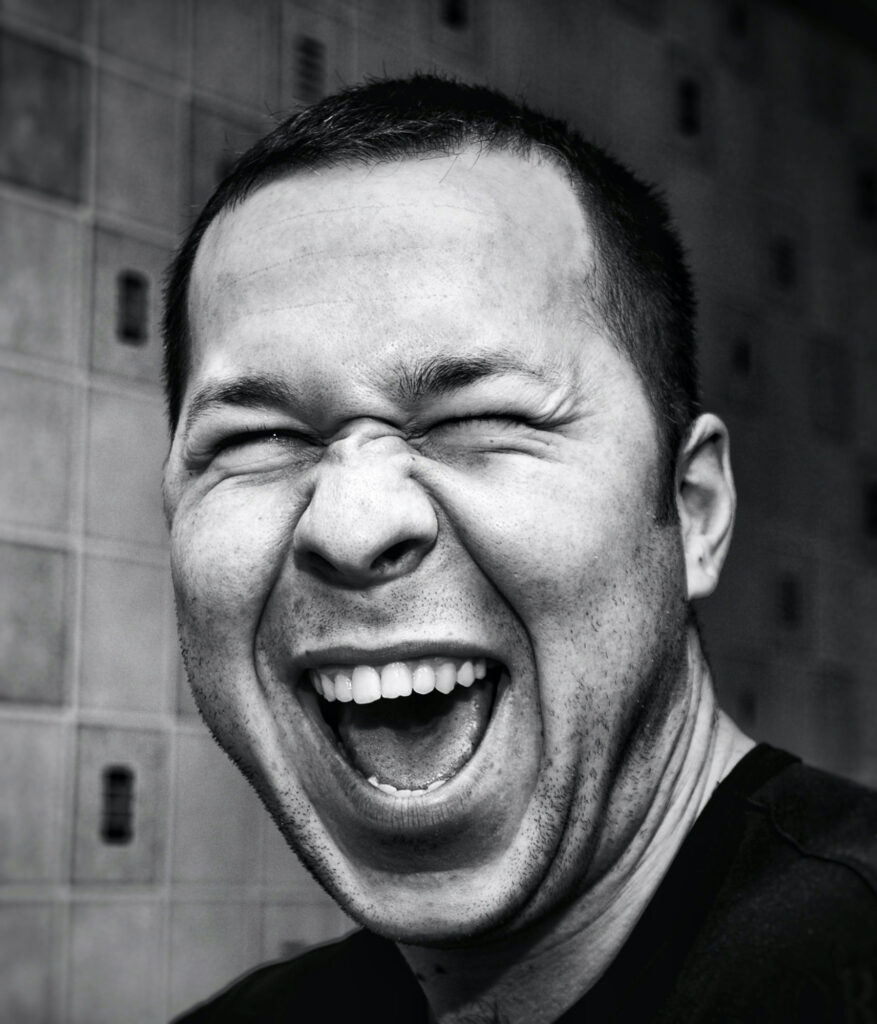
No matter the lighting quality – soft or hard – when it is directional, the texture becomes a solid positive attribute for black and white portraiture. Photograph by Jorg Karg
Texture works well on men, especially when showing character in the face. For women, you don’t want a lot of texture in the skin but ample texture in the hair and clothing.
Key Lesson: The first step in stunning black and white portraits is evaluating your subject and the lighting you must work with. Direct overhead lighting is typically considered bad news unless it promotes a theme you have in mind (like image #5). Soft light produces lower contrast and lighter shadows. Hard light creates high contrast with deep-defined shadows. When confronted with low contrast, look for ways to use it in your final product (like image #6).
Recommended Reading: If you’d like to learn how to create amazing black and white images, grab a copy of Photzy’s best-selling premium guide: Better Black and White.
Focus on the Eyes and Pick Your Depth of Field (Dof) Window Carefully
William Shakespeare said, “The eyes are the window to your soul.” Nowhere is that truer than in black and white portraiture.

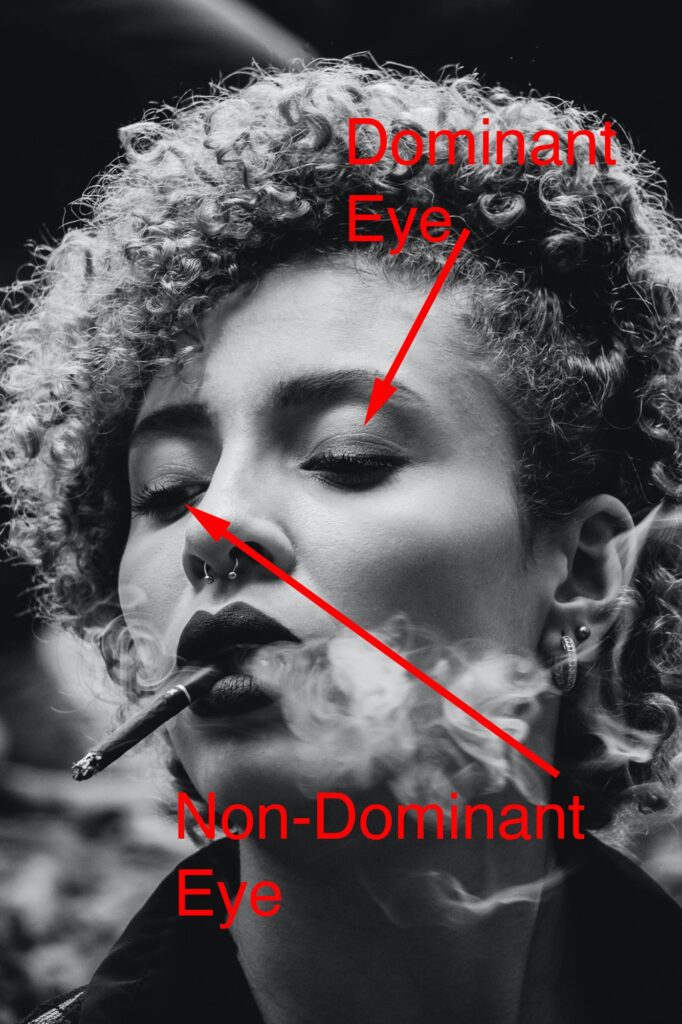
In black-and-white portraiture, there is rarely a reason not to place the point of critical focus on the eyes. When color is missing to grab our attention, we will gravitate toward another human element that we all understand: the eyes. Always have at least one eye critically focused.
This is where the depth of field (DOF) is also a crucial concern.
Key Lesson: In black-and-white portraiture, at least one eye should be in critical focus. But there is a caveat to this statement. The eye in focus must be the subject area of the portrait.
When composing a portrait, think about the subject’s face in typical composition terms. You want a foreground, a subject area, and a background.
The depth of field should (in most cases) cover at least the subject area and possibly the foreground. The background will be your most minor concern.
Use Shadows for Drama
Key Lesson: In black and white portraiture, actually any black and white photograph, it’s essential to place perception on shapes, texture, and viewer eye movement. This is usually best accomplished with your placement of light and shadow.
Shadows are super dramatic, and if you’re not considering them for every shot you create, you should be!
Ansel Adams is world-renowned for his black-and-white photos. One of the reasons why was his dedication to tonal values that included deep, rich blacks and vibrant, clean whites with a full scale of tone in between.
This tone scale is easier to achieve now (digitally) than in his day (film and darkroom).
Key Lesson: Strive for deep, rich blacks and creamy, vibrant whites. Use tone to direct the viewer’s attention through your black-and-white portraiture.
Contrast for Style: Tonal Isolation
Photograph by Kent DuFault
Contrast is kind of the ‘ugly forgotten cousin’ to light and shadow. Contrast is fundamental, and photographers usually emphasize keeping it under control and within acceptable boundaries.
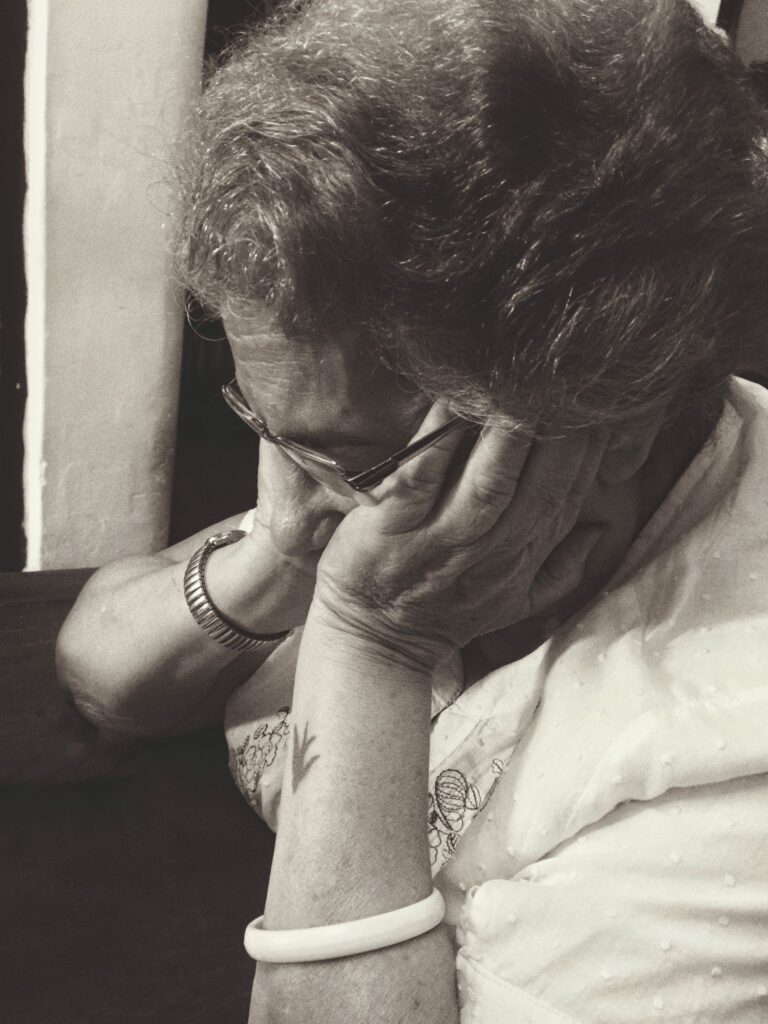
Key Lesson: You can use contrast to subliminally send a message about the subjects in your photos.
The image above uses low contrast to maximize the message displayed in the older woman’s body language.

High contrast tends to inject a feeling of energy.
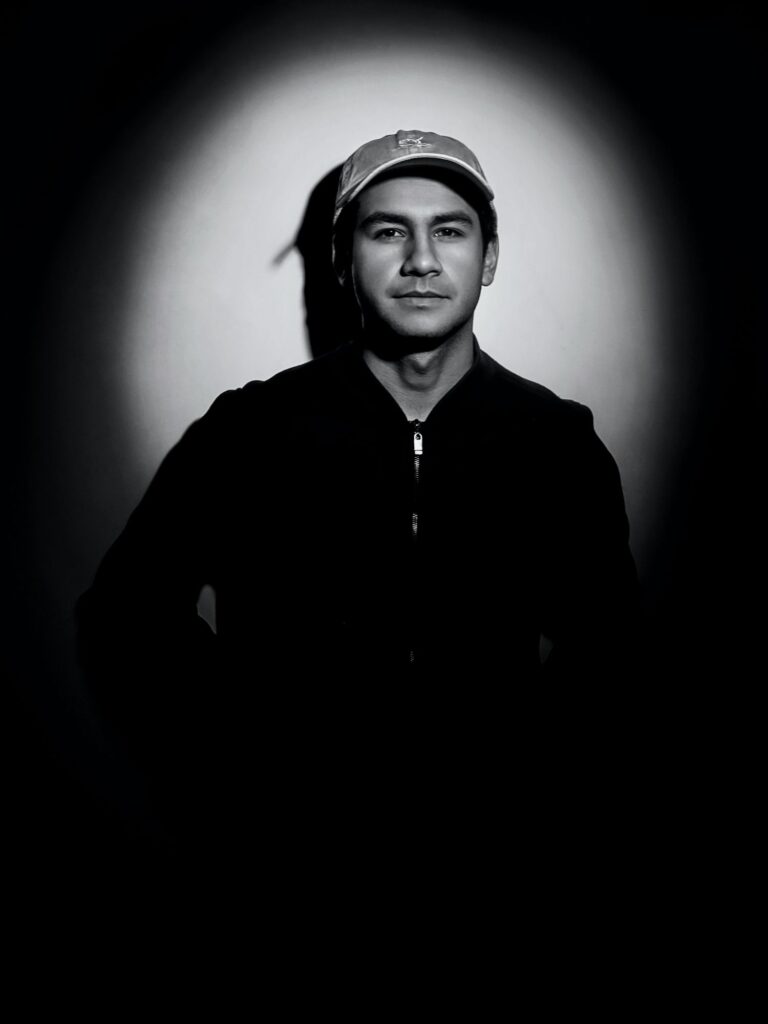
Key Lesson: Using contrast to direct a viewer’s eyes to a particular location within your black-and-white image is known as tonal isolation. Take the image above as an example. We have two portrait subjects. Higher contrast fits the mood of their attire and location. Tonal isolation has been used to add greater visual weight to the woman. The man is still quite visible and a critical element of the story, but he is indeed supplicant to her as the subject area.
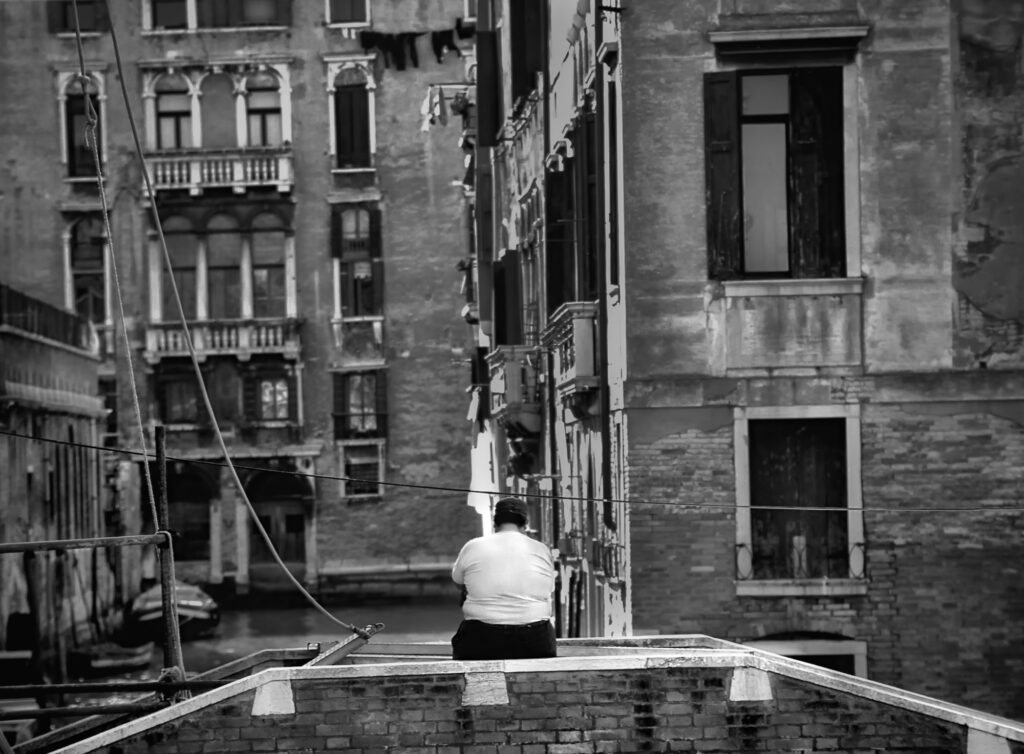
Another example of the power of tonal isolation is through contrast. This scene is quite busy, yet the eyes go right toward the man sitting on the bridge. Why? The power of tonal separation! Photograph by Kent DuFault
Playing With Shapes
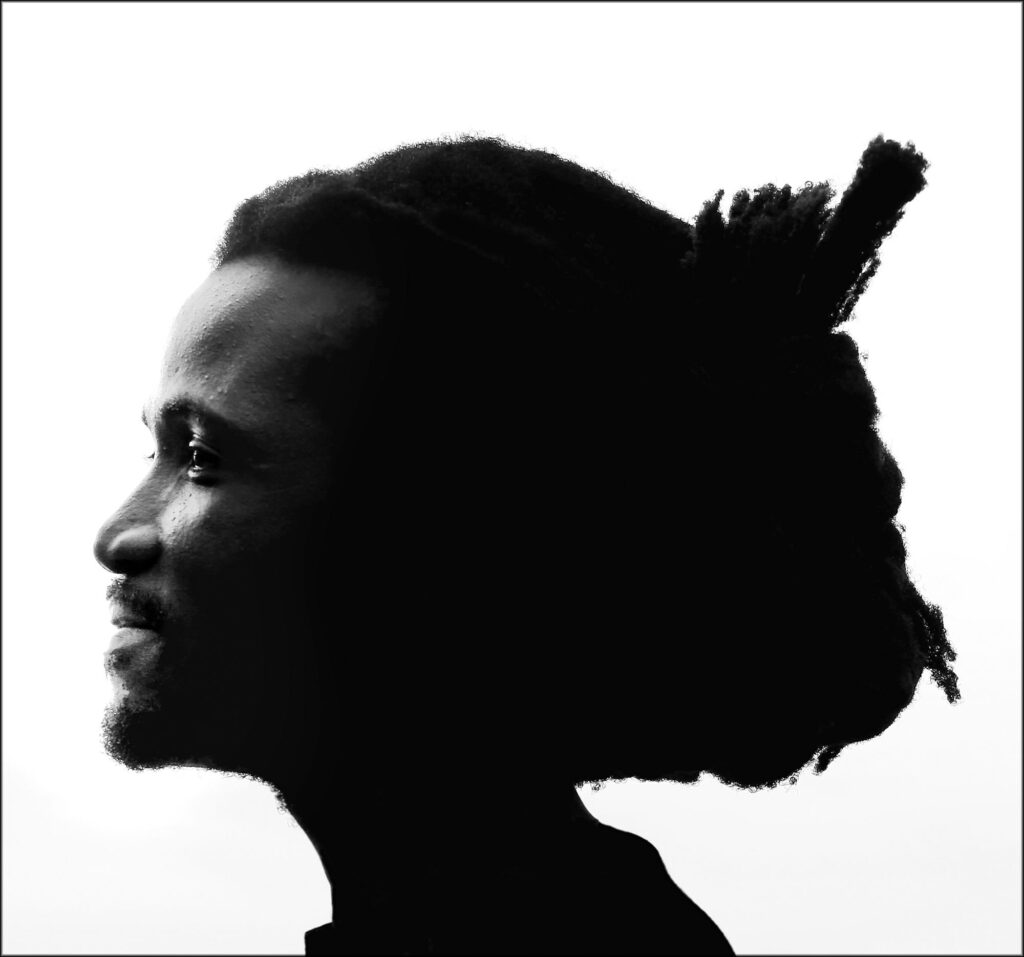
Photograph by Kent DuFault
This was a neighbor of mine, and I was fascinated by the shape of his hair. I wanted to accomplish two things with this black-and-white portrait. Firstly, I wanted to emphasize the shape of his hair. Secondly, I wanted to reveal his face so the viewer recognized who it is in the picture.
Key Lesson: Study your black-and-white portrait subjects for interesting shapes in their face, hair, and body. Consider creating a dramatic shape through your choice of pose, props, and makeup.

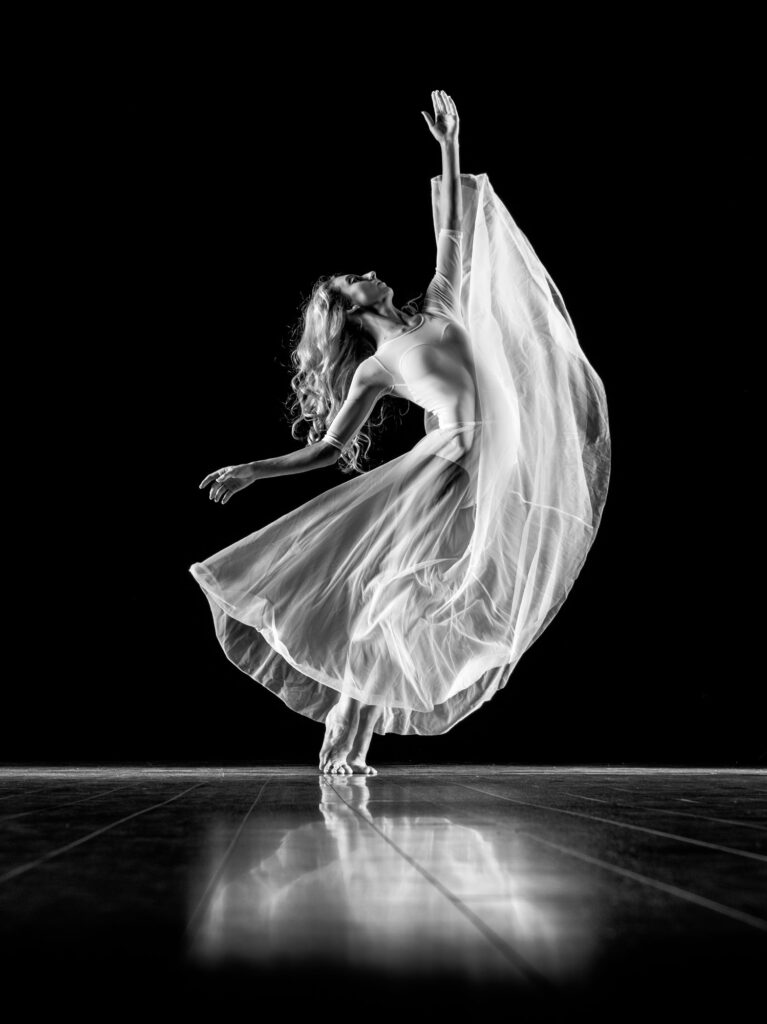
Photograph by Kent DuFault
This black and white portrait also uses shape to create drama. The difference between the image above and the image on the previous page is that the shape was present in the subject for the image on the previous page, and in the image above, the photographer (me) used shape, tone, contrast, and critical focus placement to create drama.
Printing on Fine Art Paper
Printing a fine art black and white image, portrait or otherwise, is the final step in this process. Black and white photographs are presented best on paper rather than on screen.
Printing your black-and-white portrait on fine art paper can add a tactile and emotional dimension to the photograph. Choose paper with a matte or textured finish to enhance the black-and-white tones and create a more immersive experience. Alternatively, consider printing the portrait on a metal or acrylic substrate to create a modern and sleek look.
Printing your black-and-white portrait on fine art paper can add a tactile and emotional dimension to the photograph.
Printing at home can be challenging, but it is another step in the process for an artist.
There is no shame in printing at a commercial lab. That’s primarily what I do these days.
Key Lesson: If you use a commercial lab to print your black-and-white portraits, get to know them. Find someone you like and stick with them. Use art paper versus standard printing paper for additional creative input.
Recommended Reading: If you’d like to learn how to create amazing black and white images, grab a copy of Photzy’s best-selling premium guide: Better Black and White.
Conclusion
Remember, producing stunning black-and-white portraits takes time and practice. Start with these tips and techniques and experiment with different lighting, editing, and printing styles to find your unique style and voice. With dedication and persistence, you can create beautiful and impactful black-and-white portraits that capture the essence of your subject.

Photograph by Kent DuFault
Self-Check Quiz:
- What should all black-and-white portraiture start with?
- Why is composition even more critical in black-and-white portraiture than in color?
- What three attributes of the lighting should you pay special attention to?
- True or False: Overhead lighting is always bad in a black-and-white portrait.
- True or False: You should always strive to create soft lighting, as hard lighting never works in a black-and-white portrait.
- What can you create when you use low contrast?
- What type of lighting produces low contrast?
- Where should the critical focus be placed?
- When considering the DOF window, what area of a black-and-white portrait is of the least concern?
- Shadows are important for two reasons. Name them.
- What can contrast help to do?
- In a black-and-white portrait setting, where can you find shapes?


