


When the skies cloud up and storms approach, most people turn their attention toward indoor activities, and for good reason: the dark, windy, and wet conditions outside are not exactly ideal conditions for going for a walk, barbecuing, or tending to the garden.
Despite the dreariness, there is one aspect of thunderstorms that can captivate us every time we see it: lightning.
The zigzagging bolts across the sky are beautiful and mesmerizing – a tremendous display of nature’s power.
While beautiful, lightning can also be intimidating and dangerous. The combination of power and danger makes lightning an attractive subject for a photograph.
In this article, we’ll discuss…
- The danger involved in photographing lightning
- Equipment you’ll need
- Planning for a safe and successful outing
- Ideas for framing your shots
- Camera settings
- Techniques for capturing lightning strikes
Lightning is Dangerous
Lightning Is Dangerous! (I cannot emphasize this enough)
Simply put, lightning is a discharge of static electricity. We all know that electricity can be dangerous, even deadly, if we are careless around it. Lightning is no exception. Every year, countless reports of damage are made, many people are injured, and nearly 2000 people die from lightning strikes.
This makes lightning one of the leading causes of weather-related deaths.
Key Lesson: Safety, and common sense, are more important than the gear or technique when involved in the process of photographing lightning during a thunderstorm. Lightning can strike 10-15 miles away from the thunderstorm itself. As a rule, if you can hear thunder, you are close enough to be struck. Even if you can’t hear thunder, you may not be entirely safe. Pay attention to what’s going on around you, and be prepared to take shelter in an enclosed building or in a vehicle with a metal roof and the windows closed. There is no completely safe space outdoors when thunderstorms are in the area! Caution is paramount.
If you do get caught outside in a thunderstorm, there are steps you can take to reduce the risk of injury or death, but you cannot eliminate it.
- Don’t be the tallest thing in the immediate area
- Stay away from the tallest things in the immediate area (do not take shelter under a tree)
- Avoid open fields and hilltops
- Go to a low area
- Stay away from water, metal objects, and power lines
- Do not lay flat on the ground
- If you’re in a group, spread out
If you wish to learn more about the science behind lightning and safety during thunderstorms, visit the National Weather Service (NWS) and National Oceanic and Atmospheric Administration (NOAA) website at http://www.lightningsafety.noaa.gov/
Note: If you want to avoid boredom and repetition in your photography, you can inject some creativity into your work, by using the fun and challenging assignments in our Creativity Catalog. Go here now to take a look.

Equipment
If you still want to photograph lightning strikes, here’s what you’ll need:
- Common sense and a safety plan. If you can, go with a friend. Make sure you tell someone who is not going with you where you will be. Follow the safety tips above. If the weather is very severe, stay inside.
- A camera with minimal shutter lag. DSLR, SLR, and mirrorless cameras work best because of the quick nature of lightning flashes and strikes, but point-and-shoots with manual settings and cell phones could possibly be used with mixed results.
- A way to hold the camera still. Tripods are the most popular way to do this, but they’re not the only option. Beanbags, window mounts, or anything sturdy that will allow you to frame your shot and avoid camera shake will be fine.
- A remote shutter release. Even with sturdy support, cameras do move when you press the shutter button.
- Spare batteries and memory cards. If you’re going to the trouble of setting up for this type of shot, you don’t want the experience to end because of a power outage on the camera or a lack of storage for the images.
- A good thunderstorm. Not all thunderstorms are created equal. Some are very photogenic; others, not so much. Some are just too dangerous to be in. It’s up to you to decide what is “good,” but if you’re in doubt, err on the side of caution and stay inside.
Isolated cells, cells forming ahead of cold front, and super cells are good candidates to photograph lightning. Distant and weak thunderstorms, or those with heavy rainfall around the lightning, are not as good to shoot.
DSLR, SLR, and mirrorless cameras work best because of the quick nature of lightning flashes and strikes...
Optional equipment:
- A dry lens cleaning cloth. Your gear may get wet. Unless part of your artistic vision is to include some random bokeh in the shot, you’ll want to be able to dry off the front of your lens.
- A smartphone. Various websites and apps allow you to track storms and see where the lightning is in real time. They are great for staying ahead of the storm.
- A weather radio. If you don’t have a smartphone, portable weather radios will let you know when storm warnings are issued nearby.
- A flashlight, especially if it is dark.
- If you like gadgets, check out a lightning trigger.

Planning
Now that you’ve read up on staying as safe as possible, you have your gear packed up, and a good thunderstorm is approaching, you’re almost ready to go. Take some time to study the path and history of the storm.
What type of lightning is it producing? Where is it heading? Has it spawned any damaging winds, tornadoes, or hail (if it has, I’d hesitate to consider it “good” for photography)?
Is it intensifying, weakening, or holding together? Is anything developing ahead of or behind it?
These things will all come into play as you’re deciding whether to head out or not, and where to go if you do.
Key Lesson: Lightning can form anywhere in a storm cell, but strikes on the leading edge of the system, and away from the heaviest rainfall, are usually the best for photography. Try to find a spot where the cell will swing past you, and not over you. For example, if the storm is moving west to east, try to get northeast or southeast of it. You will still see the lightning on the front of the line, but you are less likely to have to duck for cover. Be aware, though, as storms don’t always follow a straight path. If the path shifts, or something else develops, you’ll need to quickly reevaluate your plans.
Pay attention to the type of lightning the storm is producing, as it may influence your camera settings and framing.
There are three main types of lightning: intra-cloud (within a cloud), inter-cloud (cloud to cloud), and cloud to ground.
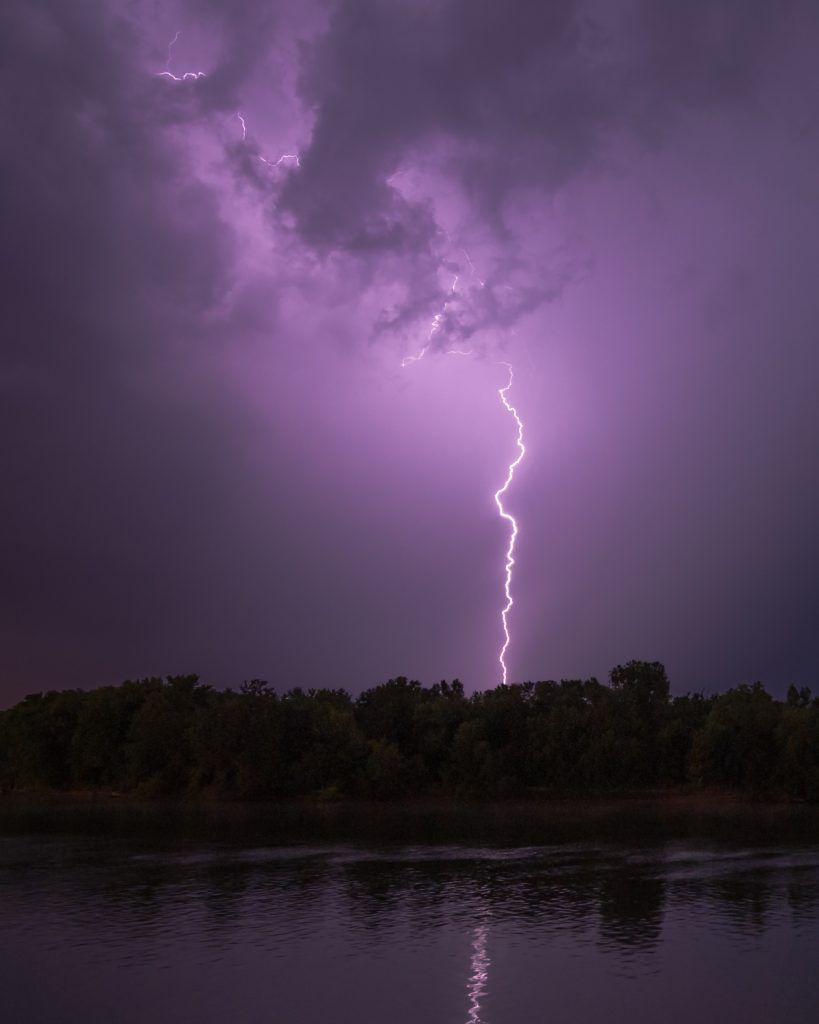
Cloud to ground lightning is the most dramatic, and awe-inspiring, type of lightning to witness, but it poses the most risk to you.
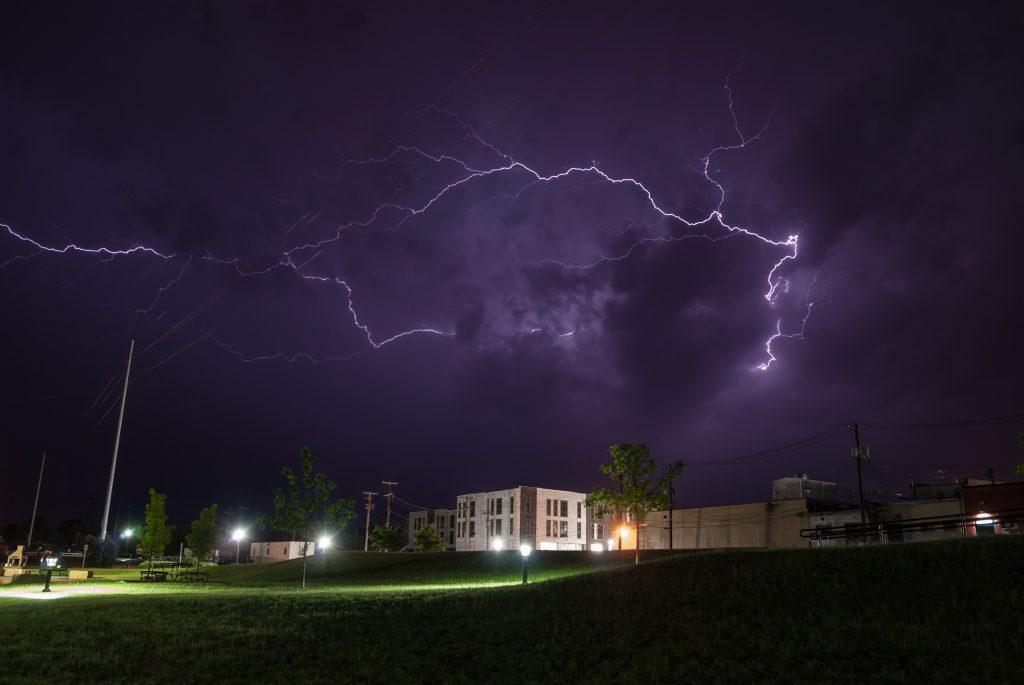
Inter-cloud strikes can produce some very impressive arcs across the sky.
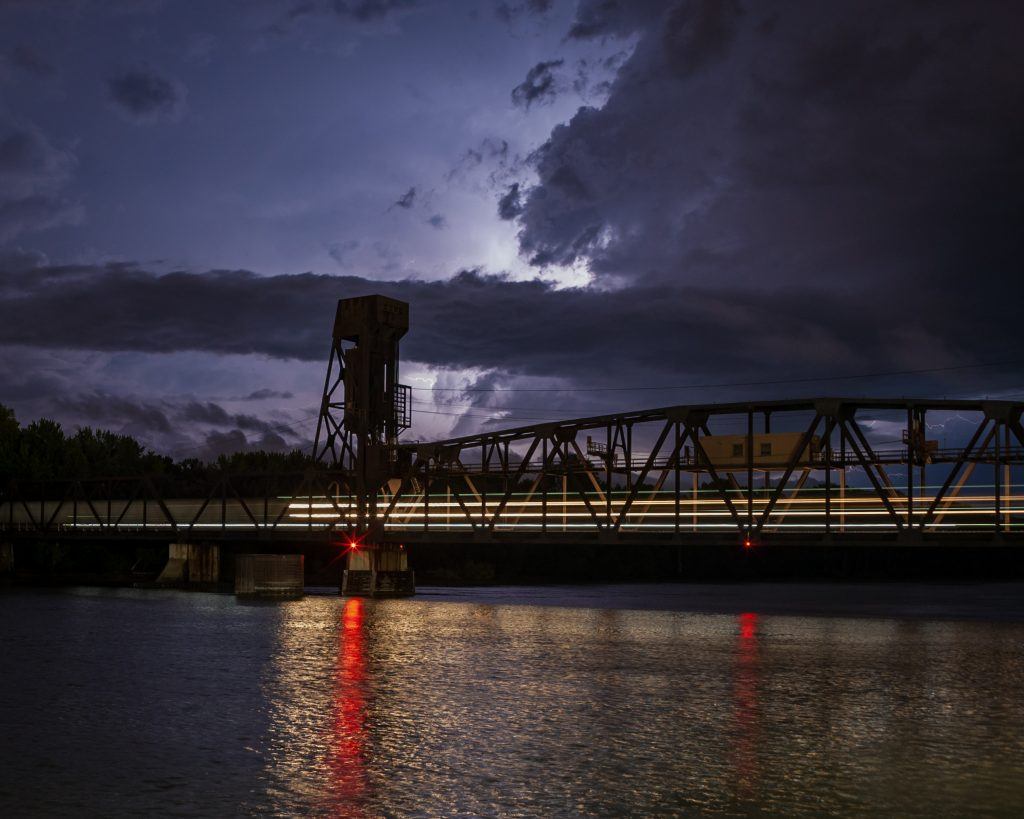
Intra-cloud lightning mostly illuminates a cloud from within, but occasionally a bolt may protrude.
Framing Your Shot
Once you’ve arrived at the safest, most advantageous vantage point that you can find, it’s time to set up for the shot.
Take a moment to observe the storm one more time. Make sure it’s still where you thought it would be.
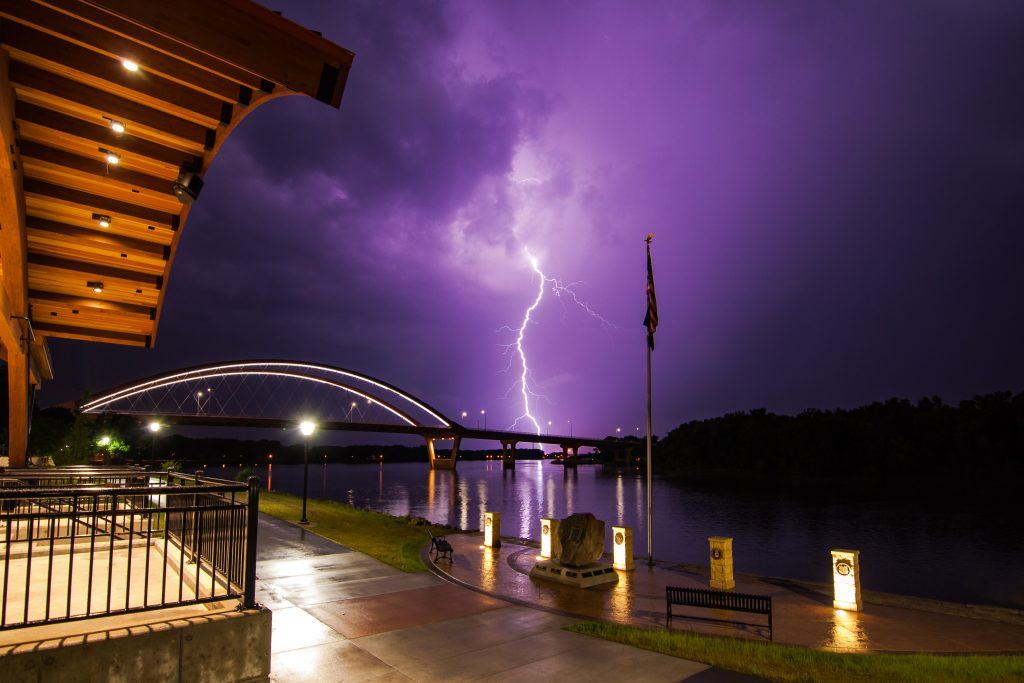
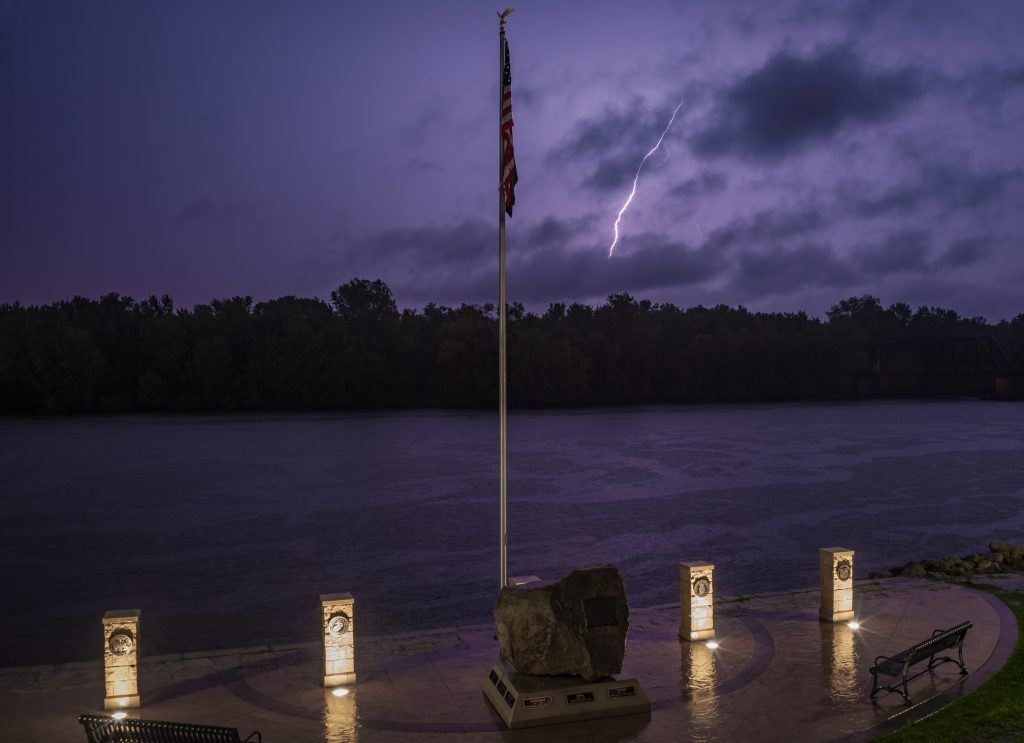
Look for elements to include in your scene that would provide some sort of visual anchor in the foreground, and also provide a sense of scale.
Anything that could make for a compelling landscape, or a cityscape, photo will suffice. The main thing is to include enough of the sky so that the lightning is in the frame.
Look for elements to include in your scene that would provide some sort of visual anchor in the foreground, and also provide a sense of scale.
The different types of lightning, and the height of the flashes, as compared to your foreground, may compel you to experiment with different types of framing.
For example, a single cloud to ground strike that originates closer to the horizon may lend itself to a tighter composition. Inter-cloud flashes that sprawl across the sky would be better captured with a wideangle lens to emphasize the breadth of the strike. Intra-cloud flashes can make for intriguing abstract images of the clouds themselves.
These are just suggestions to get you thinking about your shot. Compose in a manner that makes you happy and enjoy the experience.
Just remember, the lightning will move across the sky with the storm. Be flexible and adjust your framing as needed.
Recommended Reading: If you’d like to improve your composition skills to create better images, grab a copy of Photzy’s best-selling premium guide, Advanced Composition.
Camera Settings
There are no hard or fast rules for what settings to use on your camera when photographing lightning.
Every storm is different.
The intensity of the flash, your distance from the strike, available ambient light, and the different shooting techniques will require you to use different configurations. We’ll discuss more specific settings with each technique, but here is a good starting point:
Focal Length
If you’re shooting from a safe distance, a mid-range zoom will serve you well. I take the majority of my lightning shots with a 28-105mm lens on my Nikon D700 and a 17-70mm lens on my Nikon D200. I do occasionally break out my 20mm, 11mm, or 16mm lenses when the lightning is extremely high or it is sweeping across the sky. But that’s the exception rather than the rule.
Focus
Set your lens to manual focus and set the focus at infinity. The strikes are your subject, and they should be far enough away to be in focus at infinity if you’re shooting from a safe distance.
White Balance
Auto white balance should do just fine. If you prefer a cooler blue cast to your image, you could try using the tungsten mode, or use a Kelvin temperature setting between 2850K and 4000K. If you shoot in RAW, you can experiment with different white balance settings in post-production. On my D700, AWB does a remarkable job of getting the color accurate to what I saw while watching the storm. My D200 tends to render things a little bit warmer, but it still is close enough. Take the time to learn what works best on your camera, and then set it accordingly.
Camera Shooting Mode
Manual gives you the most control, but aperture priority can work if you have enough ambient light (outside of the light provided by the lightning strike). I usually use Aperture Priority mode during the day, and then I use Manual mode at night.
ISO
Start at your lowest native setting, but don’t hesitate to bump it up if your shutter and aperture combinations don’t give you enough exposure.

Aperture
This is going to depend on the intensity of the lightning flash and your distance from the strike. Think along the lines of using an electronic flash. The wider your aperture is, the more intense the flash is going to be in the resulting image. I usually start at f/11 and tweak it from there. Go to a smaller aperture if the flash is too bright, and a wider aperture if it’s not bright enough.
Shutter Speed
This depends on how much ambient light you have to work with, the technique that you use to trigger the shutter, and the frequency of the lightning strikes. When shooting in Manual mode, I try to set my shutter to stay open for as long as possible without blowing out any highlights, catching too many strikes in a single frame, or introducing noise from longer exposures.
Take the time to learn what works best on your camera, and then set it accordingly.
Techniques for Capturing Lightning on Camera
There are a few ways to capture lightning strikes. All of them involve some trial and error and a lot of luck.
Regardless of which method you employ, check your first shots to make sure the exposure is good and make any necessary adjustments before you miss the “perfect shot.”
If too much light is hitting the sensor, close down the aperture and/or shorten the shutter speed.
If not enough light is getting in, open the aperture, increase the shutter speed, and/or increase the ISO.
No method is foolproof, so expect some missed flashes and bad exposures along the way.
Don’t get discouraged. If you stick with it, you will get some impressive images!
Bulb Mode
Set your shutter speed to “Bulb” and open the shutter using your cable release. Wait until you see a flash, and then close the shutter.
This technique works best at night or in low-light situations, but it could work during the daylight hours with ND filters in place.
This technique is great for making sure you get a strike in each frame, but it does run the risk of overexposing or underexposing your images. Noise may also be more of an issue since longer exposures tend to heat up the sensor.
Spray and Pray
Set your shutter speed, aperture, and ISO so that you get a good low-key exposure without any lightning present in the shot. Be careful to avoid blowing out any highlights and try to get as little clipping in the shadows as possible (via the histogram). Open the shutter, and hope for a strike to occur while the shutter is open. No lightning? Open the shutter again and repeat, repeat, repeat.
Be careful to avoid blowing out any highlights and try to get as little clipping in the shadows as possible (via the histogram).
This method can be used at any time of day, but it is more efficient with longer exposure times. It can result in a lot of frames with no lightning. However, it allows you more control over the exposure in the foreground.
Your success rate will increase if the lightning flashes are more frequent or are more evenly spaced apart.
If your exposures are 10 seconds long, and the lightning flashes are occurring approximately 30 seconds apart, you can calculate to wait 15-20 seconds between exposures. Is this a perfect method? No, but it may cut down on wasted shots.

Quick Trigger Finger
Like spray and pray, you will set your shutter speed, aperture, and ISO to get a low-key exposure of the foreground with no lightning strikes. When you see a flash of lightning, hit the shutter release button (your cable release) as quickly as you can.
This method can also be used any time of day, but it’s the least successful because lightning flashes are so impulsive.
You may get lucky, and your odds will improve if there’s a return strike that lingers for a moment, but be prepared for a lot of missed opportunities.
Use a Lightning Trigger
There are a number of devices on the market that will release your shutter when a flash of lightning is detected. Many of them also allow you to trigger your camera and/or flash with sound, laser beams, or even your smartphone. Set the shutter speed, aperture, and ISO; plug the device into your shutter release port; and let the magic happen.
Triggers can be very helpful, but they are expensive, and they certainly don’t offer a 100% success rate.
I have a multi-function trigger, and I get a lot of missed shots, especially with weaker lightning flashes.
Despite the potential for a missed shot, it is my preferred method of capturing lightning because I can spend more time watching (and enjoying) what’s going on around me.
Putting It All Together
While it may sound like an intimidating task, capturing a lightning strike isn’t as challenging as it may seem.
The keys are preparation, safety, and a lot of luck.
The next time a good thunderstorm rolls through your area, gather up your equipment and a friend, check to see where it’s headed, and get out ahead of it.
Make sure you are in as safe a location as possible, though.
Set up your camera and frame your shot. Pick a method of capturing the lightning and see how it works for you.
Be safe, and have fun!
Note: If you want to avoid boredom and repetition in your photography, you can inject some creativity into your work, by using the fun and challenging assignments in our Creativity Catalog. Go here now to take a look.
Self Check Quiz
- Why are safety and common sense essential to photographing lightning?
- True or false: All thunderstorms are great candidates for lightning photography.
- What should you include in your frame to make a compelling photograph of lightning?
- Why do you need to be flexible with your camera settings?
- What are the different techniques for capturing lightning strikes?


