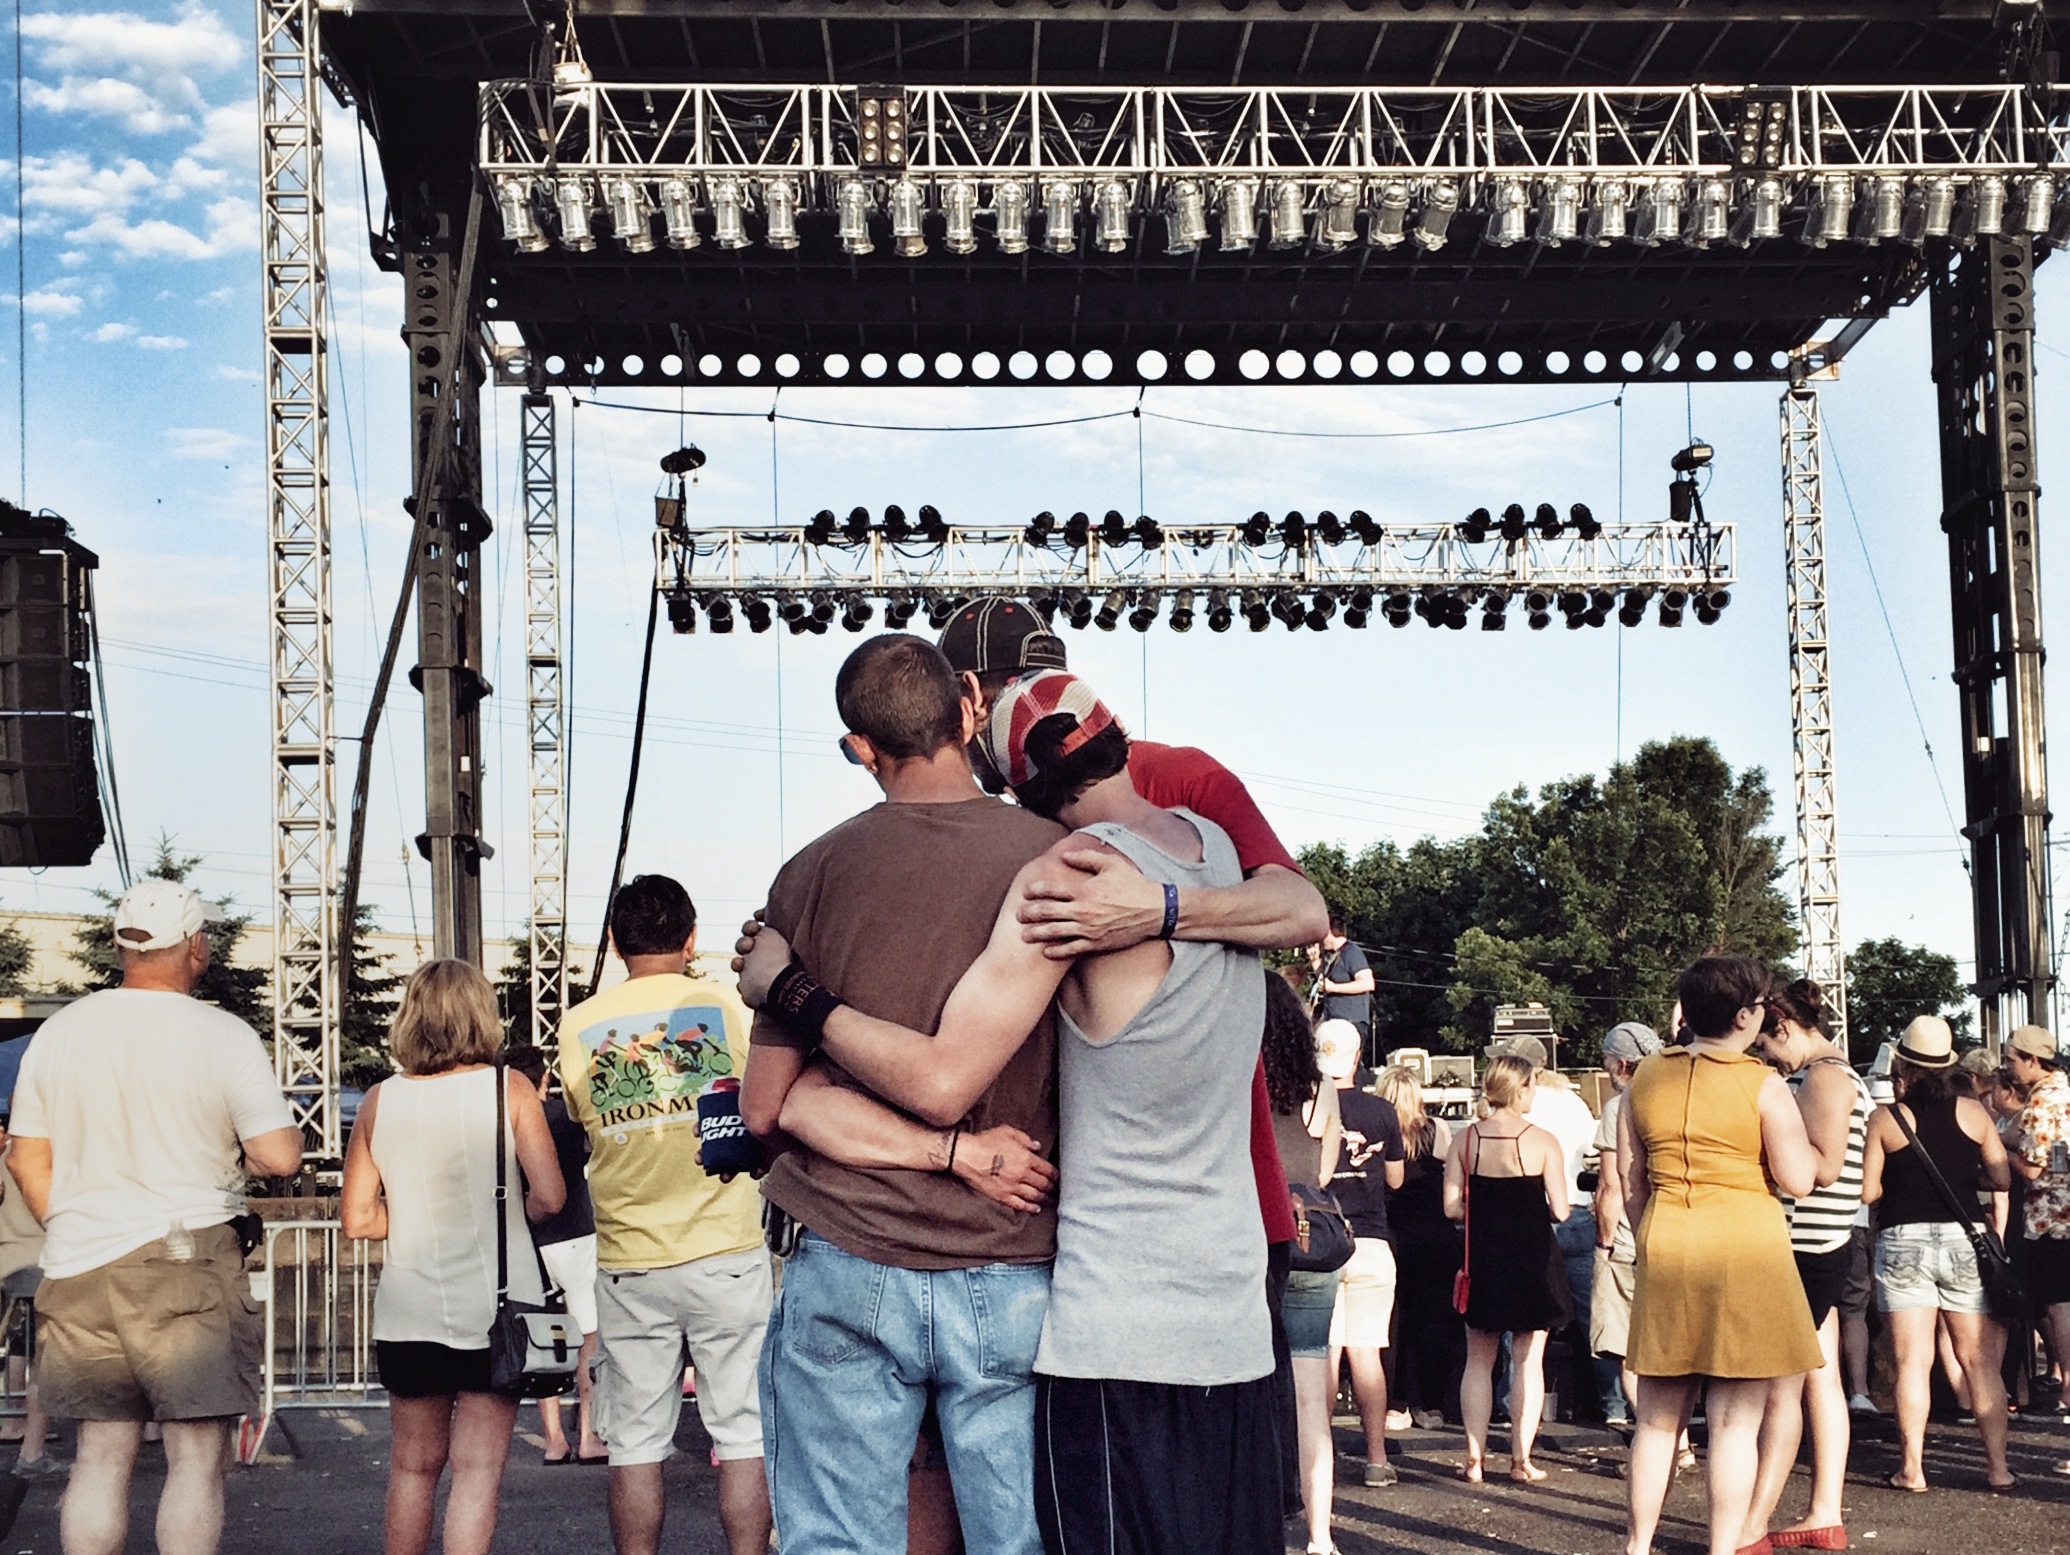
When you mention ‘candid photography,’ I think many people think of weddings or street photographers.
While it’s true that candid photography is an aspect of those two genres, it also holds a place of its own (a genre or specialty) – at least in my mind.
Candid photography is a lot of fun. It’s also extremely gratifying when you capture that peak moment. What do I mean by ‘peak moment’?
A ‘peak moment’ candid photograph will have meaning and interest to a viewer who wasn’t even there when the event happened. It communicates the moment.
Think about some candid wedding photographs that you’ve seen in your lifetime.
Some will barely catch your eyes for a second, while others will cause you to pause, reflect, and even study the moment. You might even laugh out loud if the candid photo depicts the ring bearer trying to hold up his pants after they fell down to his ankles while walking down the aisle.
Or you might sigh with a wash of romance when the groom grabs a quick kiss from his new bride, and she blushes with a huge smile.
Those are ‘peak moment’ photographs.
You can capture those same compelling photographs in your daily life!

Photo by Kent DuFault
This candid photograph was captured at a family gathering for a birthday party. The birthday girl is quite the cat lover. What makes this image hold universal appeal is the oddly ludicrous juxtaposition of the props, the woman’s stance, and the disinterested expressions on the elderly people seated on the couch behind her. This image captures peak action and raises thought in the mind of a viewer. Capturing this image utilized many of the tips that you are going to learn in this Quick Guide. Family moments and everyday life can provide excellent opportunities for the skilled candid photographer.
Candid photography is extremely gratifying when you capture that peak moment.
What exactly is a candid photograph?
A candid photograph is a photograph captured without creating a posed appearance. This can be achieved in many ways; for example, when the subject is in motion, by avoiding prior preparation of the subject, by surprising the subject, by not distracting the subject, or interrupting the moment during the process of taking a photograph.
The key to wonderful candid photography is that something of interest must be happening, and that something needn’t be extraordinary. However, it should relate in some way to a viewer when they see it.
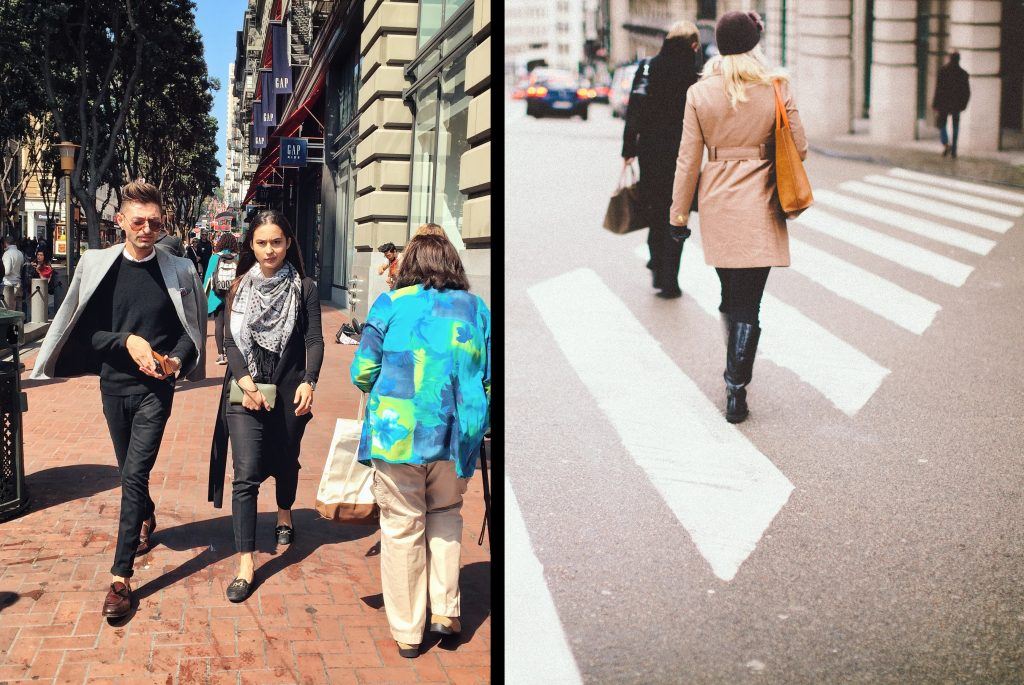
Let’s take a look at two candid photographs that were created under similar conditions.
Both of these images are candid. They were both taken on the street. (However, let’s ignore that aspect for this conversation.)
They also have very different styles of post-processing. (Let’s look past that as well.)
From a candid point of view, let’s look at peak action.
You may have a point of view different from mine.These are my thoughts:
The shot on the right has no peak action. It has no captivating point of view. It doesn’t say anything to me about the people, the moment, the scene, the location, or the mood; nothing. There is no sense of drama or communication. It’s a snapshot (in my opinion).
The photograph on the left does capture an interesting candid point of view. It depicts two young fashion-oriented millennial adults walking past a much older woman, who has a very different sense of fashion.
Now, whether this is what really was happening or not, their expressions depict a sense of disgust and disinterest. Those expressions were vastly important to the peak action of this shot. This is peak action that creates drama.

There is a lot happening in this shot that sends out a wave of mood and emotion. The expressions are obvious. However, the body language is equally important. In this type of candid scenario, you will have less than a second to create the shot. The techniques discussed in this guide will help you develop those skills. Photo by Kent DuFault
Here’s a larger version of the image after my post production tweaks.
Here is what you will learn:
- Flash or no flash
- Strategic positioning
- Fluidity
- Shooting with both eyes open
- Pre-focus
- Focus points
- Shooting from the hip
- Using an auto-exposure mode
- Shoot with a burst or not
- Using auto ISO
- Faces, expression, action (FEA)
The key to wonderful candid photography is that something of interest must be happening, and that something needn’t be extraordinary.
Flash or No Flash?
Most candid photographers will tell you, “Don’t use an electronic flash.”
In general, that’s good advice as an electronic flash attracts a lot of attention. With that attention comes an altered state of mind for everyone that is aware of it. It’s hard to get candid photographs when everyone is painfully aware of what you are doing.
However, there are times where an electronic flash is necessary to get the shot. Getting the shot is better than getting nothing, or even getting a bad photograph.
You must use your skills as a photographer to determine when an electronic flash is necessary.

Photo by Kent DuFault
Another criticism of electronic flash in candid photography is that it can create unrealistic lighting, as seen in the image above. This type of lighting can be used for creative effect.

Look at this photograph. An electronic flash was used to create that image. Yet, it’s really impossible to tell. To achieve a realistic look while using an electronic flash (in general), you want the exposure level of the flash to be about 1/2 to 1 stop less light than the exposure for the ambient light. How do you set that up?
Whenever possible, keep your electronic flash off. However, it is better to use a balanced electronic flash than to drive your ISO setting up so high that you develop extensive noise in your image.
Strategic Positioning
Strategic positioning takes place in one of three ways: the location of the subject, the location of the camera, and the location of the subject and the camera.
Every candid situation will present you with a new challenge. In some cases, you may have the ability to alter one, two, or all three of the possibilities listed in the previous paragraph. In other cases, you won’t be able to.

Photo by Kent DuFault
The image above was a candid shot taken during a theatrical show. My position, as the photographer, was fixed. I could not move.
The performer was moving virtually the entire time. I was limited, from a candid POV, to where the subject was located.
To compound the challenge was the lighting. No electronic flash was allowed, and the interior was quite dark.
Experience told me that I needed the performer to be in ‘the stage lights’ to get a candid shot.
Knowing that, and with my camera at the ready, I followed her around the room through my viewfinder and waited for peak action to occur.
At one point she stopped in a spotlight, hit a particularly high note in her song, and raised her hands. Everyone laughed, cheered, and clapped.
I was ready, and I got the candid shot.
That moment that I just described to you is known as FEA (faces, expression, and action). We will come back to FEA later in the guide, as it is extremely important.
Next we are going to discuss ‘fluidity.’ Fluidity and positioning are closely tied components to candid photography. In strategic positioning you want to take the following into account:
- The subject
- Is the subject moving?
- Where is the light source or sources?
- Is the subject interacting with something, or someone, or is the likelihood of that about to happen?
- What will peak action be?
- What is behind the subject?
- What is to camera left and right of the subject?
Fluidity
This is one of the more ironic aspects of photography. Photography captures a still image of a moving world.
Rarely is the world standing still, and this is especially true in candid photography.
Positioning is one aspect of fluidity.
Rarely is the world standing still, and this is especially true in candid photography.
Fluidity is the idea that everything is moving. Positioning is anticipating fluidity to take advantage, hopefully, of the fluidity.

Photo by Kent DuFault
This image is a great example of this concept.
Everything in this picture was moving.
My candid subjects were the two women in conversation on the green couch.
I worked out my ‘positioning’ based on their location and their surroundings.
As I watched the women through my viewfinder, I became aware of a sense of movement that was almost musical in nature as people moved in and out of the scene.
I grabbed a couple shots quickly, because I didn’t want the scene to dissipate if the women suddenly got up and left.
I then let the fluidity develop. The image was the right moment, as the individuals surrounding the green couches formed a perfect frame around my subject, and at the same time added a story to my candid shot.
In candid photography don’t be afraid to start shooting and keep shooting. However, in most cases I’m not a huge fan of using burst mode for shooting fast frames. More on that in a few pages.
Shooting with Both Eyes Open
As you develop your skills with strategic positioning and fluidity, another super important skill is to learn to shoot with both eyes open.
Having both eyes open allows you to evaluate everything that’s going on around your subject.
You won’t develop tunnel vision onto your subject while ignoring what was happening around the subject.

Photo by Kent DuFault
The image is a great example of this technique at work. This image was taken on Valentine’s Day.
The man and the woman had clearly been drinking, as I observed them. I was walking toward them with my camera raised, as they were having quite a lot of fun together.
I had both eyes open, which brought to my attention the approaching policeman, as well as the disinterested pedestrian on the left. Including those elements added story and created a stronger candid photograph.
Pre-Focus
Pre-focus is a technique where you remove the lens and camera from the auto-focus setting. You then manually focus the lens on your subject. Finally, you wait for the right candid moment to develop.

Photo by Kent DuFault
This was the case with the image above.
When I first noticed the man sitting on the bench, he was quietly looking out at the ocean.
Nothing was happening, and that lacked any candid spark (FEA) to give it appeal.
I chose a strategic position based upon the man, the bench, the tree, and the ocean.
I pre-focused on the man.
Part of my candid decision-making process occurred because I had both eyes open, and I noticed a family approaching behind me and to my left with a bag of bread to feed the seagulls.
When the birds noticed the family, they swooped in from in front of the man and to his right.
My strategic positioning and pre-focus took advantage of the fluidity of the birds, and I captured a compelling candid moment of this man, and he never even moved.
Focus Points
Modern digital cameras have numerous focus points.
Under certain circumstances, using all of the focus points can be helpful.
The problem with that is that you are giving the camera complete control over where to place the critical focus.
Critical focus is the exact plane where the lens is set to focus.
Everything outside of that plane, even a minute 1/2 inch, will be slightly out of focus no matter what your aperture and depth of field are.

Photo by Kent DuFault
Depth of field provides the illusion of focus. However, it is not the point of critical focus.
In many cases that won’t matter unless you’re a perfectionist like me.
I like to place the critical focus where I want it.
That typically means that I use a single focus point or a small grouped set of focus points. I rarely have the camera set to use all of the focus points.
Depth of field provides the illusion of focus. However, it is not the point of critical focus.
In the image above, my critical focus was placed on the woman’s face. Using numerous focus points could have easily shifted the critical focus to a plane behind her, which likely would have ruined the moment, and I would have missed the shot.
Shooting from the Hip
“Shooting from the hip” is a term I’m sure that you’ve heard.
If not, what this term means is to preset the camera settings and then shoot your candid images with your camera down by your side. You never look through the viewfinder.
This technique generally works best with a wide-angle lens, and then setting the camera to an auto-exposure mode, auto ISO, and the maximum number of focus points.
Photographers use this technique because it raises less attention than bringing the camera up to their face.

Photo by Kent DuFault
The downside to it is that you really have no idea what you’re getting. It’s going to be a surprise because you are not composing the shot thoughtfully.
Some describe this technique as “spray and pray,” because you shoot like crazy and then hope you get something worthwhile.
The image above was taken using this technique, and while I don’t think it is an awful image, it could have been better composed. I sprayed and prayed and got a lukewarm result. If you’re uncomfortable photographing strangers candidly, it is a good way to get your feet wet. However, I recommend that as soon as your confidence level permits, step away from using it.
Auto Exposure Modes
Auto exposure modes are a huge benefit to the candid photographer.
All those comments that you hear about getting off of auto and only shooting in manual mode… well, you can throw them right out the window.
Using an auto exposure mode allows you to concentrate on “FEA” (faces, expression, and action).
FEA is the lifeblood of great candid photography. You can fix an image (especially in camera raw) that has an exposure issue. You cannot, however, replace or fix missed peak action, no FEA, or a poor expression.

Photo by Kent DuFault
So, which auto exposure mode should you use?
Honestly, that’s personal preference.
A lot of photographers favor aperture priority mode. I’m not really sure why that is.
In all of my years of professional photography, I’ve had to evaluate a lot of photographs taken by myself and by other photographers. When an image is technically flawed, it is almost always due to camera shake. Rarely is there a problem with depth of field, especially in candid photography. If you’re properly placing critical focus, depth of field is less of a concern.
I prefer shutter priority mode.
The only auto modes I don’t recommend are ‘Full auto’ (the green box on Canon or the green camera on Nikon).
To Burst or Not to Burst?

Photo by Kent DuFault
I’ve mentioned FEA a few times in this guide. Is FEA always required for candid photography?
The image above has no face, thus no ‘facial’ expression. However, it has action, and through that action it intimates ‘expression.’ These are my thoughts.
Some of you may agree with that and some may not.
I happen to really love this candid shot. It says something in such a subtle way.
Those comments lead into my thoughts on using the burst mode or not using the burst mode when shooting candid photography.
I’m not a fan of using the burst mode, and here is why: it tends to make a photographer lazy.
Rather than using their skills of FEA, pre-visualization, and timing, they tend to rely on the speed of the camera shutter to capture the perfect moment.
After doing photography for decades, I have come to believe that the camera captures the ‘perfect moment’ in burst mode far less often than it does. (In the old film days, we called it the ‘motor drive.’)
Burst mode is for sports and birds. Why do I say that? Sports and birds are not so reliant on FEA.
After doing photography for decades, I have come to believe that the camera captures the ‘perfect moment’ in burst mode far less often than it does.
Auto ISO
I often preach about not letting the camera take control of your photography.
Auto ISO is an exception. Camera technology has advanced so much in the area of digital noise that the auto ISO setting can relieve you of a technical matter that isn’t necessary for your constant attention.
Most cameras allow you to set parameters for the Auto ISO setting. I have three cameras that I use regularly. I have the upper limit parameter for two of the three cameras set in the Auto ISO setting.
- Panasonic LUMIX GX-85 camera: maximum Auto ISO – ISO 800
- Nikon D750 camera: maximum Auto ISO – ISO 6400
- iPhone 8+: maximum Auto ISO – no setting available

Photo by Kent DuFault
Faces, Expression and Action (FEA)
FEA is so important to candid photography that I thought we would close the guide by evaluating a number of images for FEA.

Photo by Kent DuFault
This image displays FEA. I wanted to make a quick point. FEA can include, and often does include, body language. When practicing your timing for FEA, do not fully concentrate your visual acuity onto the face. Watch the body as well.

Photo by Kent DuFault
Is this a candid photograph? Does it reflect FEA? The answer is “yes” to both questions. A distant candid photograph can be just as effective as a close-up shot, if it includes FEA.
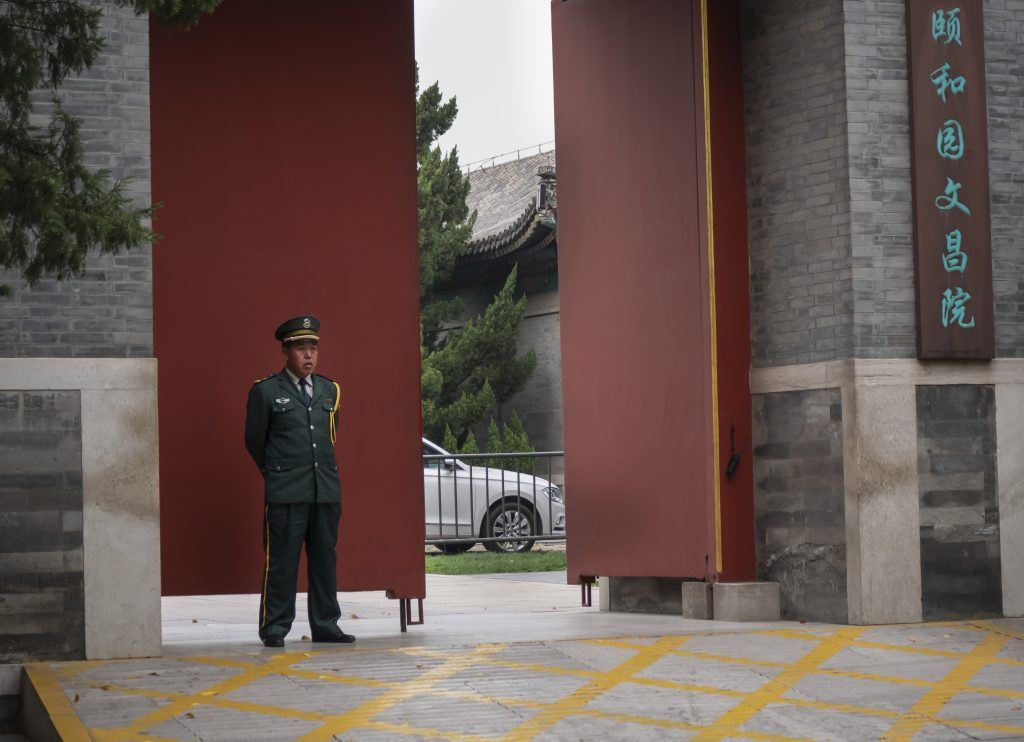
Photo by Kent DuFault
FEA is an acronym for faces, expression, and action. In the image above, we certainly have a face and an expression. Do we have an action? Yes, we do.
In photography, try to put aside the idea of literal meanings and explanations. Think as an artist.
The action here is that the man is standing guard. He is not physically moving at all. There is an implied action. If I had tried to run through that door, then his implied action would become immediately apparent!
Implied action can satisfy FEA.

Photo by Kent DuFault