
10 Post-Processing Terms Every Photographer Should Know

New / Noteworthy
EDITOR’S NOTE: If you’re looking for a quick way to learn the basics of photography take a peek at our popular cheat sheets: The Snap Cards. If you missed out on your set last time, they’re available again and on-sale right now.

Post-processing can bring out the best in a photograph. Photo by Giuseppe Milo
Here is a list of ten post-processing terms that every serious photographer should have a good understanding of. Not only will it make you more confident in your post-processing, it will also help you have a better control over the process and get creative at the same time. The terms or the tools mentioned in this post are relevant to most of the popular photo-editing programs out there.
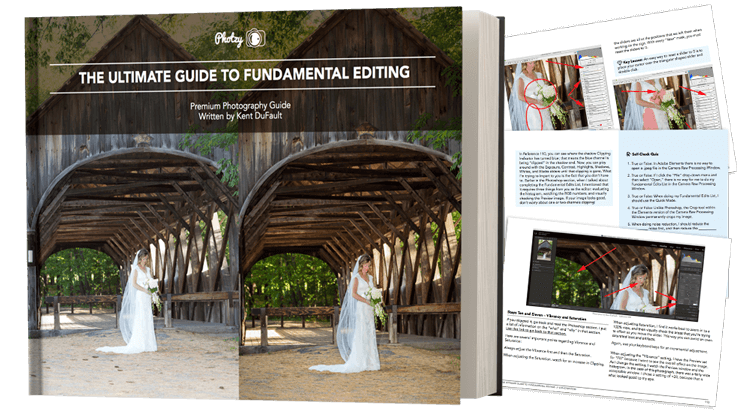
If you’d like to get better at post-processing and learn how to use a dedicated workflow to edit your photos, take a look at Kent DuFault’s guide on fundamental editing.
1. Curves / Tone Curve
Curves or the tone curve is a powerful tool for adjusting tones – to add contrast, brighten, darken, or adjust colors in an image. It is a visual representation, similar to the histogram, that allows you a whole lot of control and versatility whether you want to brighten a dark scene, enhance contrast and color, check for clipped pixels, or make color corrections to the image. You can learn more about it here.
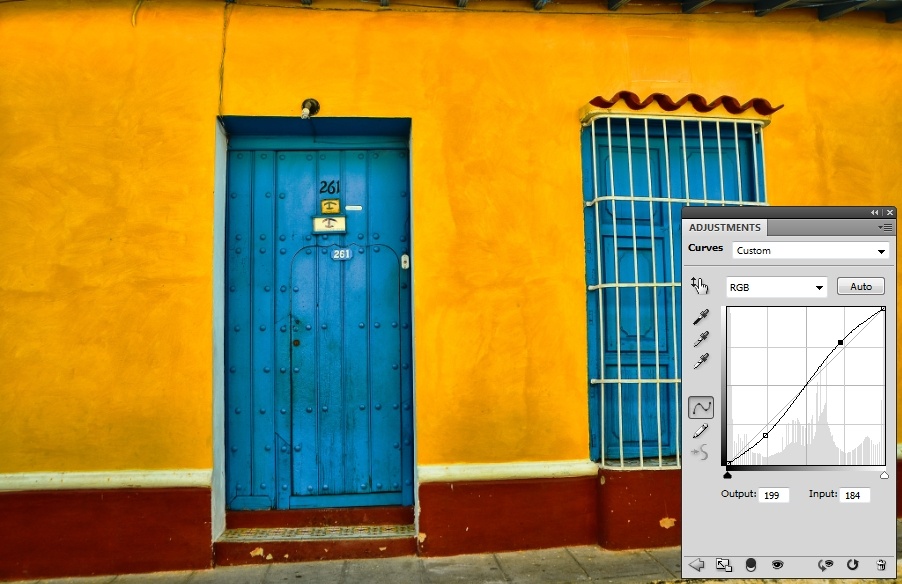
An S-curve adjustment boosts contrast and saturation. Photo by Bud Ellison
2. Saturation and Vibrance
Enhancing color saturation is a common step in almost every post-processing workflow. While saturation affects the intensity of all colors in your image, the vibrance slider only affects the more muted colors and does not alter the skin tones and already saturated colors, giving you a better control over how you want the colors to appear in the final image.

A comparison of vibrance and saturation adjustment made to an image. Photo by Bodey Marcoccia
3. Sharpening
As the name suggests, sharpening improves the details in the image by boosting sharpness. Almost all photographs, from portraits to landscapes, can benefit from sharpening. The amount of sharpening depends on the end use of the image – whether it’s going to be viewed on a digital screen or be printed. To learn more about sharpening, take a look at our free guide here.

The exposure triangle. Image by WClarke
Get Better at Post Processing– If you want to get the most out of your photos by utilizing the power of post-processing but do not know where to start and how to proceed, we have a solution for you – The Ultimate Guide to Fundamental Editing. This bestselling guide gives you a step-by-step post-processing workflow to help you create great-looking photos efficiently and consistently, using popular programs like Lightroom, Elements and Photoshop. Click here now to check it out.
4. White Balance
The color of the light impacts the way your photographs look. The White Balance setting can help you adjust for the varying light conditions and take care of color casts, if any. It can be adjusted in-camera while capturing the shot, or you can change it in post-processing if you photograph in raw.
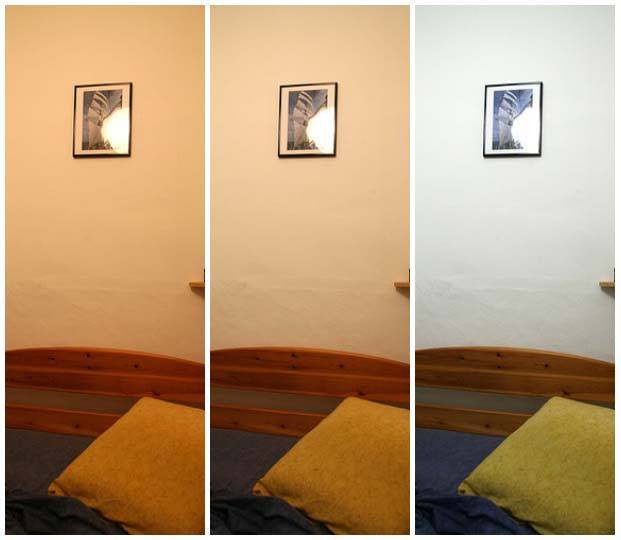
The White Balance setting can help you color correct an image or create a mood of your choice. Photo by Bruno Girin
5. Highlights, Shadows and Midtones (and the Histogram)
The brightest regions in an image are referred to as highlights, the darkest ones as shadows and everything in between as midtones. A histogram is a representation of the distribution of pixels in an image based on their brightness (or luminosity), the leftmost region representing shadows and the rightmost, highlights. A good understanding of the histogram allows you to get the most out of curves (#1 above), and achieve the desired exposure and contrast.

An image with its histogram. The histogram is skewed to the left as there are a lot of dark areas (shadows) in the image. Photo by jpeter2
6. Noise
Noise is the visible, grainy look in your image that can arise out of various factors. Shooting at a high ISO, long exposures and careless editing can all contribute towards image noise, among other reasons. No matter how much you avoid it, noise can still creep into an image. There are different ways you can reduce noise in post-processing to improve the quality of the photograph. Check out the free video guide here to learn how to fix noise in Lightroom.

Sometimes image noise works towards adding a mood to the photograph like in this one. At other times, you can remove noise in post-processing. Photo by Marketa
Get Better at Post Processing– If you want to get the most out of your photos by utilizing the power of post-processing but do not know where to start and how to proceed, we have a solution for you – The Ultimate Guide to Fundamental Editing. This bestselling guide gives you a step-by-step post-processing workflow to help you create great-looking photos efficiently and consistently, using popular programs like Lightroom, Elements and Photoshop. Click here now to check it out.
7. Blending
Blending, as the name suggests, is a technique to combine two or more versions of the same shot in a post-processing software to create a final image that aims to achieve, among other results, a better exposure (exposure blend), wider depth of field (focal length blend), or perspective (panorama or vertorama). To learn more, take a look at the post here.

Focus stacking allows you to create a wider depth of field than what is possible in a single shot by blending multiple shots with different focus planes, which is especially useful in macro photography. Photo by Gabriel González
8. Masking
Masking is a powerful tool in Photoshop when working with layers. It allows you to selectively make changes to a layer without affecting the other layers, and helps you perform non-destructive editing. Learning how to utilize masks in your photo-editing can help you employ more advanced techniques with ease.

Masking allows you to selectively edit portions of an image in a non-destructive way, like enhancing the foreground and the sky here using two separate adjustment layers. Photo by Robert J Heath
9. Dodging and Burning
Dodging refers to lightening the tones, and burning refers to darkening the tones. This technique has been employed since the darkroom days to increase the tonal range, mostly with B&W images. Dodging and burning allows you to direct the viewer’s attention and focus to the subject of the image.

Dodging and burning allows you to selectively brighten and darken areas of the image to enhance the tonal range. Photo by Thomas8047
10. HDR (High Dynamic Range)
The dynamic range of an image refers to the amount of light captured in the given scene. A high dynamic range (HDR) would refer to a wider range of lights in the scene, that is, regions of bright parts (highlights) as well as regions of dark areas (shadows). Cameras have a limited dynamic range that they can capture in a photo, but in post-processing you can combine multiple exposures (exposure blending from #7 before) to create an image that shows details in both highlights and shadow regions of the image.

An HDR image with details in highlights as well as shadows. Photo by Photographer No.9
BONUS: I've got something special for you on the next page...
If you’re unsure about your Fundamental Editing, or you would like some guidance on how to edit your photos for maximum impact. Kent DuFault has written a comprehensive guide on the subject.
It covers all three Adobe products: Photoshop, Lightroom, and Elements. Plus it includes a free printable step-by-step editing checklist with that you can pin-up, or leave next to your computer.
If you missed out on your copy last time. It’s available again, and on sale right now.
Click below now, to read about it on the next page…
About Ritesh Saini
Ritesh has been photographing for about nine years now and his photographic interests have varied from nature and landscapes to street photography. He recommends Kent DuFault's best-selling guide, The Ultimate Guide to Fundamental Editing to give yourself a step-by-step post-processing workflow so you can create great-looking photos efficiently and consistently, with Lightroom, Elements or Photoshop.