

Today, I will guide you through the often-confusing terminology used to describe cropping, resolution, resampling, and resizing.
Like everything involved with photo editing, cropping has always been one of those edit features that takes as much as it gives. What I mean by this is that, although cropping (as a compositional afterthought) might seem to be heaven sent, the process can produce almost as many problems as it purports to solve.
For example, if you are a wildlife photographer, you are often in a position where you simply can’t get close enough to the subject to sufficiently fill the frame, so cropping off excess pixels in postprocessing is your only viable solution to making the subject appear closer. You could buy a more powerful telephoto lens, but once you step into the world of superzooms, that can be a significantly expensive alternative.
So, while cropping into the file is a good way to make the subject fill the frame, in doing so it also removes pixels, and this compromises image clarity, noise, and its future enlargement potential.
This surely won’t worry Instagrammers and Facebook users because social media requires only the smallest of resolutions, but it will have a big impact on anyone wanting to see their work in print – a medium that requires as many pixels as possible to reproduce good image clarity, color, and detail.
Here is what we will discuss:
- The advantages of cropping a picture in postproduction
- The disadvantages of cropping a photo in postproduction
- How you can avoid losing image resolution when cropping
- Why cropping overlays are a valuable tool
- How to create an image border with the cropping step in post-production
- Explanations of resizing and resampling
- A rundown of terminology that you should understand
- Software recommendations, including a free option
Recommended Reading: If you’re interested in improving your post-processing workflow, check out Photzy’s Understanding Masking premium guide. It has sections on Lightroom and Photoshop, as well as Snapseed for mobile users too.
Cropping in the Edit Process
As a photographer, there are many reasons to use the Crop Tool, not least as an aide to composition. It’s also used as a way to remove parts of the image that might be deemed distracting.
Cropping is an excellent way to rid your frame of all those annoying little objects that seem to impinge on the subject around the edges of the frame, such as things we didn’t notice when the shutter was tripped and things that distract from the main message of the subject.

Photograph by Robin Nichols
Cropping is an excellent way to rid your frame of all those annoying little objects that seem to impinge on the subject around the edges of the frame,
Personally, I try to frame as much as possible using the viewfinder rather than the Crop Tool for the simple reason that I love print, so want to retain as many pixels as I can. Besides, if you use the Crop Tool with an unrestricted marquee (so it doesn’t conform to specific print shapes), you might find that your crops do not match the print space provided, which might result in further cropping as you try to squeeze an irregularshaped cropped file into a preset image space.
Key Lesson: Cropping can aid in creating a better composition, but potentially at the loss of important image resolution.
Photograph by Robin Nichols
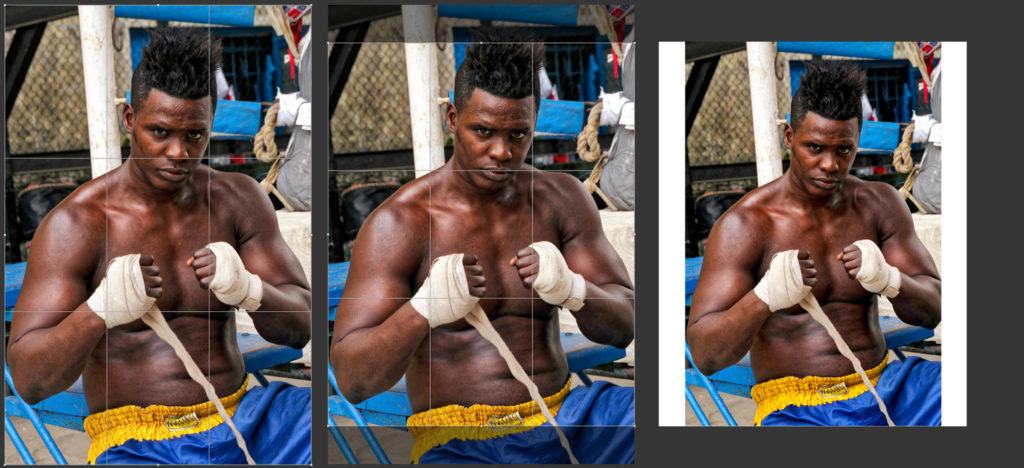
Cropping to a specific print size can be really restrictive. In this example, the crop marquee, at left, was set to 6 x 4 inches – the same proportion as the sensor in my Canon camera so it encompasses the entire file. But if you choose to print or display this file, say, as a 10×8 inch image (center), you will have to crop 15-20% off the image to get it to fit the new format. Alternatively, to avoid losing valuable image detail, you could simply reduce the image size so the longest edge fits within the 10 inch height restriction and accept the white lines down each side of the frame.
Cropping for Better Composition
In the past, the Crop Tool was fairly unsophisticated. You used it to chop bits off of your picture. It was no more complex than that. Roll forward a couple of decades and the tool has transformed into quite a sophisticated device that not only produces precise results, but also incorporates compositional overlays designed to help creatives get more from their work. Cropping overlays include the very handy Rule of Thirds (ROT) overlay, plus, in some of the more sophisticated applications, a Golden Mean (or Golden Rule) overlay, along with grids and diagonals, all good tools to help us trim, rotate, shave, and carve the pixels into the right arrangement.
Key Lesson: Cropping overlays are an important tool in helping you choose the best crop while maintaining the most resolution.
Some might say it’s better to compose in the field using the ROT grid within the camera’s viewfinder to do the job. But then there are plenty of instances where you might forget to set this up, be too excited with the subject matter (a charging rhino), or you just plain forget to adjust the setting. Then it’s time to fall back on the Crop Tool’s creative potential – back home in a more relaxed atmosphere – to get the composition just right.
Key Lesson: Cropping in the camera really means taking the time to compose your picture tightly and properly. However, sometimes that won’t be possible, and you will have to turn to the crop tool in your postproduction software. One such circumstance would be if your subject was quite a distance away and you didn’t have a long telephoto lens. Having a higher megapixel camera aids in the ability to crop in post-production while still having enough resolution to print.
Photograph by Robin Nichols
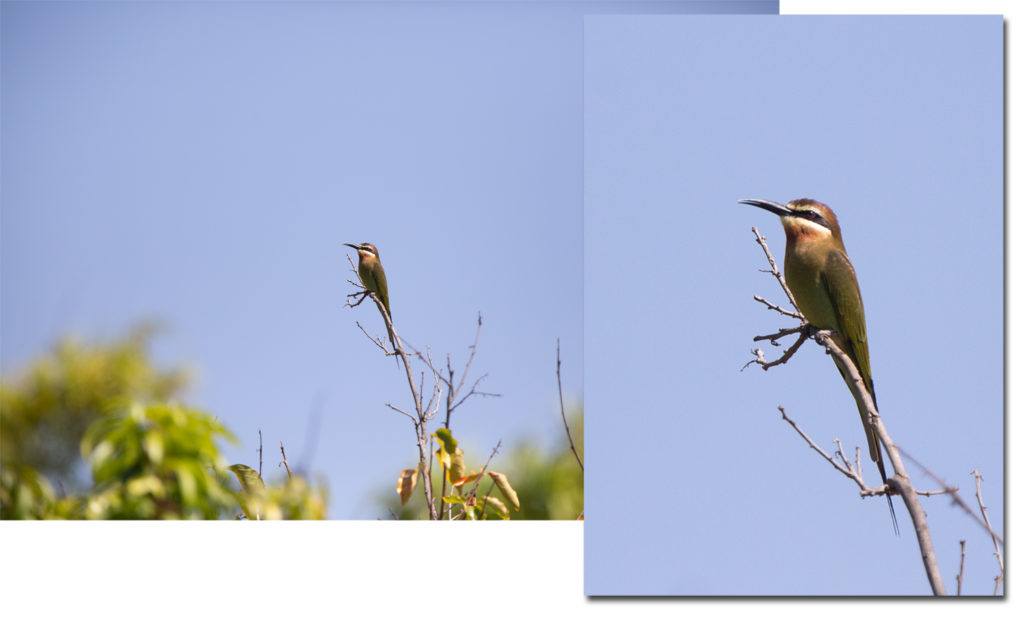
Here’s a good example where cropping can produce a better result compared to the original RAW file. This Purple Roller, the first one I had ever seen, settled on a distant tree spike. Even with a 420mm lens, it looks very small in the frame. Cropping as you see here produces a superior wildlife shot, but the file size has reduced from 60Mb to less than 4Mb. No problem if this is destined for social media, but it’s restrictively small if it’s to be printed larger than a postcard.
Cropping to Create a Border
You can use the crop tool in most applications to create a border around the frame. This doesn’t work with all software, but where it does, it might open up a useful new avenue for creativity in terms of image presentation.
Here’s how it works: Open an image and select the Crop Tool. Usually you’ll see the cropping marquee overlay appear over the image. In most cases, this sits at the edge of the file. Grab one of the corner handles and instead of cropping into the image, drag the handle outwards, over the area surrounding the image (the pasteboard). Repeat this action using the handle that’s diagonally opposite. When the mouse is released, the area selected over the clipboard is replaced with active pixels, meaning that it becomes part of the image itself and it forms a border. I do this quite a lot, adding a border to the image, so that, once printed, it can be slipped directly into a folio case or picture frame without the need for a matte to be cut.
While I use Photoshop Elements to achieve this, you’ll find many other applications work in a similar fashion.
If the clipboard is added to the image as a transparent area, use the Paint Bucket to flood the edges with your preferred color. Creating a border using Photoshop Elements requires you to set the border color first using the program’s Color Picker.
Key Lesson: Adding a border to your image is one more creative outlet for you to explore.
Recommended Reading: If you’re interested in improving your post-processing workflow, check out Photzy’s Understanding Masking premium guide. It has sections on Lightroom and Photoshop, as well as Snapseed for mobile users too.
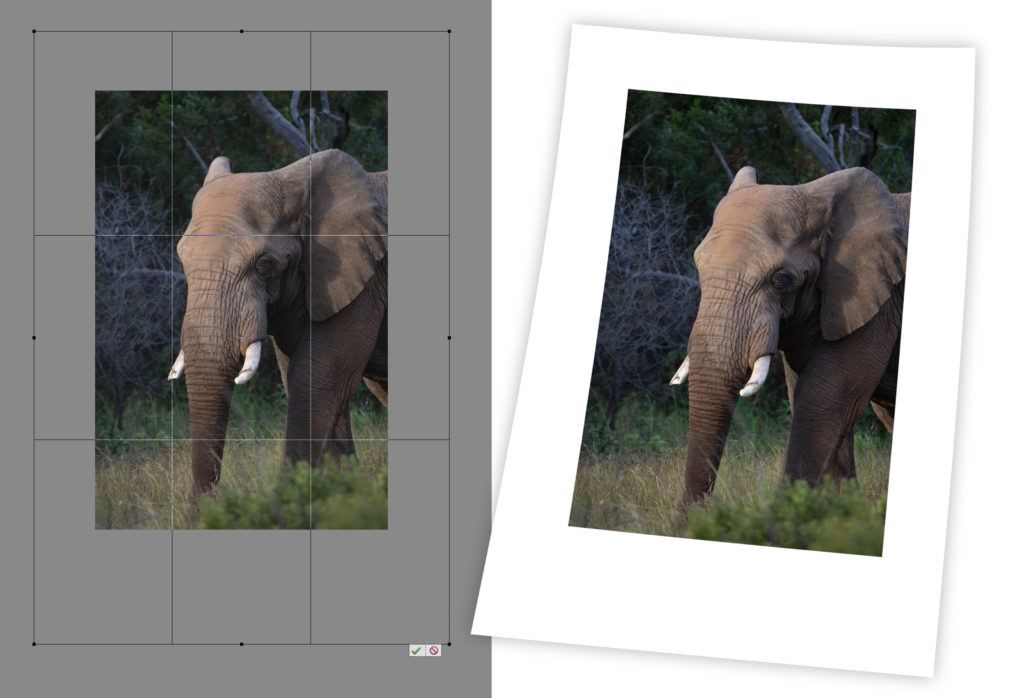
Adding a border like this is an easy process with most photo editing applications (in this image I used Photoshop Elements 2020). Although the subject does now appear smaller, in fact the image – which now contains an additional 30% white pixels – is now much larger. Photograph by Robin Nichols
Cropping and Resizing
Years ago, I ran a photo competition in the magazine I was working for. It was at the early stage of digital camera development, and while still accepting prints and slides (remember those?) for submission, I was also receiving files in the new ‘digital’ format.
One submission was a digital file no bigger than 170kb. It was large enough to print up to the size of a 10 cent coin. I called the photographer and he admitted that he’d cropped 90% of the image out of the file to get ‘the bit’ he wanted, and anyway, commenting further he said: “you should be able to resample the picture to make it larger if needed…”
Cropping is good, but cropping too much compromises the number of pixels in the file, and this in turn restricts the size that it can be printed.
This shouldn’t be a problem for those shooting purely for Instagram or Facebook because these formats require files of less than a megabyte. But if you ever want to print a file, you are going to need all the pixels you can get. When a file does not have enough pixels in it to print at your required dimensions, it usually adds pixels to match the print resolution, which for most purposes is 300 dots per inch (dpi). This is a process called Resampling or Interpolation. To uninitiated photographers engaged in a heavy-handed editing crop-fest, this must read like a life saver, but in practice, maintaining quality, especially when trying to enlarge very small (170kb) files, it’s counter-productive. Resampling algorithms need a lot of data before they can work optimally. So that tiny 170kb file never made the competition.
Cropping is good, but cropping too much compromises the number of pixels in the file, and this in turn restricts the size that it can be printed.
If I resample a 24Mp file that has been cropped to half its original size back to its original pixel size, it might look OK, because the software has approximately 12 million pixels from which to make its algorithmic ‘guesstimations.’ But if the file has been first resized for Instagram, from 24Mp to only 0.5Mb (1080 pixels across its width), then the resampling algorithms have almost nothing to sample from, so once 23.5 million pixels have been added back to the file, it’s going to look very soft and fuzzy.
Key Lesson: Resizing, sometimes referred to as scaling, a picture file can be useful at times. However, always make sure to preserve your original file by saving any scaled photo as a copy!
The nice thing about photo editing software is that you have the option to resample the file while cropping. For example, if you know the photo is going to be printed at a photo lab up to 7 x 5 inches (5R), this can be set in the application’s Crop options so that, regardless of how big or small you drag the cropping marquee through the frame, the result will always be a 5 x 7-inch image, thus achieving two goals with the one action.
Still, bear in mind that if your cropping produces in a very small sample from the
original, the result is never going to be as good as if the subject was shot full frame, thus negating the need for any cropping in the first instance.
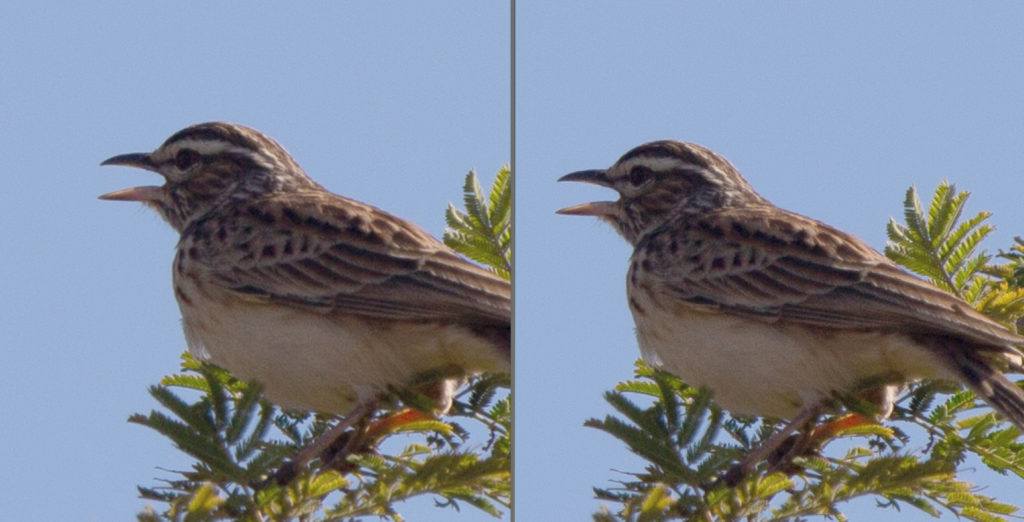
What’s truly amazing is that most resampling algorithms perform an outstanding job of up or down-sampling files. In this case, it’s from a small internet-ready 2Mb file, at right, back to its original 60+Mb resolution, at left. Technically the resampled file is a bit softer and the noise is more noticeable but overall, the results are impressive (Photoshop Elements 2020). Photograph by Robin Nichols
Last Word: Resampling/Resizing
Digital photography can be confusing, especially when it comes to pixels, resolution, image size, print size, and resampling. Here’s a quick primer:
- Resolution describes the number of pixels in a file.
- Image size usually defines the size of the file, measured in megabytes.
- Print size is defined by the number of pixels, and their density in a file, described as dots, or lines per inch (dpi or lpi).
- Dot density, or dpi, is actually programmed incamera, but it can easily be changed in postproduction to suit your output requirements. For example, some cameras order their files at 72dpi while others might output files at 300dpi. Pixels can be pushed together or spread further apart using the Image Size tool in your photo editor.
- Resizing a file involves changing its pixel density; for example, from 72dpi up to 300dpi. If no resampling is used in this rearrangement process, the physical print size will reduce as the pixels are pushed closer together. (Files for print should be set to 300dpi, for social media, 72dpi.)
- As you’ll see in the peacock illustration, changing just the pixel density makes a huge difference to the printable size of the file. How good these resized images appear is heavily influenced by their respective viewing distances.
- Resampling is a process where pixels are either added to or subtracted from the file when the external dimensions are changed (bigger/smaller) or when the resolution (dpi) is adjusted up or down. Resampling works using a range of different algorithms, each designed for a specific resampling task (i.e. increasing or decreasing the resolution). It’s best to experiment with your images to see which of these algorithms produces the best results.
Some resampling types include:
- Bicubic (Adobe + Affinity Photo)
- Bilinear (Adobe + Affinity Photo)
- Nearest Neighbor – best for graphic images (Adobe + Affinity Photo)
- Lanczos Separable (Affinity Photo)
- Lanczos Non-Separable (Affinity Photo)
Key Lesson: Learn the terms associated with photo file resolution so that you can make informed choices regarding the creation and editing of your pictures.
Recommended Reading: If you’re interested in improving your post-processing workflow, check out Photzy’s Understanding Masking premium guide. It has sections on Lightroom and Photoshop, as well as Snapseed for mobile users too.
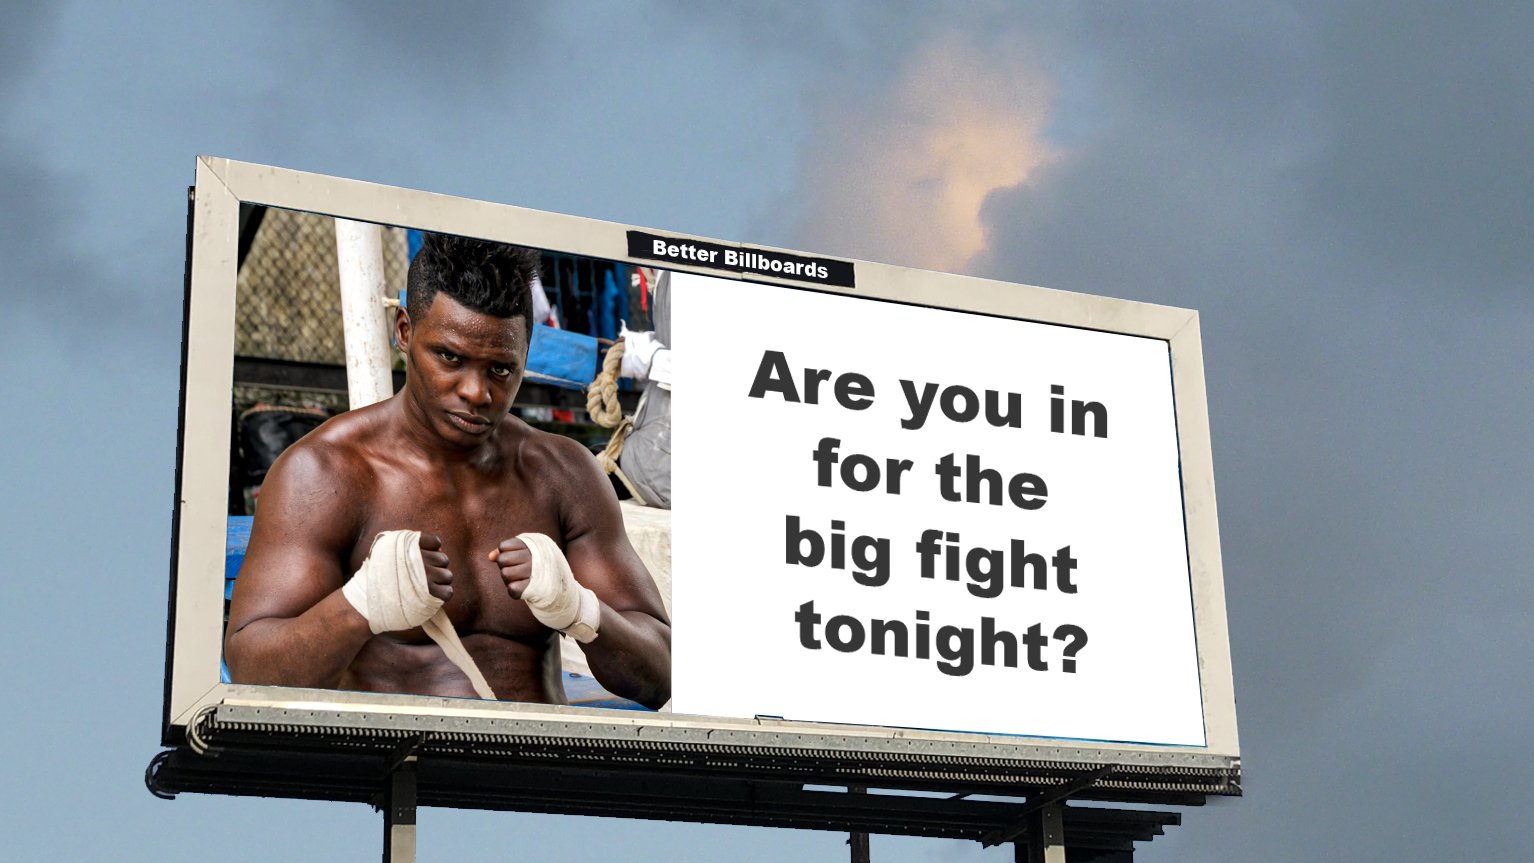
It’s quite hard to illustrate what happens when a digital file is resized rather than resampled because you soon run out of display space. The smaller image is an unedited 18Mb file from a Canon 60D, producing a 51Mb RGB file, measuring 11×17 inches at 300dpi. If I change the dpi from 300 to 72 – with no resampling – the file’s dimensions expand to about eight times its current size (i.e. 72×48 inches). As you see, the grain (digital noise) and clarity is compromised. But then, considering that it has changed from the size of a magazine page to a poster, if it’s viewed from the correct distance, around two meters, it’ll look pretty good. FYI: Because billboards are usually viewed from quite a distance, they are printed at around 30-40dpi.

Photograph by Robin Nichols
Turbocharge Your Resampling
- A Sharper Scaling (Free – www.a-sharper scaling.com)
- ON1 Resize 2020 (US$50 – www.on1.com)
- GIMP (Free – www.gimp.org).

Looking at this illustration you might think that the resolution needed to blow an image up this much must be huge. It’s not. In fact, you can do it with almost any quality DSLR or mirrorless camera. The file size needed for a double page spread in a magazine is pretty much the same as for a billboard. The main difference between the two is the distance at which they are viewed. Photograph by Robin Nichols
Self-Check Quiz:
- True or False: The average DSLR can create an image file capable of being enlarged to a billboard size.
- Name a situation where you couldn’t properly fill the frame with your subject and you would have to resort to cropping in post production.
- What is a disadvantage of cropping a picture in post-production?
- How can the cropping overlays help you?
- What is the advantage of cropping with a border?
- What is the disadvantage of resizing, or scaling, your pictures in post-production?
- If you are going to resize a photo, what should you absolutely do?
- What does DPI stand for?


