
“Pro bono Publico (English: for the public good; usually shortened to pro bono) is a Latin phrase for professional work undertaken voluntarily and without payment. Unlike traditional volunteerism, it is service that uses the specific skills of professionals to provide services to those who are unable to afford them.” – Wikipedia
Professional photographers will often advise aspiring pros never to fall for the old work-for-free-for-the-exposure scam.
When you are just starting out, you have very little experience. Some less-than-scrupulous clients and art directors may try to get free work from you on the principle that you will get the experience plus the exposure, you’ll be building your portfolio, and your work will be seen in their brochures and on their websites.
They get at least semi-professional work for free, and you get experience and exposure…maybe.
There’s a reason it’s called a scam. You work hard for no money, and they don’t have to pay an experienced photographer, one who is perhaps working full time and needs that work to feed their family.
It’s not that they can’t pay. They are a for-profit company, but they are looking for an angle and a way to get it cheaper, and ain’t nothin’ cheaper than free.
If you do the bang-up job you both want, they can profit from your work. What do you get? Maybe some exposure; maybe not.
Professional photographers will often advise aspiring pros never to fall for the old work-for-free-for-the-exposure scam.
You do benefit by gaining experience, building skillsets, making mistakes and learning from them, and you can include your best stuff in your portfolio… so perhaps it’s not a total ripoff.
But what if you could gain that crucial experience and exposure, still working for free, but also giving back to your community?
I’m guessing you, dear reader, have not yet given up your day job, but are at least thinking about a career change.
You wouldn’t be taking bread from the mouths of pros, which need the income. You would be dipping your toe into the waters, discovering whether professional photography is the right fit, getting some otherwise difficult-to-come-by real world
experience, and providing a service that few nonprofits can afford.
In my own experience, if they didn’t have me, they’d haul out their cell phones and do the best they could. With me, they get professional work, and I don’t feel one bit guilty about it; I feel fulfilled and proud of giving back. I feel like a working pro again.
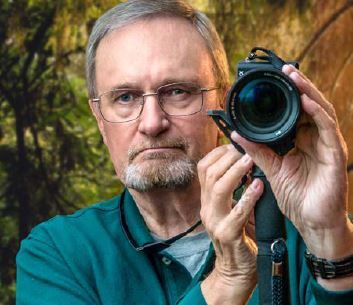
I’m a retired professional photographer.
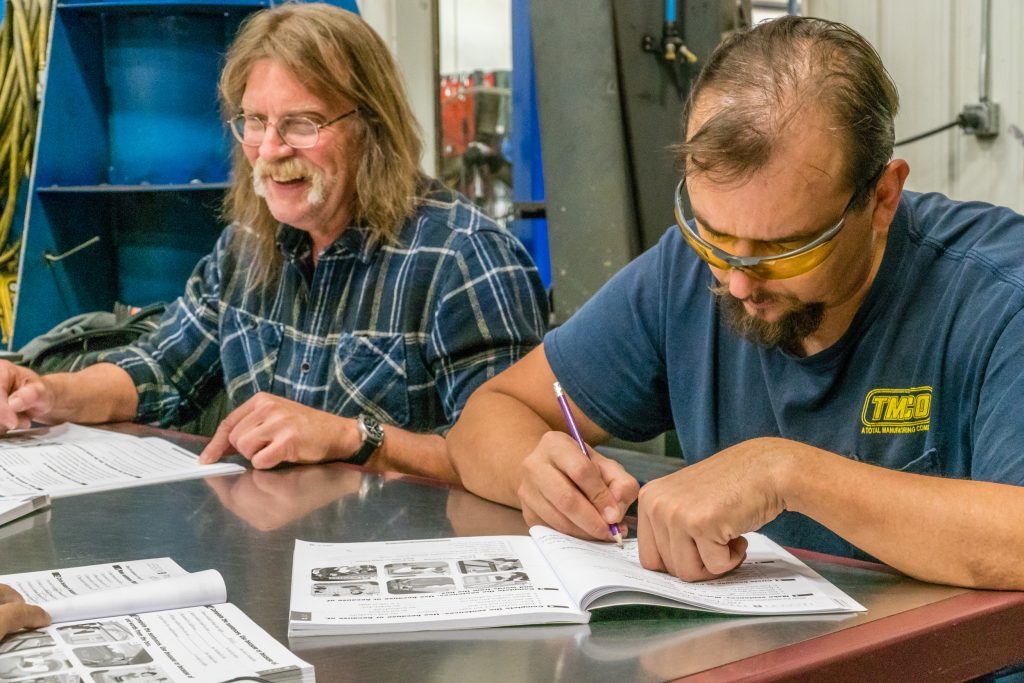
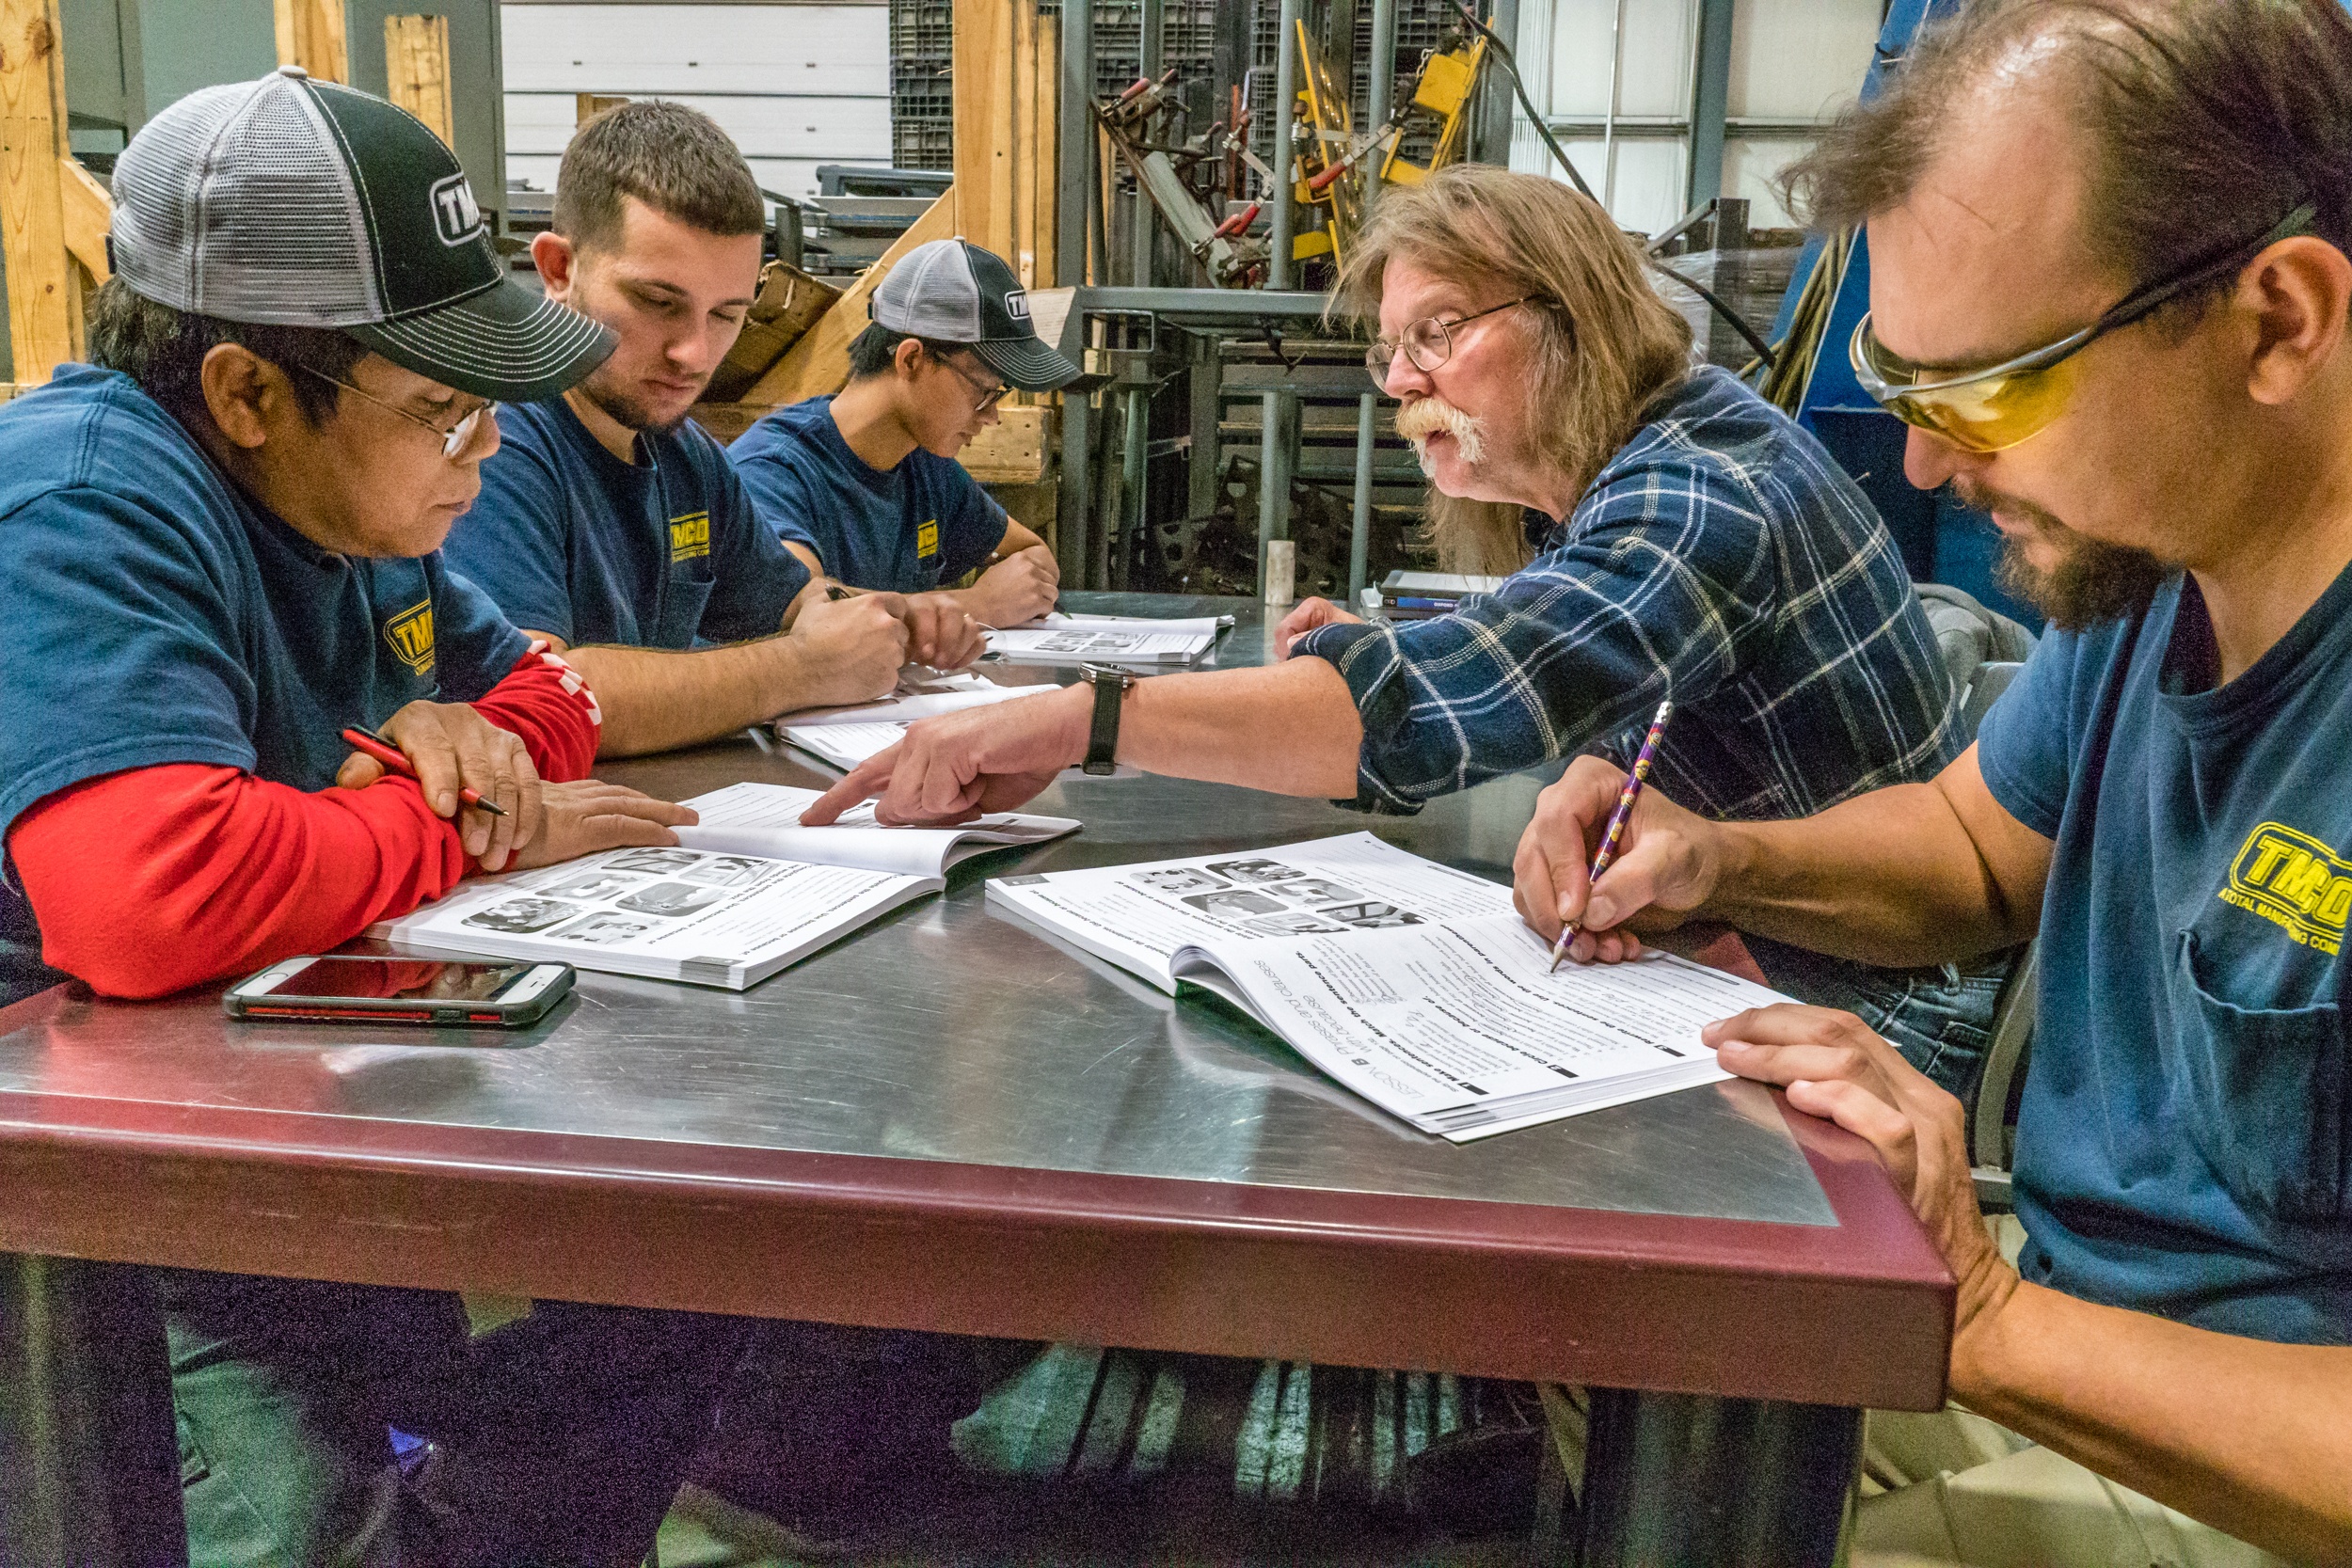
ESL on the factory floor. Photo by Charles Haacker
For 16 years I owned and operated my own studio. I joked it was my “general practice” because I liked to do a lot of things.
The bread and butter was portraits and weddings, but I was trained as a commercial photographer, so I had skills in small product, industrial, and event coverage. That tied in nicely with weddings, each providing experience for the other.
I took my last picture for money in 1995, and for a long time I “pegged my guns,” refusing even to pick up a camera. But in 2007 I acquired my first direct-to-digital $100 shirt-pocket point-and-shoot camera that just floored me with what it was capable of.
I shot and shot and shot and staged up through a few increasingly sophisticated compacts. Around 2010 I stumbled upon a nonprofit called Literacy Network.
I was actually there to volunteer as a tutor, but when they learned that I had been a full-time professional photographer, their eyes lit up. They needed photography! Lots of it! For their website, and blog, and advertising, and public relations, and gifts, and press releases, and just general coverage.
But they had no budget.
Could I do it? Would I do it?
I’ll pause here to list some of the things we will cover:
- Cold calling
- What photography is needed
- Equipment
- Flash or existing light
- JPEG or RAW
- Post-processing
- Take it seriously
- You hold the copyright
- How to cover an event
Recommended Reading: Want to expand your shooting skills and master photography? Grab our set of 65 beautifully designed and printable Action Cards that will give you over 200 photography assignments to help you take your photography to the next level. Check it out here.
Cold Calling
This guide is a little “cart before the horse.” I have never solicited a nonprofit; they have always solicited me. I have been fortunate to be able to work for many that truly interested me, and one (The Alzheimer’s Association) is very close to my heart since I lost a loved one to dementia.
Selling is important.
If you want to be a professional, you’ll need to develop your sales skills along with your photography skills. One such skill is the cold call: approaching a potential client, as a potential supplier, looking to gain their business.
Key Lesson: Making cold calls takes some moxie. You are in fact interrupting someone’s busy day, so have a ‘pitch’ scripted. Do not waste their time.
I can only discuss my own specialty, which is event and public relations photography for nonprofits. I did a lot of events and conventions as a professional, and I shot some 800 weddings. The skillsets overlap.
Clients may need other photographic services. You need to find out what they need and then determine if you can deliver it.
They may not know that or even if they need photography at all. That’s where selling comes in. It’s not arm-twisting; it’s being friendly and personable and professional, and remembering that you have two ears and one mouth.
If you want to be a professional, you'll need to develop your sales skills along with your photography skills.
I Googled “nonprofits in my home town” and was mildly surprised at how many popped up.
Nonprofits – many! –are out there looking for help on limited to no budgets.
Scroll down those lists looking for charities and foundations that light your fire.
Get on the phone and call them. Explain what you are offering. If you have a portfolio, be prepared to show it. It helps if the portfolio is targeted (i.e. not just random “pretty pictures”), but if that’s what you have and it shows a level of competence, use it.
If you have little skill but great heart, tell them. Sell them on the fact that they need you to do their photography.
What Photography Do They Need?
Don’t be disappointed to be turned away.
Some may have no photographic needs at the moment. Some may already have their photography covered, perhaps by a volunteer.
But to get your foot in the door, you need to know what they need, determine if you can do it, and then sell them on letting you provide that service for them.
You are a volunteer, but the attitude you must carry is that of a serious professional.
Don’t offer if you can’t deliver, but show them that you can do better than a staffer with a smartphone.
...To get your foot in the door, you need to know what they need, determine if you can do it, and then sell them on letting you provide that service for them.
This is what I tend to do for nonprofits:
- Fundraising walks for Alzheimer’s
- Receptions
- Meetings
- People working together
- Classrooms
- Entertainment
- Awards
- Speeches
- Flag football (Alzheimer’s)
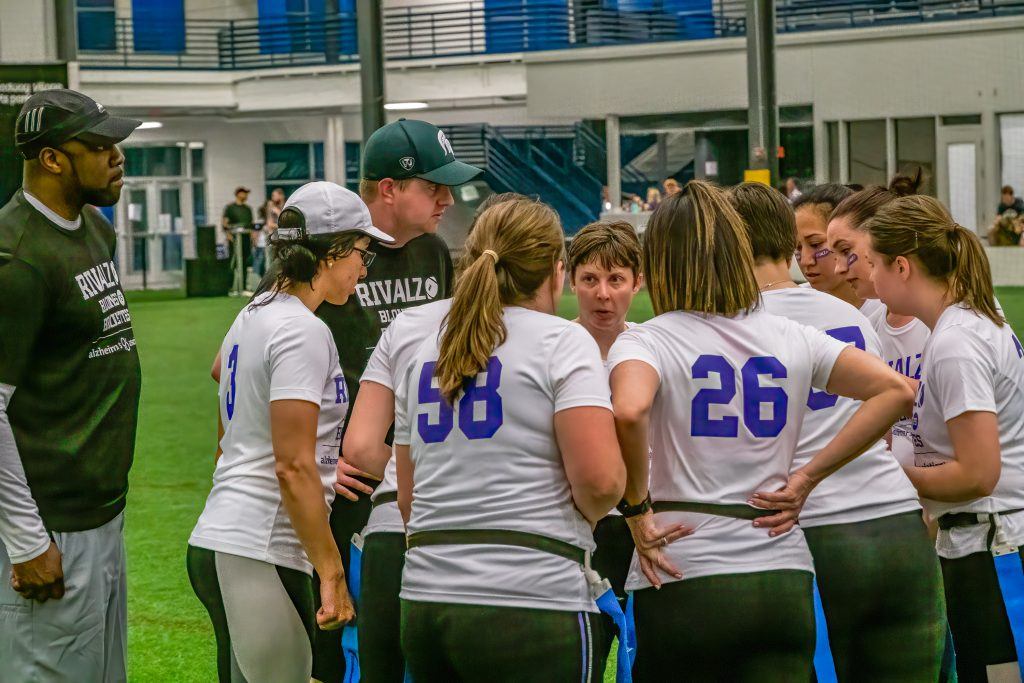
Huddled together with their quarterback is the women’s flag football team. Photo by Charles Haacker
I am a storyteller.
My approach is nearly 100% candid, pretty much all by existing light.
I occasionally set up a shot, especially headshots or small groups, but I like the natural look of the existing light and the natural, non-posed expression.
But you have to be you.
You have to develop a working style that suits you. If you want to shoot everything as a setup with a speedlight in the hot shoe, do that. I have a mantra: “You do what works.”
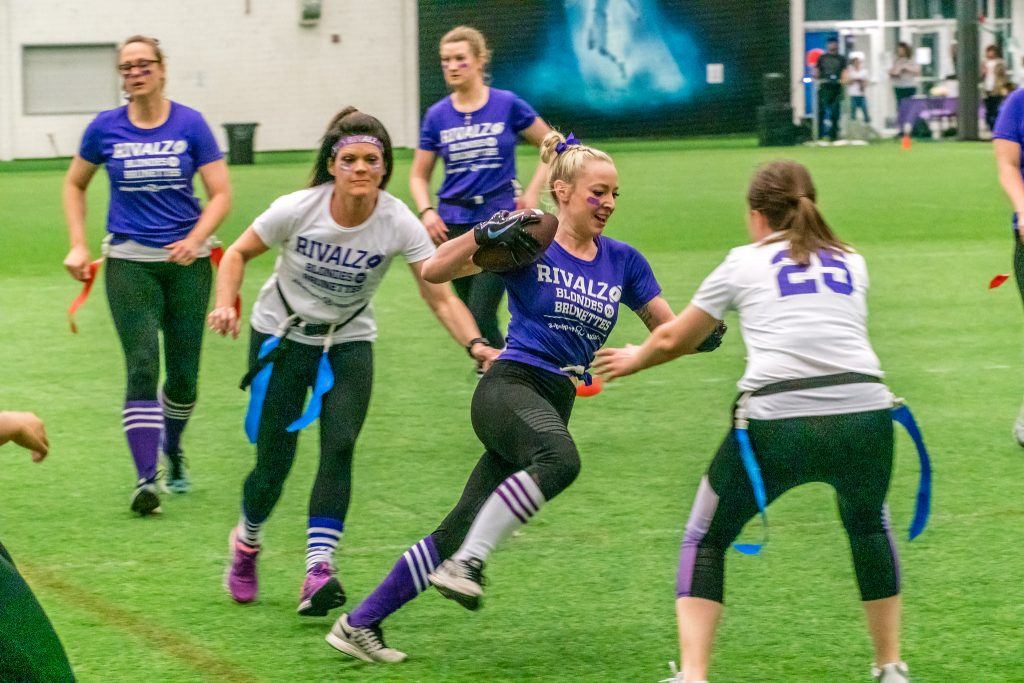
Blondes vs. Brunettes is a team that is part of the RivALZ nonprofit. They raise awareness and money for Alzheimer’s Research. Photo by Charles Haacker
Key Lesson: Adapt your working style to the situation. The only thing that matters is “getting the picture” every time. Think like a pro.
Deliver big, sharp, quality files, exactly as you would if you were being paid. Your client is going to use these images, often for fundraising purposes, so if you fail to put them in a good light, you also fail to put yourself in a good light. If they want to make a billboard, you need to deliver a file that will make a billboard (which is actually not that difficult).
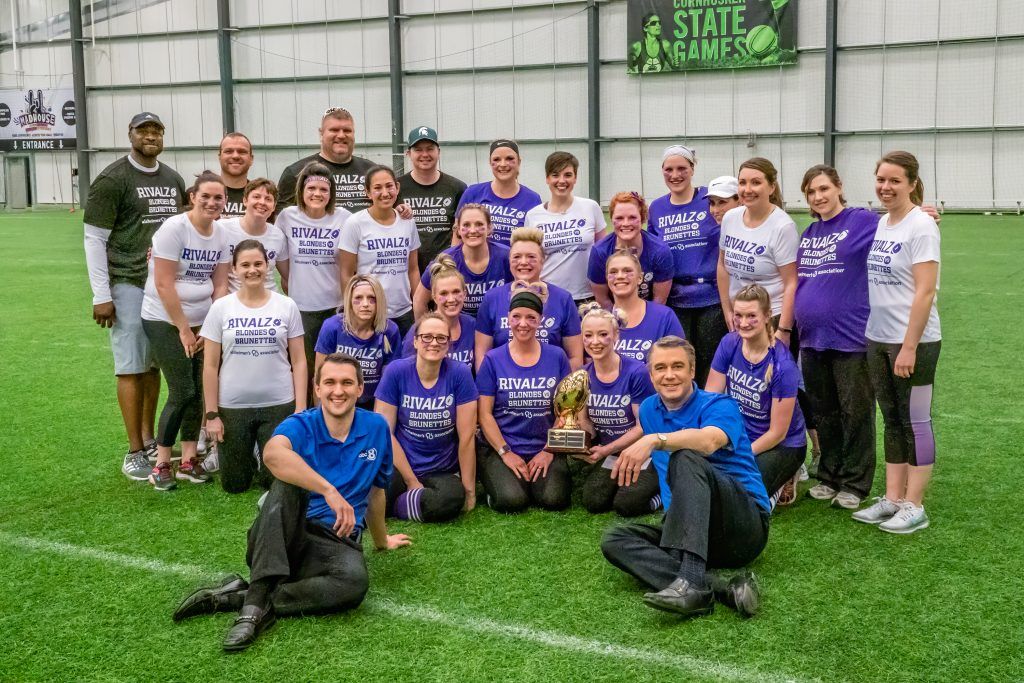
Teams of the nonprofit RivALZ. Group pictures are often called for in nonprofit photography. Notice the specific pose. You may be a volunteer, but work like a pro! Photo by Charles Haacker

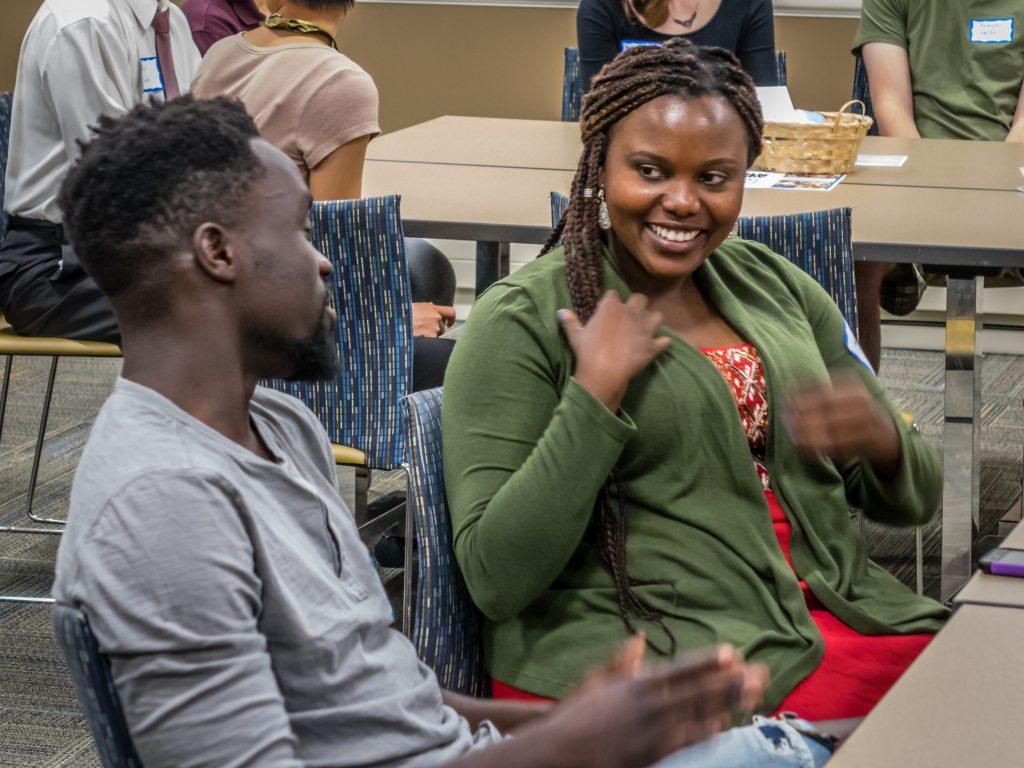
ESL students and their coaches studying together on a factory floor. Photo by Charles Haacker
Equipment
I don’t want to sound dismissive of gear, but I think it’s often the least important consideration.
When I began shooting for the Literacy Network in Madison, Wisconsin, all I had was a high-end point and shoot, a Nikon “Coolpix” P7000 backed up by a P5000.
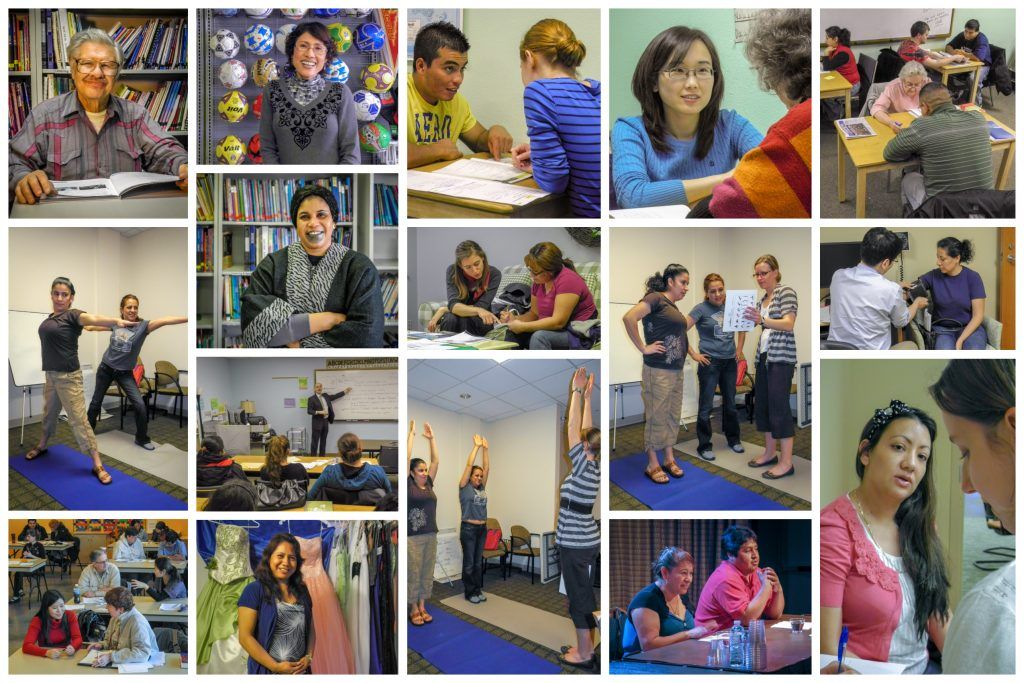
Photo by Charles Haacker
Here’s a sampling of what I did with what is, at best, a “prosumer” compact, but bear in mind that I am a retired pro for whom “cameras are cameras”.
This composite is from a number of jobs shot for the Literacy Network.
All were shot with a Nikon “Coolpix” P7000 or 7100, using the ambient light only. These tiny-sensor glorified point and shoots did the job beautifully.
They were RAW capable, but I couldn’t process RAW at the time, so all of these were JPEGs. None were straight from the camera; all were re-processed in Photoshop Elements.
If you own a DSLR and a bagful of lenses, great! But if you’re just wondering about photography, you may make do with whatever equipment you currently have (except a phone – it’s tough to look professional with only a phone).
I’ve argued for many years that cameras don’t matter. It’s not entirely true, but you needn’t invest hundreds of dollars just yet. It’s not the camera; it’s the nine inches behind it.
Have a backup. Always. Anything you have only one of will break.
From the time I acquired my first digital camera, and as soon as I staged up to a better camera, the old one was always kept at hand.
Each new camera was always backed up by the previous one(s).
Today, I work with a matched pair of Sony A6300s backed up in depth by my older A6000.
I did not set this shot up; I stood just outside of another’s frame. You can see they are looking at a different lens. This is a “grab shot” opportunity. I made another shot with them looking at me, but this one was too charming not to be published. Photo by Charles Haacker
When I was working professionally, I always had at least two cameras that took the same lenses, and absolutely they would periodically quit without warning. As a professional, never let them see you sweat. Pick up your backup and go right on.
Key Lesson: The camera is less important than knowing your equipment. Be comfortable with it. If you deliver, no one will care which camera you used. But always have a backup!
Recommended Reading: Want to expand your shooting skills and master photography? Grab our set of 65 beautifully designed and printable Action Cards that will give you over 200 photography assignments to help you take your photography to the next level. Check it out here.
Flash? Or Existing Light?
Pretty much everything I shoot is by existing light.
Since my first digital exposure I’ve been nuts about digital’s ability to cope with pretty much any light, indoors and out, even mixed.
From the first moment, I was making shots that I knew I could never have made with color film.
Auto white balance sometimes covers a multitude of bizarre lighting situations. The newer the camera, the better it is.
If shooting RAW (and I strongly recommend it), you can easily and effectively adjust white balance (WB) in post.
My go-to with my Sony APS-C MILCs is RAW only (I don’t even bother with JPEGs), auto WB (unless I can shoot a custom WB off of a neutral wall or gray card), auto ISO (usually from 100 to 6400 but sometimes higher), and aperture priority.
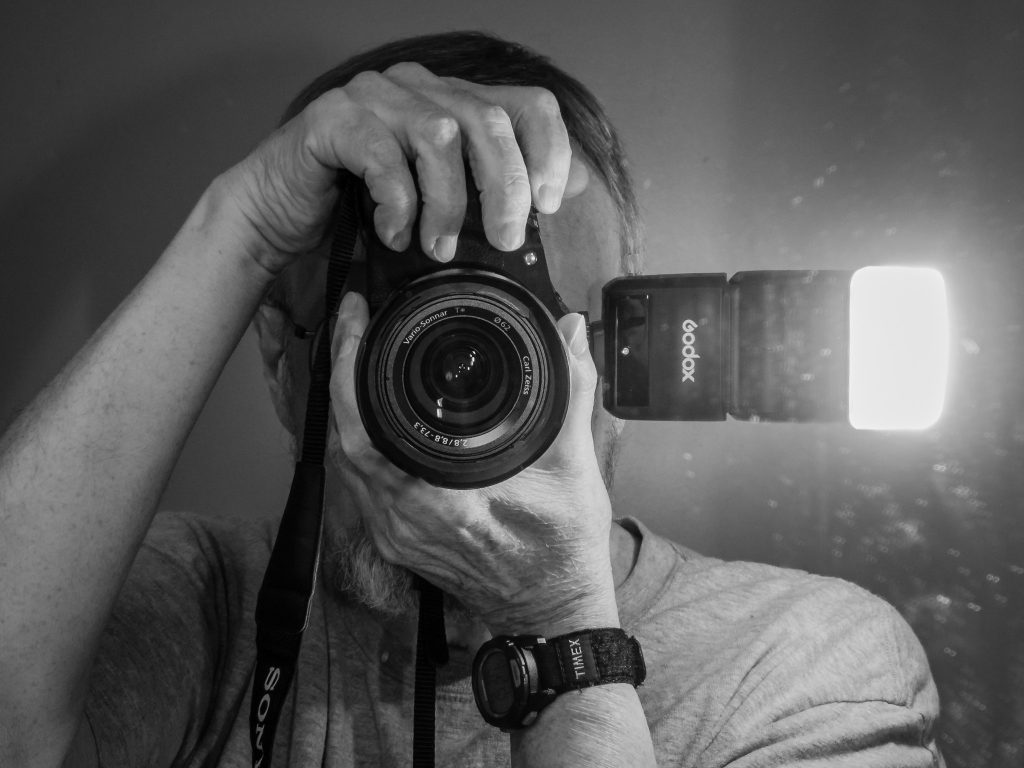
This Godox unit is matched to all my Sony cameras. This mirror shot was on full auto, exposure nailed through the lens. Photo by Charles Haacker
My cameras also allow me to specify a minimum shutter speed to avoid motion or camera blur. The ISO for the football shots earlier was fixed at 10,000 and the WB was measured off a nearby white wall.
If you prefer flash, I strongly recommend a hot-shoe-mount speedlight with a swiveling bounce head, ideally one that is dedicated to your camera so that it can take advantage of TTL (Through The Lens) technology.
It is so much faster and pretty ‘goof-proof’ if properly set up. I do not recommend using the on-board “peanut” flash that almost all cameras have. It is too small, too weak, and too close to the lens, almost guaranteeing you will get “red eye” in pictures of people.
I could shoot flash.
I could even shoot multiple flashes to make the scene look ‘non-flashed.’
It would be sharper and would allow for a lower ISO for less noise.

This entire job was shot using available light, and it was dark. Photo by Charles Haacker
My objection, though, is that unless you use only a single shoe-mount speedlight on-camera, you lose your flexibility to “shoot and maneuver.”
Event photography is all about shooting and maneuvering.
If you prefer flash, I strongly recommend a hot-shoe-mount speedlight with a swiveling bounce head, ideally one that is dedicated to your camera so that it can take advantage of TTL
Direct flash on-camera is harsh, plus it falls off (by the square of the distance from the source) so the subjects nearest you are well lit, but the further away they are, the darker it looks.
The flash is blinding and distracting.
Depending on the situation, maybe you can bounce the light. But maybe you can’t. Personally, I much prefer the existing light, even if there is not much of it.
The composite above is a 2019 job made with my matched pair of “half frame” APS-C Sony A6300s cameras with overlapping zooms, 28mm to 300mm.
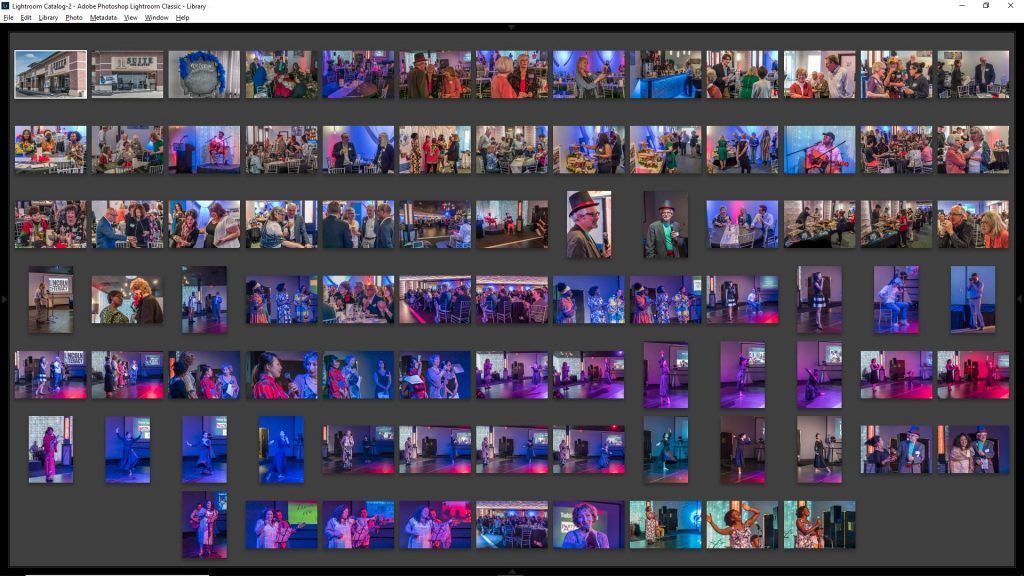
This is a screenshot of the entire job as delivered: 87 big, crisp files at 300 ppi. The “light” was all over the place, yet not a single frame was flashed. Photo by Charles Haacker
The whole thing was shot entirely in RAW with nothing but the light available – what I often joke is “available dark.” It helps to have the largest sensors I have ever owned, thus allowing me to shoot at ISO 12,800, five full stops faster than the ASA 400 film I was once standardized on.
I also used a monopod to help steady the camera.
The low lights were gelled for constantly changing color. The only solution, short of flash, was auto white balance, and thank goodness for Lightroom!
Could I have shot this job with a Nikon P7000 with its infinitesimal 1/1.7” sensor, only 1/9 the area of the APS-C sensor in my A6300? If the client and I were willing to accept some visible noise, then yes, I could have.
I’ve been astounded at how well even smartphones perform in next to no light.
That said, bigger is better, and since we are seeking a professional springboard, I’m biased toward more professional-looking gear. You should be able to produce a cut above a cell phone.
What matters is the quality you can deliver, regardless of what camera made it. But a more pro-looking camera, like a bridge, inspires more client confidence than a phone.
If you are using only a phone, they may be justified in wondering what they need you for, free or not.
What matters is the quality you can deliver, regardless of what camera made it. But a more pro-looking camera, like a bridge, inspires more client confidence than a phone.
Shooting “events” covers a multitude of situations.
Literacy Network holds an annual fun run in October when the weather is “guaranteed” to be perfect. So there I was, with my little not-weather-sealed Nikons, huddled under a golf umbrella, doing my best. I was soaked from the hips down, but the cameras stayed dry.
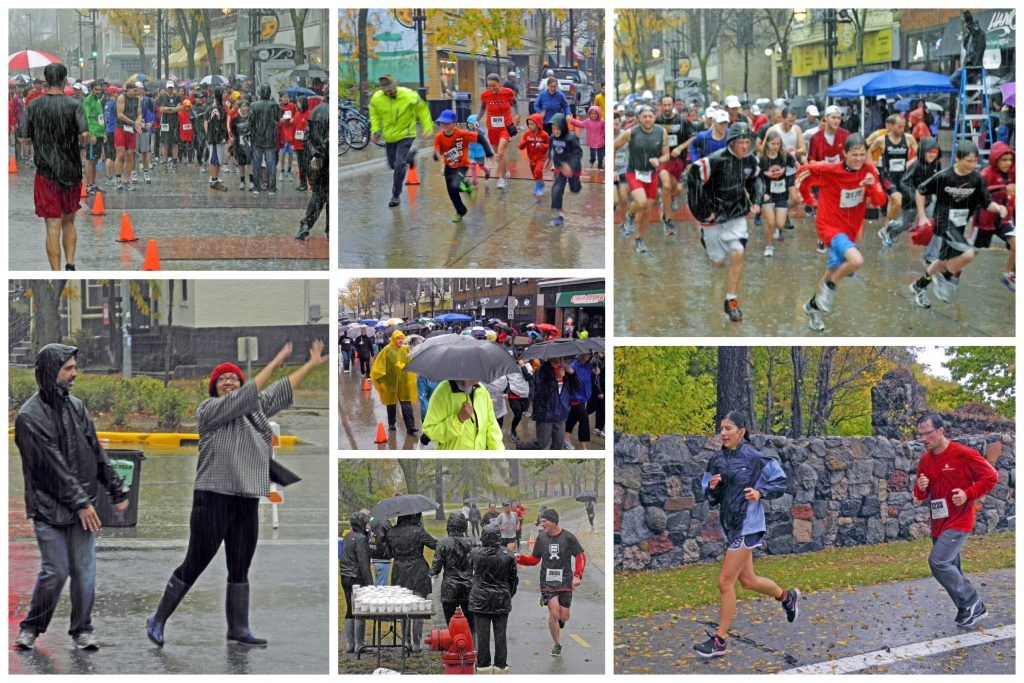
The shot in the lower-left corner is literal singing and dancing in the rain! Photo by Charles Haacker
JPEG or RAW?
I’ve been a 100% RAW guy for five years now, but for years before that, I was a 100% JPEG guy.
I am no purist. I know that you can shoot JPEG very successfully. I am, however, 100% a post-processing guy.
I am convinced that “SOOC” (Straight Out Of Camera) is a myth.
If you expose JPEG properly to hold highlight detail (expose for the highlights), you must post-process at least to open the shadow that will inevitably be blocked. If you don’t, you are not delivering maximum quality.

Comparing RAW v. JPEG image files. Photo by Charles Haacker
This pair of photos was shot simultaneously (RAW on the left, JPEG on the right). Both were finished in Lightroom to match as closely as possible, and they’re a good match, but look at the sky. The sky was equally overexposed in both pictures, but only the RAW (DNG) still had all the original, recoverable detail.
I strongly recommend camera RAW. RAW must be post-processed – no way around it – but it is absolutely worth it.
You can deliver JPEGs straight from the camera, but honestly, if you aspire to be professional, the sooner you learn to shoot and process RAW, the better off you will be.
There is a time and a place for everything, and JPEG absolutely has its place, but because RAW has so much greater dynamic range and flexibility that it can be beautifully processed with less noise, fewer to no artifacts, and detail everywhere, I now wish I’d transitioned 10 years ago instead of five.
Post-Processing
There are so many apps available for post-processing, editing, retouching, and photo manipulation that it is mind-boggling.
I subscribe to Adobe’s Creative Cloud, which gets me Lightroom and Photoshop bundled together.
These programs are enormously powerful, but they are also hard to learn, especially Photoshop.
Adobe makes a standalone product, Elements, which I used for many years. It’s a much more user-friendly consumer app that can do a lot of what full Photoshop can do.
If you are not already post-processing with pretty much any app, then you should be. If you shoot camera RAW, you have to be! However, aspiring pros should at least know how to post-process even JPEGs.
Take It Seriously
Present yourself as a pro. Dress appropriately for the occasion. Be polite and well-spoken. Listen!
You are a volunteer, but you nevertheless work for them; deliver what they expect you to and clearly understand what their expectations are.
I try to work as unobtrusively as possible.
I am not, nor should I be, the center of attention, except for the brief time that I’m doing setups, like groups.
Otherwise I am ‘candid man,’ usually working longer focal lengths, so they don’t even know I am there.
- Be polished and confident. “Fake it ‘til you make it.”
- Know your main camera inside out and backwards.
- Preset it for the situation you anticipate.
…And their eyes met… Photo by Charles Haacker
- If all else fails, put it in full auto, but avoid that because of the control it costs you.
- When not on assignment, practice, practice, practice.
- Make the effort to learn full manual control of the exposure triangle.
Once you deeply understand your camera, you can use any combination of automation or manual control with full confidence because you know how and when to override the algorithms and camera meter.
Key Lesson: If you can, shoot RAW and learn to process it. Your quality will go way up. You’ll do more work but your reputation will soar. You’ll start to get referrals to other nonprofits.
Recommended Reading: Want to expand your shooting skills and master photography? Grab our set of 65 beautifully designed and printable Action Cards that will give you over 200 photography assignments to help you take your photography to the next level. Check it out here.
You Own the Copyright
When I do pro bono work for nonprofits, I don’t use a contract. Maybe I should, but I am a volunteer, happy to help.
I am releasing my photographs for the use of the charity or foundation, but that does not mean I am giving up my copyright. U.S. Copyright Law states that s/he who pushed the button owns the copyright for their lifetime plus 50 years.
Remember the somewhat amusing monkey selfie case? The monkey pushed the button; the monkey owned the copyright.
You have released your pictures for the use of the client at no charge, but that does not transfer the copyright.
All of the pictures that I have posted in this article are my own. I have no obligation to notify the original clients that I am reposting them here as a teaching tool, because I still own the copyright.
When I do pro bono work for nonprofits, I don’t use a contract. Maybe I should, but I am a volunteer, happy to help.
When I shoot, I shoot lots, all RAW, so there is a substantial culling and processing job to do.
If I were charging money, I might feel obligated to just cull the real stinkers, but run up the proof sets of everything else.
But my experience with average clients, paying or otherwise, is that they cannot handle large numbers of images unless they are using an art director.
For nonprofits, I never send proofs; I cull and process in the very best way as I see them and deliver the finished job, “camera ready”, we used to say.
I have never had a client ask to see the stinkers, or even the other culls. They are delighted not to have to deal with it. After a suitable time, I delete all the culls to save space on the drives.
Be sure to ask for a photo credit on anything they publish. That’s where your exposure comes from.
How to Cover an Event
Never forget that you are telling a story; you are a visual storyteller.
I take pretty much the same approach as I would covering a wedding.
I create establishing shots, the check in, record the table décor, make overviews, mixes of crowd shots, small groups, tête-à-têtes, reaction shots, and shots of whatever passes in front of my lens as I keep moving and circulating. Unless the client has been specific about what they need, a good mix of everything should do the job.
When we shot film, covering an assignment this way would have been prohibitive, unless we could at least bill back the film and processing, and honestly, I would never have shot as much as I do now because I would have ended up out-of-pocket.
Thank goodness for digital!
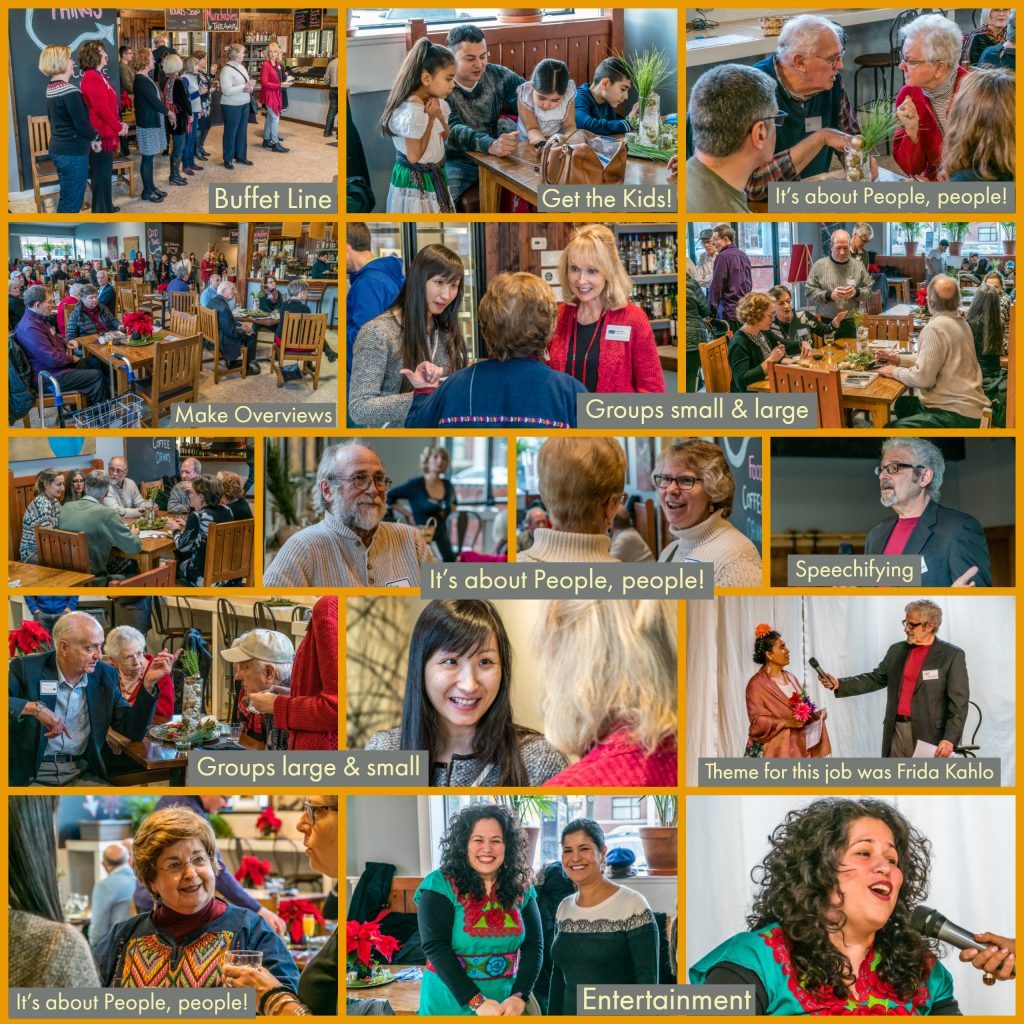
Photo by Charles Haacker
Final Thought
Volunteering to photograph for nonprofits can and should be personally rewarding, both because you are aiding a worthy cause and you are gaining experience, getting exposure, building your portfolio, and networking.
If your clients want to pay you, don’t turn it down.
Photo by Charles Haacker
If you establish contacts from your pro bono work, you can develop a paying clientele.
It’s at that point that you may begin to think of getting a business license and some business cards.
In this digital age you don’t need a studio or a lab. You will need good, reliable cameras (plural) and a good editing computer with a calibrated screen.
You will need sales and business skills.
But the first thing you need is to get some irreplaceable experience. And you will make mistakes!
That’s not necessarily a bad thing; you always learn more from your mistakes than your successes.
You don’t want to drop an entire job on its head, but the errors you make will teach you not to make them again.
Good luck! I wish you the very best!
Self-Check Quiz:
- True or False: You can wait by the phone and they’ll call you.
- True or False: You don’t need details of what they need; just go shoot.
- True or False: You need top-of-the line professional equipment.
- True or False: You needn’t act professionally; you’re a volunteer.


