


I had to chuckle to myself when I agreed to take on the task of writing a Photzy.com Quick Guide on the subject of Wildlife Photography. It’s kind of like asking for a Quick Guide on every automobile in the world. Sure there are similarities- they all have some means of propulsion and a way to steer them, but after that, they’re as different as Neptune and Earth. And that IS the nature of wildlife photography.
Let’s start out by quantifying a few things.
I believe that there are probably three types of individuals whom might be reading this guide.
- Photographers who already do wildlife photography, perhaps have a hunting background, already know what a blind is, and own a 300mm f/2.8 or longer telephoto lens. For this group, I’m hopeful, but not confident, that you’ll find something useful in here.
- Photographers who live in the country; perhaps on a farm, a ranch, or at a cabin.You see wildlife on a regular basis because you live there, you somewhat know their habits and you have a little knowledge and some access. You have some photography skills, but aren’t getting the kind of images that you believe that you should be getting… given the fact that grazing deer are in your backyard. This is the group that I believe will find this guide most helpful.
- Photographers who rarely see wildlife- You take a great vacation once or twice a year to national parks. You’ve seen wildlife on occasion; you go to the zoo and you would like to try and get a good photograph when a situation presents itself. For this group I can give you some ideas on how to prepare for the possibility that you might encounter wildlife that is close enough to try and create a great photograph.
Do You Know What This Is?
From here on out, I’m going to refer to the three groups of Wildlife Photographers (stated above) as “Serious”, “Semi-serious”, and “Hopeful”. The Serious group already knows what this is. For the rest of you, it’s called a ‘blind’. It visually hides you and your camera equipment from wildlife.
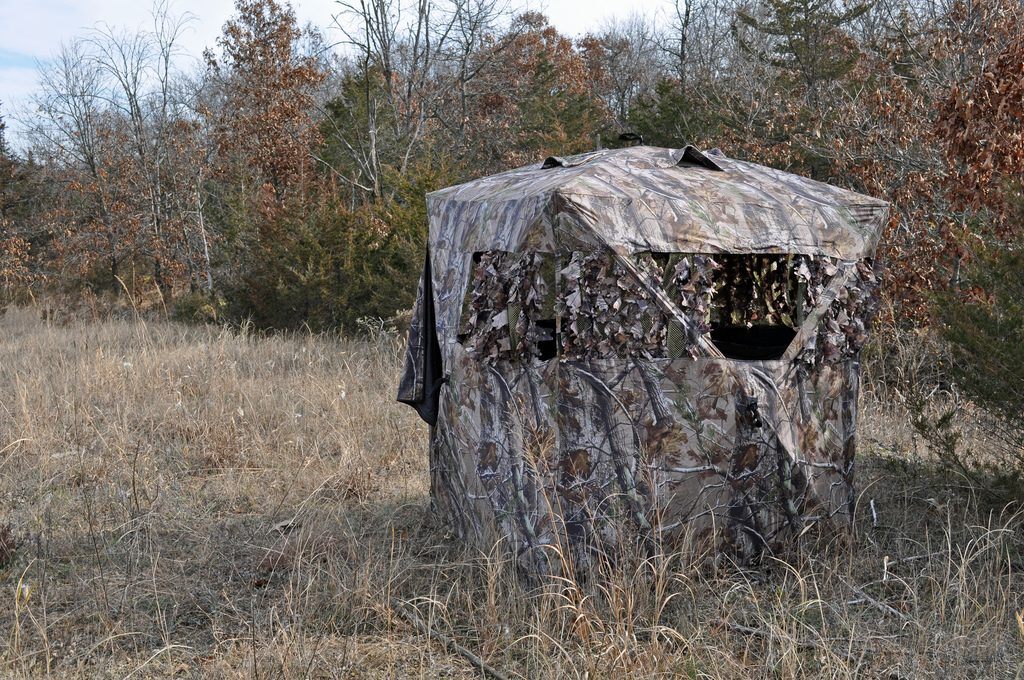
Photo by US Fish & Wildlife Service
If you’re in the Semi-serious group, you may wish to invest in a portable unit such as the one above, or build a permanent one on your property.
Outside of specific knowledge on animal behavior, and an excellent telephoto lens, a “blind” is a wildlife photographer’s best friend. You can find out everything that you need to know about blinds at local hunting, fishing, and camping stores. Also, be aware that many national parks and regional preserves have existing blinds that are available for public use. If you’re traveling to a distant location, check in advance.

Now, going back to my automobile metaphor; trying to photograph a beaver is completely different to trying to photograph a moose. If you’re serious about wildlife photography you need to study up just as much on animal behaviors you would on what kind of lens you want to use.
How might you go about that?
- If you’re traveling to a location and want to photograph wildlife, find out what’s there.
- Research what the species is doing during that particular time of year – mating, birthing, raising young, migrating, etc.
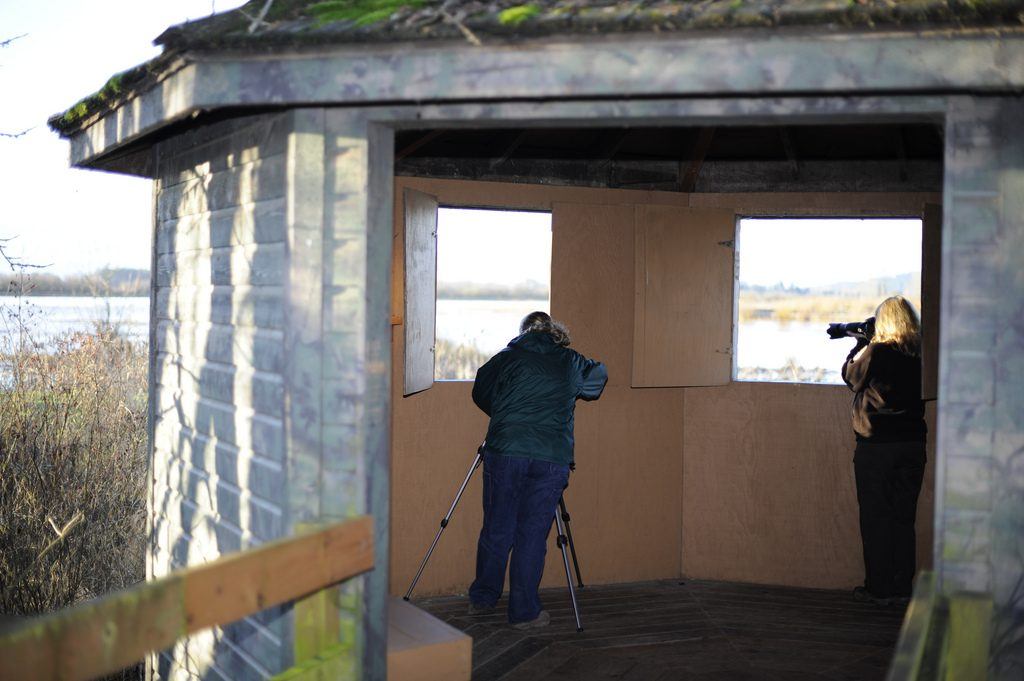
- Make a local contact and see if there is an expert that could guide you.
- If you’re visiting a park area, find out what the hours are. Ask if you can get a permit to be inside the park during off-hours. Most activity for wildlife occurs early in the morning, at dusk, or at night.
"Make a local contact and see if there is an expert that could guide you."
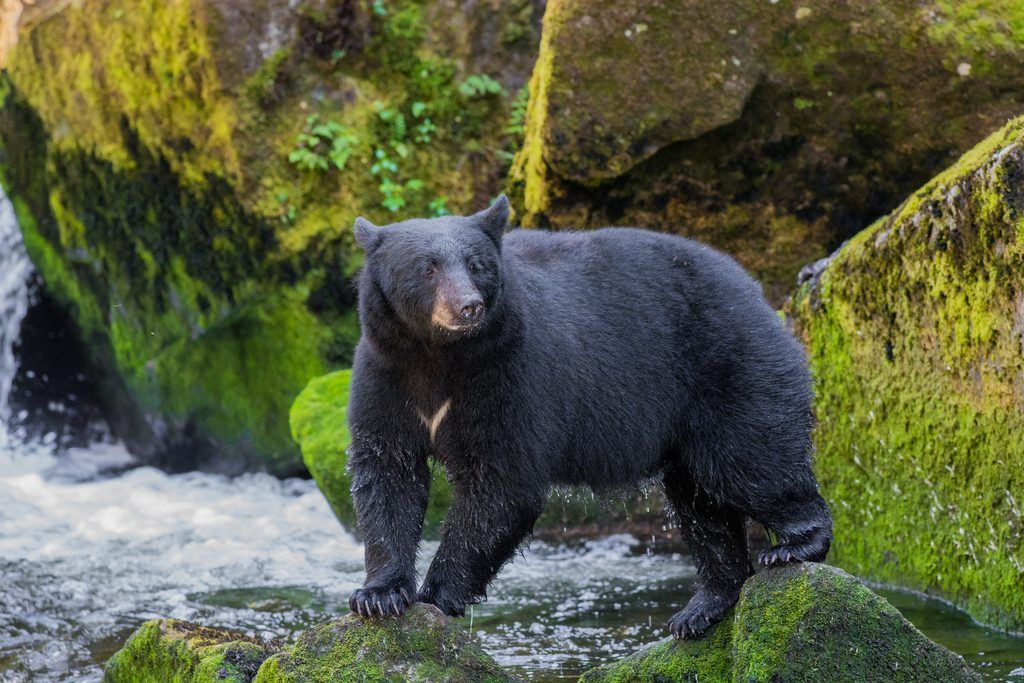
Photo by Andrew Russell
This type of photograph (above) requires knowledge, a blind, or a very long lens.
Let’s talk a little bit about equipment. There are several circumstances that are pretty much a given in wildlife photography-
- Low light
- Distance
- Audible Noise
- Potential Danger
Because of these circumstances you will want to-
- Use a camera that has low noise at high ISO settings.
- Use the longest telephoto / zoom lens that you can afford (minimum 200mm).
- The lens should have a fast aperture (f/4.0 or faster preferred).
- Many cameras have a “quiet” setting to reduce noise. It will also reduce noise if you lock the mirror up. Use the slower motor drive setting rather than the fast one. Shoot in short bursts.
- Invest in a GOOD camera remote shutter release. This will allow you to set-up your gear (at a potential photo opportunity) up close and then fire the camera from a distance. This provides a level of safety, and it prevents the animals from being spooked by your scent.
- Many types of wildlife are potentially dangerous to humans. Keep your distance. Study animal behavior. Be particularly careful during mating season and when babies are present. Carry pepper spray.
Other equipment that will be extremely helpful includes-
- A good, sturdy tripod with a ball head. If you’re using super- telephoto lenses (300mm or longer), make sure the tripod and head can support the weight.
- A handheld spot meter. This will be helpful if you’re trying to shoot a wider shot but you want your meter reading to come from the animal.
- A Photo Vest makes it much easier to carry gear in the field while still keeping it accessible. The Backpack style camera bag is an alternative. But, consider this, if you’re hiking through the woods and you spot an animal, the less you move the more likely you’ll get a shot before it runs off.

Photo by Umberto Nicoletti
How about filters? I don’t recommend using glass filters for wildlife work (other than a protective UV filter). The reason is because you don’t usually have time to fuss with them. I do’t like using a polarizing filter because it reduces the exposure, and low light is typically already an issue.
Whether you’re a Serious, Semi-serious, or Hopeful photographer, you could run into this type of wildlife opportunity at any moment. The key is to be ready and plan ahead. You’re likely to have less than a minute to get your photograph.
How Do You Get Yourself Prepared?
- Keep the camera out and handy. Remove the lens cap and install a lens shade. Keep the camera turned on. If you’re unsure about lens choice, go with a zoom (something in the 200mm-400mm range preferably, or, 80mm–200mm as an alternative).
- If lighting conditions are fairly stable and even, set your ISO at 200-800. Use Evaluative/Matrix metering, Shutter Priority Mode, and set shutter to 1/125 or faster (whatever it needs to be for you to eliminate camera shake).
- If lighting conditions are constantly changing (such as the sun going in and out of clouds),set your ISO based on the low light readings. Use spot metering, Shutter Priority Mode, and set shutter to 1/125 or faster (following the same advice given above).
- Focus mode is a personal preference. I like using just the center spot. Focus on the eyes. Re-Frame the image. If you’re not comfortable doing that quickly, use Zone Matrix Focusing. I also recommend setting the camera to single shot focusing. You don’t want the camera to re-focus should the animal shift their position slightly.
- Don’t wear bright clothing.
- Keep conversation, iPods, and other sources of noise off.
Should You Use A Flash Unit?
There may be occasions where a flash unit will help with a wildlife photograph. The problem is that most activity occurs in the morning or in the evening in lower light. You are more likely, than not, to get a shot that loos like the one above.
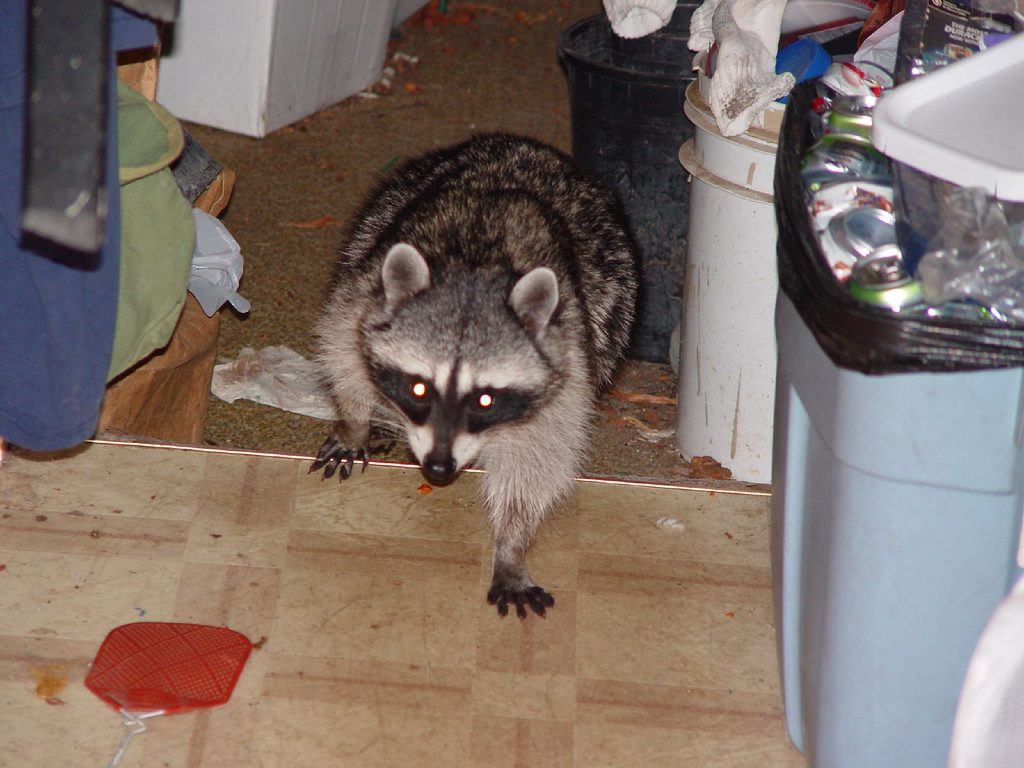
Photo by Lisle Boomer
Glowing eyeballs aren’t attractive. I would leave the flash unit at home and work with a higher ISO. The one exception is if you’re working at night. Many wildlife photographers will set-up a blind, put out bait, and use infrared firing devices for nighttime shots.

If you attempt this, make sure to position your flash units off- axis to the camera lens.

Photo by Jason Wharam
Even if an animal is at an angle to the camera, a flash positioned at a close axis to the lens can still reflect off the retina.
In wildlife photography you basically have two options:
- You take up a position and wait for the wildlife to come to you
- You go out looking for wildlife
In option one – knowledge and research are your friends. If you’re going to be patient and wait for an animal to come to you,you want to be sure that the odds arein your favor that one will come.
In option two – knowledge and research are equally important – but there’s an additional factor that is just as important: weight.
"Many wildlife photographers will set-up a blind, put out bait and use infrared firing devices for nighttime shots. If you attempt this, make sure to position your flash units off-axis to the camera lens."
Weight becomes a consideration when you’ll be hauling it up a mountainside, across streams, or through miles of meadow and prairies. You should consider purchasing a lightweight and sturdy tripod. Carbon fiber tripods are excellent for this use. You may be able to get by with a monopod instead of a tripod.
Although I prefer prime lenses, you may wish to consider using a zoom lens. That way you can carry one or two, rather than a number of lenses.
Several other tips for fieldwork include-
- Carry some plastic garbage bags to cover your gear should it start to rain.
- Carry a cell phone, GPS, AND a handheld compass in case you get lost.
- Let someone know where you’re going, how long you’ll be there, and when you plan to return.
Let’s enjoy some existing images and see what we can learn from them!
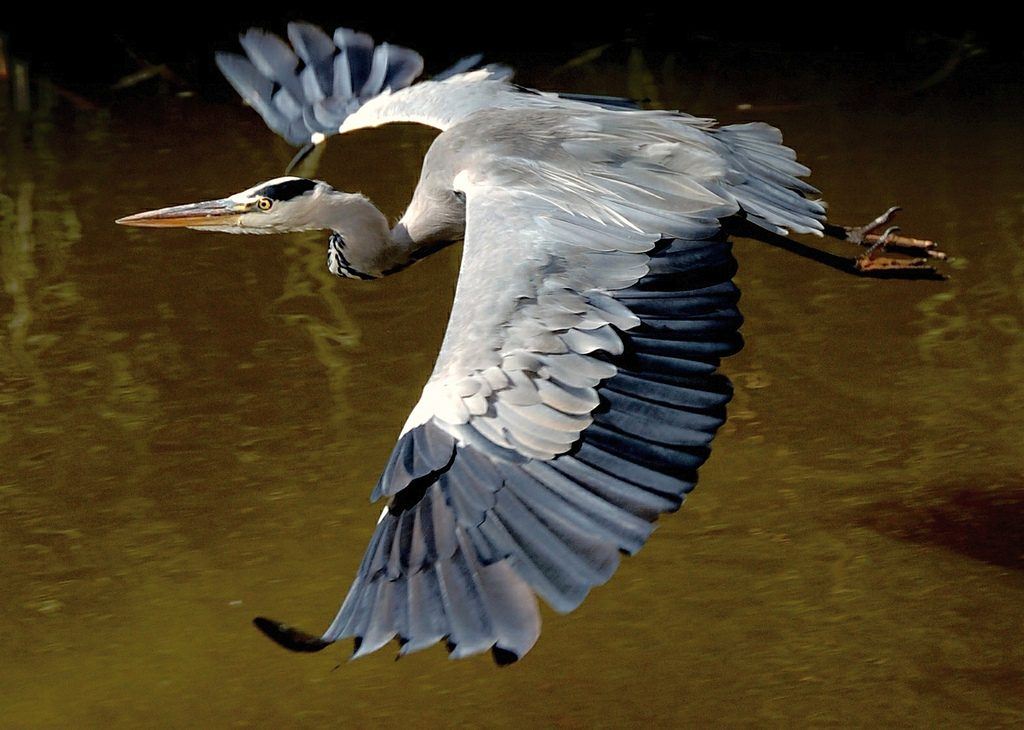
Photo by blinkingidiot

Photo by Bruce McKay
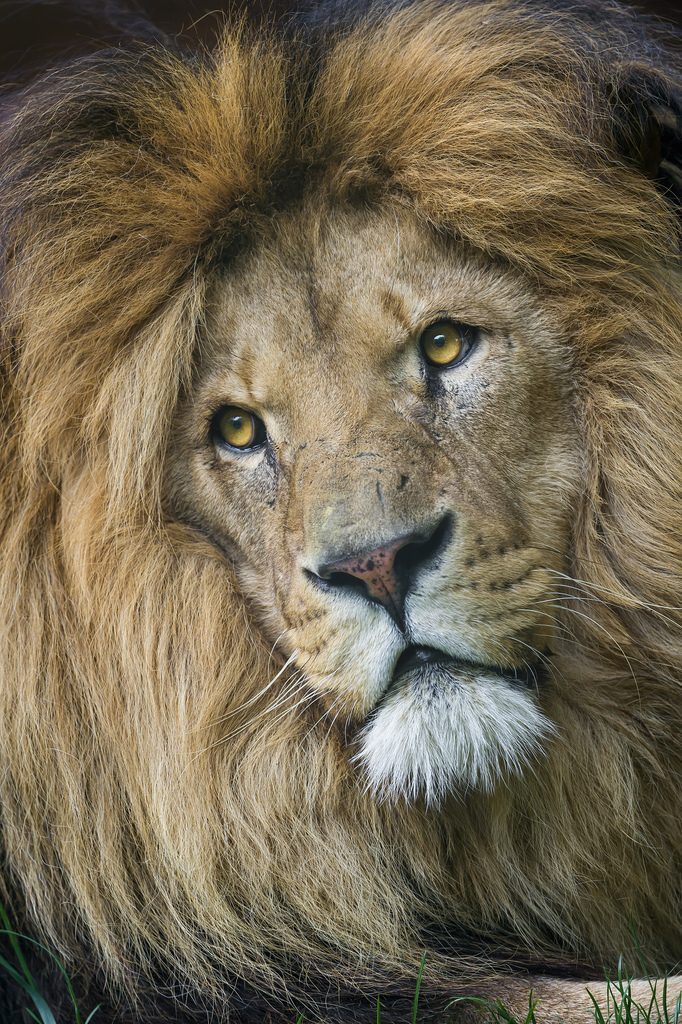
Photo by Tambako

Photo by Jan Tik

Photo by Vinoth Chandar
This is a beautifully executed photograph that any photographer from Serious to the Hopeful could achieve.
What made this image work?
- Center Spot Metering – Anything else and the fawn would have been too dark.
- Focus On The Eyes – The eyes, face, and ears of an animal are the most interesting points. Always focus on the eyes!
- Sharpness – Make sure that your shutter speed is high enough that you don’t get camera shake in your excitement, or subject blur should the animal move.
I hope you’ve found some helpful tips in this Quick Guide, and good luck in your wildlife adventures.


