

In these days of digital photography, filters are not as widely used as they were when everyone shot on film. These days, a lot of functions can be replicated by editing programs such as Photoshop and Lightroom. However, some filters are still incredibly useful and one of these is the polarizing filter.
In this guide, I’m going to explain polarizing filters to you and show you why they’re such a useful piece of kit. Let’s look at what we’re going to cover:
- What is the polarization of light?
- What is the difference between a linear and circular polarizer?
- How do you use a polarizing filter?
- When to use a polarizing filter.
- Potential polarizing problems.
Recommended Reading: If you’d like to learn more and improve your landscape photography, grab a copy of Photzy’s bestselling premium guide: Complete Landscape Photography.
What Is Polarization?
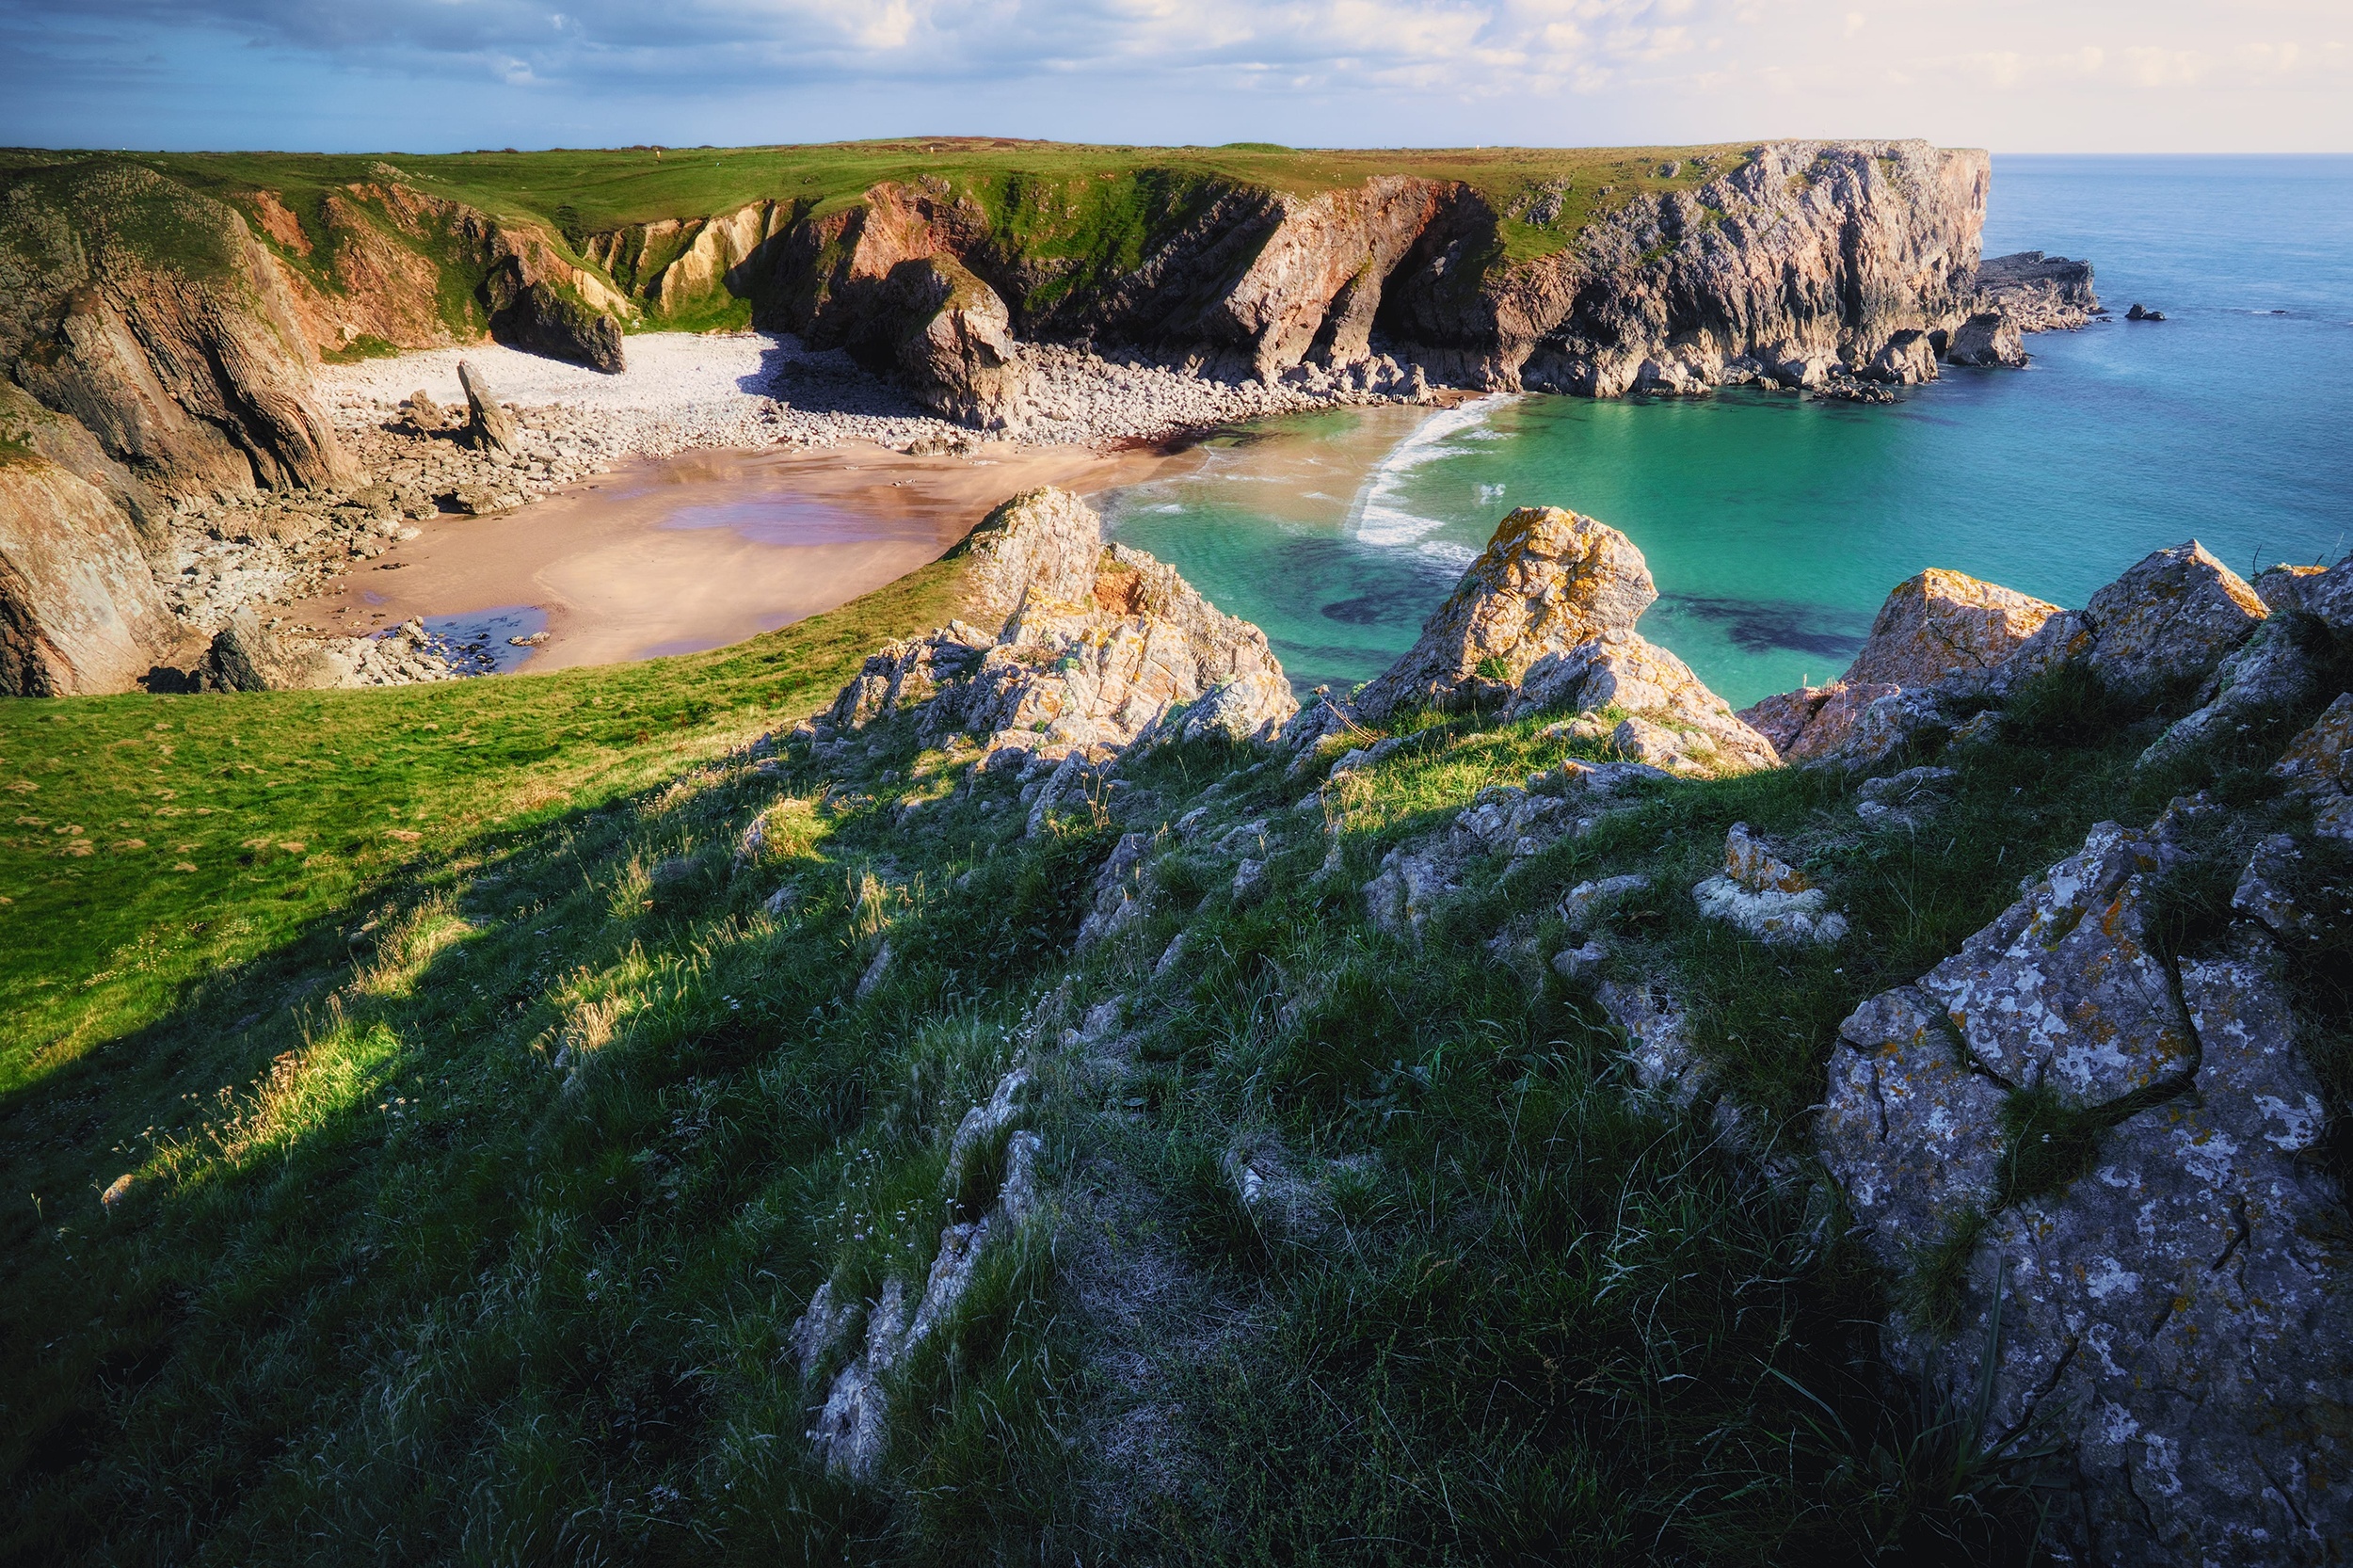
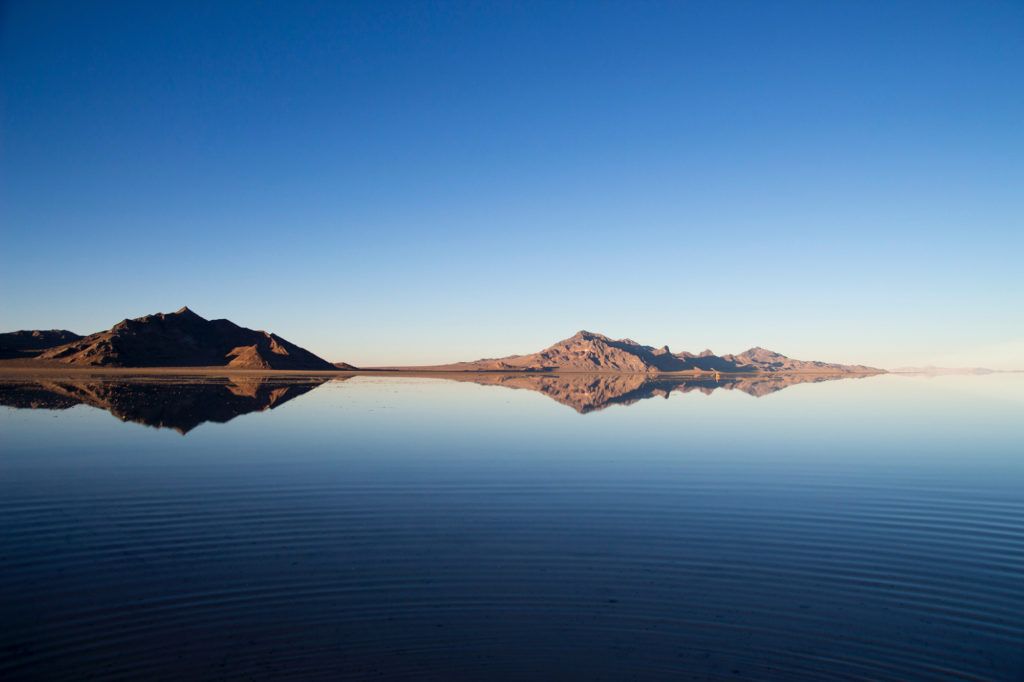
When people think about a polarized photograph, they usually associate it with the deep blue sky seen in this landscape shot. Photograph by Andrew H
Polarization refers to the behavior of light waves hitting your lens and essentially means that light is oriented in one predictable direction. Polarizing filters are specially adapted pieces of glass that reduce glare from reflected surfaces when turned at an angle to a light source. In simple terms, they change the direction that the light is polarized.
Don’t worry if this all sounds technical – I will explain how to use the polarizer in real-world terms as we go along!
What Is the Difference Between a Linear and Circular Polarizer?
Just to confuse you further, there are two types of polarizers available: linear and circular. Linear polarizers consist of two elements that can be twisted to alter the direction of light waves: one angle will allow the passage of horizontal waves, whilst rotating the polarizer by 90 degrees will only allow vertical waves. This is ideal for situations when you want to suppress one direction of light more than others: for example, you can reduce the amount of reflection from a mirror or water easily, as one direction of light will be stronger than others.
A circular polarizer takes the linear polarization and adds a quarter-wave plate (stuck to the back of the linear polarizer) with a specific orientation so that light from the quarter-wave plate is circularly polarized. You’ll find that most polarizers on the market are circular, and you might be wondering why this is. It’s actually down to the cameras that have been on the market for many years. SLRs and DSLRs have a partially reflecting mirror in them and this partial reflection can cause metering errors when you use a linear polarizer. A circular polarizer eliminates these issues and, even if your camera doesn’t need one, you can still use it!
What Is the Difference Between a Linear and Circular Polarizer?
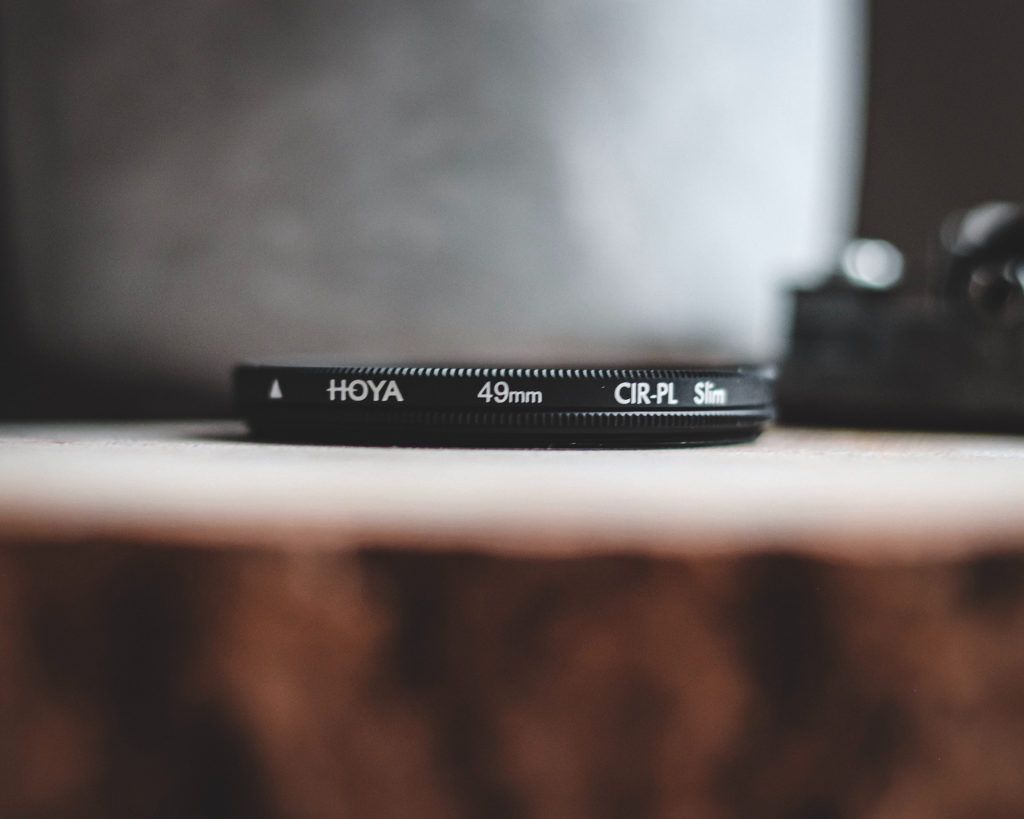
Hoya’s Circular Polarizers are a great option when you’re starting with filters. Photograph by Scott Gummerson
Firstly, a quick note on choosing a polarizing filter. As I noted above, most polarizers are circular and the easiest kind to use are screw-in filters that attach directly to the filter thread on the front of your lens. Make sure you note the filter size for the lens you want to use the filter on and buy accordingly! The number will be written in millimeters, usually on the back of your lens cap (e.g. 77mm). Circular polarizers are not cheap filters, due to the rotating elements, and you’ll find that they get more expensive the bigger the lens filter thread. There are numerous manufacturers making filters – a good mid-price option is those made by Hoya.
Key Lesson: Most people will be using a circular polarizer, and using it is easy – you simply rotate the front element of the filter until the adjustment is to your liking. However, it’s useful to remember that polarizing filters are at their most effective when your lens is pointed at 90 degrees away from your light source. A quick tip to find this spot is to form a letter L with your hand, pointing your thumb at the light. A polarizer will have maximum effect where your finger is pointed.
When to Use a Polarizing Filter
Polarizing filters have several functions. Let’s look into them individually.
Reflections
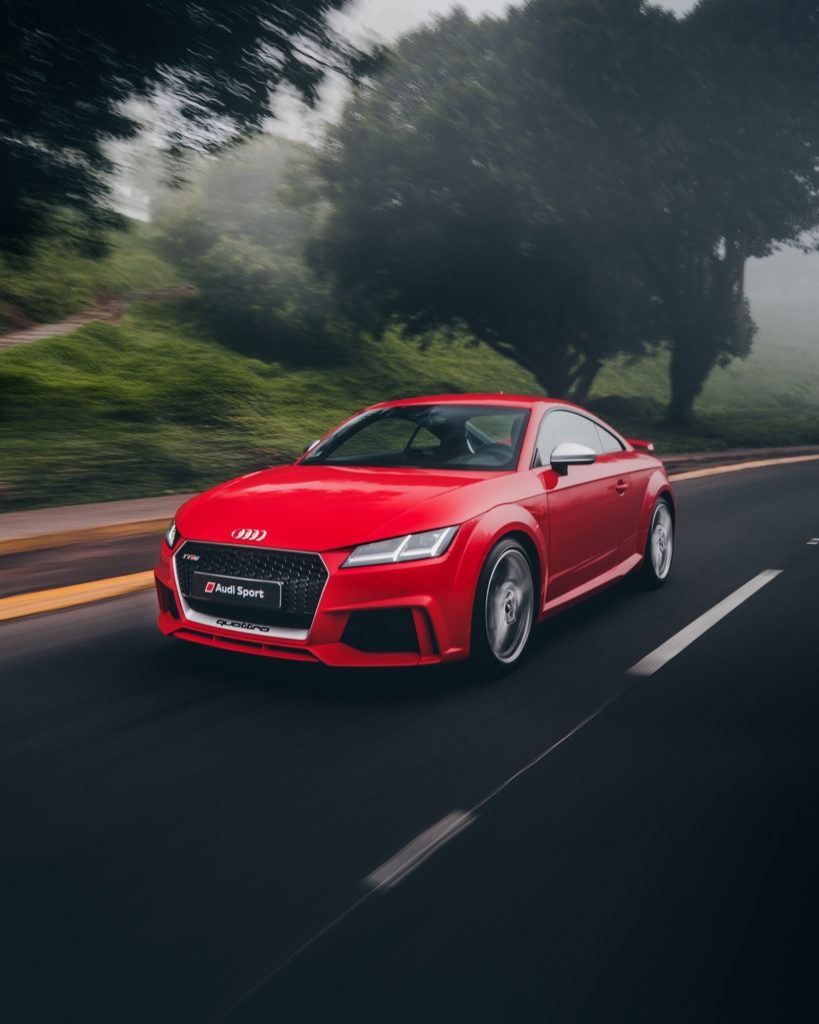
Polarizers are often used to cut out the glare and reflection from glass and shiny surfaces and are extremely popular for car photographers. Photograph by Eduardo Flores
One of the most useful functions of a polarizing filter is its ability to cut out reflections. Photographing reflective surfaces such as windows or shiny cars suddenly becomes far easier with a polarizer, as you can cut out the glare and unwanted reflections.
Make sure you note the filter size for the lens you want to use the filter on and buy accordingly!
But in addition to completely cutting out reflections, you can also use a polarizer to manipulate reflections. A polarizer gives you the option of keeping some of the reflections in your image and reducing the impact of others. It does take a little practice, but there is a wealth of creative opportunities available here.
Color
When most people think of the effect of a polarizer, we associate it with enhancing the blue color of the sky. A polarizer can’t make a dull gray sky blue, but it can turn a light blue sky into a far darker blue, with a lot more impact. Similarly, you can use your polarizer to make the water look bluer (and clearer and less murky by reducing reflections). You will also find that a polarizer can make other colors look more vibrant (foliage on trees, for example). This usually happens when you’re shooting in areas with a lot of moisture in the air (near water being the classic example). This moisture actually creates small reflections, so using a polarizer will reduce these reflections and add a natural saturation to your images.
Haze
As well as controlling your reflections and enhancing the colors in the sky and water, the polarizing filter used in this shot has also removed any trace of haze in the air. Photograph by Daniel Bowman
Have you ever woken up early to photograph sunrise and then been hugely disappointed by your results? The chances are that this will be down to an early morning haze on your images, which can wash out the colors and make photographs look flat. But did you know that haze is essentially just moisture and particles in the air that reflect light? A polarizing filter again allows you to remove these reflections and produce an image with vivid and saturated colors.
Potential Polarizing Problems
When using wide-angle lenses with a polarizer, photographs can be prone to vignetting and darker patches of sky. Photograph by Alexander Hörl
You will need to take a little extra care if you’re shooting with a wide-angle lens. Firstly, as the sky’s polarization isn’t even, you will notice a change in the blue color the further it is from the sun. This can lead to a slightly unnatural look. Also, vignetting in the corners of your images can be a problem with wide-angle lenses. There are two ways to fix this. You can simply crop the image in an editing program! However, if you want to be able to print as a shot, the only way to avoid vignetting is to use a filter larger than the diameter of your lens, which you can then attach via a simple adapter.
Key Lesson: Polarizing filters also reduce your exposure by 1-2 stops, meaning that you must take care to compensate for this. As polarizers are commonly used in bright sunlight, it’s often easier to just use a faster shutter speed to compensate. If this isn’t possible (and your aperture is fixed due to the depth of field you want), you can raise your ISO to compensate.
Recommended Reading: If you’d like to learn more and improve your landscape photography, grab a copy of Photzy’s bestselling premium guide: Complete Landscape Photography.
Be aware that you need to adjust the white balance on your camera manually when using a polarizing filter. The AWB setting (auto white balance) is usually pretty reliable and people often leave their white balance on Auto for ease of use. However, the polarizing filter can confuse your camera’s white balance because it’s a darker filter. It’s best to manually set your white balance to Daylight so that your camera knows what it’s shooting and what result you’re expecting.
Personally, I also think that you can go ‘too far’ with polarization and you will sometimes see photographs with an unnaturally blue sky. It’s up to the photographer, obviously, but I think it’s important to make sure photographs don’t look completely unnatural!
Conclusion
I hope this guide has encouraged you all to go out and invest in a polarizing filter. They may not be the cheapest filters, but the results you get from them will make it well worth the investment. This is particularly true if you’re a keen landscape photographer. Besides, you really can’t replicate the effects of a polarizer in Photoshop or Lightroom. Once you’ve started using a polarizing filter, you’ll wonder how you ever coped without it!
- If you use a DSLR, which type of polarizer must you use?
- Where on your lens can you find the filter thread size?
- At what angle are polarizing filters most effective?
- Name the three main functions of a polarizing filter.
- What effect does a polarizing filter have on your exposure?
- What setting should you change your white balance to when using a polarizer?


