Everyone’s jumping on the Artificial Intelligence (AI) bandwagon lately, and Adobe does not want Lightroom to be left behind. As such, they are adding AI-driven features that are useful and, in some cases, quite astounding!
Here is what you will learn:
- AI-powered denoise
- AI masking features
- Curves control for masking
- Edit tool identification once used
- Edit in Photoshop option improvements
Not all of the newest features are not driven by Artificial Intelligence, but the most significant ones are. In this guide, we’ll introduce you to these new and updated features.
Key Lesson: Take your time to read through this guide and then experiment with each of the new features while the information is fresh in your mind. The sooner you practice using each of them, the more smoothly you’ll transition them into your regular Lightroom workflow.
Recommended Reading: If you want to learn how to enhance your photos and create better images, grab a copy of Photzy’s premium guide: Ultimate Guide to Fundamental Editing.
Denoise With the Power of AI in Lightroom
Even with the incredible advancements in digital camera sensor technology, noise is still a frustration when pushing ISO settings to the outer limits. As new cameras drive ISO limits higher and higher, we do love the flexibility this provides us in low-light situations. It’s great to leverage a higher ISO setting to enable one or two more stops of shutter speed or aperture.
It’s great to leverage a higher ISO setting to enable one or two more stops of shutter speed or aperture.
I love that ISO capabilities have improved over time to produce higher-quality images. I also love that the denoise functions in Lightroom and Photoshop have improved progressively. It’s great to know that I can utilize this software function to clean up images containing excessive digital noise.
In this new Lightroom release, we are treated to a serious upgrade. The new AI-powered denoise button makes it possible to denoise an image with a single click. Bayer or X-Trans RAW images have digital noise removed while preserving all the finer details. If you’re wanting to denoise images scanned from film or others that are not RAW files, then you’ll have to wait as this update does not include other file formats.
Screenshot by Kevin Landwer-Johan
Screenshot by Kevin Landwer-Johan
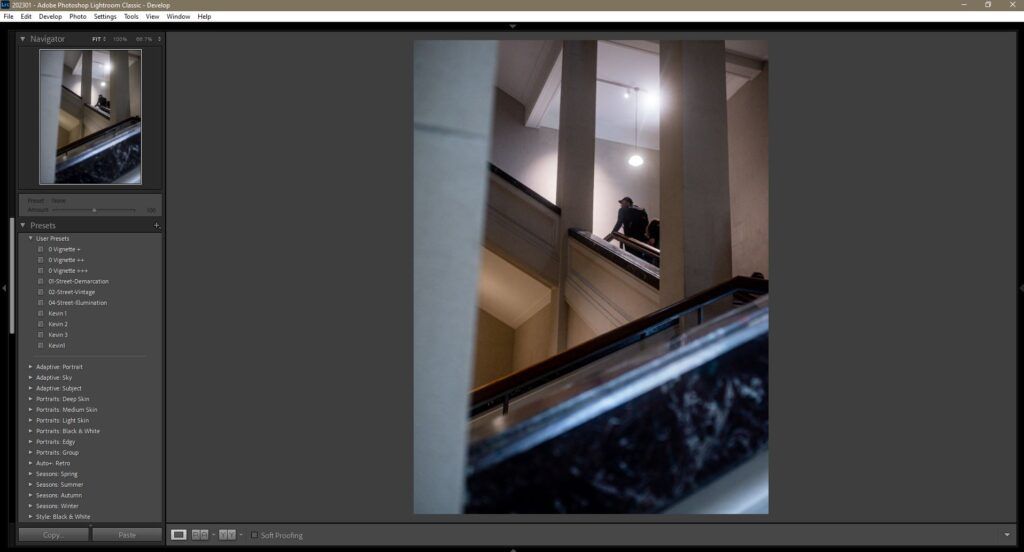
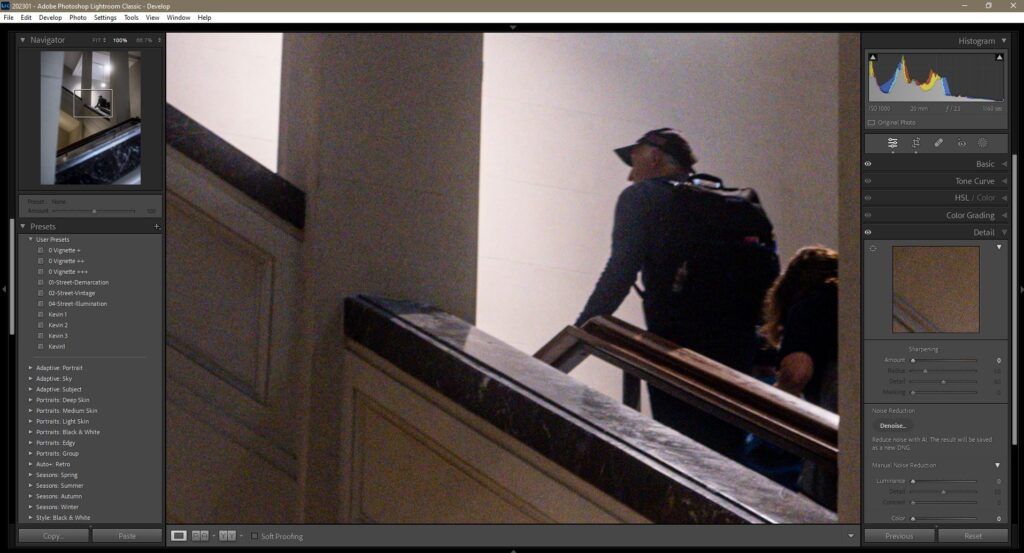
In Develop mode, click the Detail panel on the right and choose denoise. Or go to the Photo menu and select Enhance.
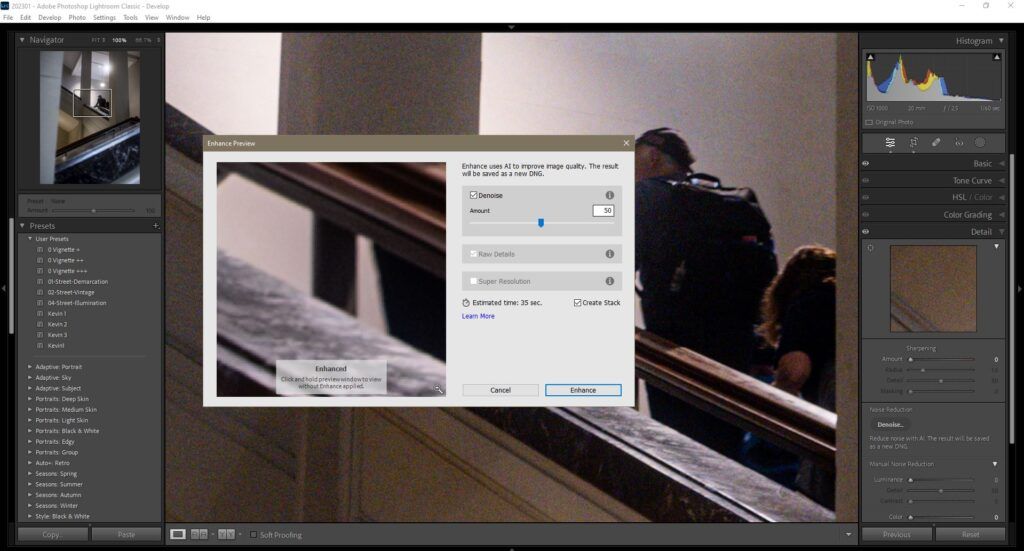
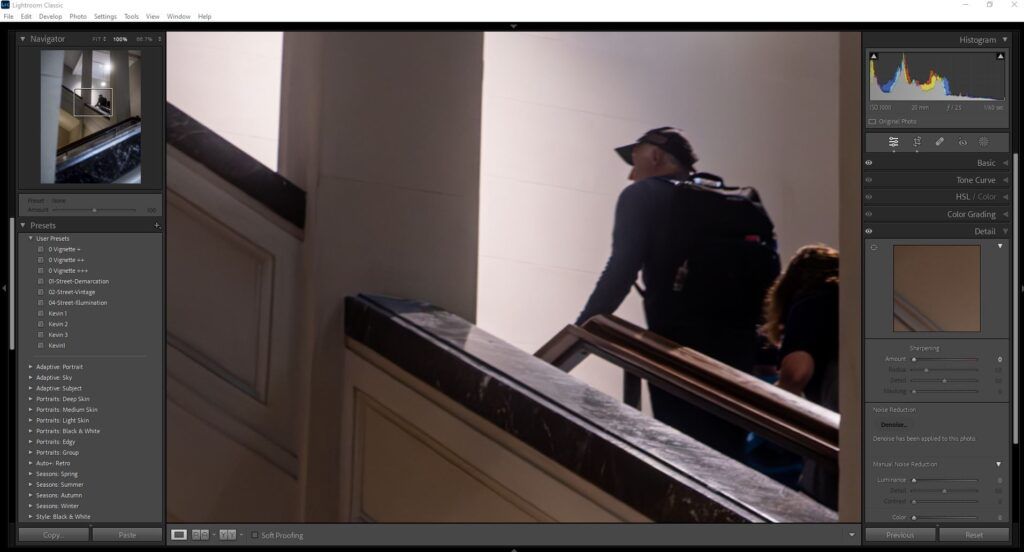
This brings up the Enhance Preview window where you have a slider to determine the level of noise reduction. Click the Enhance button and Lightroom will do its magic. Wait a short while for the clean image. Lightroom saves it as a new DNG file.
Screenshot by Kevin Landwer-Johan
Screenshot by Kevin Landwer-Johan
In the image I chose to illustrate this new feature, there’s not a lot of texture detail, so the smoothing effect that the denoise process has is more difficult to see.
Once you have denoised an image, you can’t repeat the process. Although, you can open the original image again and apply the process using different settings if you’re not satisfied with the results. The legacy noise reduction functionality is retained in Lightroom if you wish to manually denoise your images.
Key Lesson: Experiment using the new AI denoise feature. Create a Virtual Copy of your image before you start and then use the AI denoise on one of the files. Then, using the other file, see if you can get the noise levels reduced as well using the old, manual denoise tools.
Masking Features Updated
Tone curve adjustments are now possible within the masking tool environment. There’s even a targeted adjustment option with the tone curve tool. This provides you with an incredible amount of control especially when working with specific areas that need special attention.
The new masking features also include many options for masking people or particular parts of people. Select the eyebrows, facial skin, facial hair, and other details that you may want to edit separately.
Tone curve adjustments are now possible within the masking tool environment. There’s even a targeted adjustment option with the tone curve tool.
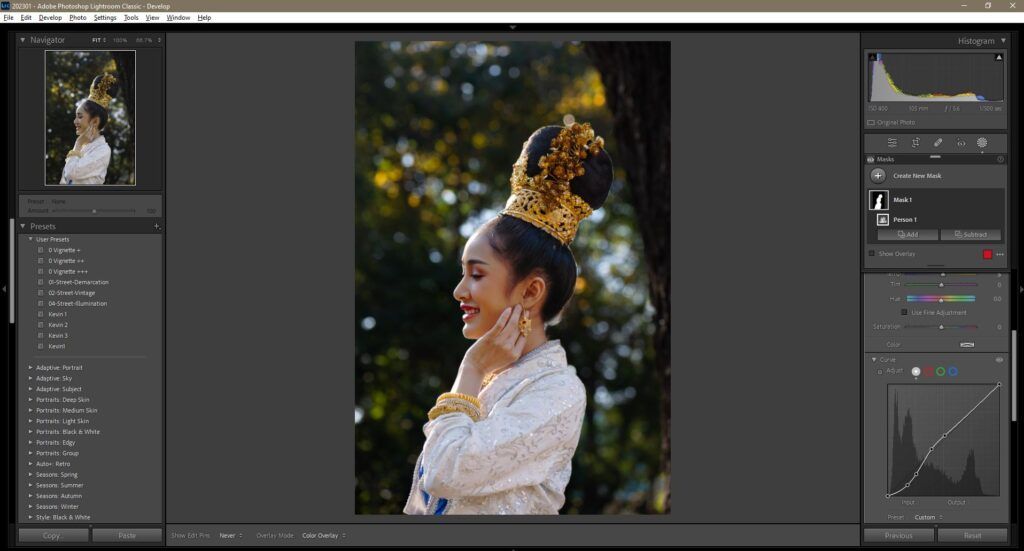
It’s possible to work with multiple masks when you want to adjust different parts of a human subject in your image.

Photograph by Kevin Landwer-Johan
In the image below, I first selected the whole person and adjusted the exposure and curves to balance the light on my model.
Screenshot by Kevin Landwer-Johan
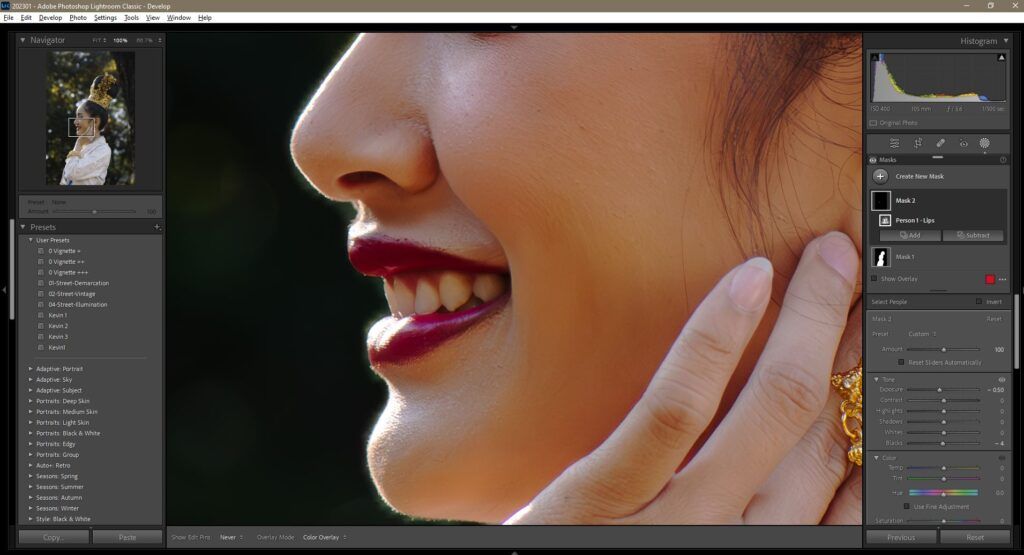
Then I selected her lips and darkened them.
Screenshot by Kevin Landwer-Johan
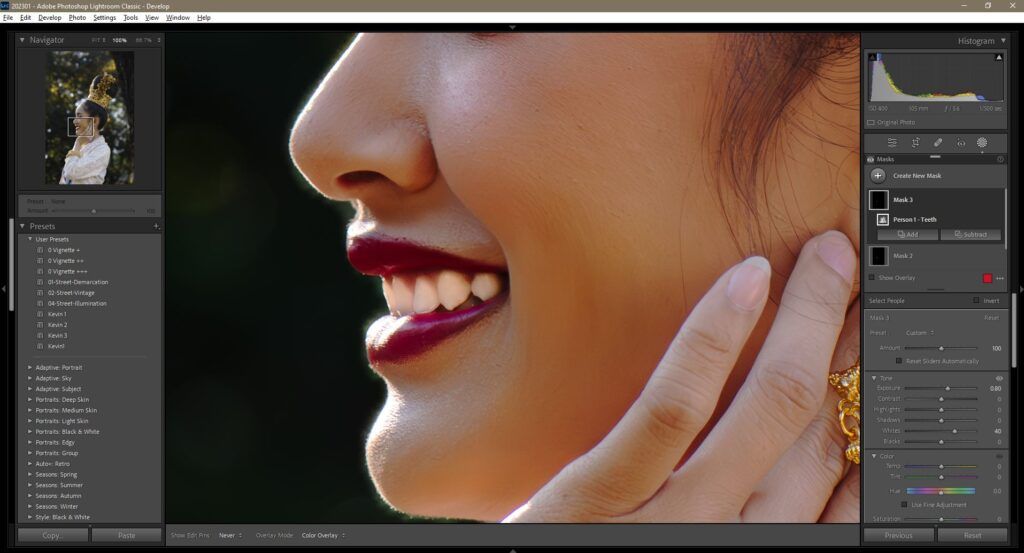
Next, I selected her teeth and brightened them slightly.
I’ve exaggerated my adjustments somewhat to make them more obvious.
Once I’d selected the whole person option, to work on the specific features I needed to use the Create New Mask option. Selecting to add to the mask I’d already created resulted in the whole mask being affected by any subsequent changes I made.
Screenshot by Kevin Landwer-Johan
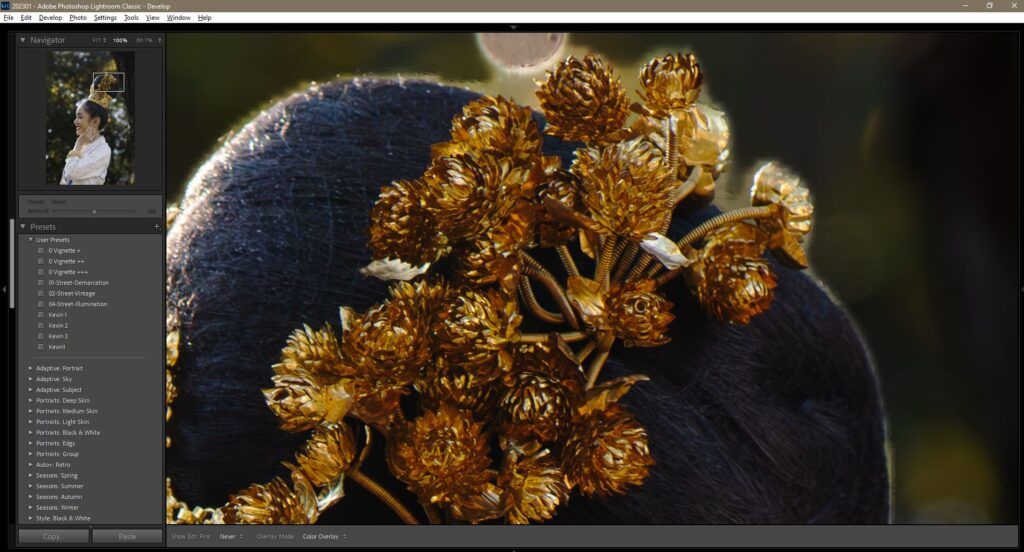
Zooming into the image you are masking is necessary to check the mask is as accurate as you like it to be. There is certainly still room for improvement. I zoomed into the detail in my model’s hair and expected it would be well-masked. The hair and adornments are sharp, and the background is well blurred. However, the mask feature has left a halo effect.
Screenshot by Kevin Landwer-Johan
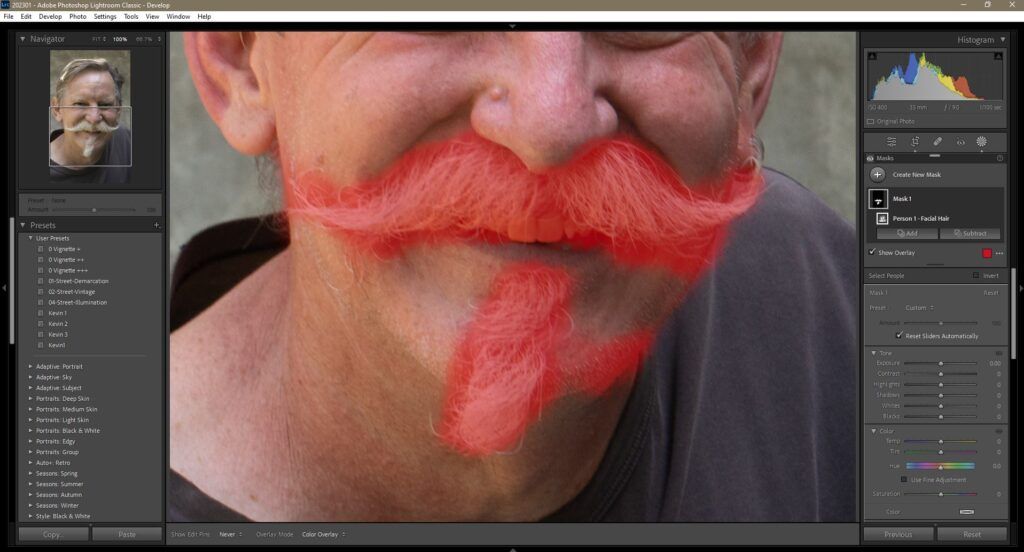
I also tested the Facial Hair mask and found that it did not do such a great job of only selecting facial hair in the image below.
Screenshot by Kevin Landwer-Johan
Key Lesson: Zoom in and view the mask selection at 100%. Do this with the mask overlay showing. Then make your edits and view the image again at 100%. Look carefully around the edges of the selection to ensure that you are adjusting only to the relevant parts of your image.
Identify Edit Tools You Have Used
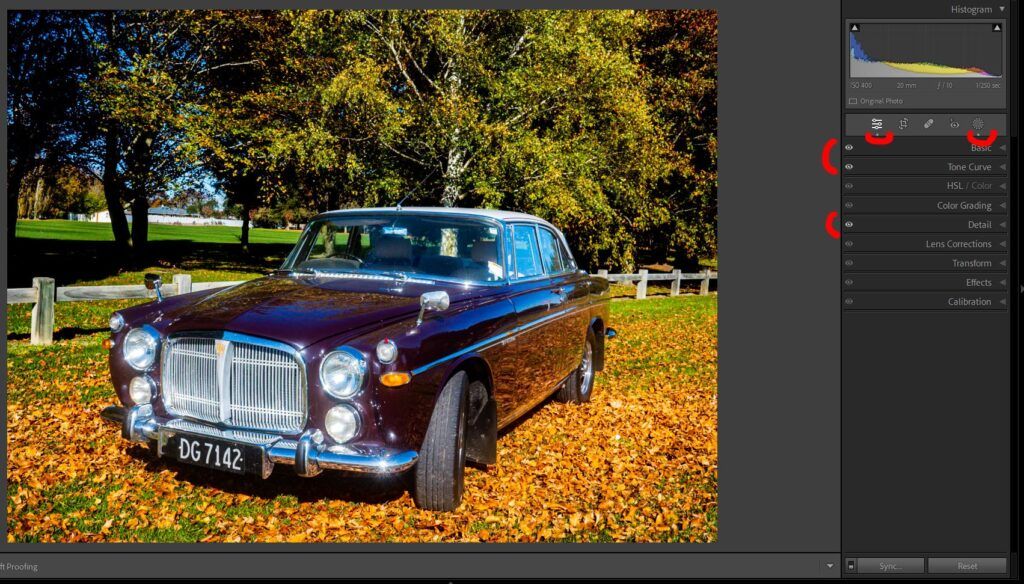
Lightroom has some handy new icons dispersed amongst the Develop Module tools. These are in the form of eyeballs and dots. As you work with a particular tool, the icons appear and/or change to show what you’ve worked on already.
This new functionality allows you to easily see which tools you’ve already used on any particular image you’re editing. Previously, to see which tools you’d used it was necessary to open each tool to check it.
Now you can simply keep track of edits and tools by viewing the status of the eye indicator. In the Develop module, the eye has been added to all of the Edit panels, along with the Healing, Red Eye, and Masking tools. Pressing and holding the eye temporarily hides the settings of that panel.
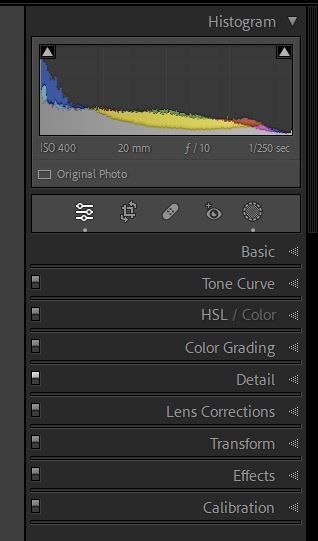
You can see from the dots under the icons in this example that I have adjusted the image using the Edit tools and Masks. Also notice the illuminated eyes on the Basic, Tone Curve, and Detail panels. These indicate that I have adjusted in each of them.
Screenshot by Kevin Landwer-Johan
As you make edits, the eyeball changes from dark to light on whichever panel you use. A dot appears on the tools strip under each of the tools you have used. Holding the Alt key on a PC, or the Option key on a Mac changes the icon from the eye to a switch. You can then turn any panel off and on again using this switch. This is helpful as it allows you to clearly see the effect of the edits you make.
Screenshot by Kevin Landwer-Johan
Edit in Photoshop
I often like to transition my editing workflow from Lightroom to Photoshop to perform specific edits. This is most helpful when I need to introduce new layers to work on. This was possible in previous versions of Lightroom, but now more options are available.
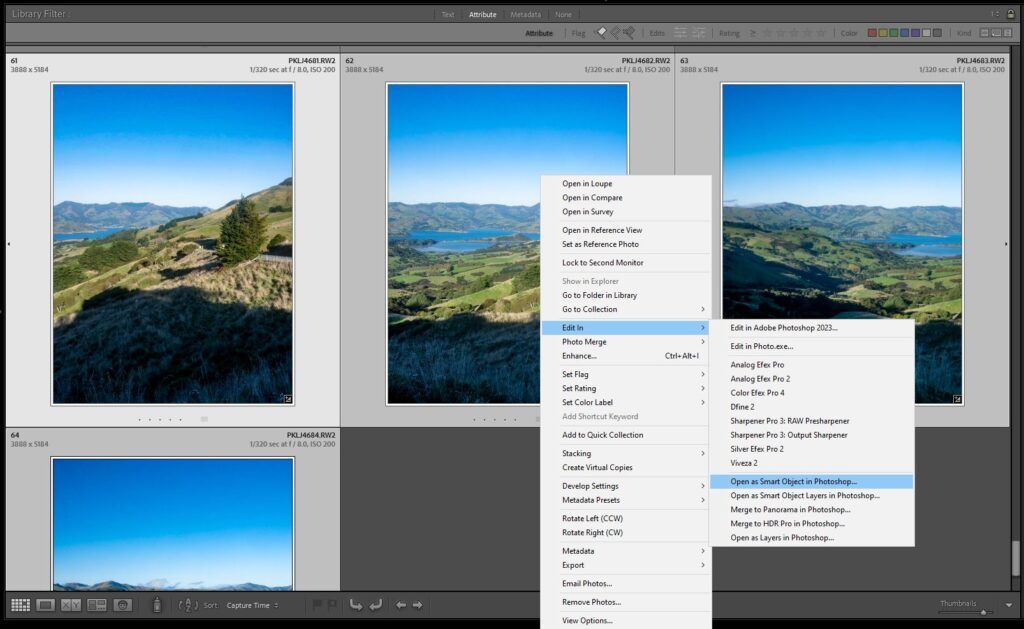
You can choose how you want your image to open in Photoshop. You can open any image in its current format or open it as a Smart Object. When you have more than one image selected in Lightroom you can choose to edit them as the following:
- Layers in Photoshop
- Open as Smart Object Layers
- Merge to Panorama in Photoshop
- Merge to HDR in Photoshop
Depending on other software you may have installed on your computer, there may also be other options for opening and editing your images.
Screenshot by Kevin Landwer-Johan
Other Enhancements
This version of Lightroom includes a variety of other minor enhancements.
Scrolling performance when in Library mode is now better than before. Mask names are now added to the History steps. New adaptive presets have been added to the Portrait group. There are also updated embedded browser frameworks for Map and Web modules.
As always, new camera and lens profiles are included with this update.
How to Update Lightroom
In your current version of Lightroom, go to the Help menu and click ‘Updates.’ This opens the Creative Cloud desktop application where you’ll see the appropriate button for updating.
Conclusion
It’s always exciting to install an updated version of Lightroom. As always, it will take some time to experiment, practice, and possibly make some workflow tweaks. The more you work with the new features, the more familiar you will become, and the more your skills will improve.
I always like to give myself time to play around. I’ll generally choose some new images to work on first. Then I’ll revisit a few older ones I’ve already edited and work on them again using the new features. I find this helps me develop a feeling for the new features naturally.

Photograph by Kevin Landwer-Johan
Recommended Reading: If you want to learn how to enhance your photos and create better images, grab a copy of Photzy’s premium guide: Ultimate Guide to Fundamental Editing.
- Are all the new Lightroom features AI-driven?
- Is the new denoise feature available for all image file formats?
- How can you compare the new denoise feature with the old denoise tools?
- Name one major addition to the Mask features in Lightroom.
- Why is it important to check the masked areas around the edges?
- What type of icon is now used to indicate when you have used an editing tool?
- How has the Edit in Photoshop feature been improved?


