

Have you ever sat and watched a storm in the distance, admiring the shapes and textures in the clouds as they roll past? Or enjoyed watching a cinematic lightning show while thunder rolled and growled? Or maybe like me, you’ve been in awe of some of the amazing storm images you’ve seen and wanted to capture something similar.
I’ve had a passing interest in storms and storm chasing for many years, in large part because I love the shapes and textures of storm clouds. Storm chasing was not something I prioritized, though, as family obligations meant I didn’t have the freedom to drop everything and join the storm chasers in my photography circle on short notice. As time has passed and the demands on my time have shifted, I’ve found that my interest has grown. Unfortunately, my chaser friends are no longer chasing consistently.
Photograph by Lisa Cannon
This is where social media comes into play. I follow multiple photo accounts on Twitter, including several storm chasers. I happened to like a storm cloud photo from a photographer I’d never heard of, and he responded to me. We had a short tweet exchange and connected over direct messaging to chat about the storm chasing that he had done and our shared interest in photography. We stayed in touch and have formed a close relationship since, and last summer I was able to join him on my first real storm chase.
In this guide, I’ll walk you through what I learned about chasing and capturing images throughout the storm and share some images I captured and crossed off my photographic bucket list.
Here’s what we will cover:
- Safety
- Terminology
- Useful apps, tools, and resources
- Determining favorable conditions
- Gear to pack
- What to shoot
- Shooting and editing the images
Recommended Reading: If you’d like to succeed in creating stunning outdoor shots even in bad weather, check out Photzy’s Producing Top Photography In Bad Weather premium guide.
Safety
Probably the most important thing I learned is that without question, safety comes first. Storms develop and change very quickly, and you don’t want to find yourself caught in the path of dangerous weather. There is a fair amount of information that chasers keep track of while on the move to help them have a safe and successful chase, including storm direction, wind speeds, lightning strikes, and precipitation.
A great way to monitor all of that is to have multiple experienced people working together, whether in person in a chase group and/or by keeping in touch over the phone or by text. Using hands-free calling or recruiting a passenger to help are excellent ways to avoid distracted driving. This can also include staying in contact with other chasers who are in different areas of the same storm, or even on different storms that may be in the same area. The more information you have about the behavior and movement of a storm and the weather in general, the better the chances are of staying safe and being successful. And if you’re lucky like I was, you may even find a meteorologist in your chase group!
Storms develop and change very quickly, and you don’t want to find yourself caught in the path of dangerous weather.
There are a few other points I want to highlight in regards to safety. Do not chase storms by yourself. Remember to situate yourself out of the immediate path of the storm. Some of the best images can come from the backside of the storm system anyway, so it’s a win-win. Having said that, storms move and change quickly, so be sure you have more than one way out of the area you are in. If the worst should happen and you do find yourself in the path of hail or, especially, a tornado, do not stop and seek shelter under an overpass. This not only leads to hazardous traffic situations with poor visibility but can create a more dangerous situation if a tornado should pass by. High-speed flying debris can be blown under the overpass and cause serious injuries, or even death, and the relatively small space under an overpass could increase the wind speed. I have provided a link to a good article on this issue at the end of the guide for more information.
Key Lesson: I think the thing I have heard most from the storm chasers I have interacted with is to always be safe first. Remember there is safety in numbers, and avoid chasing by yourself especially if you are new to it. No image is ever worth your safety, or your life.
Terminology
The terminology used in storm chasing could easily be a guide in and of itself. I will just stick to what I’ve learned. There are lots of online resources you can look to if you’d like to do a deeper dive on the topic, and I’ve included two links at the end of this guide if you’re interested.
Here is a shortlist of terms I’ve learned:
Anvil – this refers to the anvil-shaped top of a thunderstorm
CG – Cloud to Ground lightning
Convection – the process of warm air rising and taking available moisture with it, thus building clouds
Funnel cloud – a rotating, funnel-shaped cloud that forms under a storm, but doesn’t touch the ground
Hail core – the area of the storm that is producing hail
Mammatus. Photograph by Max Pixel
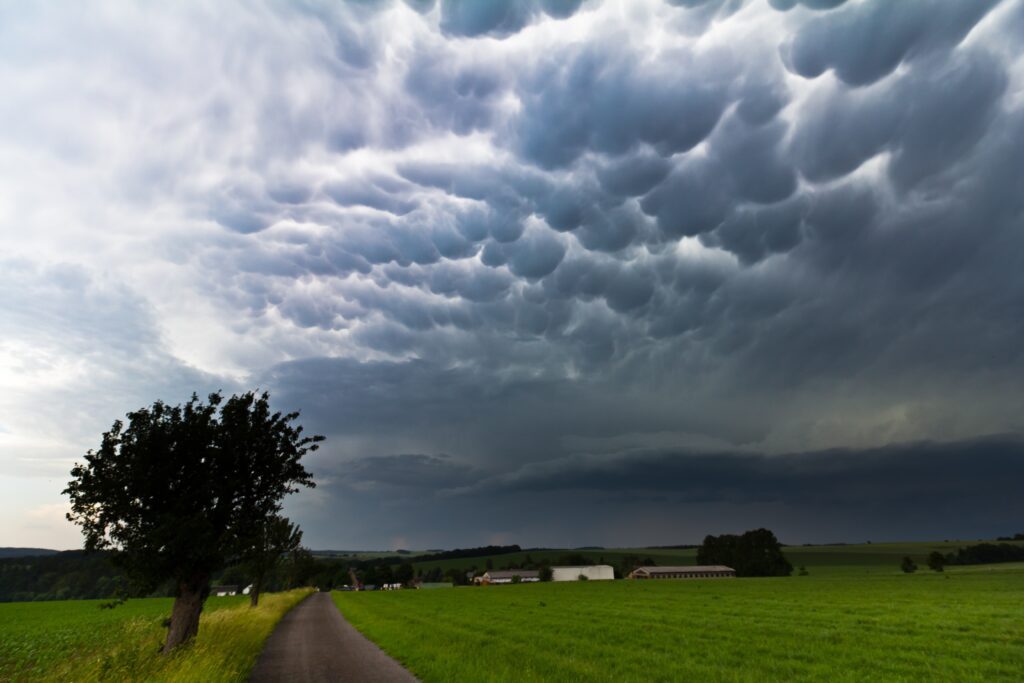
Mammatus – smooth, round protrusions on the undersides of clouds
Shelf cloud. Photograph by Raychel Sanner
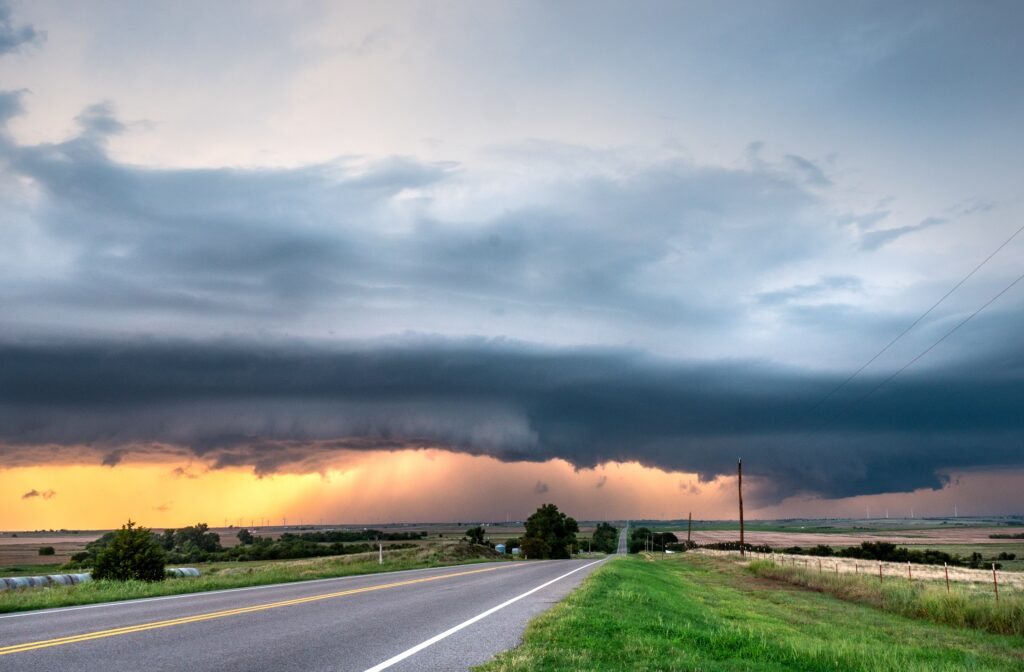
Shelf cloud – low wedge-shaped horizontal clouds on the leading edge of a storm
Supercells – the most common type of storm cell, and the most likely to produce tornadoes
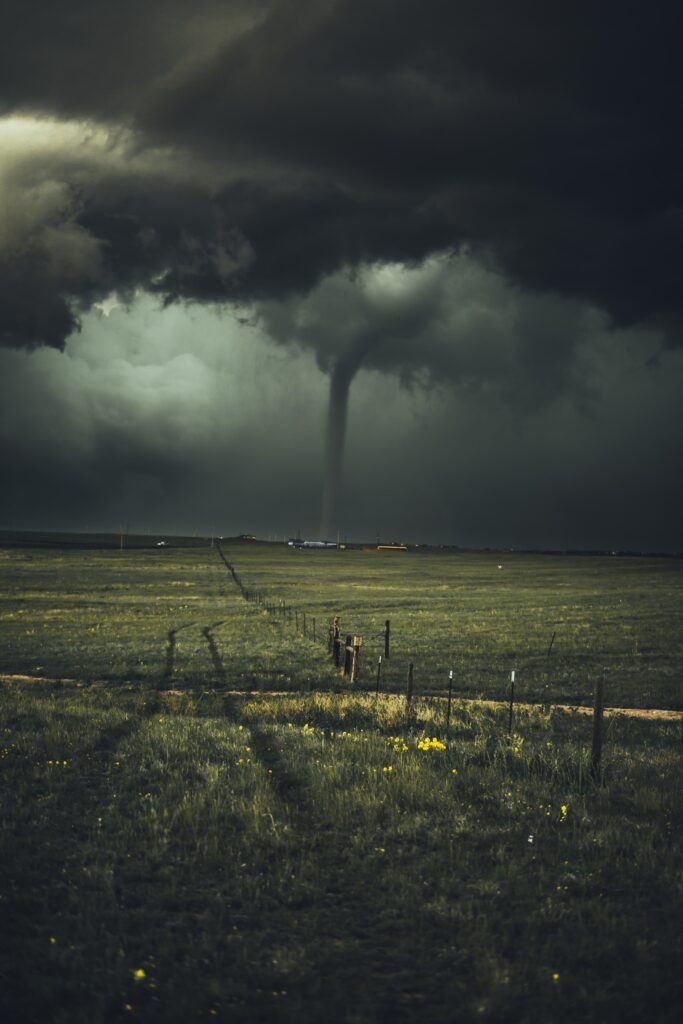
Tornado. Photograph by Nikolas Noona
Tornado – a mobilized vortex of rotating winds, often funnel-shaped
Updraft – moist, warm air moving upward
Key Lesson: These terms are ones that I have heard and learned from storm chasers, but many others apply to storms and this type of weather. I highly encourage you to explore and learn some of the terminologies as I believe it can result in better communication, which can then lead to better images and help keep you safe.
Useful Apps
I have been quite satisfied using a national weather app for all the information I need to stay informed every day. When it comes to storm chasing, however, there is a greater need for more and more specific information. These are the apps my partner depends on, and a quick summary of what they are used for. All are available for download in both the Apple App and Google Play stores. I have added links at the end of the guide.
Radarscope – shows high-level radar data, and tornado, severe thunderstorm, flash flood, and Special Marine warnings throughout several countries including Canada and the US
Windy – gives information from leading forecasting models, offers 40 weather maps, and includes wind, rain, temperature, and pressure information
Weather Network – an app version of the mainstream weather service
My Lightning Tracker – shows lightning strike location information close to real-time
My partner also relies on two other apps: one for local emergency services to provide information about immediate disasters, including their locations, for the Canadian province we live in, and one for a mainstream Canadian news network for local information. Please find similar apps that cover your area.
Key Lesson: More detailed information is vital for safety and success, and there are many apps available for your phone that can provide what you need.
Determining Favorable Conditions
I, admittedly, don’t yet have much understanding of how to determine when the best time to head out on a chase is. One of the things you notice when you spend time with an experienced chaser is that they are constantly watching the weather and the data, looking for the next opportunity to go out and chase. While my partner does share bits and pieces of that information with me, my limited knowledge means he doesn’t share in great detail, and I may not understand all of what he does share. And because I don’t live in the same area as he does, sharing detailed information with me daily simply doesn’t make sense. This is one topic that I hope to continue to learn about so that I can play a more active role in our future chases.
One of the things you notice when you spend time with an experienced chaser is that they are constantly watching the weather and the data, looking for the next opportunity to go out and chase.
What I have picked up is fairly basic. Check your local weather for storms in the forecast, watch the radar to see the cloud data that will indicate rain and hail, and be alert for thunderstorm watches and warnings in your area.
Key Lesson: For more detailed information, find experienced storm chasing groups in your area to join and stay in communication with. When you get the signal that it’s time to head out, meet up with the group, follow their lead and instructions, and keep your eyes on the skies as well as the road. Enjoy the thrill that I find chasing storms and creating dramatic images most definitely provides.
Recommended Reading: If you’d like to succeed in creating stunning outdoor shots even in bad weather, check out Photzy’s Producing Top Photography In Bad Weather premium guide.
Gear to Pack
Key Lesson: Storm chasing does not have to require specialized gear.
You probably have everything you need to shoot during a storm chase in your camera bag right now. I shot with my trusty Canon 7D Mark II and switched between my Canon 24-70mm f/2.8L EF USM lens and my Tokina 11-16mm f2.8 (IF) DX lens. I have also seen storm photos taken with longer lenses to capture more close-up views of the action while maintaining a safe distance or focusing on specific details within the storm system. As with most aspects of photography, I don’t believe there is a right or wrong choice – it just comes down to personal style and preference.
The only piece of gear I would say you will most likely want on hand is a sturdy tripod to allow you to shoot in low lighting conditions. You can shoot handheld, but it will be more difficult anytime the lighting drops. And don’t forget that you will not be able to shoot after dark without a tripod, and that is when you can capture some amazing lightning.
Photograph by Lisa Cannon
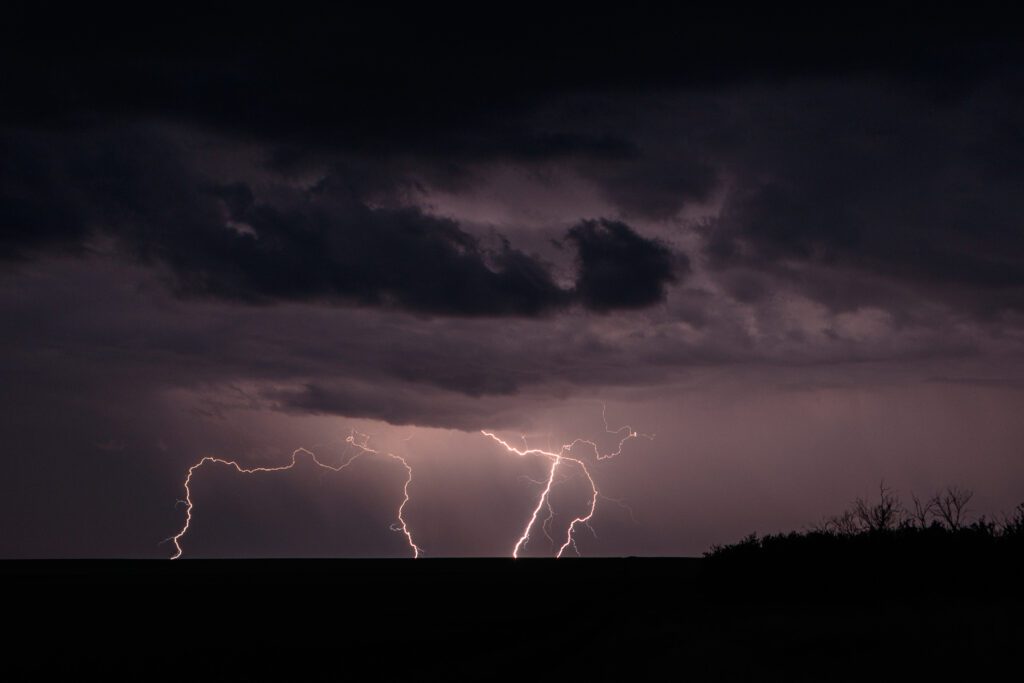
If you’re trying to capture daytime lightning, then a neutral density, or ND, the filter will come in handy as it will allow you to shoot longer exposures and increase your chances of catching lightning strikes while your shutter is open. You can fire your camera manually and take shot after shot, or use an intervalometer to shoot frames continuously; that’s what I did using the one built into my camera. Alternatively, if your budget allows, you can invest in a lightning trigger. These devices mount on your hot shoe and will trigger the camera for you only when it senses a lightning strike, thereby eliminating the need to keep your shutter open for long periods.
Photograph by Lisa Cannon
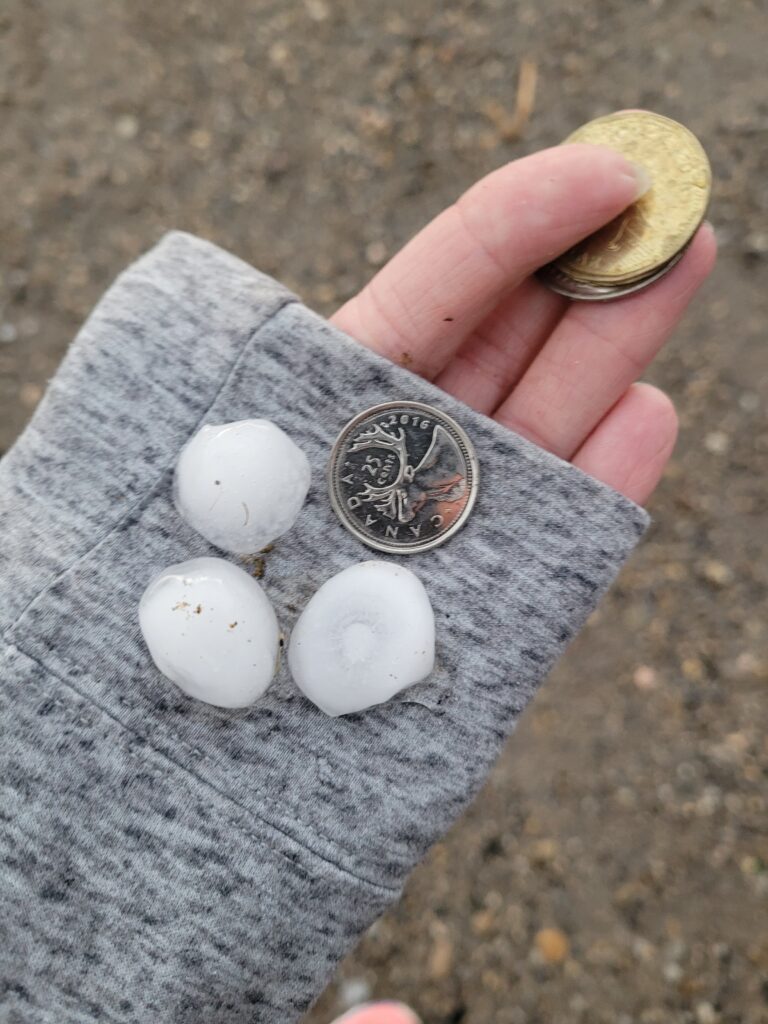
Finally, there is the set of gear I hadn’t even thought of, including a collection of everyday objects that are used as a comparison to measure the size of hailstones. Have you ever heard descriptions like “dime-sized hail” or “golf ball-sized hail” in weather or news reports? I hadn’t considered those storm chasers carrying these actual items to make their comparisons. The common items I encountered were a set of coins and balls of various sizes.
What to Shoot
Photograph by Lisa Cannon
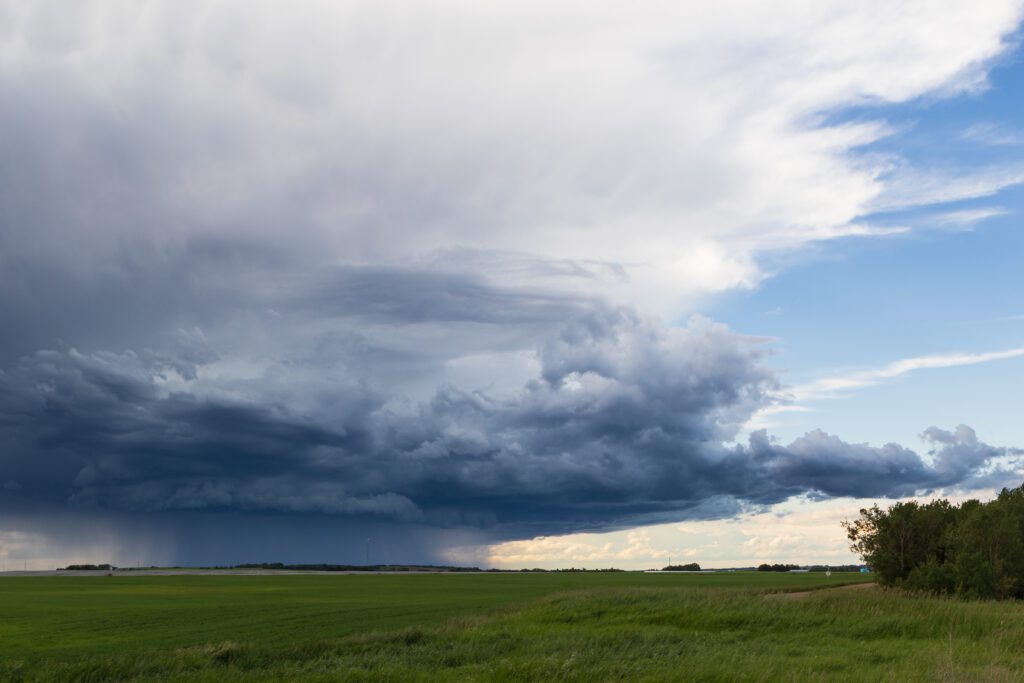
Storms provide many opportunities for creating images. Throughout the lifespan of a storm system, you will see the clouds shift and move while the light changes in response. You may see active lightning, rain, and maybe hail falling in the distance or even up close. You might even get lucky enough to witness some unique events like a tornado. If you have the option and opportunity, switch between focal lengths to help create different viewpoints of the scene.
Photograph by Lisa Cannon
Key Lesson: While keeping your safety in mind, use your personal vision and creativity to capture what you see.
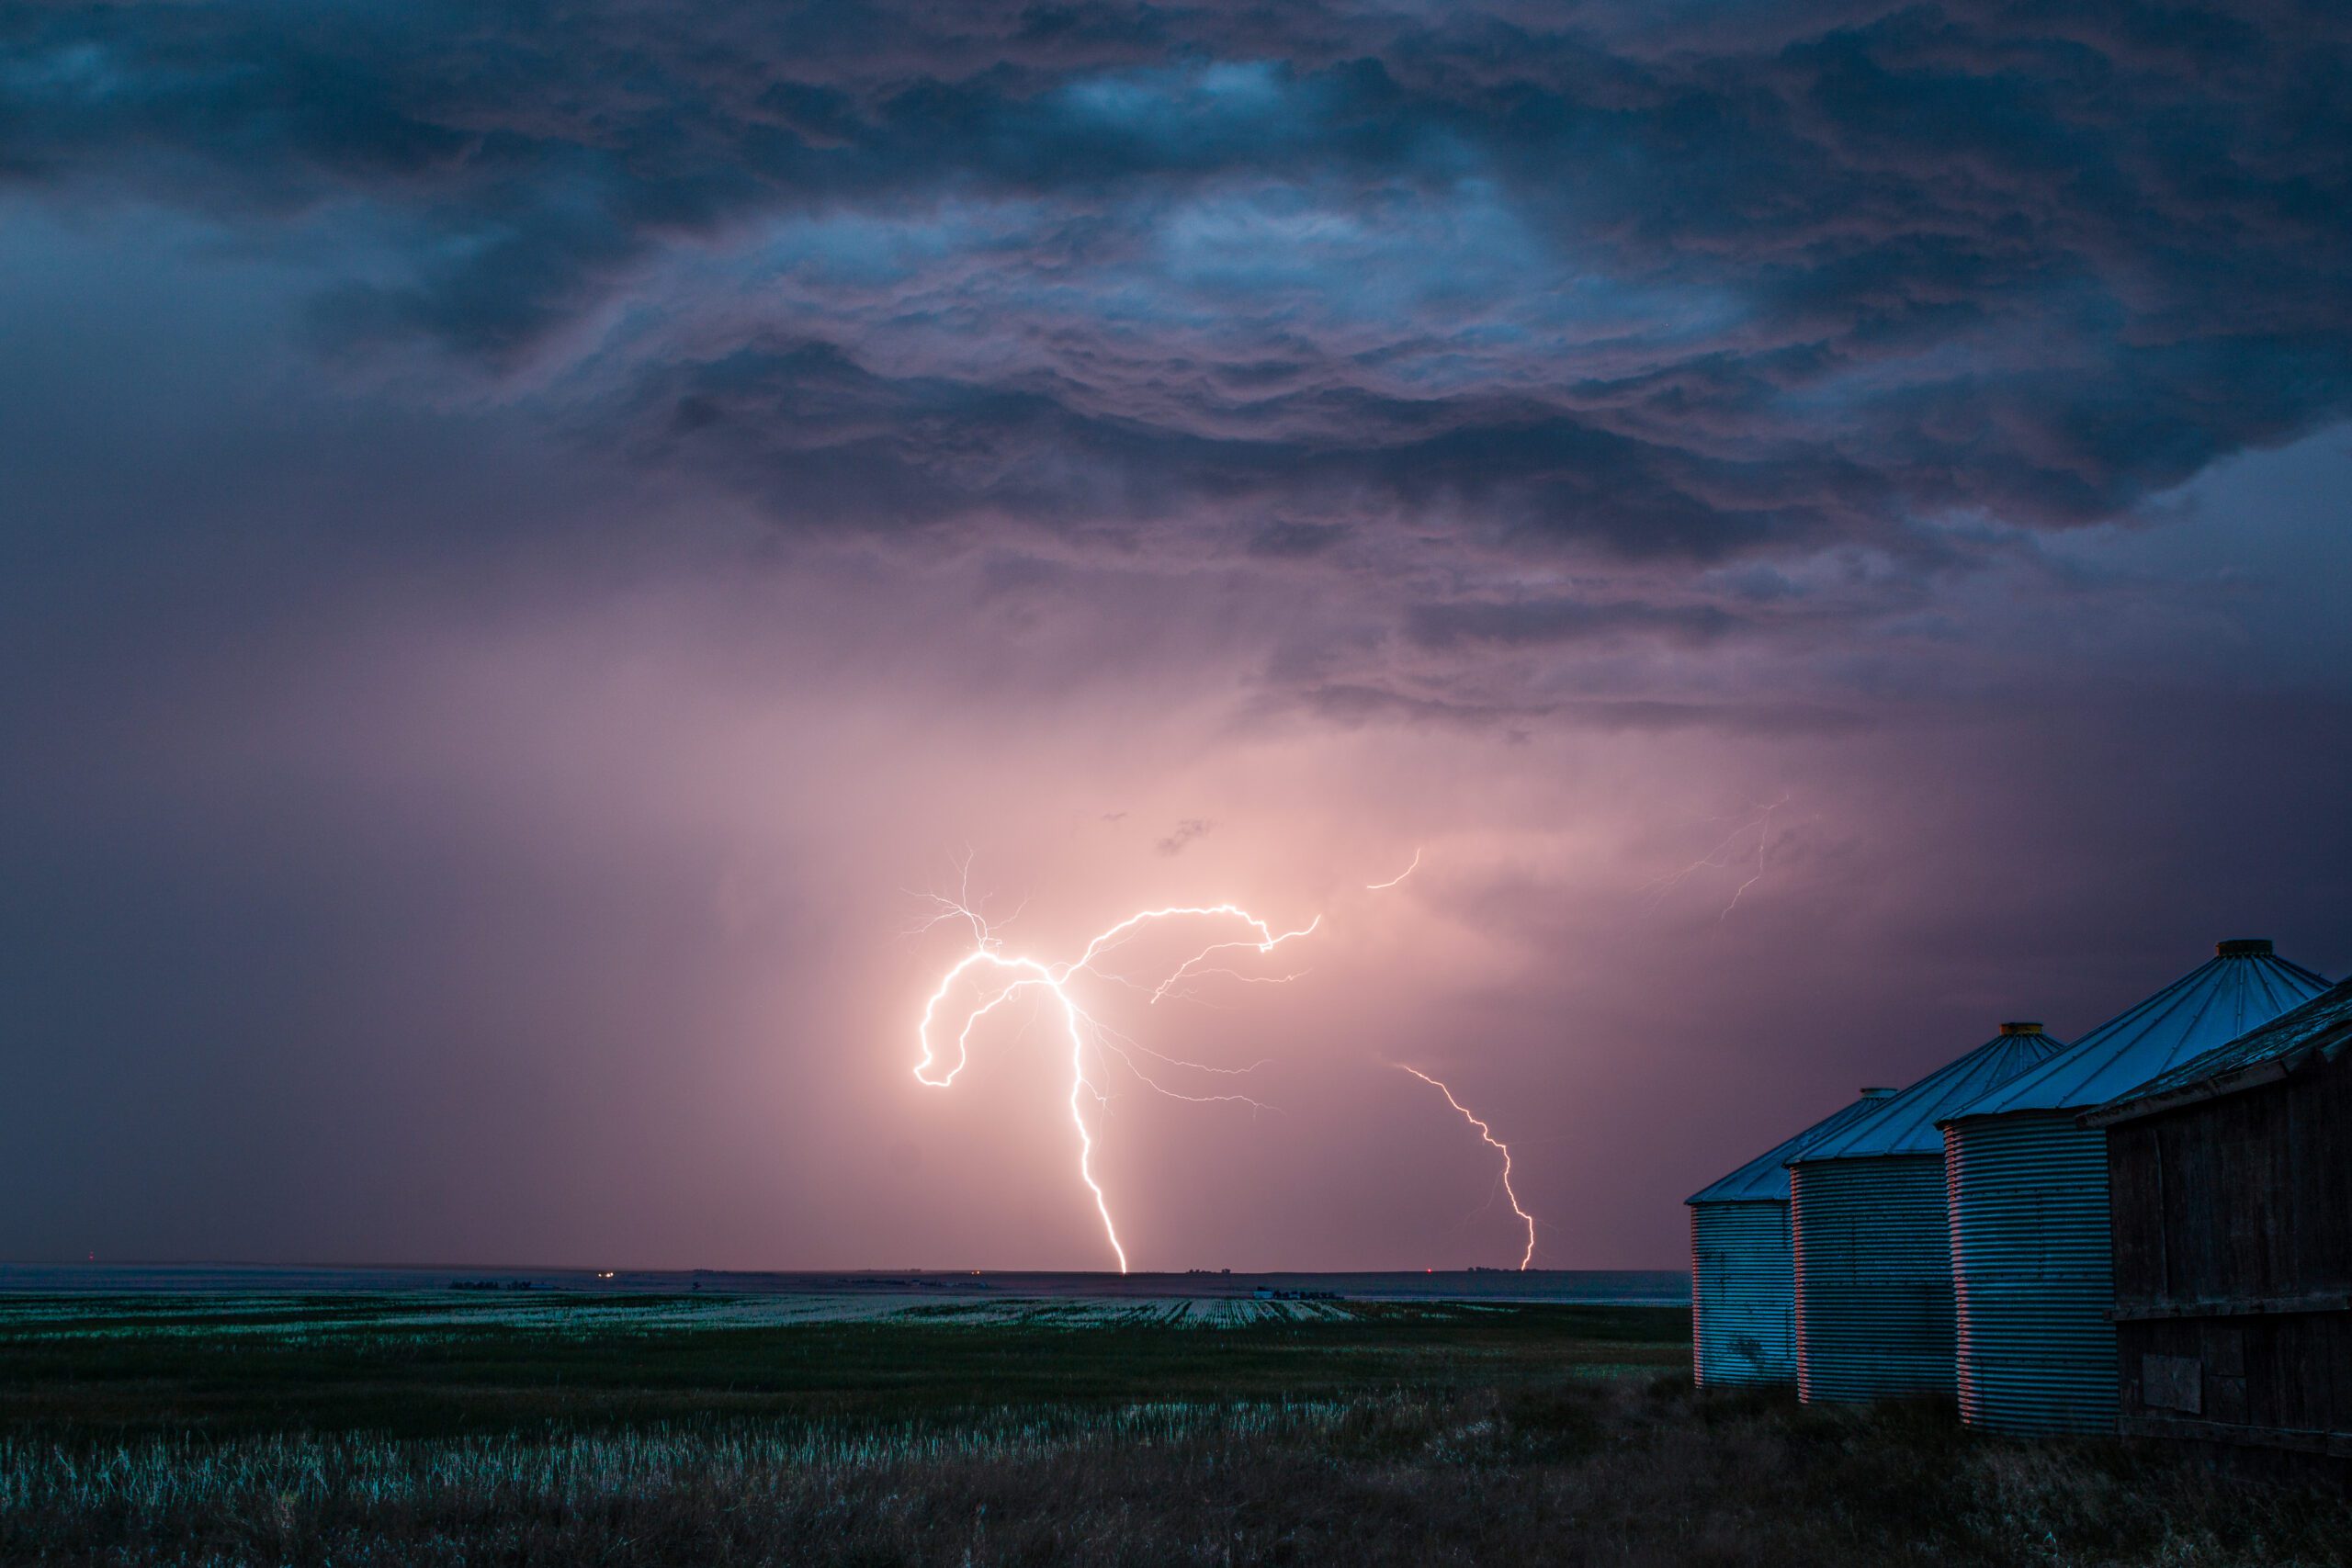
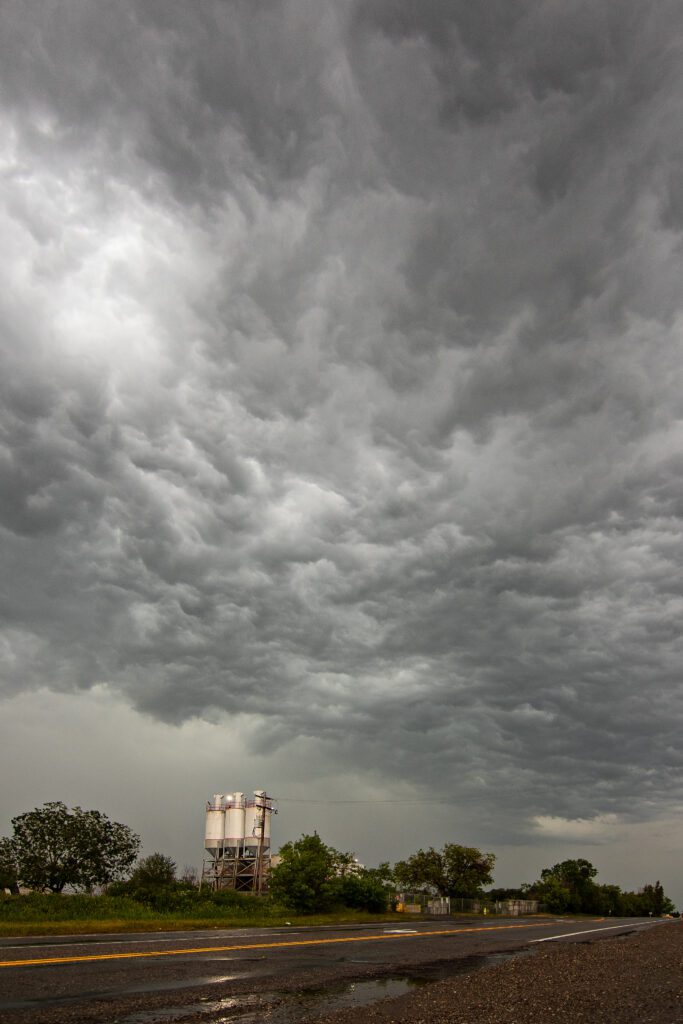
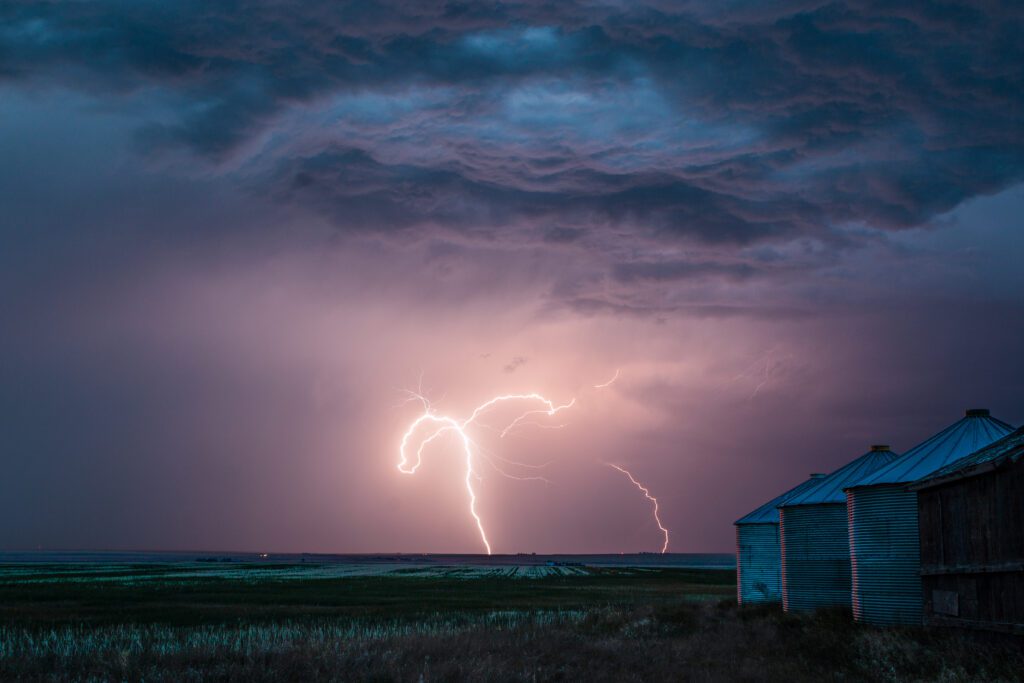
I also recommend looking for unique landscapes to use as foregrounds for your storm skies. This may not always be an option, but I would suggest doing it when you can. For this image, we found this stand of grain storage bins that help to add to the story.
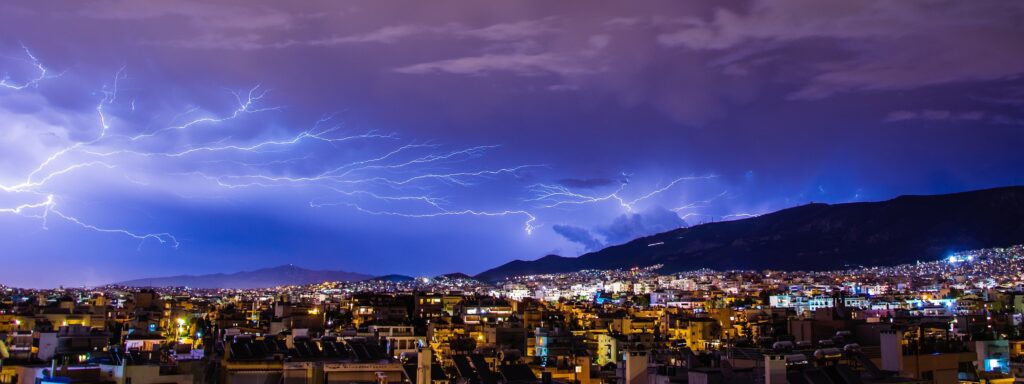
Cityscapes can be just as effective, as can images of just the storm system itself.
Photograph by Lisa Cannon
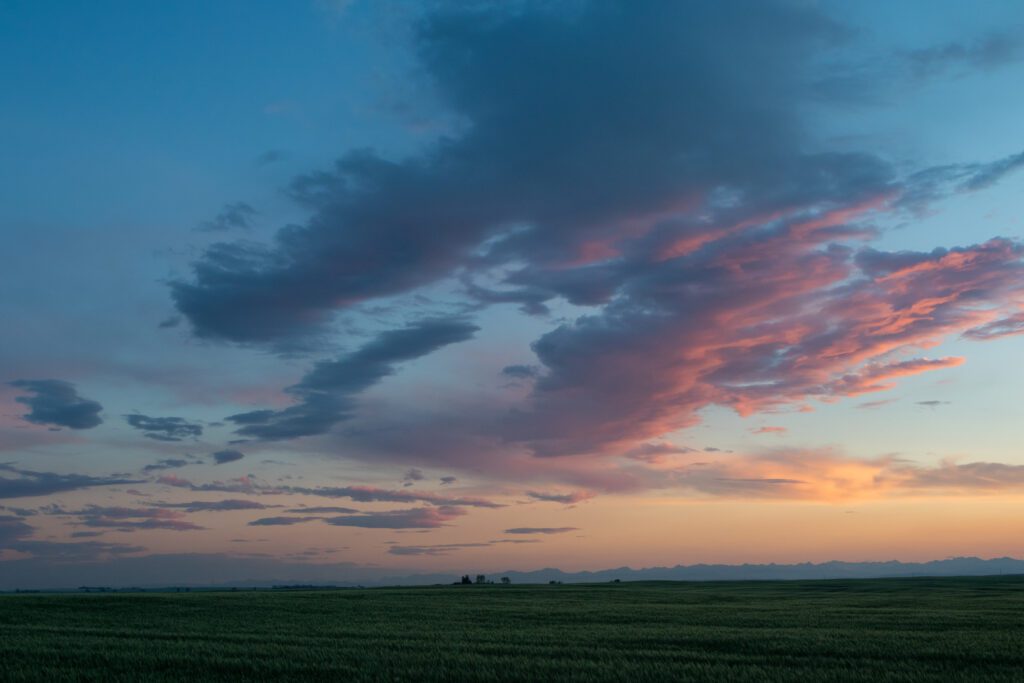
And don’t forget to watch for the rainbows and beautiful sunsets that a clearing storm may offer. In my experience, there was something special about ending a long day of chasing with an amazing sunset. It seemed to be the perfect way to mark the end of the day’s adventures.
Photograph by Lisa Cannon
Shooting and Editing the Images
Key Lesson: Your settings for shooting during a storm chase will vary. Stormy skies can go from bright to very dark and back again. Your choice of the subject matter will also factor into the settings you will need.
Changing storm conditions during a chase will mean your camera settings will also need to change. Faster shutter speeds will help to freeze the details in fast-moving clouds, while slower speeds are ideal for capturing lightning. Maybe the only thing I learned that could be considered standard is to use longer exposure times if you are trying to capture lightning.
If you are chasing during the day, this most likely will mean using a combination of higher apertures, lower ISO settings, and possibly even ND filters. You will want to aim for an exposure that keeps your overall image well-lit while avoiding over-exposing the lightning. It is very bright, and you don’t want to risk losing some of the great detail that is often there.

Photograph by Lisa Cannon
This image was shot at f/11, ISO 100, and my exposure time was 2.5 seconds. We had followed a storm with a lot of active lightning and found this location with a foreground we liked and a good open view of the storm. I set up my camera with a relatively high aperture and set my ISO at its lowest as I was aiming for that long exposure time. After taking a few test shots to confirm my overall exposure, I set my intervalometer and let the camera run. Because we had plenty of lightning in the area, I monitored my images and had plenty of opportunities to make adjustments as I felt I needed to.
My post-processing for this image included the use of a graduated filter in Lightroom to darken the sky and bring out the texture in the clouds. I dropped the overall exposure of the image slightly and increased the contrast and whites to help add a sense of moodiness. A small amount of final sharpening finished the image off nicely. It turned out I had done a good job exposing the image in the field, and this meant I didn’t need to adjust much after the fact.
Photograph by Lisa Cannon
Once our day turned to night, my partner and I found ourselves in a very dark rural area. We decided to continue to chase the storms as neither of us had shot nocturnal lightning before. The weather apps confirmed we had two busy storms in our area, one following the other, and we decided to try to capture as many lightning strikes as we could. We got to work setting up our cameras and discussing the best settings to use.
At this point, I do want to stress that we were continuing to monitor the weather conditions and lightning proximity to be sure we stayed safe.
Maybe the only thing I learned that could be considered standard is to use longer exposure times if you are trying to capture lightning.
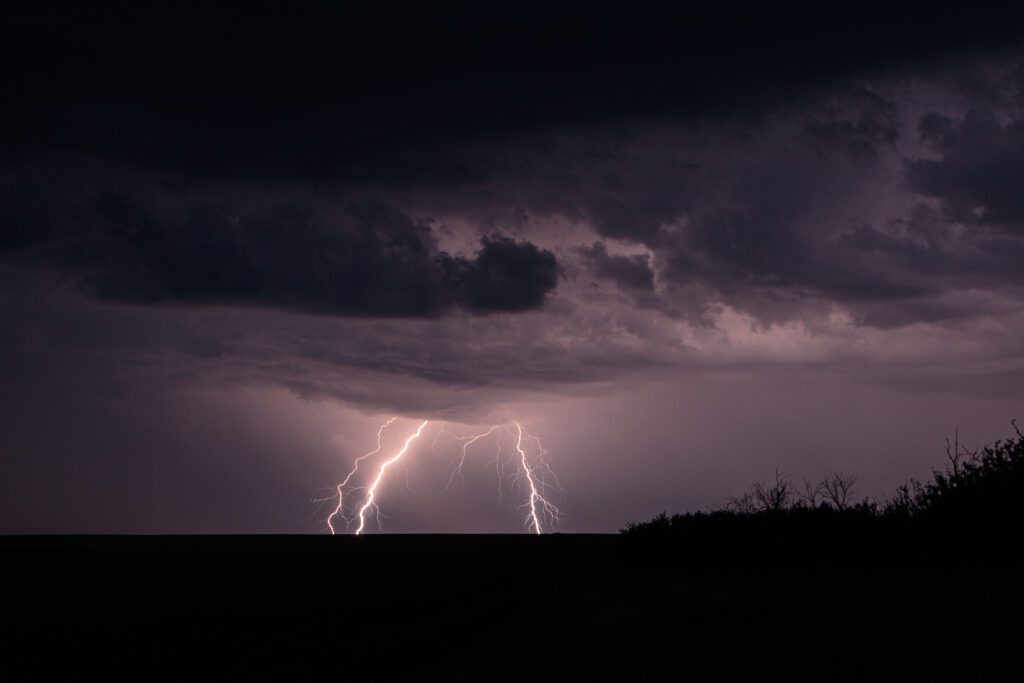
After dark, you will need to let more light into your camera, while again watching so that you do not overexpose the lightning. We chose to set our cameras for a 30-second exposure, hoping to catch multiple strikes within the same frame. To do that, we left our ISO settings low and opened our apertures just wide enough to capture the lightning without overexposing it. After a few test shots confirmed my settings, I once again set my intervalometer to shoot continuously and monitored the images to be sure I was getting the results I wanted. This image is a 30-second exposure shot at f5.6 and ISO 200.
Post-processing for this series of images was again fairly basic as my test shots and monitoring paid off. I increased the overall exposure a bit to slightly brighten up the sky, and I lowered the highlights to preserve the lightning detail. A small boost in clarity and texture to enhance the cloud detail and some final sharpening was all I felt I needed for an image I am really happy with.
My Final Thoughts
I was very excited to take part in my first real storm chase, and the experience did not disappoint. Part of why I was able to enjoy it was that I was in the company of an experienced chaser. In the end, we were lucky enough to chase two days in a row, seeing some incredible skies both during and after the storms. It turned out to be the only chasing opportunity we had this summer, but it left me eager for more and looking forward to next year.
Recommended Reading: If you’d like to succeed in creating stunning outdoor shots even in bad weather, check out Photzy’s Producing Top Photography In Bad Weather premium guide.
Self-Check Quiz:
- What is the most important thing to remember when storm chasing?
- Where should you never take shelter if caught in the path of a storm?
- What are the three types of storm clouds?
- What is the one piece of gear, other than your camera, that you should take with you?
- What ordinary objects can be useful for size comparison purposes?
Learning Assignment:
Learn to use your weather apps to track storm information for your local area without actually going out. You can also start practicing photographing storms close to home in areas that you are familiar with, and that you know to have safe shelter available, should it become necessary. Your yard is a great place to start. Use the internet and social media to connect to local storm-chasing groups. This can be a great way to start learning what you need to know to take part in future chases.


