

Exposure bracketing can help you achieve more accurate exposures. It’s especially useful when you’re taking photos in challenging lighting conditions. It’s a technique where you take three or more photos of the same composition and vary the exposure settings for each image.
Normally, in the first image you make in your bracketing sequence, your exposure will be set as per the light meter. The other exposures will be underexposed and overexposed. So, you’ll end up with a selection of the same composition with different exposures. This provides you with more options when you’re editing.
In this guide, we’ll take a look at why you would use exposure bracketing and I’ll suggest some practical ways it can help you improve your photography.
Recommended Reading: Want a step-by-step guide on photography skills with your DSLR? Grab a copy of our best-selling guide, the DSLR Crash Course.
Who Uses Exposure Bracketing?
Beginner photographers can benefit by using exposure bracketing. If you are not sure you’re getting well-exposed photos, take the same composition using three or more different exposure settings. This provides you with some choices when you are post-processing.
Photographers who enjoy High Dynamic Range (HDR) photography use exposure bracketing. The HDR technique combines multiple images of the same composition. Each image must have its exposures bracketed. They have processed in such a way that the most well-exposed portions of each composition are blended. This creates a single image with more tone range than is possible if you only expose one frame.
Film photographers use exposure bracketing. Using film, you do not have the ability to immediately examine the photos you take to check you have them well-exposed. There’s no live view or electronic viewfinder to help determine you have the exposure you want. Bracketing gives you options if you are uncertain as to whether you have nailed the exposure.

Photograph by Kevin Landwer-Johan
Key Lesson: If you’re a beginner photographer, get used to using exposure bracketing as often as you can. This technique can help you see that the camera’s auto-exposure does not always provide you with the most interesting exposures. If you’re already using manual mode, bracketing can help you understand how to be more creative when you set your exposures.
Why Use Exposure Bracketing?

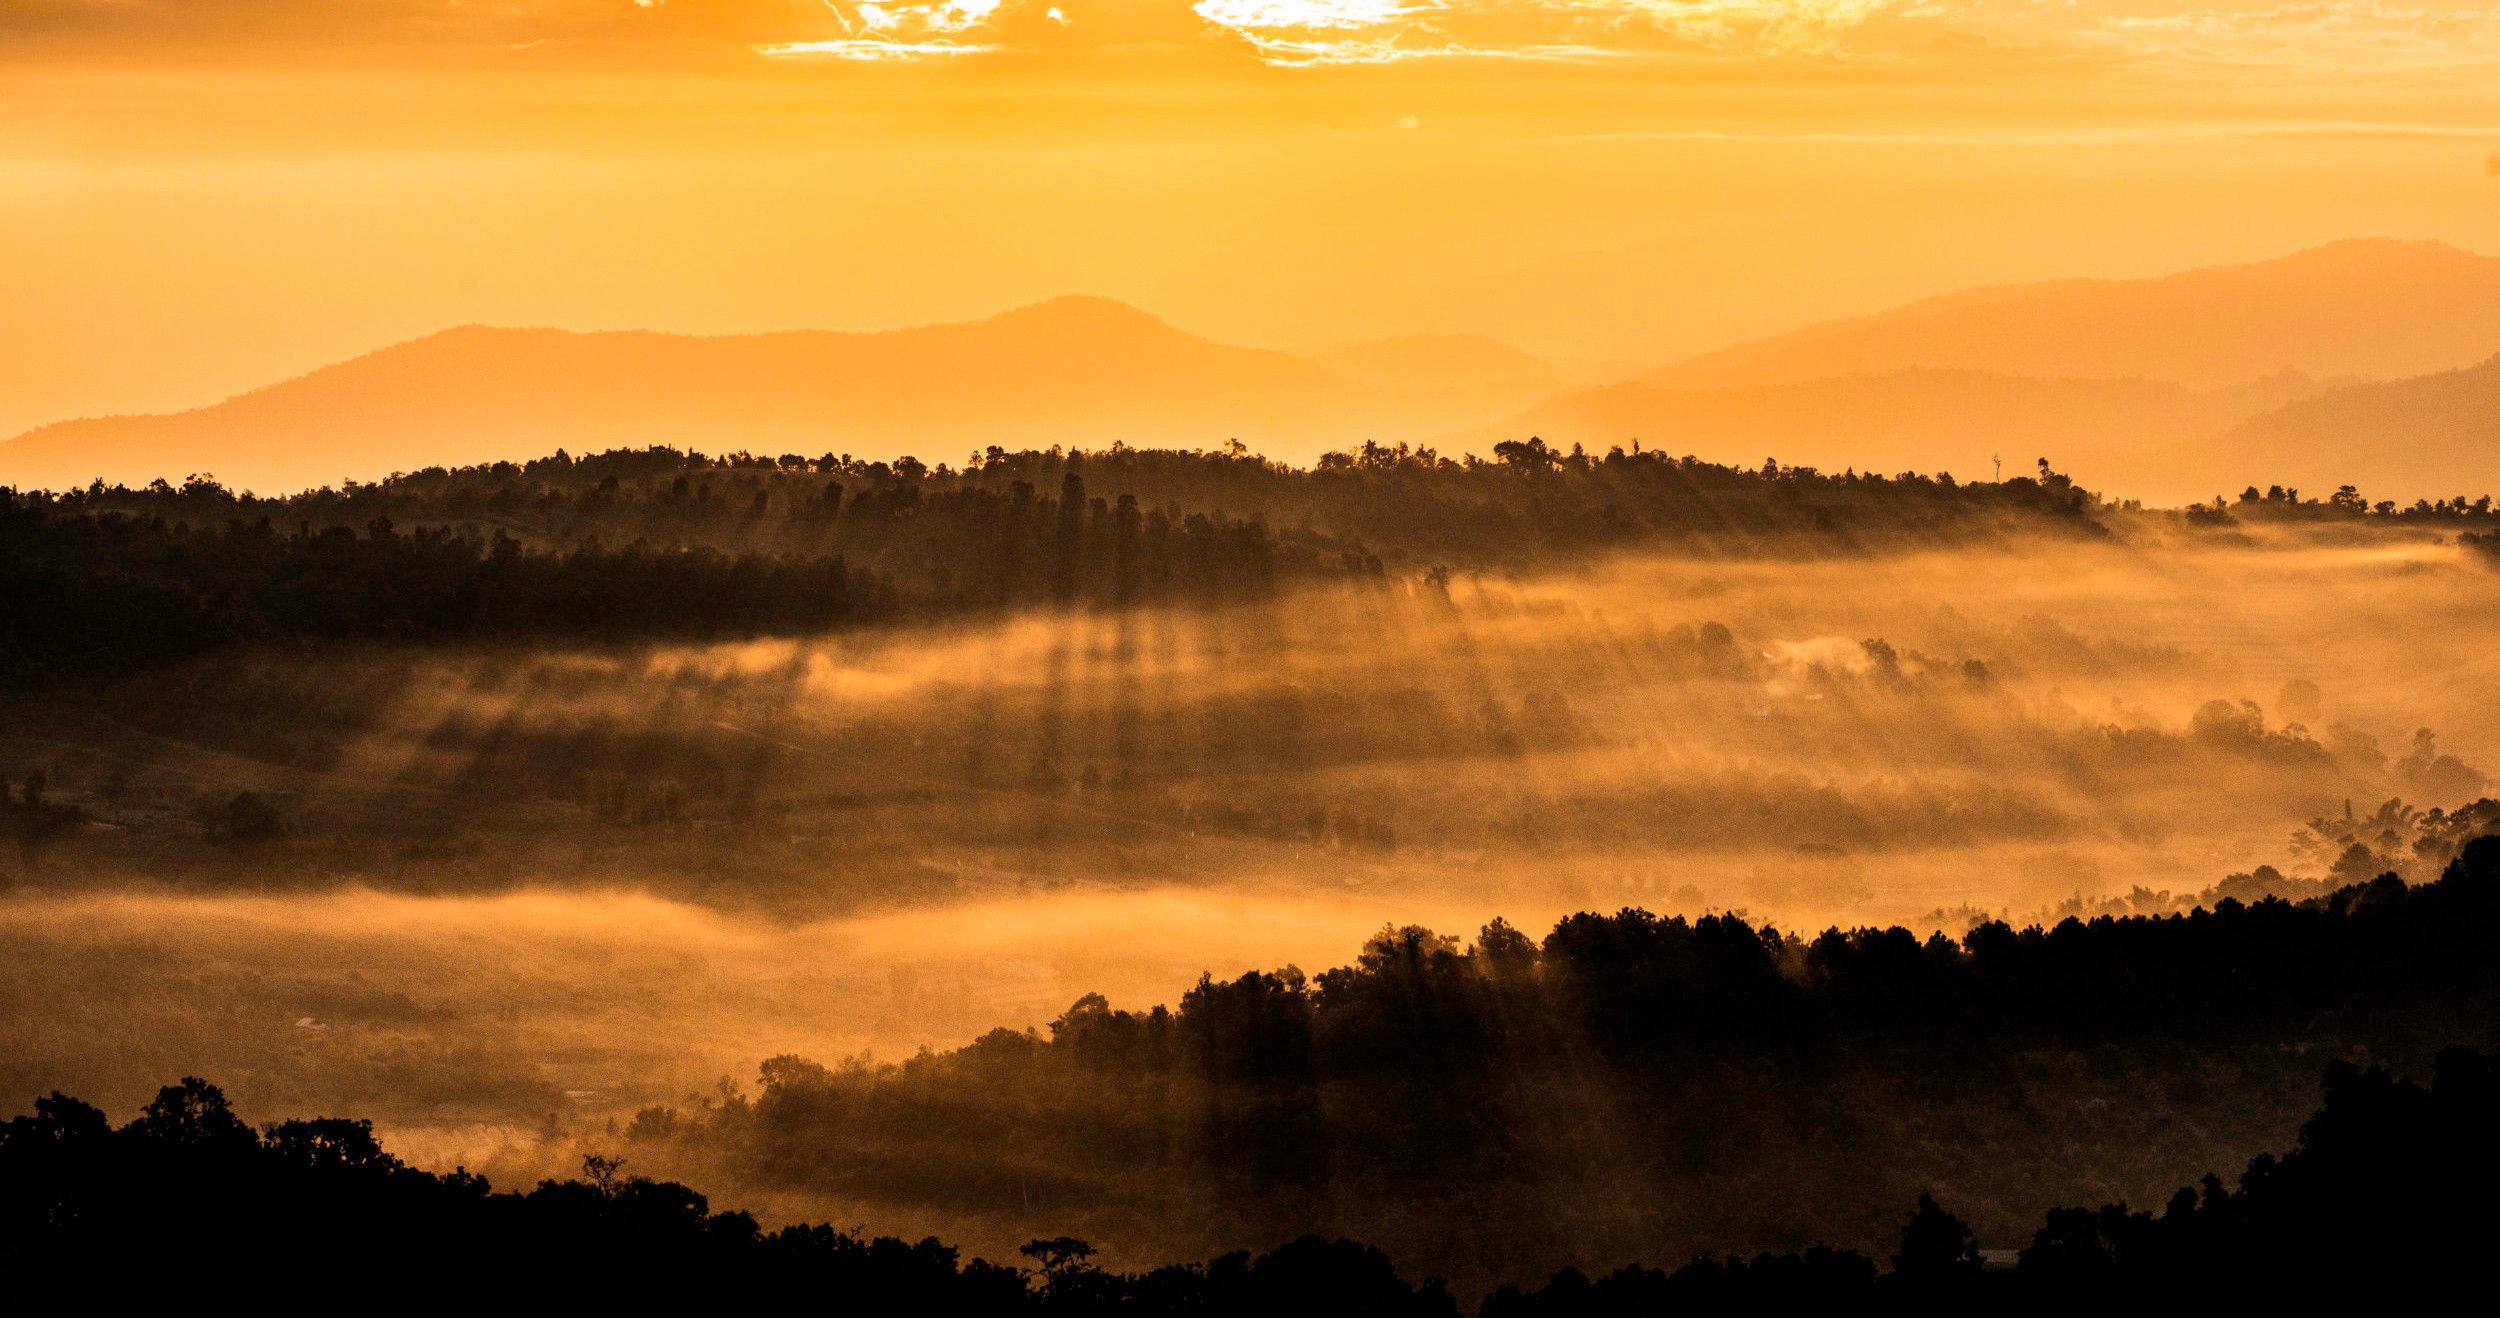
HDR merge of five bracketed exposures. Photograph by Kevin Landwer-Johan

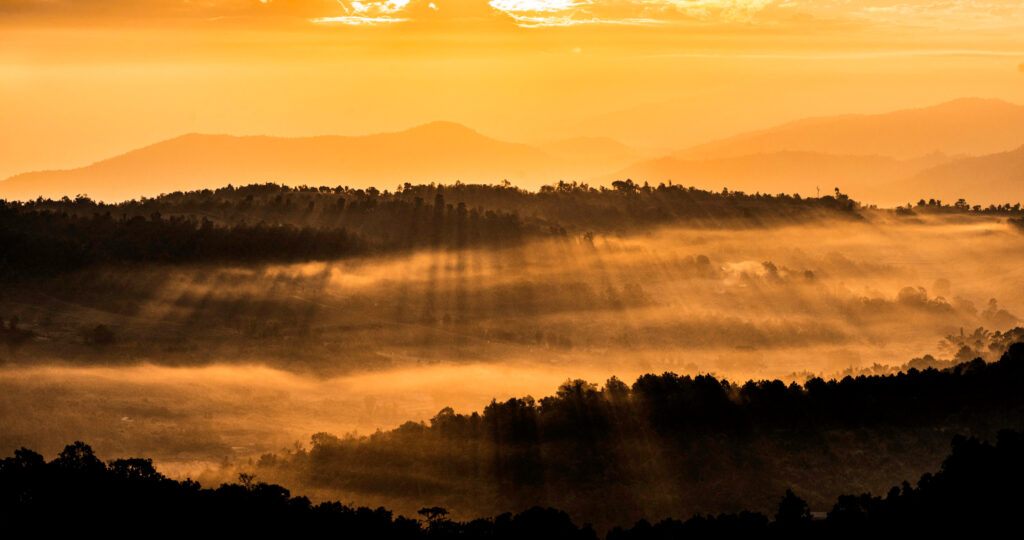
Single image from the bracketed series. Photograph by Kevin Landwer-Johan
Exposure bracketing can be helpful in a few different ways.
When you’re photographing in challenging lighting, exposure bracketing provides alternatives to what the camera’s light meter is indicating.
Taking photos in bright, hard light with high contrast subjects is often problematic. When photographing a subject with strong backlighting or strong reflections, it can be difficult to set your exposure. Bracketing in these situations can make the difference between capturing a photo worth keeping or ending up with poor exposure. Using an auto exposure mode or manually setting it may not provide you with a satisfying exposure.
Taking photos in bright, hard light with high contrast subjects is often problematic.
Choosing the most appealing exposure from a series of bracketed images means you’ll have fewer disappointing photos. Beginner photographers who are learning to control their exposures can compare images from a bracketed series. With this comparison, they can discover that sometimes underexposing or overexposing is a good choice.
HDR photography takes bracketing to another level. By combining a series of well-exposed and alternatively exposed photos, a greater tone range is possible. This can mean an image looks more like we see it with our eyes, or it can appear quite fake if poorly executed.
Key Lesson: It can be more challenging to capture a pleasing exposure with scenes with high contrast. Experiment with exposure bracketing. This will provide you with more options in difficult lighting and high-contrast situations.
Do You Need to Use a Tripod When Exposure Bracketing?
It is not necessary to use a tripod when you bracket your exposures unless you are planning to merge them into an HDR image. To make HDR images, you need three or more bracketed photos of precisely the same composition.
You don’t want any amount of camera or subject movement between bracketed images. This will make merging them into an HDR picture flawed. Using a tripod and photographing a composition where nothing is moving will ensure there’s no ghosting in your merged image.

Photograph by Kevin Landwer-Johan
What’s the Easiest Way to Exposure Bracket?
Many cameras have an auto-bracketing feature. This allows you to set your camera to take a sequence of exposures at various settings automatically.
You can dial in the number of exposures you want to include in your bracketing sequence and the amount you want each exposure to varying. The number of images included in the sequence will be odd. The first image is exposed according to how you set your exposure. Of the other two images in the series, one will be underexposed and the other overexposed. If you dial in to take five or more photos in a bracketing sequence, an even number will be underexposed as will be overexposed.
On some camera models, when you set the bracketing sequence the camera will make the set number of exposures when you press the shutter release once. On other cameras, you need to press the shutter release once for each exposure in the sequence.

Photograph by Kevin Landwer-Johan
Key Lesson: When you’ve completed the series of bracketed photos using the auto-bracketing feature, don’t forget to turn it off. This is more important to remember if your camera is of the type where you have to press the shutter release for each photo in the sequence. If you don’t turn auto-bracketing off, you’ll be taking a lot of underexposed and overexposed photos.
Can You Bracket Exposures Manually?
Yes. It is possible to bracket your exposures using manual mode by using manual exposure mode or using auto-exposure and exposure compensation. By setting your bracketing manually, you can dial in the amount of underexposure and overexposure you want.
Sometimes you might want more steps underexposed. Photographing a sunrise or a sunset are examples of when you might choose to take more underexposed photos to capture the detail and color in the sky. When taking photos at night, you may want to overexpose more steps, so you capture the best detail in the shadow areas.
How you set your initial exposure determines the extent of your bracketing. How you set your meter will also impact this. Using averaged metering may return a different result than using spot metering. It’s best to decide on what you think will be the best base exposure. Then check your monitor, read the histogram, and look at the highlights indicator. This information will help you decide how many stops and how many frames you want to bracket your exposure.
Key Lesson: Modern high-end digital cameras capture a broad dynamic range. This means you have more flexibility to bring out details in the dark and bright areas while editing. Because of the depth of detail in each exposure, it means varying your bracketing by one-stop does not make much difference.
Recommended Reading: Want a step-by-step guide on photography skills with your DSLR? Grab a copy of our best-selling guide, the DSLR Crash Course.

Photograph by Kevin Landwer-Johan
Bracketing in increments of two or three stops will result in a more useful series of images. They will have a much broader dynamic range than if you only bracket by single stop increments.
How Do You Edit Photos That Have Been Bracketed?

Photograph by Kevin Landwer-Johan
Editing bracketed exposures can be done in three main ways. Firstly, you can select one frame from the series that looks the best. Secondly, you can merge two or more of your series to make an HDR image. Or thirdly, you can open two or more images as layers and then erase parts of some or all of the layers above the base layer to reveal only the well-exposed parts of each photo. The second and third options are only practical when you’ve used a tripod and nothing in each photo was moving.
Picking the best of your bracketed exposures is a matter of studying the highlights and shadows and deciding which one you like the most. You may prefer a brighter image with the highlights overexposed. Or you may like one where the highlights are well exposed and there’s no detail in the shadows.
Picking the best of your bracketed exposures is a matter of studying the highlights and shadows and deciding which one you like the most.
There are automated HDR options in many software programs like Lightroom and Photoshop. It’s very easy to select a series of images you want to use and blend them automatically. Various options allow some amount of control over how the images are blended to make one high dynamic range photo.
By manually stacking a series of photos in layers in Photoshop, you can erase parts of these layers to leave only areas that are well exposed. This is the most time-consuming method of editing bracketed photos, but it can produce the most pleasing results. This technique is often used with room interiors to create images where the light looks well balanced in the finished photo.
Photograph by Kevin Landwer-Johan
Conclusion
Bracketing photos can help you create a more evenly exposed image or provide you options to choose the best exposure of a series. If you save your photos as RAW files, there’s now so much dynamic range available in your photos. Bracketing is no longer necessary except in extremely difficult lighting conditions.
The most convenient way to bracket a series of exposures is to use the auto-bracketing feature on your camera. Check your camera manual or do an online search specific to your camera model if you’re not sure how. Once you set this feature up, it makes bracketing a series of images very easy.
Next time you’re not sure if you are nailing your exposure just the way you want it, try bracketing a series of photos and enjoy the options this gives you.
Self-Check Quiz:
- What can exposure bracketing help you achieve?
- What does HDR stand for?
- Do you need to use a tripod when taking photos using the HDR technique?
- How can using bracketing help beginner photographers understand auto-exposure?
- What’s the easiest way to bracket your exposures?
- Why is it better to bracket in two or three stop increments?
- What are three ways you can edit a series of photos that have been bracketed?


