
When Photzy proposed this topic, I actually laughed. What in the world? Doesn’t everyone know what tripods do? They just stand there with a dopey grin holding up your camera, right?
Tripods have three legs, hence the name, literally “three feet.” If they had four legs, they would be as wobbly as any four-legged table because they always have at least one leg shorter or longer than the others, and they don’t give out free matchbooks anymore to be used as shims. Ever tried leveling a wobbly four-legged table by carefully shortening the too-long leg? Pro tip: don’t.
Key Lesson: The tripod is a camera support with three legs, so it is always stable even on uneven ground.
Recommended Reading: Want to expand your shooting skills and master photography? Grab our set of 65 beautifully designed and printable Action Cards that will give you over 200 photography assignments to help you take your photography to the next level. Check it out here.
Actually, I avoid tripods. I like to be footloose and fancy-free, able to handhold sharply and leap tall buildings in a single bound. Seriously, I like to be very flexible, and a tripod is an encumbrance. Just hauling one around is a nuisance, and often the thing won’t get the lens easily and quickly to the height and angle that I want. But if the camera absolutely positively must not move, a tripod is your best bet. You can use a beanbag on the top of your car, but the tripod allows you to put the camera exactly where it needs to be and holds it rigidly – hopefully if it’s a halfway decent one.
In my day, almost all tripods had twist locks on the legs for adjustment. Many still do, but I have come to love the flip or lever locks because they are so much faster and easier to use. My monopod has them too.

Photograph by Charles Haacker
My anti-tripod workaround has long been to boost the ISO so I could get a shutter that was at least double the focal length and deal with the inevitable noise later, with mixed results, but at least I could hop along shooting merrily handheld and not have to deal with my awkward three-legged anchor plodding along in the rear slowing down the war.
When I came up in the lower paleo-photographic, tripods were inconvenient. There were no quick-release leg adjusters or camera mounts. To mount a camera meant screwing in the 1/4 x 20 screw and tightening the collar. To take the camera off, the process was reversed – all tedious and time-consuming and potentially shot-missing.
In a working career spanning more than 50 years, I have owned and used numerous tripods. When I was in school, our department chair advised us to go to the store and ask to be shown the “back room.” Look back in the darkest corner, he said, to find a massive thing that looks like a spider-webby oil derrick. Try to lift it, he said, and if you can’t, BUY it, because THAT is a TRIPOD. He was joking. I think.
Key Lesson: Modern tripods are lighter and more convenient to use than in the past.
I was trained as a commercial photographer, and in those thrilling days of yesteryear, we were taught that if a camera wasn’t at least a 4×5-inch bellows camera, then it wasn’t a “real” camera. But because such were heavy and awkward, tripods were de rigueur. Even the press cameras, designed to be handheld, would produce superior sharpness on a tripod. We were given the assignment to prove it to ourselves.
Our department’s 4×5-inch Graphics weighed six pounds and had slightly wide-angle 105mm “press” lenses. You know the rule of thumb that your slowest handheld shutter speed should be no less than the reciprocal of the focal length, so we were to shoot at 1/100 of a second. It sounds pretty instantaneous, no?
Actually, I avoid tripods.. but if the camera absolutely positively must not move, a tripod is your best bet.
It was a deceptively simple assignment. Take two pictures of the same thing at 1/100-second with appropriate aperture. One picture was to be made firmly on the tripod, but the other handheld. Then process the negatives and make four 8×10” prints, two to be made full-frame (2X enlargement for 4×5” negatives), and the other two with the enlarger raised to the top of the mast to get as big an enlargement as possible of a smaller section of the negative.
In the print room, we could see the difference right on the easel just by looking at it. The handheld shots looked pretty good at only 2X enlargement, but as soon as we tried to crop the image, they just fell apart. The pictures from the tripod were equally wire-sharp at any magnification.
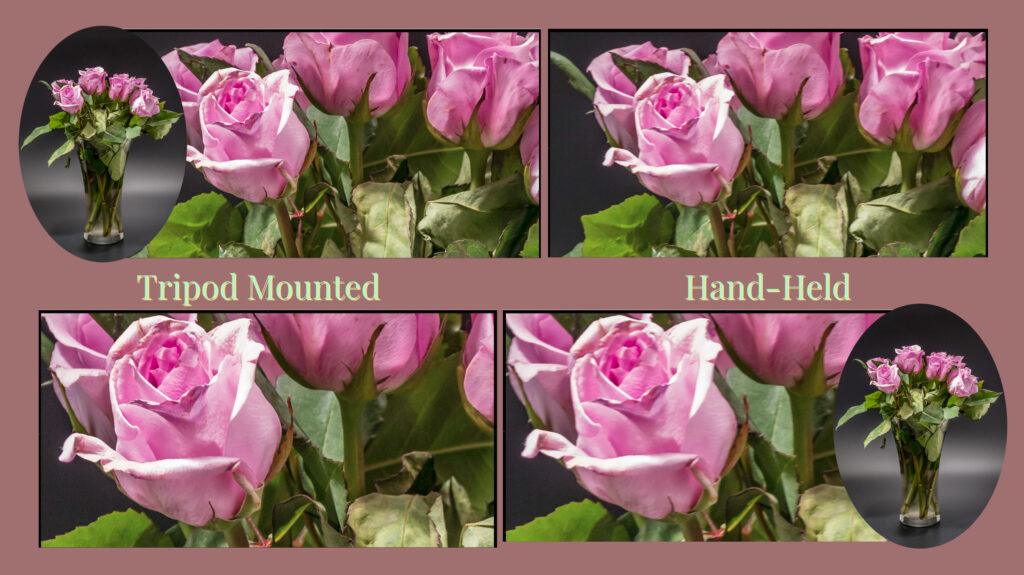
All photos were made with my Sony A6300 with a 30mm normal lens (equivalent to 45mm). All settings identical at 1/30 sec (1 over the focal length), f/4.5, ISO 800. The only difference is that one was made from a sturdy tripod and the other handheld. The roses were enlarged up to 300% (bottom row). You should be easily able to see the difference. Photograph by Charles Haacker
Key Lesson: You can prove to yourself that a sturdy tripod will often deliver a sharper picture than you can make handholding, especially at high magnifications with lower ISO and longer shutters.
In this article, we will discuss:
- Tripods in general
- Don’t buy cheap
- Weight (carbon fiber vs. aluminum)
- Convenience
- Height
- Center columns
- Friction vs. crank
- Low columns (reversible)
- Ball heads
- Pan heads
- Quick releases
- Monopod
Tripods can be useful anywhere, anytime, under any conditions. Some photographers use them consistently. Certain types of photography are nearly impossible without a sturdy tripod or other camera rest. Macro really benefits from eliminating camera movement. I love to do a lot of macros, and I do a lot of “focus stacking” where several frames are shot at different foci and “stacked” and masked to take a single picture with astonishing depth of field, but a tripod is mandatory.

This brown marmorated stink bug was found dead on a bit of paper towel. I made 11 separate frames with a focus rail on a tripod and “stacked” the images to get the entire bug in sharp focus. Photograph by Charles Haacker
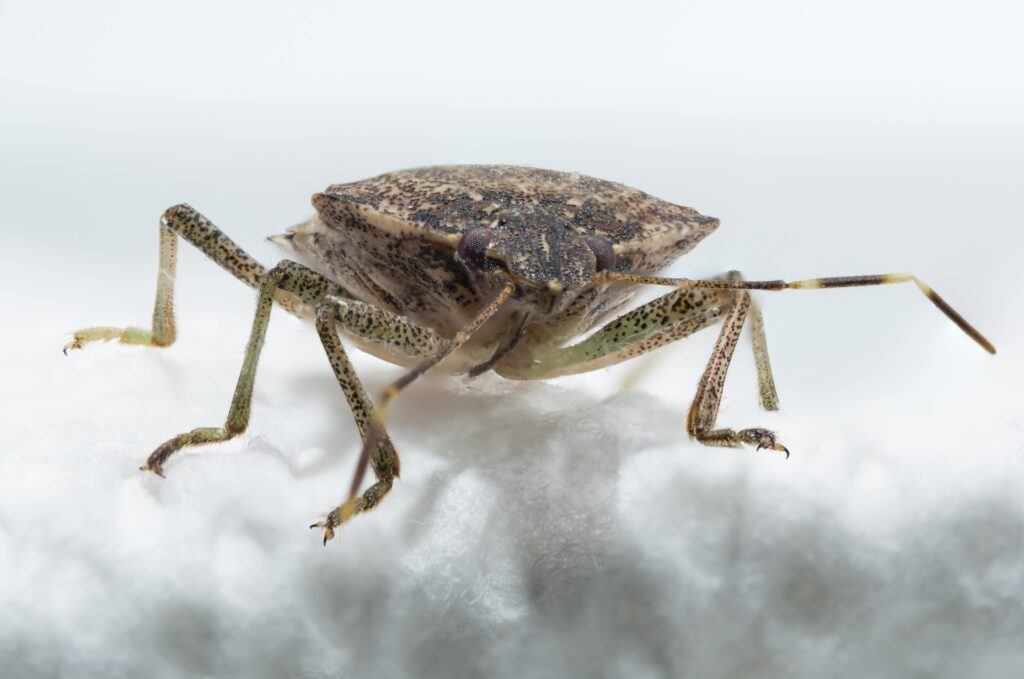
Not pretty, but pretty sharp. Photograph by Charles Haacker
Key Lesson: A tripod is mandatory when doing focus-stacking or bracketing for HDR so the frames will perfectly align.
Photograph by Charles Haacker
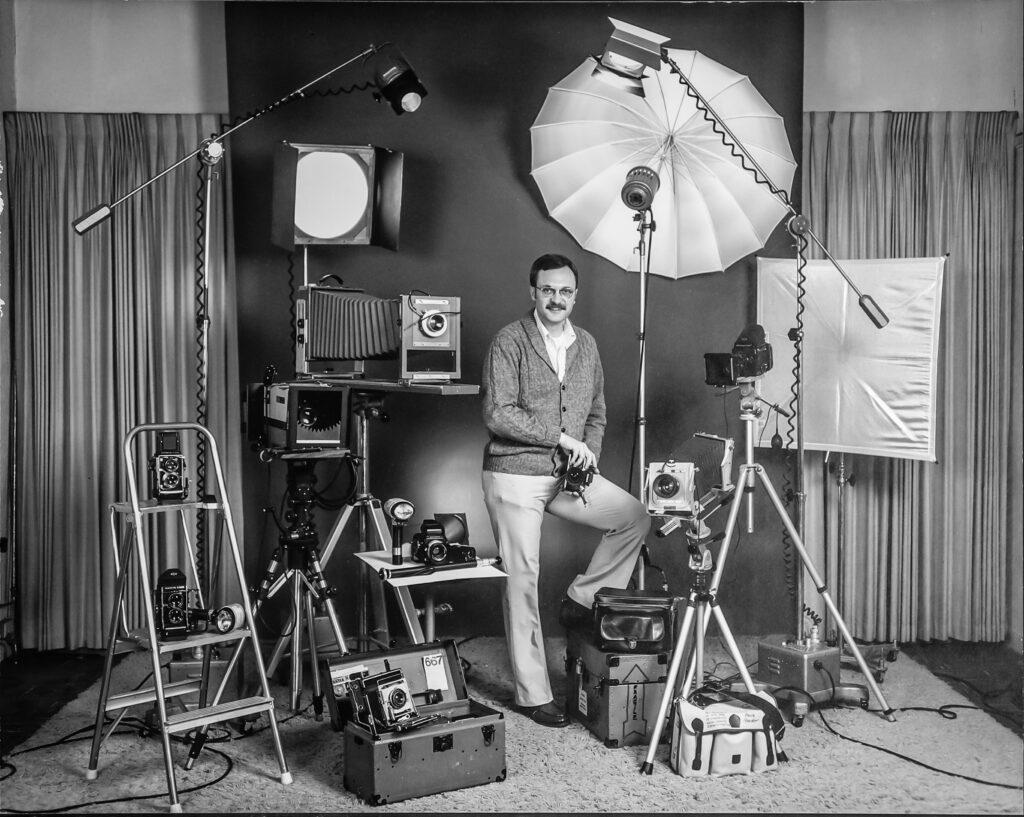
When I had my own studio (with more hair and less stomach), I had a lot of cameras and a lot of tripods, many dedicated to a single camera. There are four tripods visible here. The view cameras (with the bellows) could not be used without one. The Speed Graphic press camera down front could be handheld but has already demonstrated it was better to support it. Studio portrait cameras were almost always set on a tripod so I could frame and compose the portrait, then come out from behind the camera to chat with my client while firing off frames as I saw expressions I liked.
Key Lesson: Cameras that have no viewfinder or rangefinder can only be focused and composed on a tripod.
Tripods in general are not complicated: three adjustable legs with a head or other camera platform. A glance at any retail site tells you that there are at least as many tripods as there are cameras. It is bewildering, even daunting for a beginner.
Resist the urge to buy cheap. Tripods come at all sizes, weights, and prices, from GorillaPods to the “oil derricks” that my mentors recommended. What you really want to think about is the purpose of the tripod. Start with the combined weight of your biggest body and lens combination. My heaviest weighs 3 pounds (~1.36 kg). For that I want a tripod rated for at least 10 or more pounds since I like overkill. The challenge is to keep the weight of the tripod manageable while still providing sturdy support, ideally in all conditions.
Key Lesson: Tripods are not created equal. Very cheap ones are likely to be a waste of money because they will not be sturdy enough for almost any camera. Start with the combined weight of your biggest body and lens combination, and then double or triple that number for your tripod weight rating.
Recommended Reading: Want to expand your shooting skills and master photography? Grab our set of 65 beautifully designed and printable Action Cards that will give you over 200 photography assignments to help you take your photography to the next level. Check it out here.
I think it’s best to see tripods in an actual store where you can lift them, try to twist them (if it deforms easily, avoid it), play with the head and see if it can be replaced (some cannot), see how much rise it has without using the center column and such.

My A6300 body with massive Sony FE 70-300mm lens (105–450 equivalent). At two pounds, the lens weighs twice as much as the body. The collar is removable but almost essential for balance on a tripod. Using a collar takes the strain off the camera’s flange. Photograph by Charles Haacker
The weight of the tripod itself is a factor when carrying it in the field. There are travel tripods that often have more leg sections so they can be shorter when collapsed, but that can be a compromise in leg strength. The more joints, the weaker the leg.
For a long time, tripods were made of wood, like surveyors tripods. They were sturdy but also heavy. Aluminum, being lighter and stronger than wood, was the gold standard for my generation. Today the best tripods are made from carbon fiber, which is lighter and stronger than aluminum, but the downside is higher cost. If you are going to backpack with it, carbon fiber will be worth the expense.
The challenge is to keep the weight of the tripod manageable while still providing sturdy support, ideally in all conditions.
Convenience is important to folks like me who find tripods a nuisance. The easier it is to set up, adjust, mount, and dismount the camera, the more likely you are to use it. It’s rare to see a landscapist not using a tripod. Sometimes they are focus-stacking for greater depth of field, or bracketing for HDR, both of which must be made from a sturdy tripod because otherwise, the separate frames will not perfectly match.
The height of a tripod should be such that it can bring the viewfinder up close to your eye, but there is always compromise. The higher/longer the tripod, the more it will weigh. You can find cheap tripods that are tall, but they are very likely to be lightly built and wobbly.
Key Lesson: A too-short, inconvenient, flimsy tripod is apt to not getting used at all. Spend a little more on a reliable tool. The more joints within the legs of your tripod, the flimsier they become.
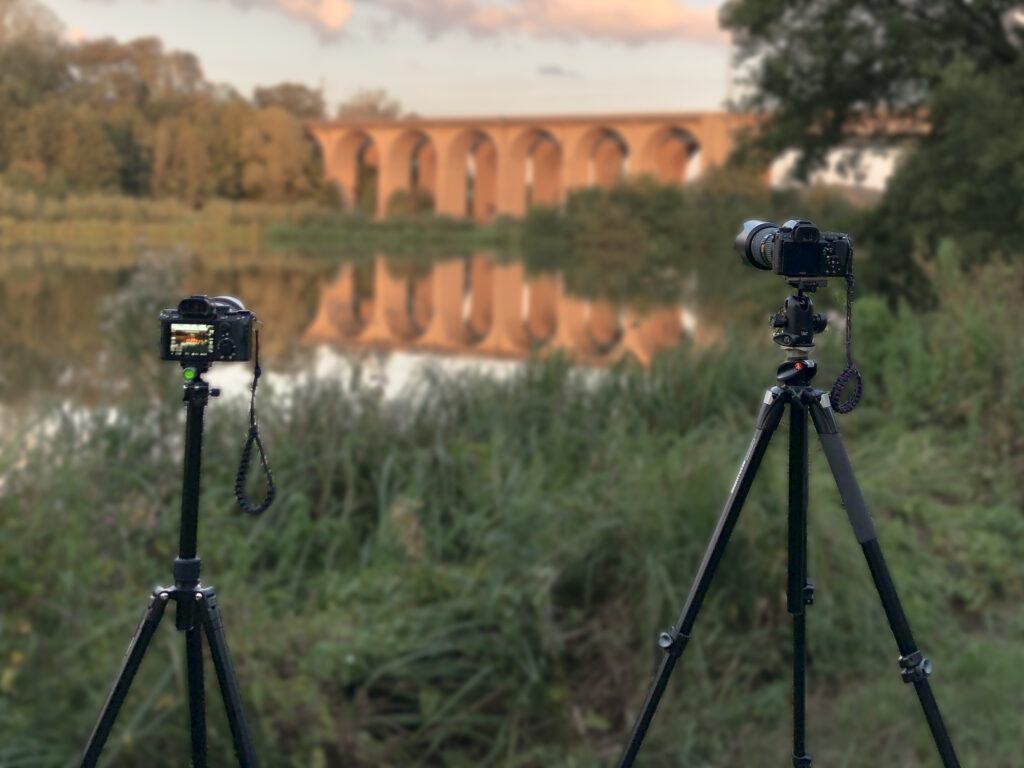
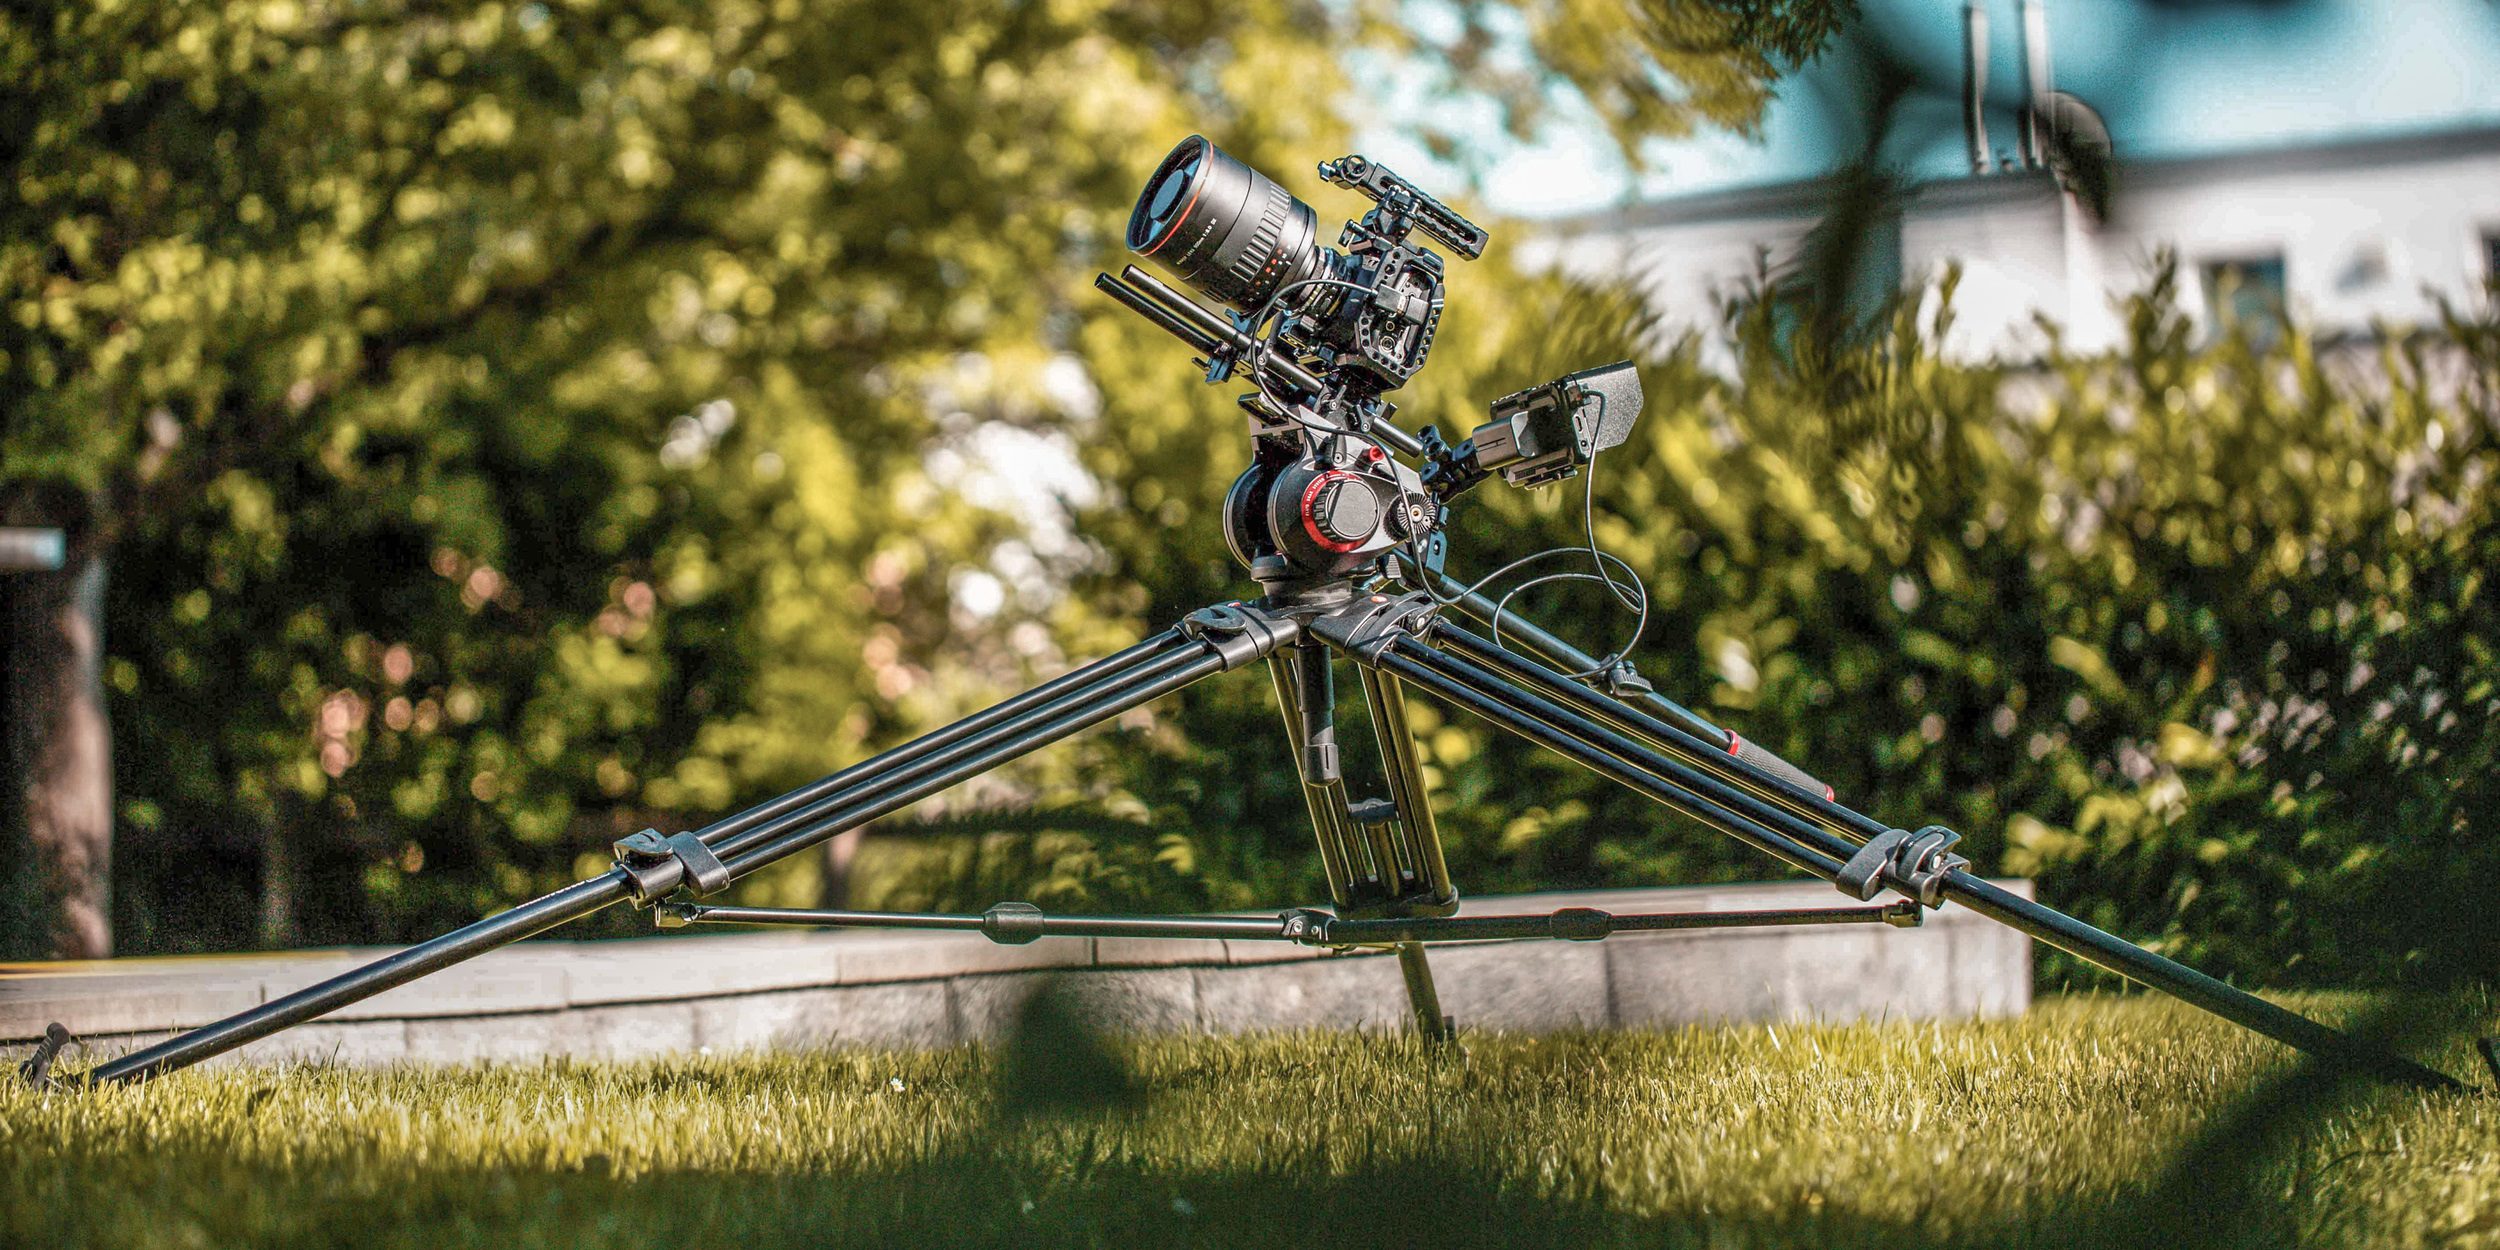
The photographer on the left is using too much center column. It’s unstable and very vulnerable to a gust of wind. Photograph by Ingo Doerrie
Center columns are fashionable for most modern tripods, but you should never use more than 2/3 of the center column on any tripod. More than that and the tripod becomes no steadier than a monopod, especially if outdoors in a breeze. In fact, it’s best not to use the center column at all. You should raise it only as a last resort.

Fingers point to the rack-and-pinion, locking collar, and crank of a geared elevator center column. I like them because they are easier to adjust with precision, but they are relatively slow compared to a friction grab-and-lift column. Photograph by Charles Haacker
Friction vs. crank center columns is a consideration. Friction means the center column is physically lifted to a certain height and held with a flip lock or twist collar. Crank center columns are geared to be raised or lowered by a crank. I like the geared type for greater precision and it’s easier to adjust a heavy camera. You still need to lock it down, but it’s easier with a crank that you can hold with one hand while locking with the other. Geared columns are also slower to adjust.

Some tripods have great leg-spread and even accessory “stubby” center columns to get down even lower. Photograph by Dan Senior
Some tripods have low or even reversible friction center columns to get a camera down to the ground. Some have stubby columns and legs that can spread all the way out to get a camera very low. A few have center columns that double as monopods, but I’ve always found such hybrids too light and flimsy.

Small ball head on a no-longer-made Leitz tabletop tripod. Photograph by Charles Haacker
Ball heads are very popular camera mounts because the camera can be easily and rapidly angled up, down, and sideways.
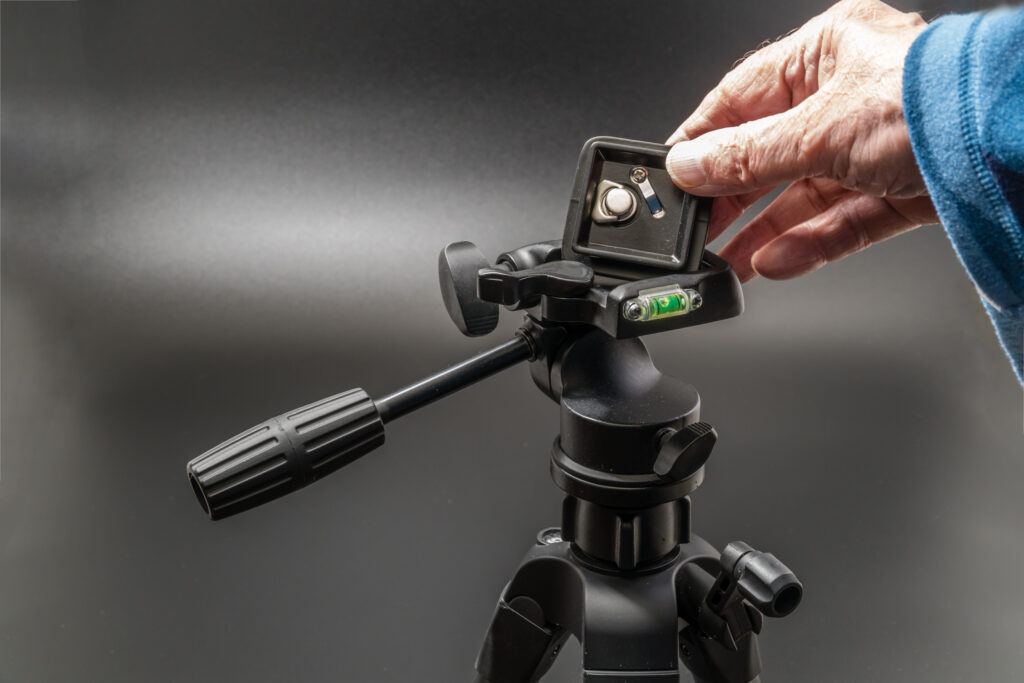
Pan-and-tilt head on my old Pro-Master tripod. I am holding the baseplate of its Manfrotto-type quick release. I have a half-dozen of these plates, so any number of cameras can easily and rapidly be switched out. Photograph by Charles Haacker
Some pan/tilt heads are harder to adjust but they were originally designed for cine cameras so the camera could be “panned” – smoothly moved side to side while holding all other adjustments rigid. Which one you choose is a matter of preference influenced by use.
Key Lesson: The choice of ahead is a matter of personal preference depending on the expected use.
Recommended Reading: Want to expand your shooting skills and master photography? Grab our set of 65 beautifully designed and printable Action Cards that will give you over 200 photography assignments to help you take your photography to the next level. Check it out here.

Shooters wye rest on my 7′ monopod. You can find them where firearms are sold but camera retailers are beginning to carry them. Originally the wye was to steady a rifle or shotgun while standing, but they are perfect for cameras, especially with long lenses or other high magnifications like macro. I can go from horizontal to vertical to handheld and back in less time than it took to type this. Photograph by Charles Haacker
Quick releases, such as the Arca-Swiss system, are mandatory these days. We used to have to basically bolt the camera to the head plate, which either meant moving both the camera and the tripod together or unscrewing the camera. It was awkward and inconvenient. Being able to quickly remove and replace a camera is very handy, and if you equip multiple cameras with the baseplates, you can switch out entire systems in no time.
Being able to quickly remove and replace a camera is very handy, and if you equip multiple cameras with the baseplates, you can switch out entire systems in no time.
A monopod is one-third of a tripod. It has just one leg but is fully adjustable. As a confessed tripod-o-phobe, I make extensive use of a monopod, but instead of any sort of head, I use a rifle rest, a shooter’s vee, or wye that gives me complete flexibility. It is not a substitute for a tripod – I still must keep my shutter speeds and ISO up – but for the events, I like to shoot it is supremely handy. It’s especially great supporting that big three-pound mass of camera and superzoom.
Conclusion

Photograph by Janis Wolf
If you don’t already own a tripod and are comfortable with what you are getting with the camera(s) you use, you needn’t rush out and buy one. So many folks these days are using smartphones and they thrive on being handheld no matter the subject, but if you get serious and find you are not getting the sharp details you want because of camera movement and/or high magnification, just remember to choose a tripod that isn’t too short and flimsy. Like your camera, a good tripod is an investment. Buy one that you will actually use.
Self-Check Quiz:
- Tripods are so-called because they have _____ legs.
- True or False: Every photographer must own a tripod.
- Tripods were once made of wood or even steel. Modern tripods are likely to be _____ or ______.
- True or False: The best tripods are hard to lift.
- For macro or HDR, a tripod is ___________.
- True or False: A monopod is a perfect substitute for a tripod.
Learning Assignment: Please try that assignment I mentioned. Take two identical pictures of the same subject: one on a firm tripod and the other handheld. Use a shutter speed equal to the reciprocal of the focal length with an aperture consistent with proper exposure. Enlarge both files to at least 100%. What difference do you see?


