
Photo by David Veldman
Introducing Shadows
If I asked you the first thing that comes to mind when you hear the word ‘photography,’ what would your answer be? I’m certain that the response would vary depending on the person asked, but for me the answer would be ‘light.’
Photography quite literally means ‘drawing with light.’ Shooting is all about understanding light: how it bends, how it reflects, how it can have different temperatures. Everything we do with a camera is dependent on light. Photzy has a premium tutorial titled ‘Understanding Light’ that pays tribute to this fact, and our sister site is called ‘Light Stalking’ for a reason.
A few years ago, I was just beginning to learn the art of creating images. I had fallen madly in love with photography, and wanted nothing more than to increase my skills. Sadly, my trusty mirrorless camera was damaged on an outing and could not be repaired. All I had left to shoot with was a tiny compact camera. Featuring 12 megapixels, a manual zoom and a tiny sensor, this was a camera that required the best of the user’s ability. I was discouraged at first. How could I create anything meaningful with such inferior equipment? Then, I read an insightful comment in a Light Stalking forum stressing the importance of light in photography. I was inspired, and began to shift my shooting schedule to maximize the golden hour. I paid attention to the different kinds of illumination. I didn’t just search for subjects, I searched for light.
My efforts (I like to think) paid off, and I continue to study light to this day.
Shooting is all about understanding light.
When you begin to study the nature of light, one thing becomes quickly apparent. Wherever you have light, you have shadows. In fact, you simply can’t have light without shadow, or vice versa. The two go hand in hand, and in some cases, photographers spend a great deal of effort avoiding the creation of shadows. Shadows, however, are not always undesirable. Shadows are merely another tool that a serious photographer must study in order to master their craft. If studying light will improve your photography, studying shadows is the next logical step. Shadows create drama and will help bring your shots into the third dimension, as you’ll see shortly.
Before we examine how to employ shadows in composition, let’s take a quick look at the different types of shadows. There are three basic categories of shadow, two of which we’ll focus on.
Hard Shadows
Hard shadows are harsh, well defined and often completely dark. In portraiture, hard shadows are avoided because they tend to create less than flattering results. Hard shadows require a strong, direct light source, such as the midday sun. Because they are so difficult to work with, many people choose instead to work in the ‘golden hour’ when the shadows lengthen and soften. Despite this, hard shadows have their uses. Their high contrast is ideal for black and white composition as well as abstracts.
Soft Shadows
Soft shadows are commonly used in art and photography. Many photographers will seek out soft shadows. You can create it by diffusing or reflecting light — common techniques used in the controlled environment of a studio. Studio shooters very carefully control soft light and shadows to flatten their subject and create definition.
Dappled Shadows
We won’t deal with dappled shadows in this guide. These shadows are hard to deal with, and are not quite as common as the others. Now that we’ve covered the types of shadows, let’s see how we can put them to work.
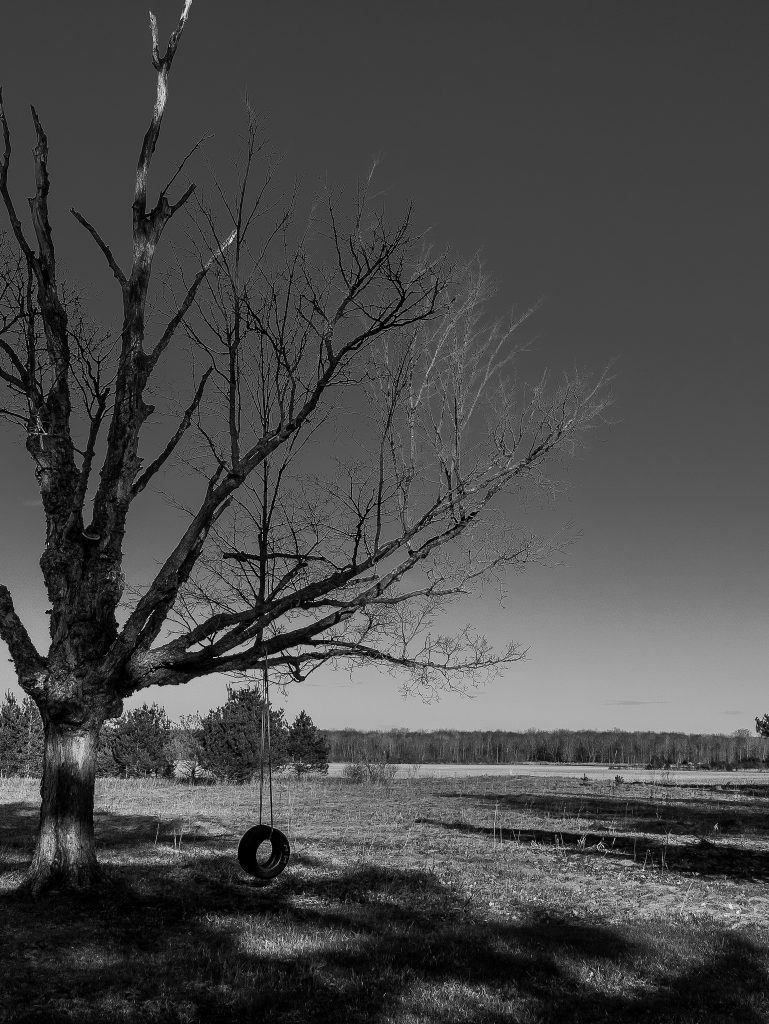
The picture of the tire swing and tree demonstrates dappled shadows. Photo by David Veldman
Use Shadows To Pull Attention
This is the most basic use of shadows. By using shadows ‘around’ the subject, it is fairly easy to control the attention of the viewer.
There is a variety of ways to control attention when we compose. In fact, that is essentially the goal of composition: to guide the viewer’s eyes in the direction we want. A well-composed picture will effectively highlight the subject, while minimizing unneeded distractions. Placement, color, and distance all contribute, but literally highlighting the subject and shading, the remainder is a time-tested method as well.
The simplest execution of this concept is the Vignette. The Vignette can be horrible if overdone, but used tastefully is an excellent technique. The great photographer Ansel Adams utilized it to great effect.
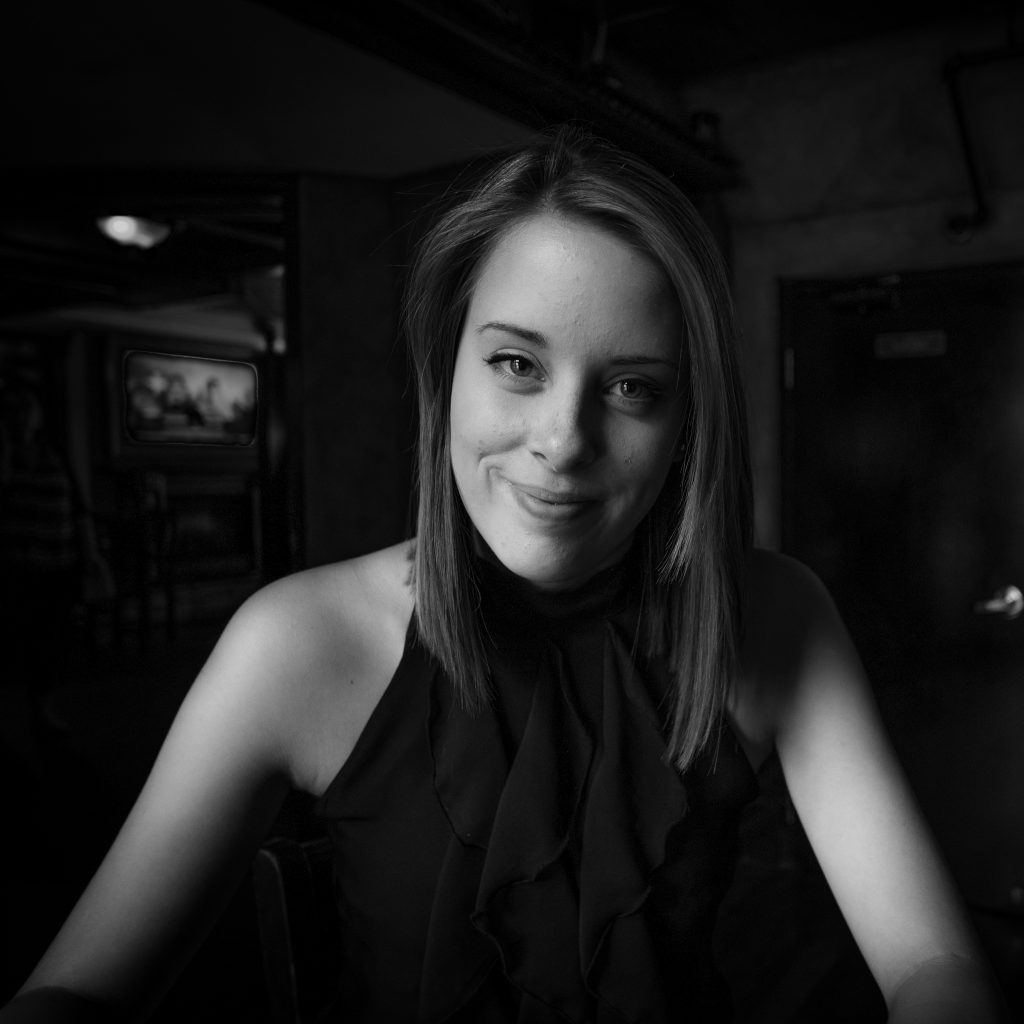
Photo by David Veldman
In this photograph (above), I managed to capture a natural vignette thanks to a single source of soft light falling across my subject’s face. The light is strong enough to create definition, but too weak to cause glare or illuminate the entire room. This pulls the attention inwards toward her. The shadows make this picture what it is: a low-key portrait.
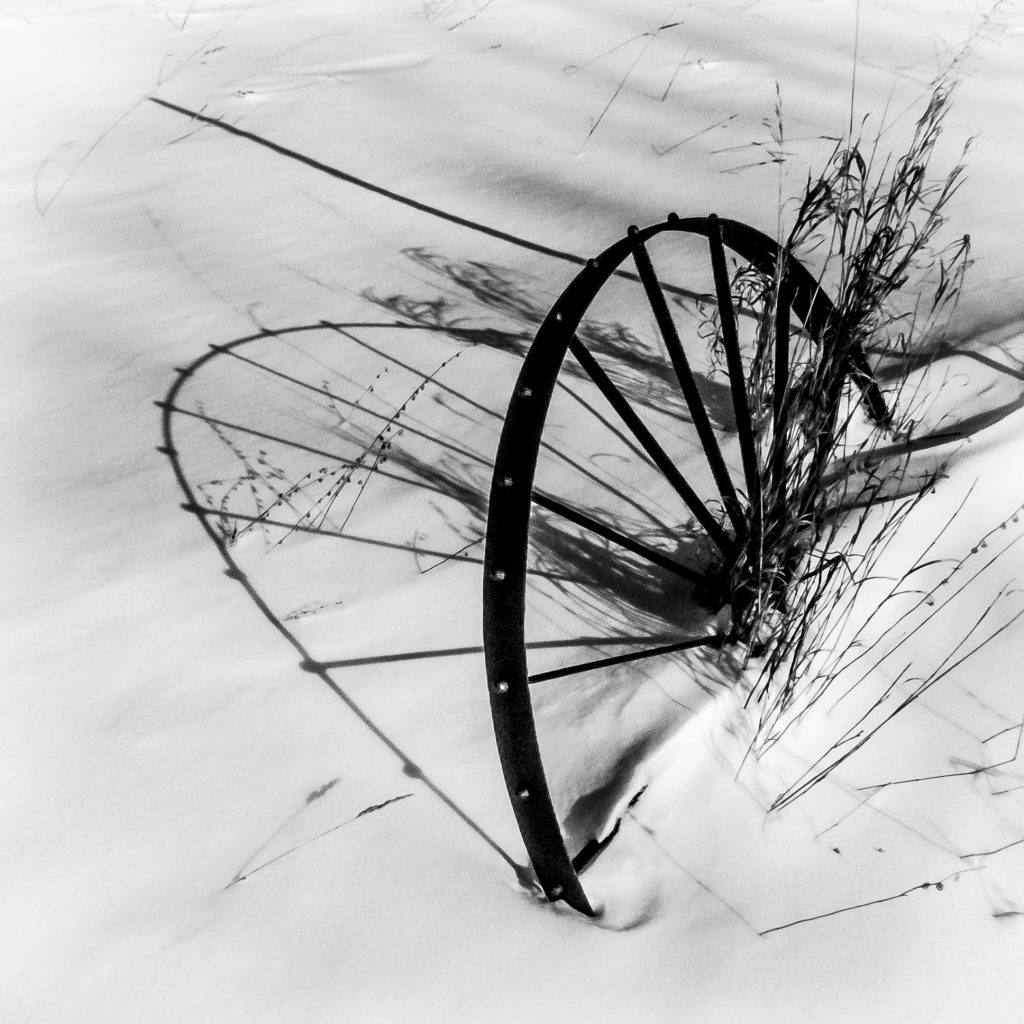
Using Shadows To Create Balance
One of my favorite creative techniques is to shoot in different aspect ratios. Shooting in different aspect ratios can free you from the restrictive 4:3 or 3:2 that cameras often natively shoot in. One of the aspect ratios I love to use is 1:1. The square is often associated with Instagram, but in fact, many great photographers shot extensively in the square format. Shooting 1:1 is a game changer when it comes to composition. The rule of thirds is not very effective and you can center your subject effectively (particularly if it is circular). More importantly, balance is key in the square format, and shadows are very useful when creating balance.

Photo by David Veldman
This image (above) would not work at all without the shadow as balance. However, using shadows for balance is not at all limited to 1:1. In any aspect ratios, you can utilize shadows to balance an image and create a counterpoint for the subject.
Shadows can essentially be utilized the same way we use reflections. Like reflections, they serve to double the subject and redirect the viewer’s attention back towards it. If you see shadows in your frame, try to determine if they can be used to create a balance with the main subject.
Using Shadows As Leading Lines
Leading lines are a fundamental technique of composition, and one that people use instinctively. Yes, admit it, you’ve taken a picture down train tracks. We all have. Just because it’s a basic method does not mean it is not effective.
Leading lines are vertical, horizontal, or even oblique lines that the viewer follows from one point to another. In most cases, we want the leading lines to end at or near the subject. Picture a sunset at the end of a long road. Regardless of where you first look, your attention will be redirected towards the sun. It’s wonderfully simple, and it works.
Shadows lend themselves well to leading lines. Not only do they return perfectly to the subject, but they also tend to do so without cluttering the frame. Simply line up your light source behind the subject and adjust as needed.
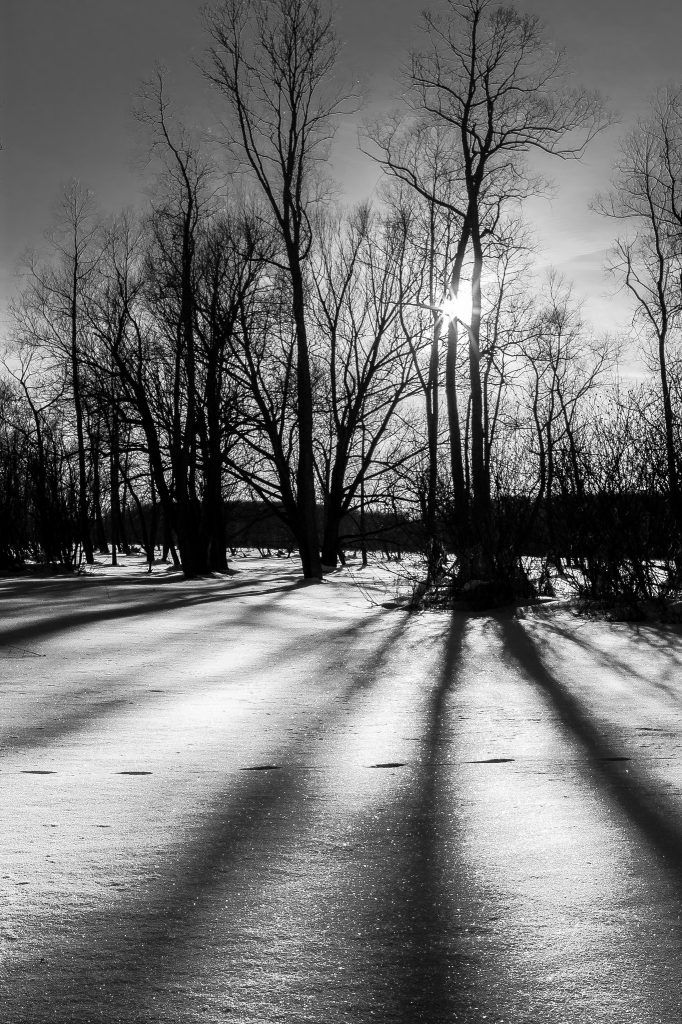
Photo by David Veldman
Use Shadows To Create Depth
I’ve saved the best for the last. However, while it may be the best, this technique is unquestionably the most complex. It’s one that requires careful thought and a lifetime to master. While the other points dealt with simple ways to direct attention or complement the subject, using shadows for depth is a holistic method to improve the entire composition of an image.
As is often the case, we can effectively learn by looking to the works of the Old Masters. Old Master is a term used to describe the legendary artists who lived between the 13th and 17th Century. Some such as Rembrandt you’ve certainly heard of, but others like Caravaggio are not as common despite their significance. At this point, you may be asking ‘what on earth does a 500-year-old painter have to do with me and my cutting edge DSLR?’ The question is understandable, and the answer is simple. The Old Masters set in place many of the rules of composition that we follow to this day. Furthermore, they possessed knowledge of light and darkness that even modern photographers still strive to emulate.
One of the most important innovations that they perfected was ‘Chiaroscuro.’ Chiaroscuro literally means ‘light-dark’ in Italian. Before the Old Masters, most paintings were flatly and uniformly illuminated. This new technique introduced contrast to art, and in doing so transformed art from two dimensional, to three.
Today, science confirms what the Old Masters knew. Light reflects more brightly off of nearby objects, while further objects will appear darker. Our brain knows this, and instinctively tells us that darker areas are further away, even if they actually are not.
Our brain instinctively tells us that darker areas are further away, even if they actually are not.
Combining this mental trick with careful shading resulted in images that leapt off the canvas and revolutionized the world of art. But Chiaroscuro is not limited to painting. We can also use shadows to create depth in our photographs. Depth is an advanced but key compositional technique.
Consider this image..
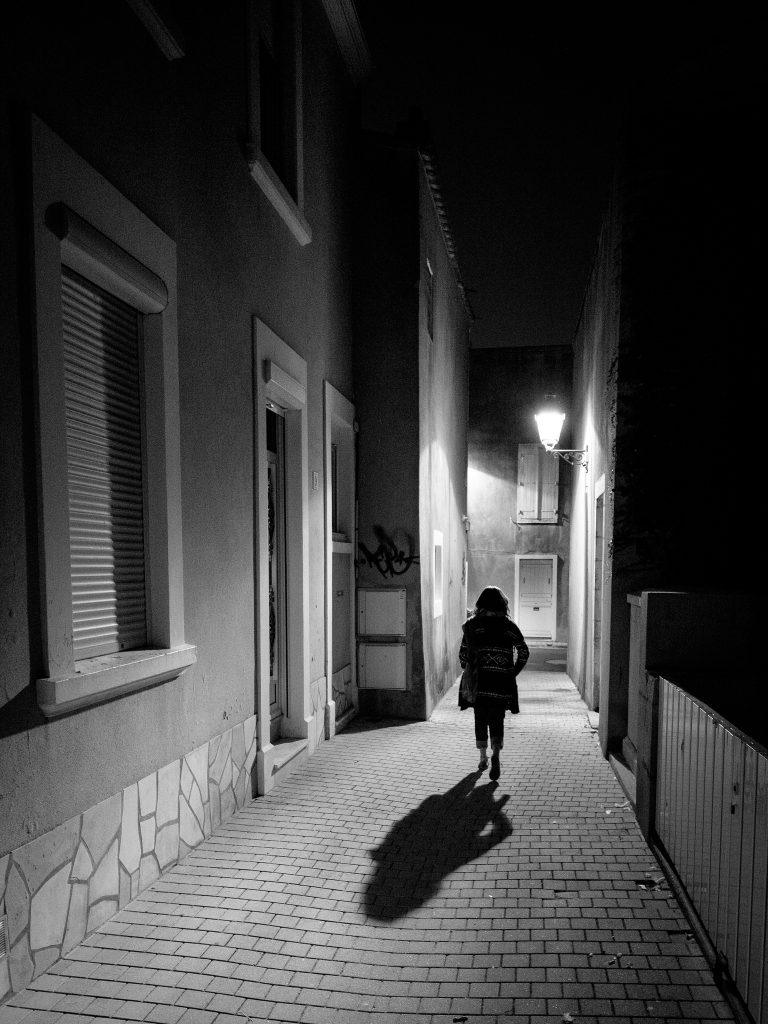
Photo by Lolowaro974
This is an image that conveys a feeling of depth, and it does so with shadows. Try to envision this shot without the contrast. Shot during broad daylight or well lit by multiple lights it would not have the same impact. The shadows along the edge of the wall combine with those of the subject to illustrate distance, and the leading lines of the buildings heighten the effect. While not classical Chiaroscuro, it’s an excellent example of how to create depth.
In the future, when viewing powerful images, keep an eye out for this technique — it can transform a scene.
Conclusion
Seeing shadows is not as easy as it sounds. When we bring the viewfinder to our eye and assess the scene, they do not jump out at us the same way as light sources and subjects. You have to train your eyes to look for the shadows, but the effort is worth it. They create drama, depth, balance, and mystery in an image. Considering the placement and types of shadows will force you to slow down and study all the compositional elements. This will almost certainly improve your images.
Recommended Reading: If you’d like to learn more about light to improve your photography, take a look at our best-selling guide » Understanding Light: Book One