Sure. I know what you’re thinking:
“I know what a lens is! It’s on the front of my camera and it focuses the picture.” You may even know the difference between a wide-angle, normal, or telephoto lens.
But, have you ever wondered why some lenses cost a couple of hundred dollars and others cost thousands?
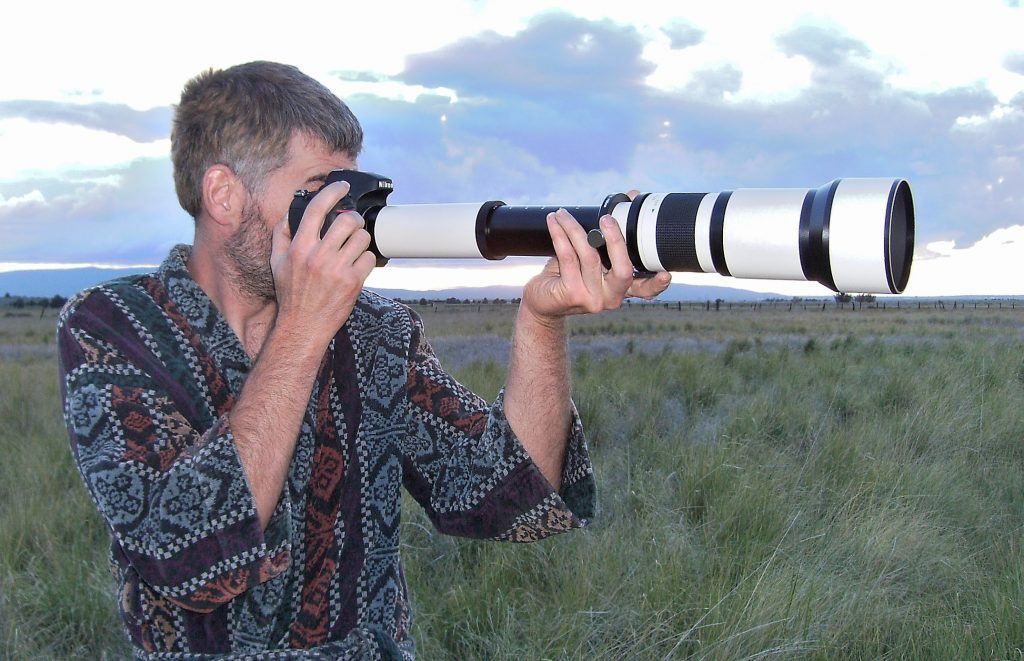
If you witnessed a photographer shooting with this lens, you would probably think, ‘Wow! Expensive lens!’ Looks can be deceiving. This lens would retail for less than $260.00 USD. Photo by Darron Birgenheler
Do you know what the terms ‘diffraction’ and ‘resolving power’ are? Are you
intimidated a little bit by technical jargon?
When you go to buy your next lens, would you like to be armed with some good old fashioned knowledge that will help you make an intelligent decision?
If so, this is the guide for you.
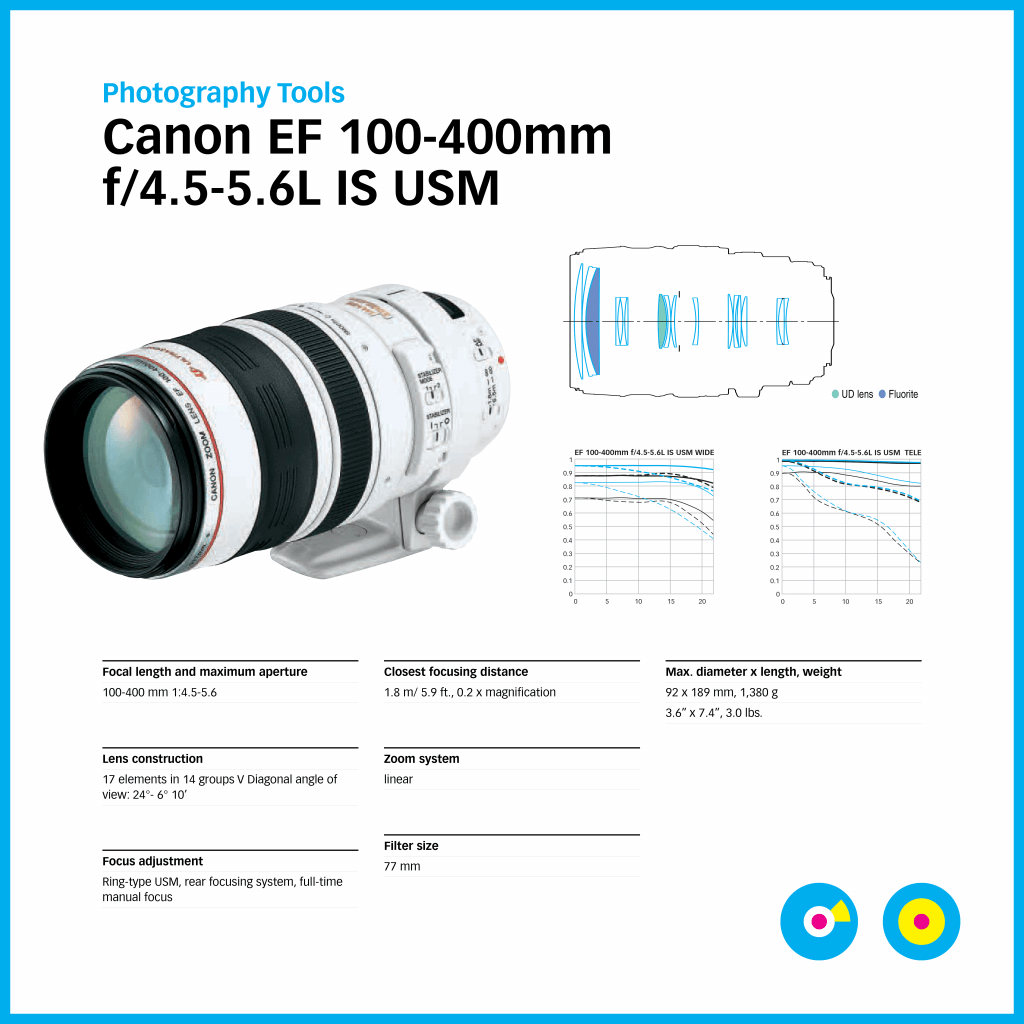
Photo by See-ming Lee
This is not going to be an overly technical article that is filled with charts and info that you don’t care about.
I’m going to give you some basic knowledge surrounding lens design and operation. My goal is to help you better understand the lenses you own, and help you make good purchasing decisions in the future.
Most of us (that have been involved with photography for any length of time) have purchased a lens that we found disappointing. Hopefully, this article will help you avoid that unpleasantness.

Photo by Shell Daruwala
Why Do Certain Lenses Cost Hundreds of Dollars And Others Thousands of Dollars
Basically, it comes down to construction quality and automation. A lens can be constructed well and shoot sharp photographs and still be inexpensive; that is, if it’s a completely manual lens or it hasn’t been designed to hold up under the rigors of professional use.
Cheaper lenses have more (if not all) plastic parts and sometimes even plastic lens elements. The plastic lens elements are typically enclosed inside the lens and the outer elements are glass. (Please note that there are SOME plastic lens elements that are highly sophisticated and high quality. They are manufactured to an extremely high tolerance, and their presence doesn’t automatically make a lens bad or cheap.) The cheapest of lenses have plastic outer elements as well. Plastic is not used for the outer elements on high quality lenses because they scratch much easier.
Does this mean that ALL inexpensive lenses are bad?
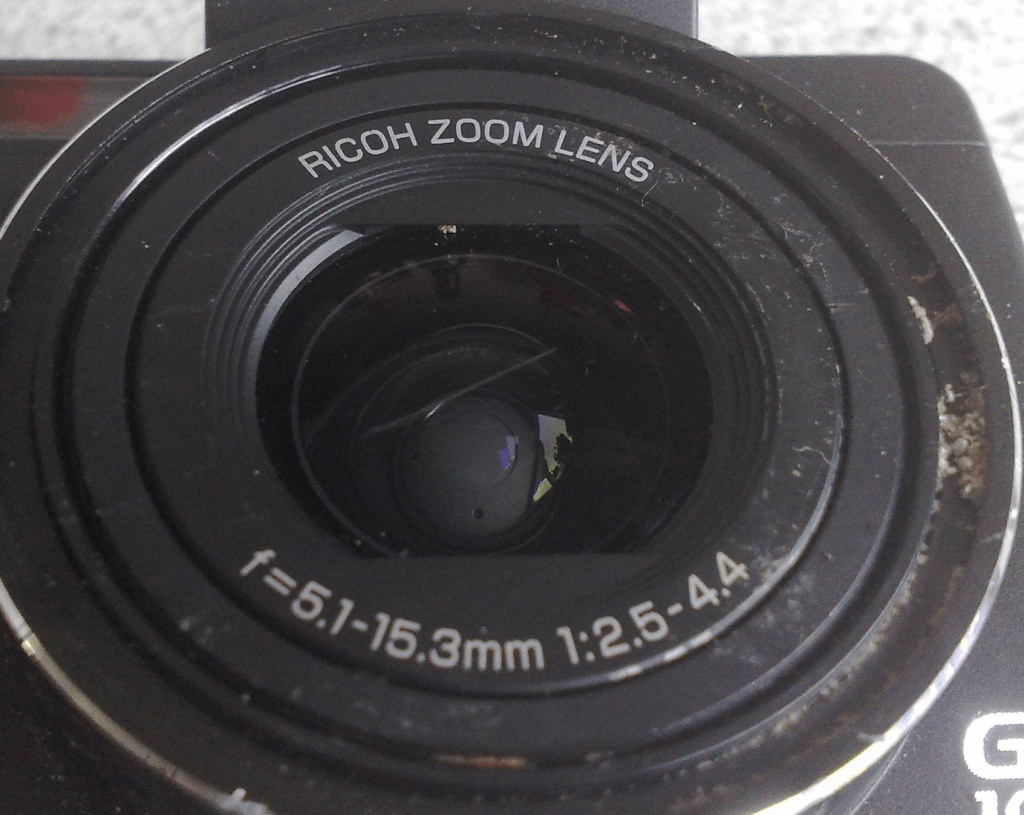
Photo by Morten Liebach
Not necessarily. If you’re a casual photographer who pulls their camera out occasionally, and you rarely go taking pictures under harsh conditions, and your photographs are primarily posted online or printed very small…
Why spend the money if your use doesn’t really require it? It’s a good point. However, there are other factors that may motivate you to fork out more dollars for your lenses (which we will get into in a moment).
I will add, while having the ‘lens quality debate’ with many photographers I have come to the conclusion that most amateur photogs would not be able to notice the quality difference of their images (i.e. lens quality) based on their FINAL USAGE of the photos. (They primarily post them online.)
What do expensive lenses bring to the construction table?
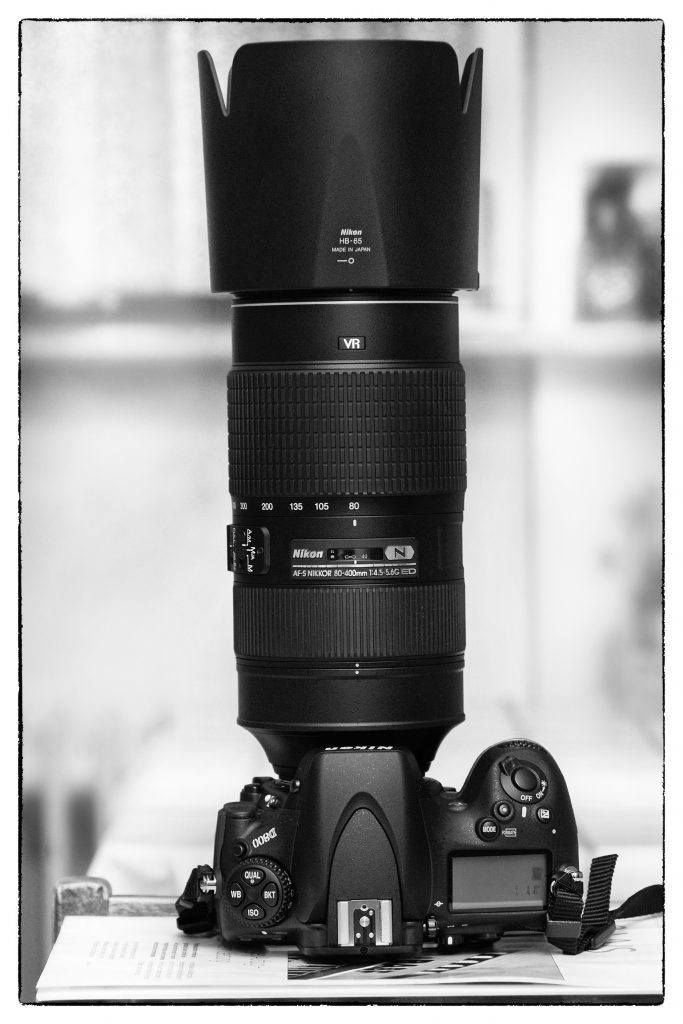
Photo by Rob124
- They are constructed primarily of metal. This is especially important as relates to the gears that operate the focus and zoom mechanics, as well as the mount, which holds the lens to the camera. These two spots are the most susceptible to damage.
- All (or most) of the elements are glass. As the glass is multicoated to reduce lens flare and the entry of ultraviolet light, this provides a sharper, crisper image. Another term that you will hear regarding lens design is- ‘Low Dispersion Glass’. LD glass helps guard against ‘chromatic aberration’, which is an inability of a lens to focus all the colors of the spectrum to the exact same point. Again, will you see the benefits of paying for this higher technology? Only you can answer that. Will you blow your images up large and hang them on the wall? If so, then the answer is a definite yes! If not, then you must decide for yourself.
"LD glass helps guard against ‘chromatic aberration’, which is an inability of a lens to focus all the colors of the spectrum to the exact same point."
- The maximum aperture will be fixed, and it will generally be f/2.8 or larger (some longer telephoto lenses may have a maximum aperture of f/4.0 or f/5.6). This has to do with lens design and manufacturing tolerances. It costs a lot more to make a lens with a large aperture, and that’s especially true with a zoom lens that has a large fixed aperture.
Other Construction Considerations
What direction does the focus ring turn when going from close-up to infinity?
This happened to me several years ago. All of my lenses focused by turning the focus ring clockwise with the camera held to my face. Then, I purchased a lens (an older 3rd party lens) that focused in the opposite direction (turning the focus ring counter-clockwise). As much as I loved the lens, I could not get used to it, and I had to sell it. Most OEM manufacturers have all their lenses focus by turning the ring in the same direction. Be aware especially if you’re purchasing older lenses by 3rd party manufacturers- that this might not be the case.
Does the lens have internal focusing?
Less expensive lenses are more likely to have a lens barrel that visibly moves as you turn the focus ring. More expensive lenses have internal focusing; this means that the physical barrel on the outside of the lens never changes. This can be very important depending on how you like to hold your camera or if you like to use filters. Also, if the focusing mechanism is entirely internal, you’re less likely to ‘bump the focus’ resulting in a fuzzy photograph.
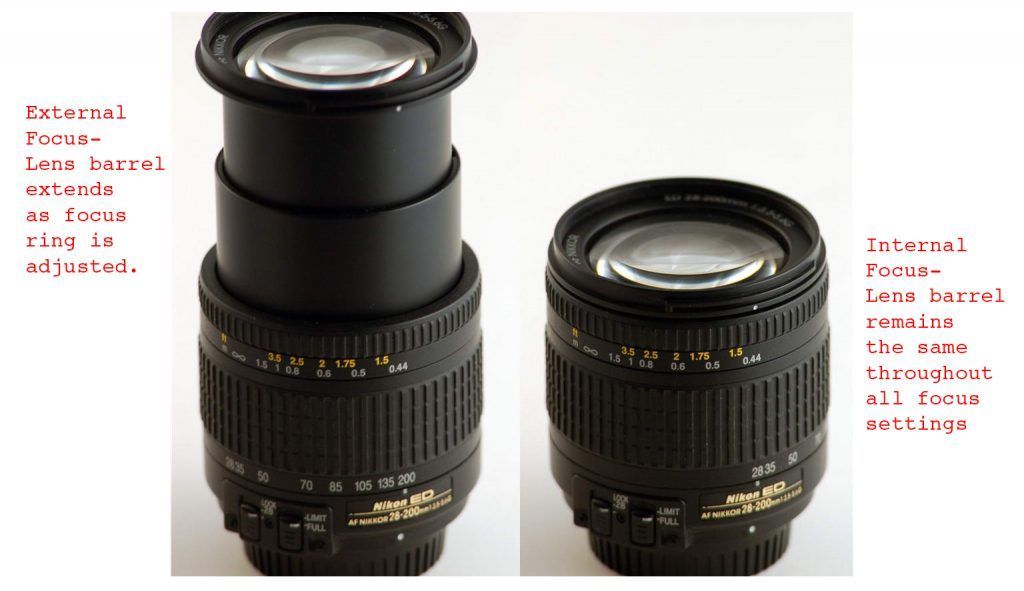
Photo by Kent DuFault
What is the filter size on the front of the lens?
If all of your lenses are one size, and you purchase a new lens that is a different size, do you want to have to purchase new filters for that one lens? Maybe… or maybe not!

Photo by Aslak Raanes
How does the ‘zoom’ mechanism function?
All of the zoom lenses (that I have owned) zoom by turning a ring similar to the focusing ring. Then, I purchased (a very highly touted) Nikon zoom lens that operated by pushing and pulling the lens barrel forward and backward. I couldn’t stand it! It felt like I was always struggling to hit the critical spot where I wanted the zoom setting to be. Another issue with the push/pull zoom mechanism is ‘drift’. The mechanism can have a tendency to drift, especially if the camera is pointed up or down. This means that you have to ‘hold’ the barrel in the correct zoom position. The point is- if you’re very used to doing something one-way, you may find it difficult to switch.
Quick Tip: If you’re looking at buying an older lens to save some money, keep this in mind. Some older zoom lenses are called ‘vari-focal’. This means that the focus changes when the zoom is changed. So, you can’t zoom in, focus on something, and zoom back out while still maintaining focus. You have to refocus every time the zoom is changed. These lenses will always cost less, but they can be a pain.
What is the physical weight and size of the lens?
This is a very tough question. Starting about 10 years ago, manufacturers started packing longer zoom lengths into smaller, lightweight, packages. As an example, Sigma makes a 50-500mm lens (and they’re not the only company offering these mega-zooms).
Obviously, there is an advantage if you want to travel light. You’re carrying a camera and one lens, which covers an entire camera bag full of focal lengths.
Manufacturers also began switching to more plastic parts to keep these lenses lightweight.
The downside is- it can be hard to get a technically good shot with these lenses.
The lighter the lens, the more difficult it is to hold the camera steady.
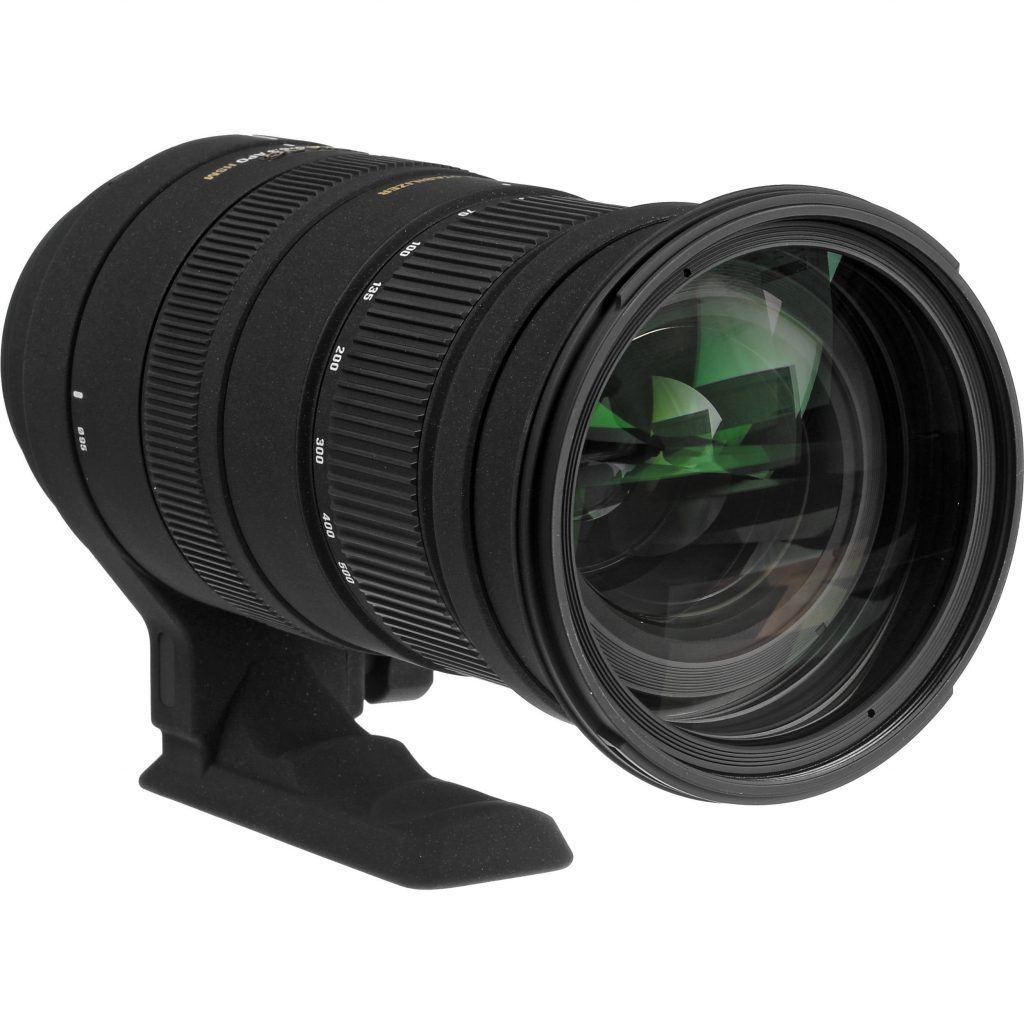
This is accentuated when you can zoom out to a long focal length such as 500mm. Because the lens is so compact, photographers tend to forget that it’s almost impossible not to get camera shakemat 500mm (especially if you’re trying to handhold the camera)!
This problem isn’t limited to only lenses that zoom out as far as 500mm. If you’re considering a lens that zooms to a focal length longer than 200mm, you want to be concerned about weight. You should try the lens out first.
"If you’re considering a lens that zooms to a focal length longer than 200mm, you want to be concerned about weight. You should try the lens out first."
I tend to like a heavier lens with a shorter zoom range. If I’m traveling light, I carry three zoom lenses: 18-35mm, 35-135mm, and a 70-200mm.
This range will cover 99% of whatever subjects I may encounter.

Long range zoom lenses (such as a 50-500mm) while convenient, and at times quite compact, require special attention toward camera shake. Photo by Paul Falardeau
How Big Is The Focus Ring
I learned this one the hard way (once again). I purchased a zoom lens that had a focus ring that was approximately 20mm wide. It was so narrow that it seemed as if the manufacturer thought that no one would ever manually focus the lens. It was also located directly next to the aperture ring, which often resulted in me bumping the f/stop instead of changing the focus. Again, I had to sell that lens. If you like to manually focus from time-to-time (and you should as there are certain techniques that require manual focus), be sure to check out that focus ring, and make sure you’re comfortable with it.

Photo by Peter Stevens
How Does The Aperture Ring Function?
Does it lock into the ‘A’ setting for auto-exposure modes? If not, is it possible to easily knock the ring off the ‘A’ setting? How easy is it to ‘unlock’ the ring from the auto-exposure setting? Does the f/ stop ring click-stop between apertures? Does it click-stop in ½ stop increments? How difficult is it to get your fingers on the aperture ring? Which way does the aperture ring turn to adjust from open to closed? Does that match your other lenses?
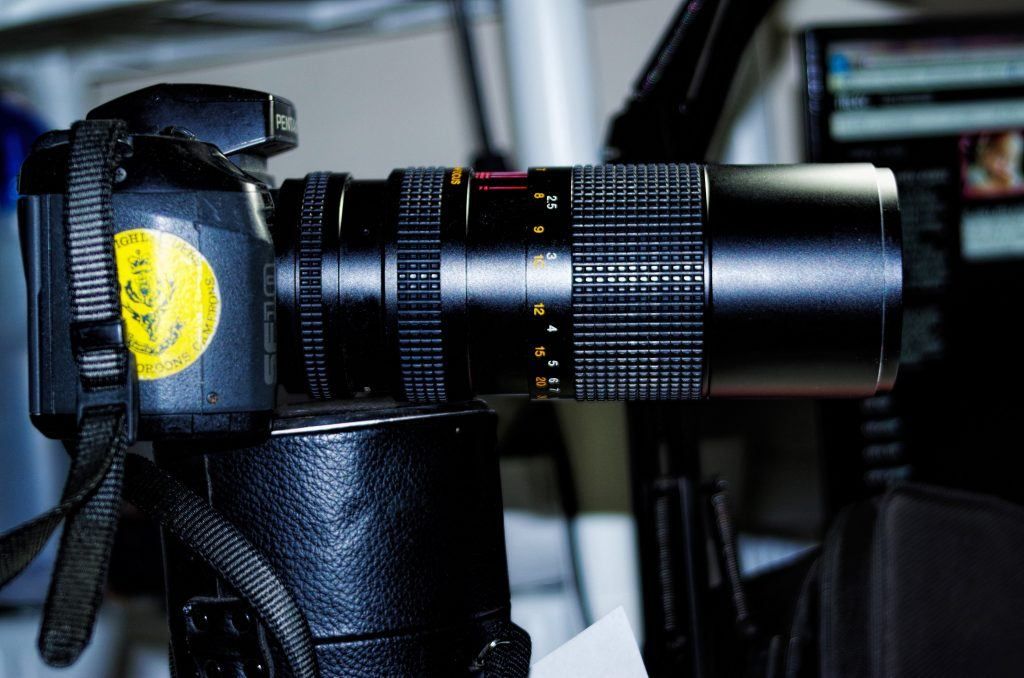
Notice how each of these function rings has good separation, so that you grab the right one. Not only are they properly distanced, but they also have their own‘size’ for the knurled rubber grips. This helps you recognize which ring you’re touching when your eye is to the camera. Photo by Jody Roberts
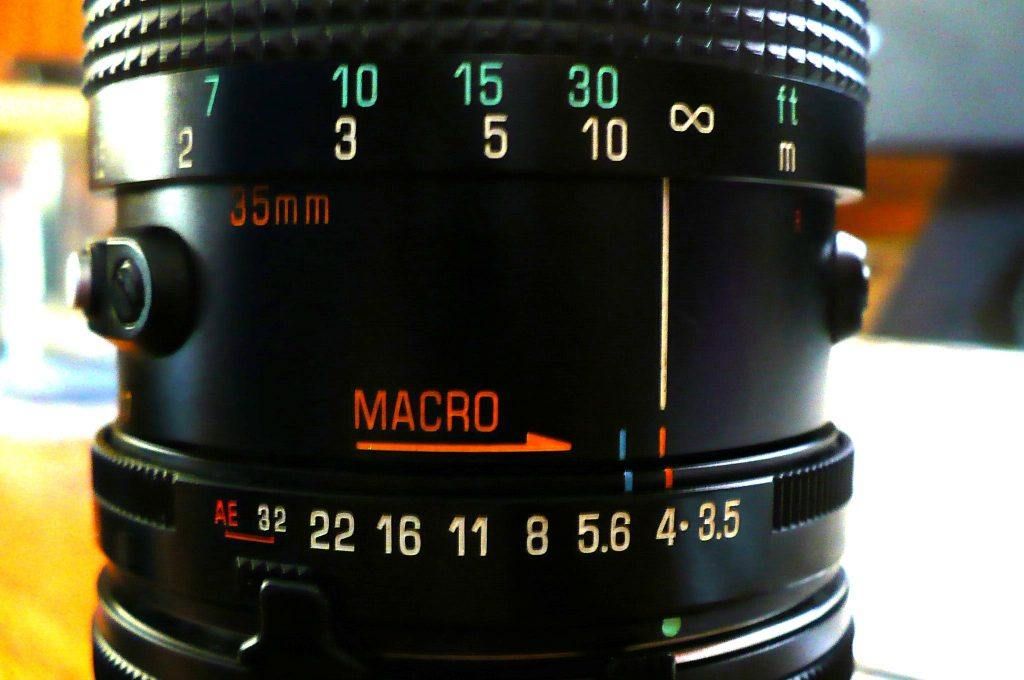
On this older lens, the aperture ring must be rotated past f/32 to the AE setting for automatic aperture use. When buying a lens, be sure to check and see if it locks, how it locks, and how easy it is to unlock. Photo by Andrew Butitta
How Quickly, And Silently, Does The Lens Autofocus Motor Function?
Have you ever watched a professional sporting event and noticed that about 90% of the photographers are using Canon? Wonder why? It’s because of the Canon Ultrasonic Motors (USM). For years, Canon lenses focused faster, quieter, and more accurately than any of their competitors. This was especially true in low light. I believe that the other manufacturers have now caught up; but the damage was already done (at least in the sports world).
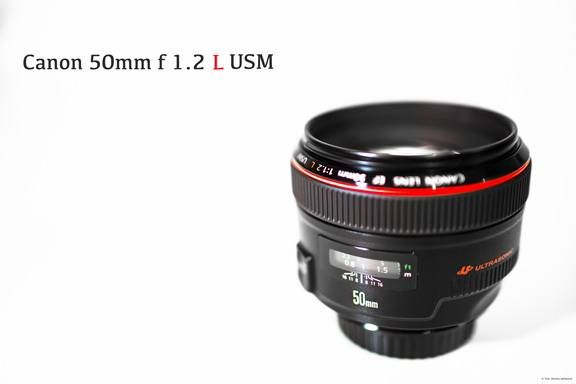
Some newer lenses have no aperture adjustment ring. It’s all done electronically.
When you’re considering a lens, you want to check that autofocus system out carefully. This is especially true in low light where a lens of less quality will have a tendency to ‘hunt’ for a focus point. And just because a lens is expensive doesn’t mean it has extraordinary autofocus capability. Just a few years ago, I almost purchased an expensive Nikon zoom lens that (quite frankly) had a terrible auto-focus motor. It was slow and noisy. It’s always best to check the lens out before buying.
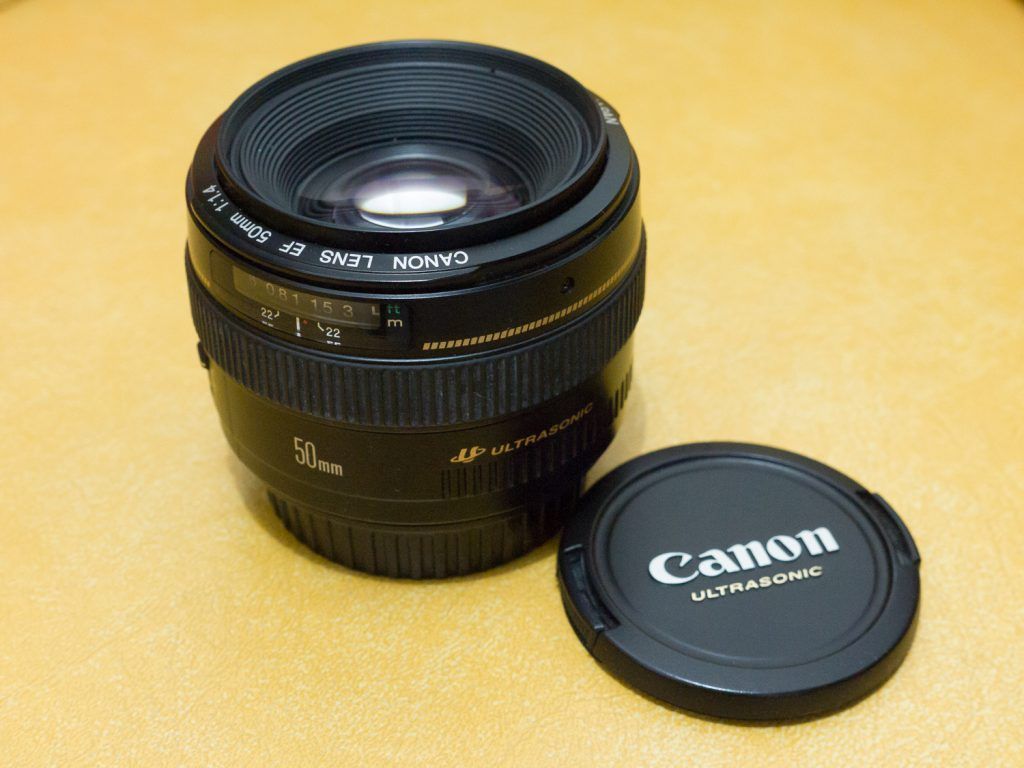
Many manufacturers now offer ultrasonic motors. However, there are differences. How fast does it focus? How noisy is it? Does the operation of thelens deteriorate under low light? Photo by cb-agulto
Additional Features...
Is Image Stabilization the best invention since the introduction of sliced bread?
Most quality zoom and telephoto lenses now come with some form of image stabilization. Depending on the manufacturer it could be referred to as: IS, VR, SR, or VC. (Some brands put the stabilization in the camera and not the lens). These acronyms all mean the same thing. They label the technology used to allow you to handhold your camera and lens at slower shutter speeds and still get a sharp picture.
That sounds pretty great!
So, if your lens has that option; should you leave it on all the time? NO! And that’s the problem. Many photographers turn it on and forget about it.
That practice can actually reduce your image quality.
Why is that?
Because lens stabilization works by introducing motion to counteract motion. (That’s a simplified explanation.) If there is no motion to counteract, the system itself can create motion that becomes a problem.
When should this concern you? Definitely when the camera is on a tripod!
"Lens stabilization works by introducing motion to counteract motion."
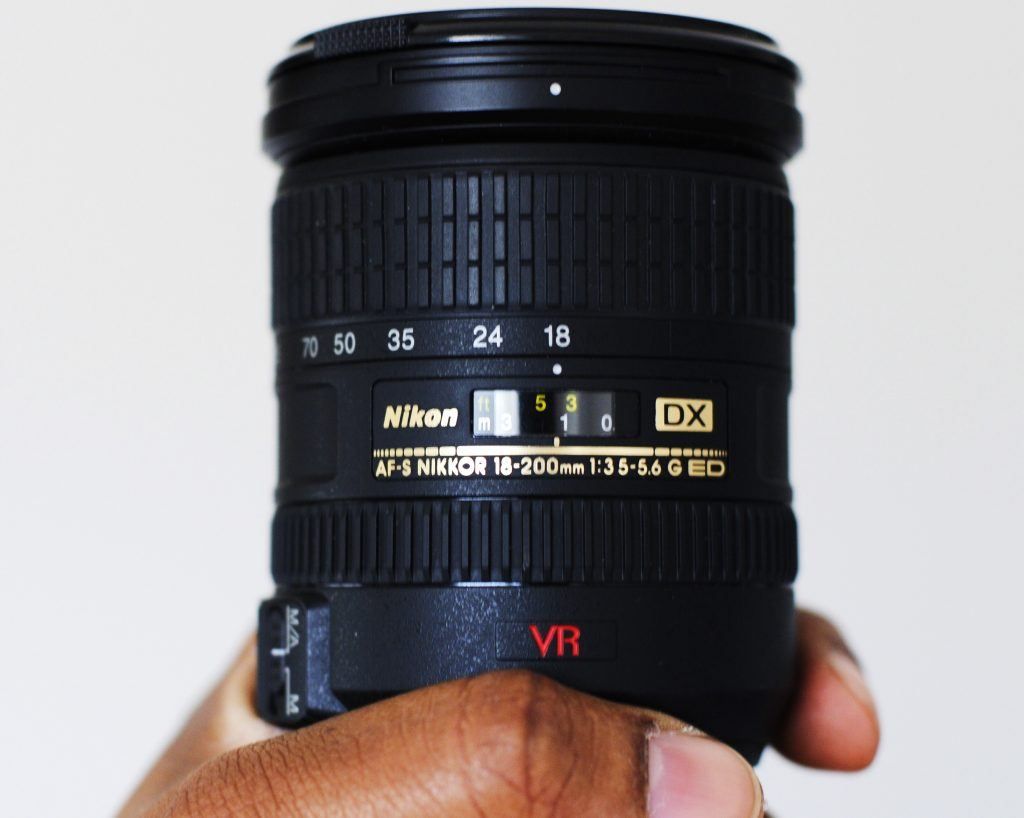
Electronic stabilization can buy you about 2 stops of hand-holding ability. A rule of thumb is that the average person can handhold a lens down to a shutter speed equal to the focal length of the lens. (For example, if this Nikon lens were set to200mm, the slowest shutter speed that you would want to handhold the camera would be 1/200th of a second. If the lens were zoomed back to say 50mm, you could handhold the lens down to a shutter speed of 1/50th of a second, and soon). Electronic stabilization buys you two stops. So, in our 200mm example,instead of only being able to handhold the camera at 1/200th of a second, you could now handhold it at 1/50th of a second (2 stops slower). Photo by IamNigelMorris
That Rotating Device Called The Tripod Collar
You will only find a rotating tripod collar on longer focal length zoom and telephoto lenses. This device allows you to mount the lens to the tripod instead of the camera.
Should you do this?
YES! Why is it important?
Long focal length lenses are longer and heavier. If you mount the camera to the tripod all that lens weight is hanging off the front. The center of gravity isn’t located over the tripod. It’s like trying to stand along the edge of a rowboat instead of the center. It’s much more stable if you stand in the center. I personally feel that a tripod collar is a MUST for any lens longer than a 200mm (zoom or telephoto).
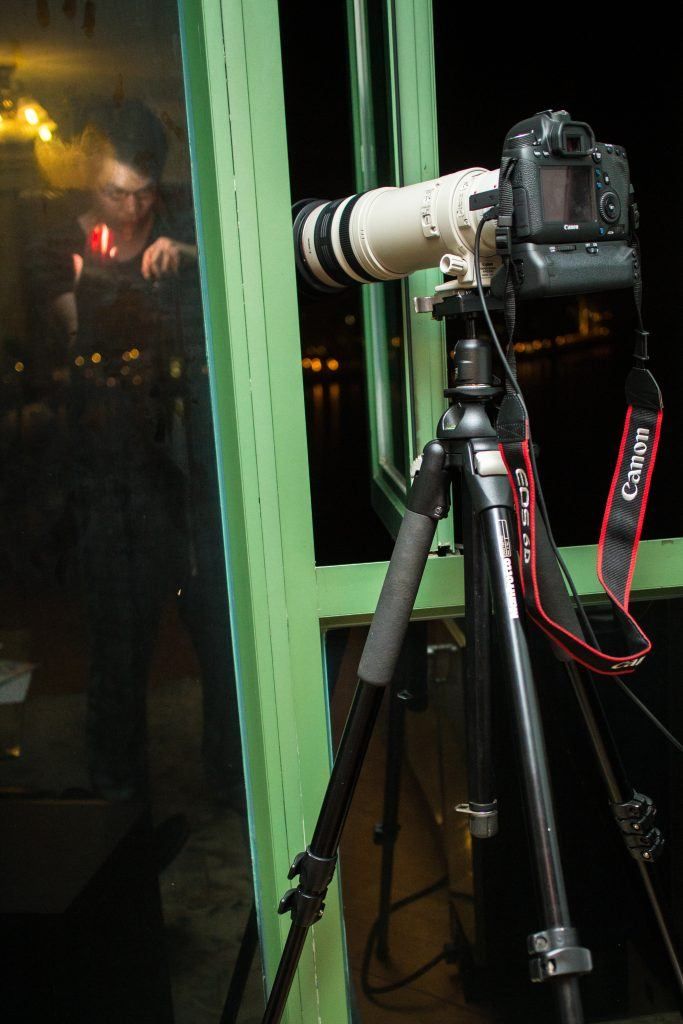
Take a good look at how this camera and lens are attached to the tripod; they’re attached by the tripod collar (on the lens) and not the camera. Notice how the weight is more evenly distributed over the center of gravity. Do you see the knurled knob to the left of the collar? This knob allows the collar to be loosened,so that the camera can be rotated from horizontal to vertical without moving the tripod head. This also adds to the stability of the setup. Photo by See-ming Lee
This Is The Importance Of A Lens Hood
The lens hood is probably one of the most misunderstood lens accessories. A lens hood has two functions.
- It helps prevent lens flare by blocking direct light from the front element of the lens.
- It can help prevent damage to the front of your lens, should you (God forbid) drop your lens to the ground. Lens flare can happen anywhere at any time. For that reason alone, I always have my lens hood on.
In respect to point #2 above, almost every photographer in the world will (at some point) experience the embarrassment of not correctly mounting his or her lens, and it will fall to the ground. When it happens (because it will), if you have your lens hood mounted to the front element, chances are good that you won’t wreck your lens.
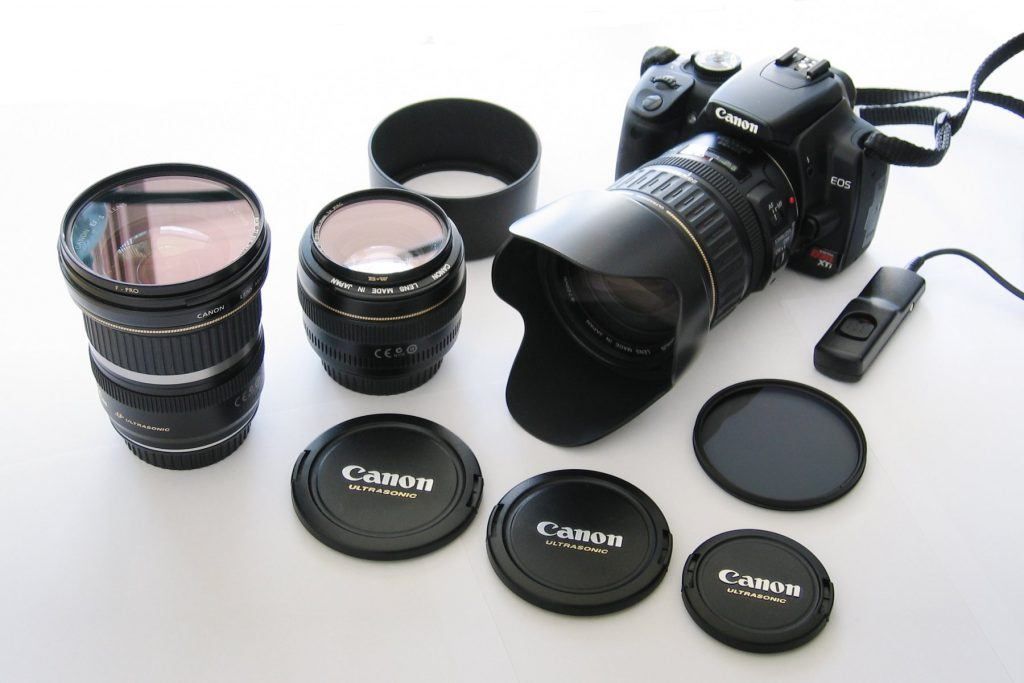
A lens hood (such as the one mounted to the camera lens above) protects the front element from any stray light, and it provides the front rim of your lens with some extra protection should it be dropped. Photo by Claudio Matsuoka
Is Having A "Fast" Lens Important?
My lens is so fast that it can run circles around your lens! Is that what I mean by the term ‘fast lens’? Of course not!
What does it mean to say ‘a fast lens’?
This is one attribute of lenses that most of us understand.
It’s good to have a wide maximum aperture.
The term ‘fast lens’ evolved because a large maximum aperture allowed the photographer to use a faster shutter speed, thereby making the lens more useful in low light.
You’ll notice that expensive lenses generally have a maximum aperture of f/2.8 or larger. Less expensive lenses will have a maximum aperture of somewhere between f/3.5 and f/8.0.
The difference in expense (based on a fixed maximum aperture) really shows up in zoom lenses.
A less expensive zoom lens will have a variable maximum aperture based on the zoom setting. Usually, when zoomed to the widest focal length the maximum aperture will be something like f/3.5 or f/4.0. Then, when fully zoomed to the longest focal length the maximum aperture will be something like f/5.6 or f/8.0.
Higher quality zoom lenses will have a fixed maximum aperture!
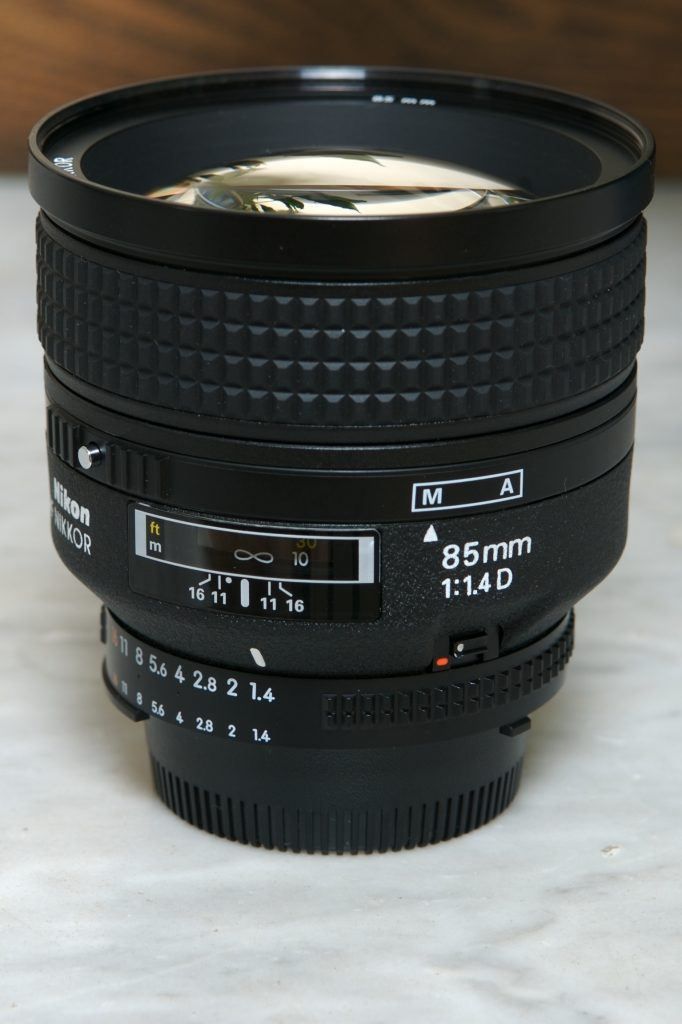
This lens has a maximum aperture of f/1.4. This would be considered a very fast lens. It’s great for low light and minimal depth-of-field. Photo by lecates
This lens has a maximum aperture of f/1.4. This would be considered a very fast lens. It’s great for low light and minimal depth-of-field.
Why is a fast lens important? Essentially there are three reasons.
1. They are made of better materials because of the complexity involved in the manufacturing.
2. They allow the photographer to create handheld images in lower light by allowing an increase in shutter speed.
3. They provide minimum depth-of-field.
Let’s talk about point #2 for a second. This benefit was more relevant in the film days than in today’s digital realm. The reason for this is that the modern DSLR camera allows us to raise our ISO to higher levels than was available with film (without image degradation).
I think the most important benefit of a fast lens in today’s digital world is the minimal depth-of-field. DOF is an important tool of composition. A lens (that is less than 300mm in focal length) that has a maximum aperture of f/4.0 or smaller, simply cannot provide that crisp, highly defined single plane of focus that a f/2.8 or faster lens can.
But, each of us must ask ourselves, are we willing to spend hundreds, perhaps thousands, of dollars more to have a fast lens?
Which brings me to the next topic.
Do I Want A Zoom Lens, A Prime Lens, Or Both?
Do you know the difference between a zoom lens and a prime lens? I don’t mean that to sound insulting. Anyone who has come to photography over the last 15 years has been bombarded with the idea (and marketing) of the zoom lens.
The kit cameras come with a zoom lens. Your local photo store will push you toward a zoom lens. Manufacturers incorporate most of their R&D into zoom lenses.
The main reason for this is convenience. A zoom lens changes focal length. A prime lens has a fixed focal length.
Why is a zoom lens more convenient? You don’t have to carry so many lenses to cover a lot of focal lengths.
But here are some facts that many folks don’t know about prime lenses.
- They are generally sharper than a zoom lens set to the same focal length.
- They generally cost far less for a fast lens at that particular focal length. For example- a Canon 24-70mm f/4.0 lens will run you about $1500USD. The Canon 24-70mm f/2.8 lens will cost you closer to $2300 USD. You could buy a Canon 50mm f/1.8 lens for around $125.00 USD, and the Canon 28mm f/1.8 for about $500 USD, and the Canon 85mm f/1.8 for close to $419 USD. This would give you three very sharp, very fast, prime lenses for approximately $500 – $1000 less than the equivalent zoom lens. (But you must carry three lenses.)
- They hold up better than zoom lenses because they have less moving parts.
- They are generally smaller, lighter, and more compact.
Am I advocating that you eschew zoom lenses for strictly prime lenses? No, I think each has a place in your camera bag.
But consider this, if you can’t afford, or don’t want to pay for expensive fast zoom lenses, purchase the zoom lenses that you want and fill in the gaps with fast, inexpensive prime lenses!
Should I Buy OEM (Canon, Nikon, Sony) or Third Party (Sigma, Tamron, Tokina)?
I’ve always felt that this was personal preference. I always choose OEM lenses. I know many photographers who swear by their 3rd party lenses. You can certainly save money by going 3rd party.
I will say this; I would never purchase a 3rd party lens without getting my hands on one first and trying it out. If you can, rent the lens, or borrow it. Read reviews about it. If you’re purchasing online, make sure you review the return policy. You don’t want to get stuck with a restocking fee as a result of purchasing a bad lens.
"Never purchase a 3rd party lens without getting my hands on one first and trying it out."
What The Heck Is A Focal Length Factor?
Before digital, all lens focal lengths (for 35mm SLR cameras) were based upon the 35mm film size.
Someone (along the line) determined that the 50mm focal length lens most closely matched our human vision, and it was dubbed ‘The Normal Lens’.
When digital photography began, and it’s still prominent today, the imaging sensor in an average DSLR was smaller than the physical size of 35mm film.
This meant that the normal lens was no longer normal. There was now a crop factor. There are a number of equations that explain why this is. But I promised not to get too technical here.
Here is a VERY simplified explanation.
When light passes through focused optics it creates an image that is shaped like a circle. This circle is called the ‘Circle of Confusion’. The format of the camera used to create the image crops that Circle of Confusion to create the final photograph.
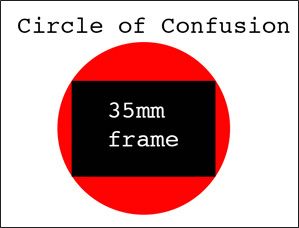
From this illustration you can see how the lens creates an image that is round(the Circle of Confusion). It’s the format of the light sensitive material (film or electronic sensor) that crops the image into a quadrilateral photograph.
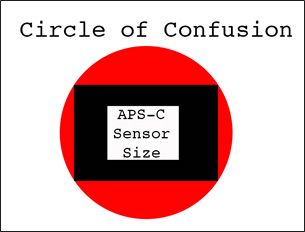
If the same lens is used on a digital camera (that has an electronic senso rwhich is physically smaller than 35mm film) the Circle of Confusion remains the same size; only a smaller portion of the circle is being captured by the recording material: essentially, it’s been cropped.
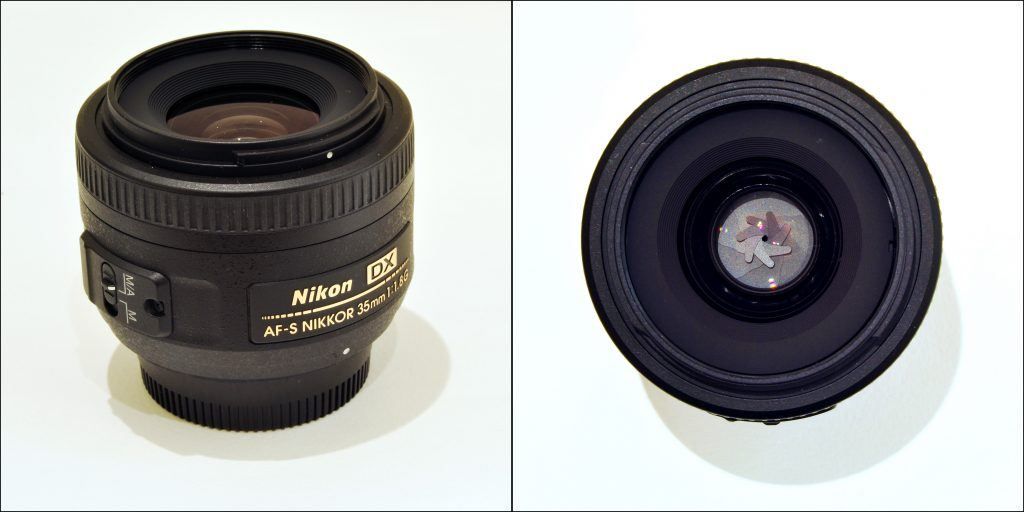
See that ‘DX’ indicator on the lens barrel? That means that this lens was manufactured for the smaller camera sensor. When purchasing lenses, make sure you’re getting the right lens for your sensor size. Photo by George Rex
What this means is that the 50mm lens is now the (approximate) equivalent of a 75mm lens when used on an APS-C sized sensor DSLR.
Then, to make things even more confusing, the manufacturers decided to create a line of lenses that were re-engineered for the smaller sensors. This was to remove the crop factor.
Now, why is this important to you?
I’m sure you’ve been hearing about Full-Frame Sensor cameras. These cameras have sensors that ARE the physical size of 35mm film. They’ve been around for years, but only recently have the prices begun to drop to where the average Josephine can afford to buy one.
Full-Frame sensors are the future of DSLR cameras.
Now, if you buy any lenses that are the ‘D series’ (resized for the smaller sensor) they will not work on a Full-Frame sensor camera without factor adjustment (and maybe not at all depending on the model)!
This could be a real problem if you upgrade to a Full-Frame camera or want to add a second camera body in a Full-Frame format. Your lenses may not work on all your cameras.
My advice is to avoid the re-engineered, digital series lenses because as technology advances, all DSLR camera bodies will become Full-Frame.
I'm Now Going To Bore You With Two Technical Terms
Diffraction – When you create a photograph, it’s light passing through the lens and hitting the light sensitive material that forms that image. Light travels in waves- just like water. And just like water, when light waves hit something they become disturbed. In photography, that ‘something’ is the metal blades that make up your aperture. When the light waves hit the aperture they begin to bounce around inside the lens creating softness to the image. This is called diffraction, and it’s inherent in every lens.
I’m really simplifying this- here is what you need to know.
- The larger your f/stop, the less metal blade there is for the light waves to hit, and the resulting image (at the focal point) is sharper. This is one of the reasons why photographs taken with a fast prime lens appear sharper than say the same photo taken with a zoom lens that has a max aperture of f/4.0 to f/5.6.
- The trade-off for a max aperture is minimal depth-of-field, and perhaps you don’t want that in your photograph. So, the alternative is to stop that lens down to f/22, or even better f/32, for max DOF! Right? Wrong! This is where diffraction really comes into play. The more you stop down, the more the metal blades get in the way of the light waves, and thus, the more diffraction occurs.
This is where we come to the term, Resolving Power. At this point one could whip out a bunch of charts and diagrams that none of us care about.
"The larger your f/stop, the less metal blade there is for the light waves to hit, and the resulting image (at the focal point) is sharper."
Here is what you need to know.
- All lenses have a limited resolving power (their ability to create a sharp image). There are a number of factors that affect resolving power.
- Lenses that have multi-coated glass, or LD (low dispersion) glass, have a higher resolving power because they bounce less light around inside the lens.
- Your choice of f/stop affects the resolving power due to diffraction. Most lenses hold their ability to resolve accurately through somewhere between f/8.0 and f/11.0. After that, diffraction begins to reduce the resolving power. So, going to a minimal f/stop such as 22 gives more DOF but reduces the resolving power.
Each lens has a different ‘place’ where diffraction begins to reduce the resolving power. You can try to do tests to figure out where that ‘place’ is, or you can do like I do; I never set my f/stop smaller than f/16 and I try to keep it at f/11 or above.
Lenses You May Have Never Heard Of
Tilt Lens – A tilt lens has special movements built into it that allow you to change the focal plane as it relates to the imaging sensor. These lenses can be quite expensive. A less expensive fun alternative is The Lens Baby

A tilt lens can be used for special effects (such as the image above) by throwing areas of the image way out of focus. Photo by evdropkick

The tilt lens can also be used to keep parts of a photograph in-focus such as these stamens on the flower. Photo by Mike
Mirror Lens – Mirror lenses come in the super-telephoto range. They typically run from 300mm to 1000mm. They have some advantages and disadvantages.
Advantages
- They are far less expensive than regular telephoto lenses.
- They are very lightweight and compact.
Disadvantages
- They have a fixed f/stop (usually between f/5.6 and f/11.0).
- They are manual focus only.
- They create an unusual donut-shaped bokeh.
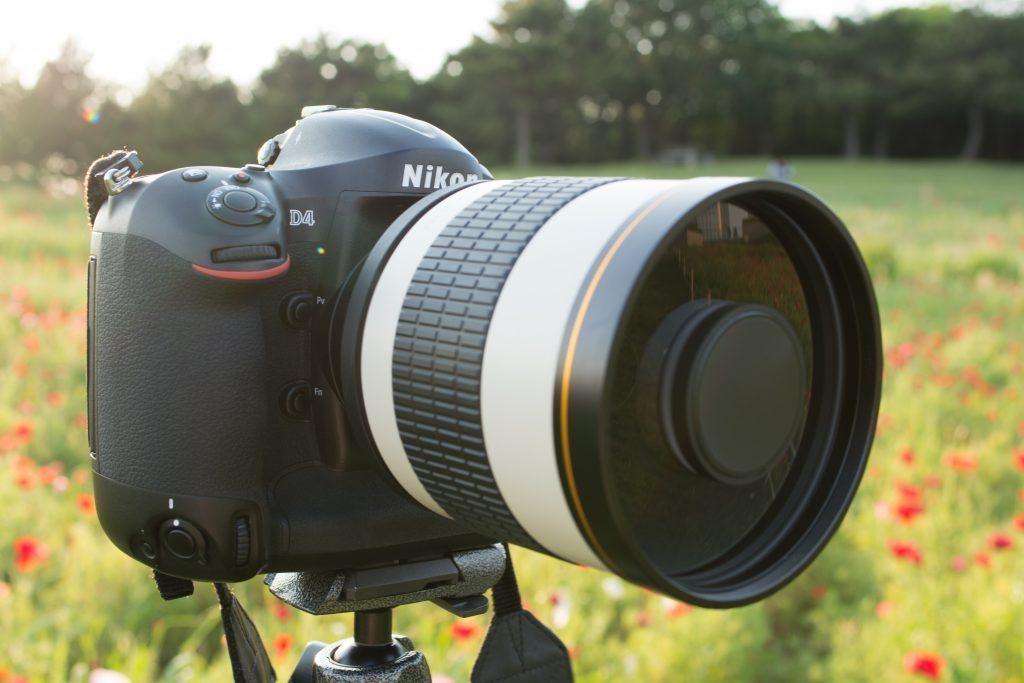
Here is an 800mm mirror telephoto lens mounted to a Nikon D4. This lens would retail for less than $400.00 USD. Notice the difference in construction on the front element. Photo by Takashi Hososhima
A really decent mirror lens can be acquired for under $250 USD. If you’re interested in trying out a super-telephoto lens without spending thousands, it’s not a bad way to go. I’ve had one for years, and I really love it. The images have a different feel to them and I like the donut-shape bokeh.
Preset Lens – You don’t see these very often (anymore), but they’re still around. The preset lens also comes only in longer telephoto focal lengths. Like the mirror lens, it’s an inexpensive alternative to getting into a super-telephoto lens.
Most lenses have an automatic aperture ring. This means that when you fire the shutter, the camera knows what f/stop you’ve selected; it quickly closes the aperture blades down to that f/stop, and then opens them completely back open after the exposure.

Take notice of the ‘donut-shaped’ bokeh of the mirror lens. Photo by Takashi Hososhima
The advantage of this system is this- when the aperture blades close, the amount of light passing through the lens is reduced, and it becomes difficult to see through the viewfinder.
Have you ever tried using the depth-of-field preview on your camera? Did you notice how the viewfinder became dark, and it was difficult to see anything? That’s because the DOF preview manually closed the aperture blades.
A preset lens requires you to manually close the aperture blades all the time.
Advantages
- Very low price for a super telephoto lens
- Unlike a mirror lens – you can adjust the f/stop
Disadvantages
- Once you have focused the lens and manually stopped down the blades, it can be difficult or even impossible to see through the viewfinder. This makes it difficult to use for any object that moves.
Personally, if I wanted to invest in an inexpensive super-telephoto lens to get started in that genre of photography, I would choose a mirror lens over a preset.
"A preset lens requires you to manually close the aperture blades all the time."
What About A Teleconverter?
A teleconverter, sometimes referred to as an extender, is a less expensive way to increase the focal length of a lens.
For example, let’s say you own a Canon 70-200mm f/4.0 lens; if you put a Canon 2X extender on the lens it becomes a 140- 400mm zoom lens. If you placed it on a 300mm lens it would become a 600mm… etc.
In the old days, teleconverters really had an adverse effect on the photographs. They were inherently soft of focus. Today, that’s not the case: especially if you go with the OEM manufacturer’s extender.
So, what’s the downside? They cause light loss. Depending on the particular model and the length of the extension, you would lose between 1 to 3 stops of light. Some users also claim that it slows the autofocus of the lens.
Is an extender as good as buying a new lens of the correct focal length? No.
Is it a nice alternative if you’re not wealthy? Yes.
Something to think about…
I hope that this guide has opened your eyes to some of the issues concerning lenses!
Keep shooting…
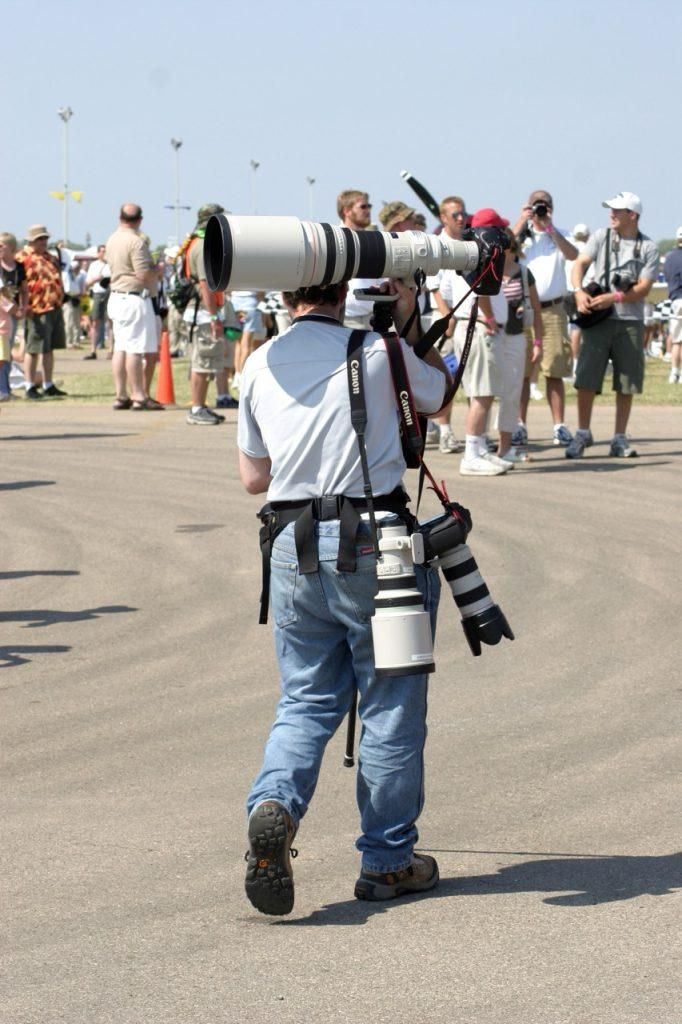
Photo by Andrew Butitta


