

My special interest is street photography. When I first thought about writing this guide, it was specifically directed toward getting more interesting pictures of strangers taken on the street. But I am a mother and grandmother and sometimes I am tasked with taking family pictures. To be honest, it terrifies me.

Photo by Diane Wehr
There is a high bar to meet when you are taking pictures of a granddaughter’s first birthday. After some thought, I realized that the techniques I use to get an interesting picture of a stranger will also help me get an interesting picture of a friend or family member. This guide is going to cover four ways to take better candid pictures of people, whether they are strangers or friends.
Go Fishing
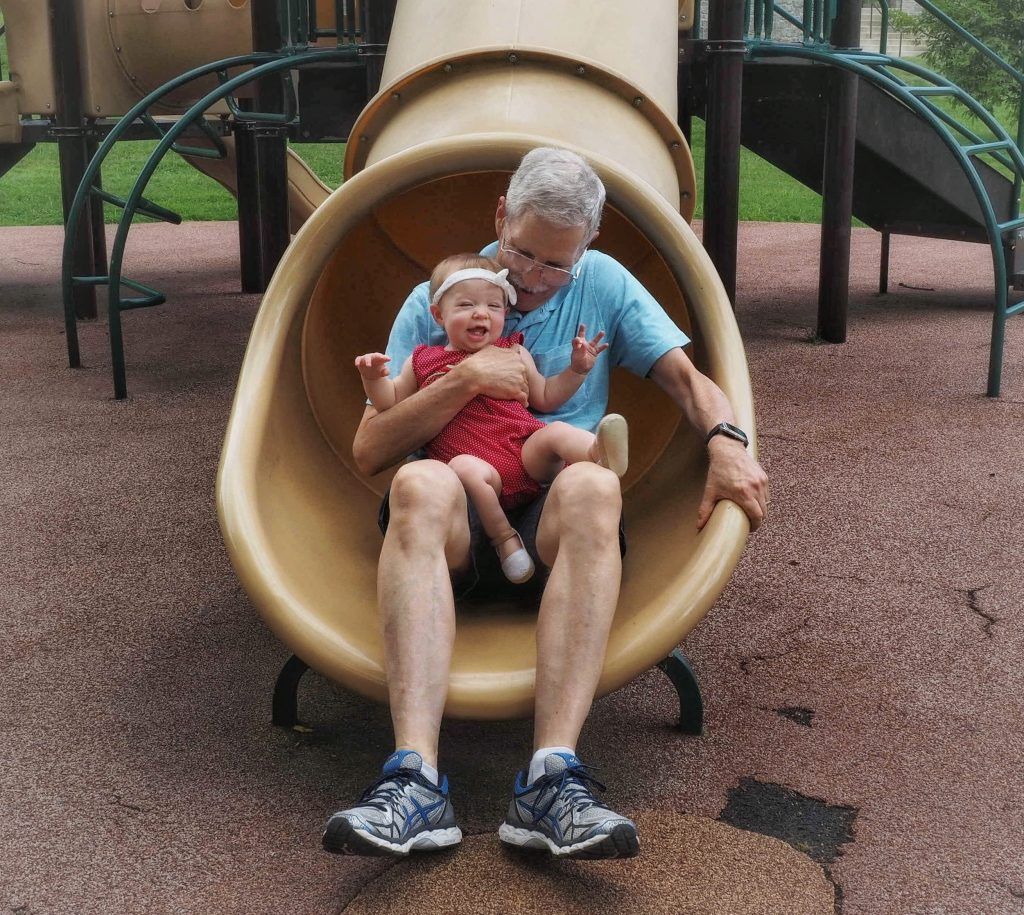
Photo by Diane Wehr
If you have read any article I have written about street photography, you will not be surprised that my first recommendation to make your street photographs more interesting is to “go fishing.” What that means is that you settle on an interesting background and then wait for a person or people to pass through it. The bonus to this technique is that it is reasonably easy to remain anonymous, so it is a particularly useful technique for new street photographers.
When you are taking photos of family and friends, the fishing technique is a little different, but the premise is the same. Let’s face it, an interesting background will always produce a more interesting picture than an uninteresting background. When you want to take candid photos, spend a minute assessing what attracts your attention about the place where you will be taking the photos. On a playground, for example, what do you look at first? It is likely to be the swings and the jungle gym because of their lines and their potential to act as a frame.

Photo by Diane Wehr
You can either encourage your child to go play on that equipment or wait until they decide to play there, but either way, you wait for them to pass through the interesting background just as you would in street photography.
In street photography the all-time easiest place to fish is to station yourself in front of an interesting shop. You can catch people going in or out. You can also catch people waiting for a shopper. This was one of the first pictures that I took in front of this shop. I spent another 10 minutes trying other combinations. I have a picture of a man walking by the shop and a family interacting with children in front of the shop.

Photo by Diane Wehr
It did not take long before I realized that I had the picture I wanted with the “men waiting on their women.”
I have fished in front of buildings, fountains, subways, steps, markets, store windows, street art, and beach fronts. I typically do this first if I am in a new place, or if I am getting tired, or if I need to get a sure-fire picture.
This picture came from a fishing expedition at a carousel in Berlin.
- Recommended Reading: If you’d like to improve your composition skills for better street photography images, grab a copy of Photzy’s best-selling premium guide, Advanced Composition.
Frame It

Photo by Diane Wehr
When you take pictures of family and friends, your viewers at least have an idea why you took the picture. But that does not necessarily make them interesting pictures. It is a much bigger problem when you take an uninteresting street picture, because your viewer has no idea why you took the picture. Because of this, the single goal that I have when I shoot street photography it is that viewers can determine why I took the picture. Most often that means they have to understand what they should look at first in the image. A frame, which is an element of an image that gives the sense of confining the subject, can direct the eye of the viewer to the intended subject. It is also possible that a frame will keep it on the subject longer because of the boundaries it provides.
“A frame, which is an element of an image that gives the sense of confining the subject, can direct the eye of the viewer to the intended subject.”
This is my one-day-old granddaughter (photo on the previous page). She is being dressed by her parents to go home from the hospital. Going-home rituals are interesting, but the intent of this picture was to show the look of contentment on her face. Her parents’ hands provide the frame that helps the viewer know what I want them to look at. The bonus is this frame of hands gives added information to tell the viewer exactly what is happening.
Almost anything can act as a frame, including trees and foliage, doors and windows, light, color, and people. Frames can be effective even when they form a boundary on only one or two sides.
They can be in focus, but they do not have to be. The street photo on the next page was taken on a “fishing expedition.” The place was chosen because it offered a white frame. In addition, there was a bench to sit on right across from the frame. This is truly the best of all worlds for several reasons. First, I am much more likely to spend a longer time waiting for the right person if I am sitting down. Also, the picture is shot from a slightly lower height, which I think adds interest. Finally, I can stabilize my camera on my knee, which increases the likelihood that that the camera will be in a perfectly horizontal position when I shoot. That is really important because any leveling you have to do in post-production results in loss of the edges of the image. I have a leveling bar that I can choose to show on my screen, which I always do. You can also use the edges of your camera screen and line them up with a vertical or horizontal line in the scene. The woman in the picture is perfectly framed. Imagine how different the impact would have been if she had been at one of the edges of the white rectangle instead of inside it.

Photo by Diane Wehr
Face The Light
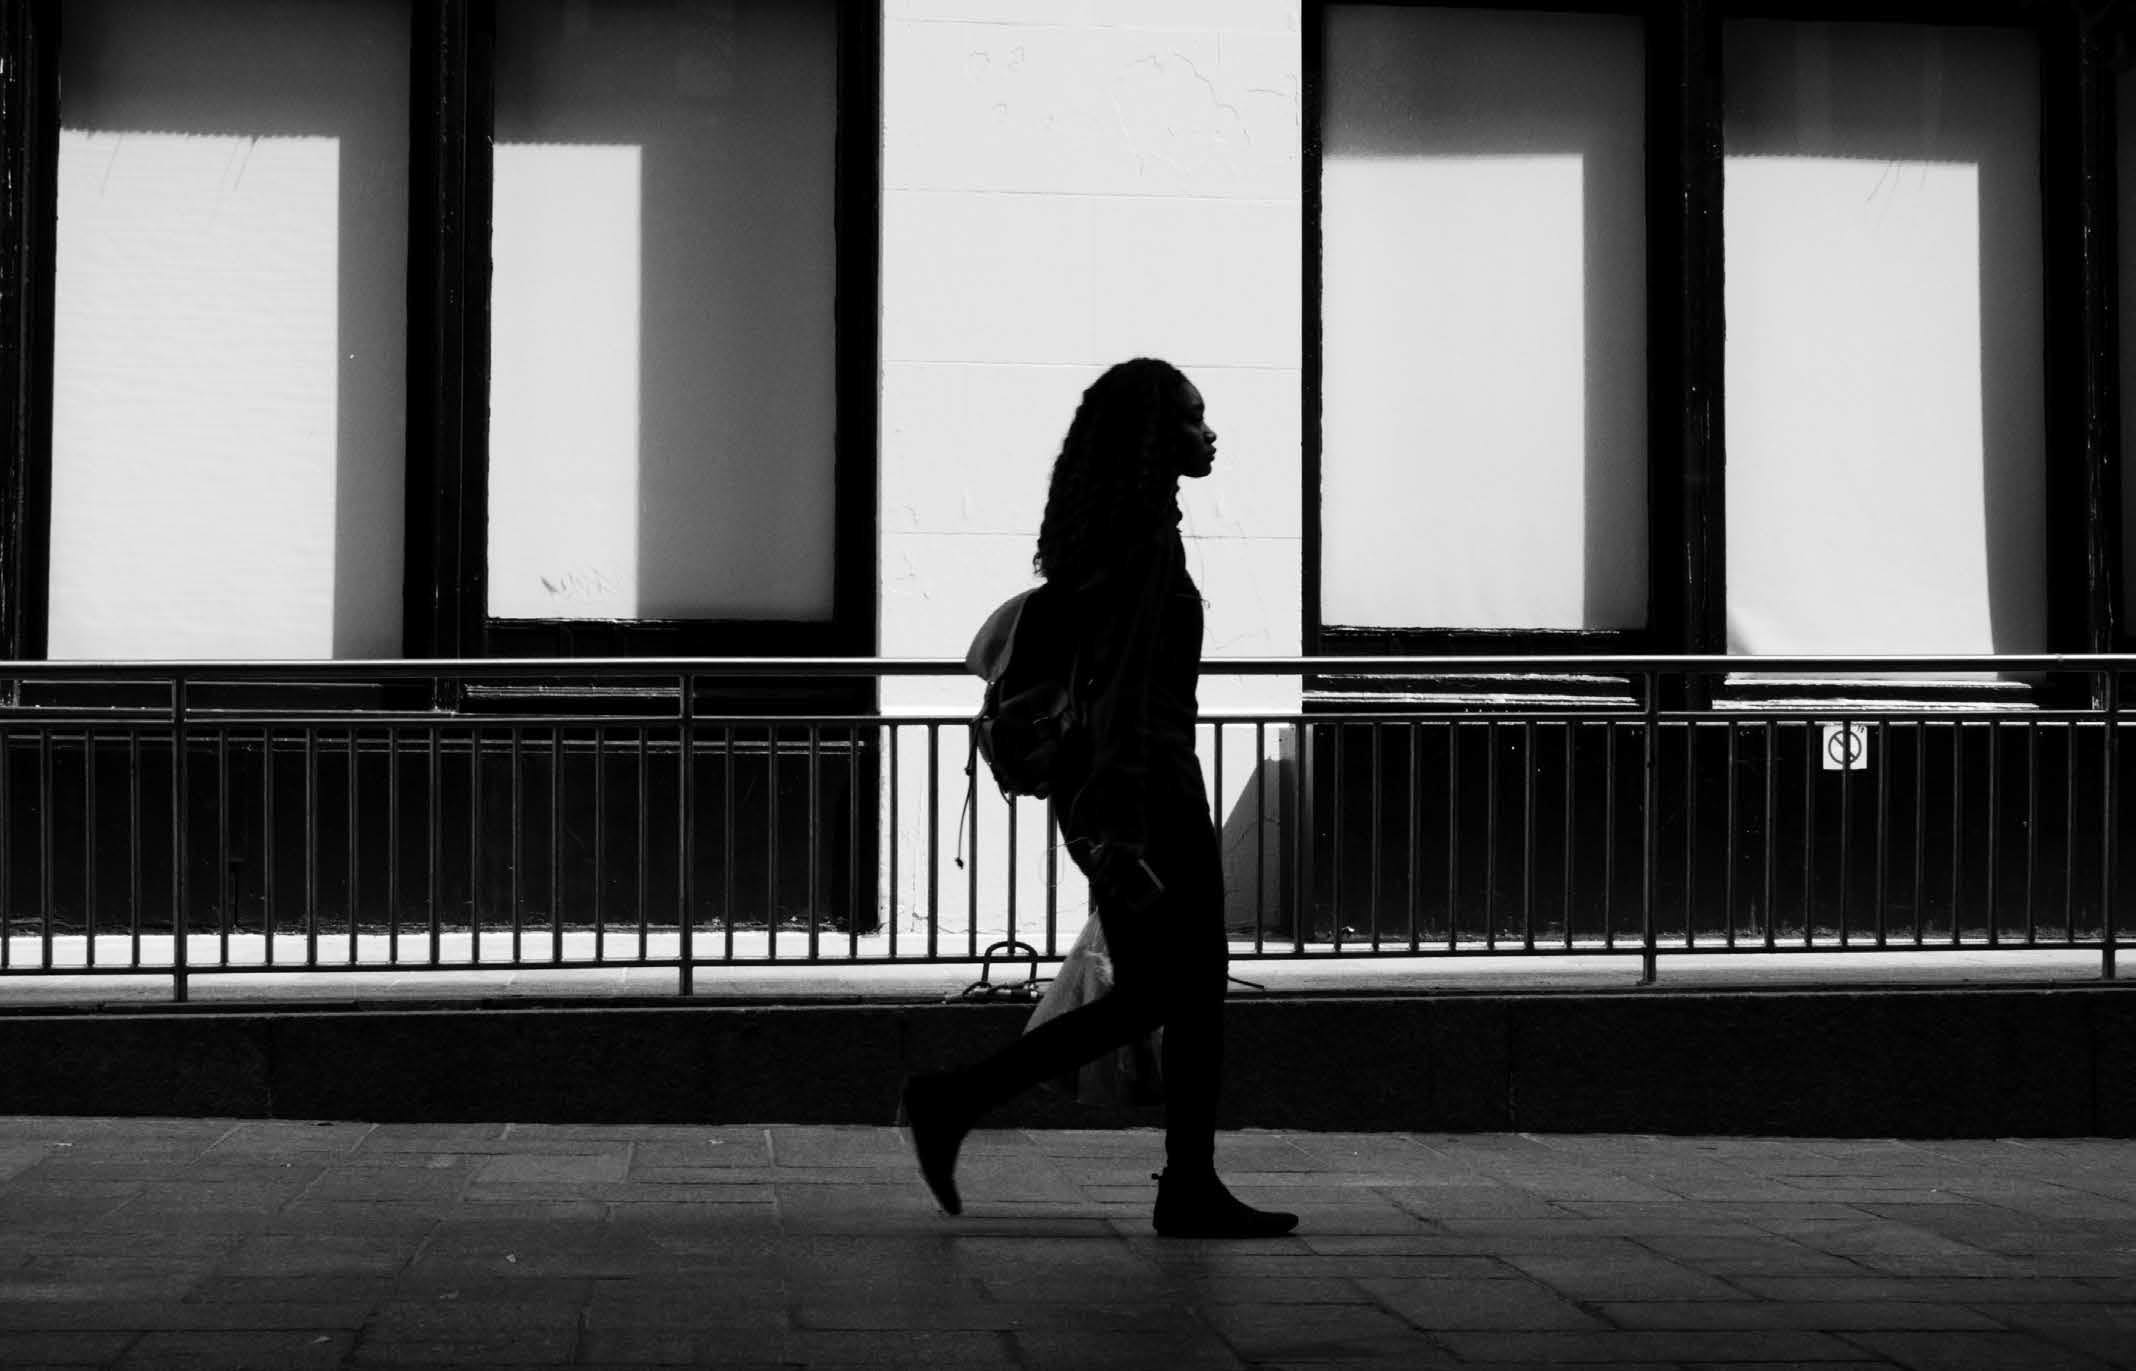
The reason you choose to face the light is because that is a way to get silhouettes in a picture. There are lots of opportunities for this. Pictures taken at the beach or waterfront and pictures taken when the sun is low because it is early in the morning or late in the afternoon will all produce silhouettes if you shoot into the light. In a city, if your subject is in the shade but in front of a light background you have the potential of a silhouette. That is exactly what happened in the picture of the young woman framed in the white rectangle. A silhouette is also produced when you take a picture of a person who is standing in front of a bright window.
Not all silhouettes are created equal. It is important to have some interesting detail. The lady framed by the white box is in perfect portrait profile. The silhouetted ladies in the lakefront scene are separated from each other. You can see detail in their hair, hands, legs, and accessories. What you do not want is a black blob.

Photo by Diane Wehr
It generally takes some post-processing to get a good silhouette. You can try raising blacks or shadows to get a darkened silhouette, but that can darken the entire picture in an unacceptable way. I generally use a brush and burn (darken) the silhouette. Sometimes I leave hints of color detail in a semi-silhouette, as I did in this picture.

Photo by Diane Wehr
Use Your Math
Finally, I have an answer to the age old question, “Why do I have to take geometry?” You can use geometry to strengthen your composition. Artists have done that since the 4th century BC when the Greek sculptor, Polykleitos, wrote a Canon on the ideal proportions for a male nude. Geometric shapes and even the suggestion of geometric shapes add a layer of meaning to a picture. Vertical lines suggest stability, growth, and dominance. Horizontal lines suggest tranquility, calmness, and lack of change. Diagonal lines give the sense of movement and depth. Rectangles, including squares, give a sense of conformity. Circles suggest completeness, and triangles suggest tension.
In this picture I wanted to create the feeling of an idyllic moment in childhood. The circular window portal, for me, seems like a snug cocoon. The straight line of the horizon signals a peaceful moment.

Photo by Diane Wehr
In this street picture of a mom and her son at an art museum, the vertical and horizontal lines and the rectangles give the sense of the art museum experience: a quiet, calm experience that is shared by most of the people in attendance. Tension is created by the child who is a part of an implied triangle created by the stroller.

Photo by Diane Wehr
Finally, the picture of “our tour guide” conveys a lot of meaning because implied lines and triangles suggest movement and tension. One almost feels this baby lecturing to us about travel plans.
One way to include geometric shapes in your picture is to choose backgrounds that have real or implied shapes as a place to fish. You can also train your eye, by studying pictures (either yours or someone else’s) that you like and look for underlying geometry. Finally, if you take a lot of candid pictures at one time, instead of just a few – a process that street photographers call “working the scene” – you will likely find pictures you prefer in the group. Sometimes it is because of the geometry in them, real or implied.
- Recommended Reading: If you’d like to improve your composition skills for better street photography images, grab a copy of Photzy’s best-selling premium guide, Advanced Composition.
-
Exercises:
- Go fishing! Select a background as a setting for your candid photos.
- Find frames that you have used in your candid photos. How do you think they have changed the composition?
- Take a candid photo that includes a silhouette. Start looking for the opportunity for backlighting and practice getting silhouettes, even if they are not human silhouettes.
- Look for the geometry in your own pictures.
**Editor’s Update: If you’d like to produce your own inspiring, memorable images that convey real meaning and emotion, our 214 page Art of Portrait Photography eBook is the perfect next step. If you missed out on your copy last time, it’s available again and on sale right now (80% off limited time deal) It covers everything you need to know to take consistently great portrait shots – lighting and posing tips, composition guidelines, getting great shots from minimal equipment, and much more. Click here now to check availability →
📸 Thank you very much for your support, hope you have an awesome week! Visit the Marketplace Deals for more in-depth photography training.


