

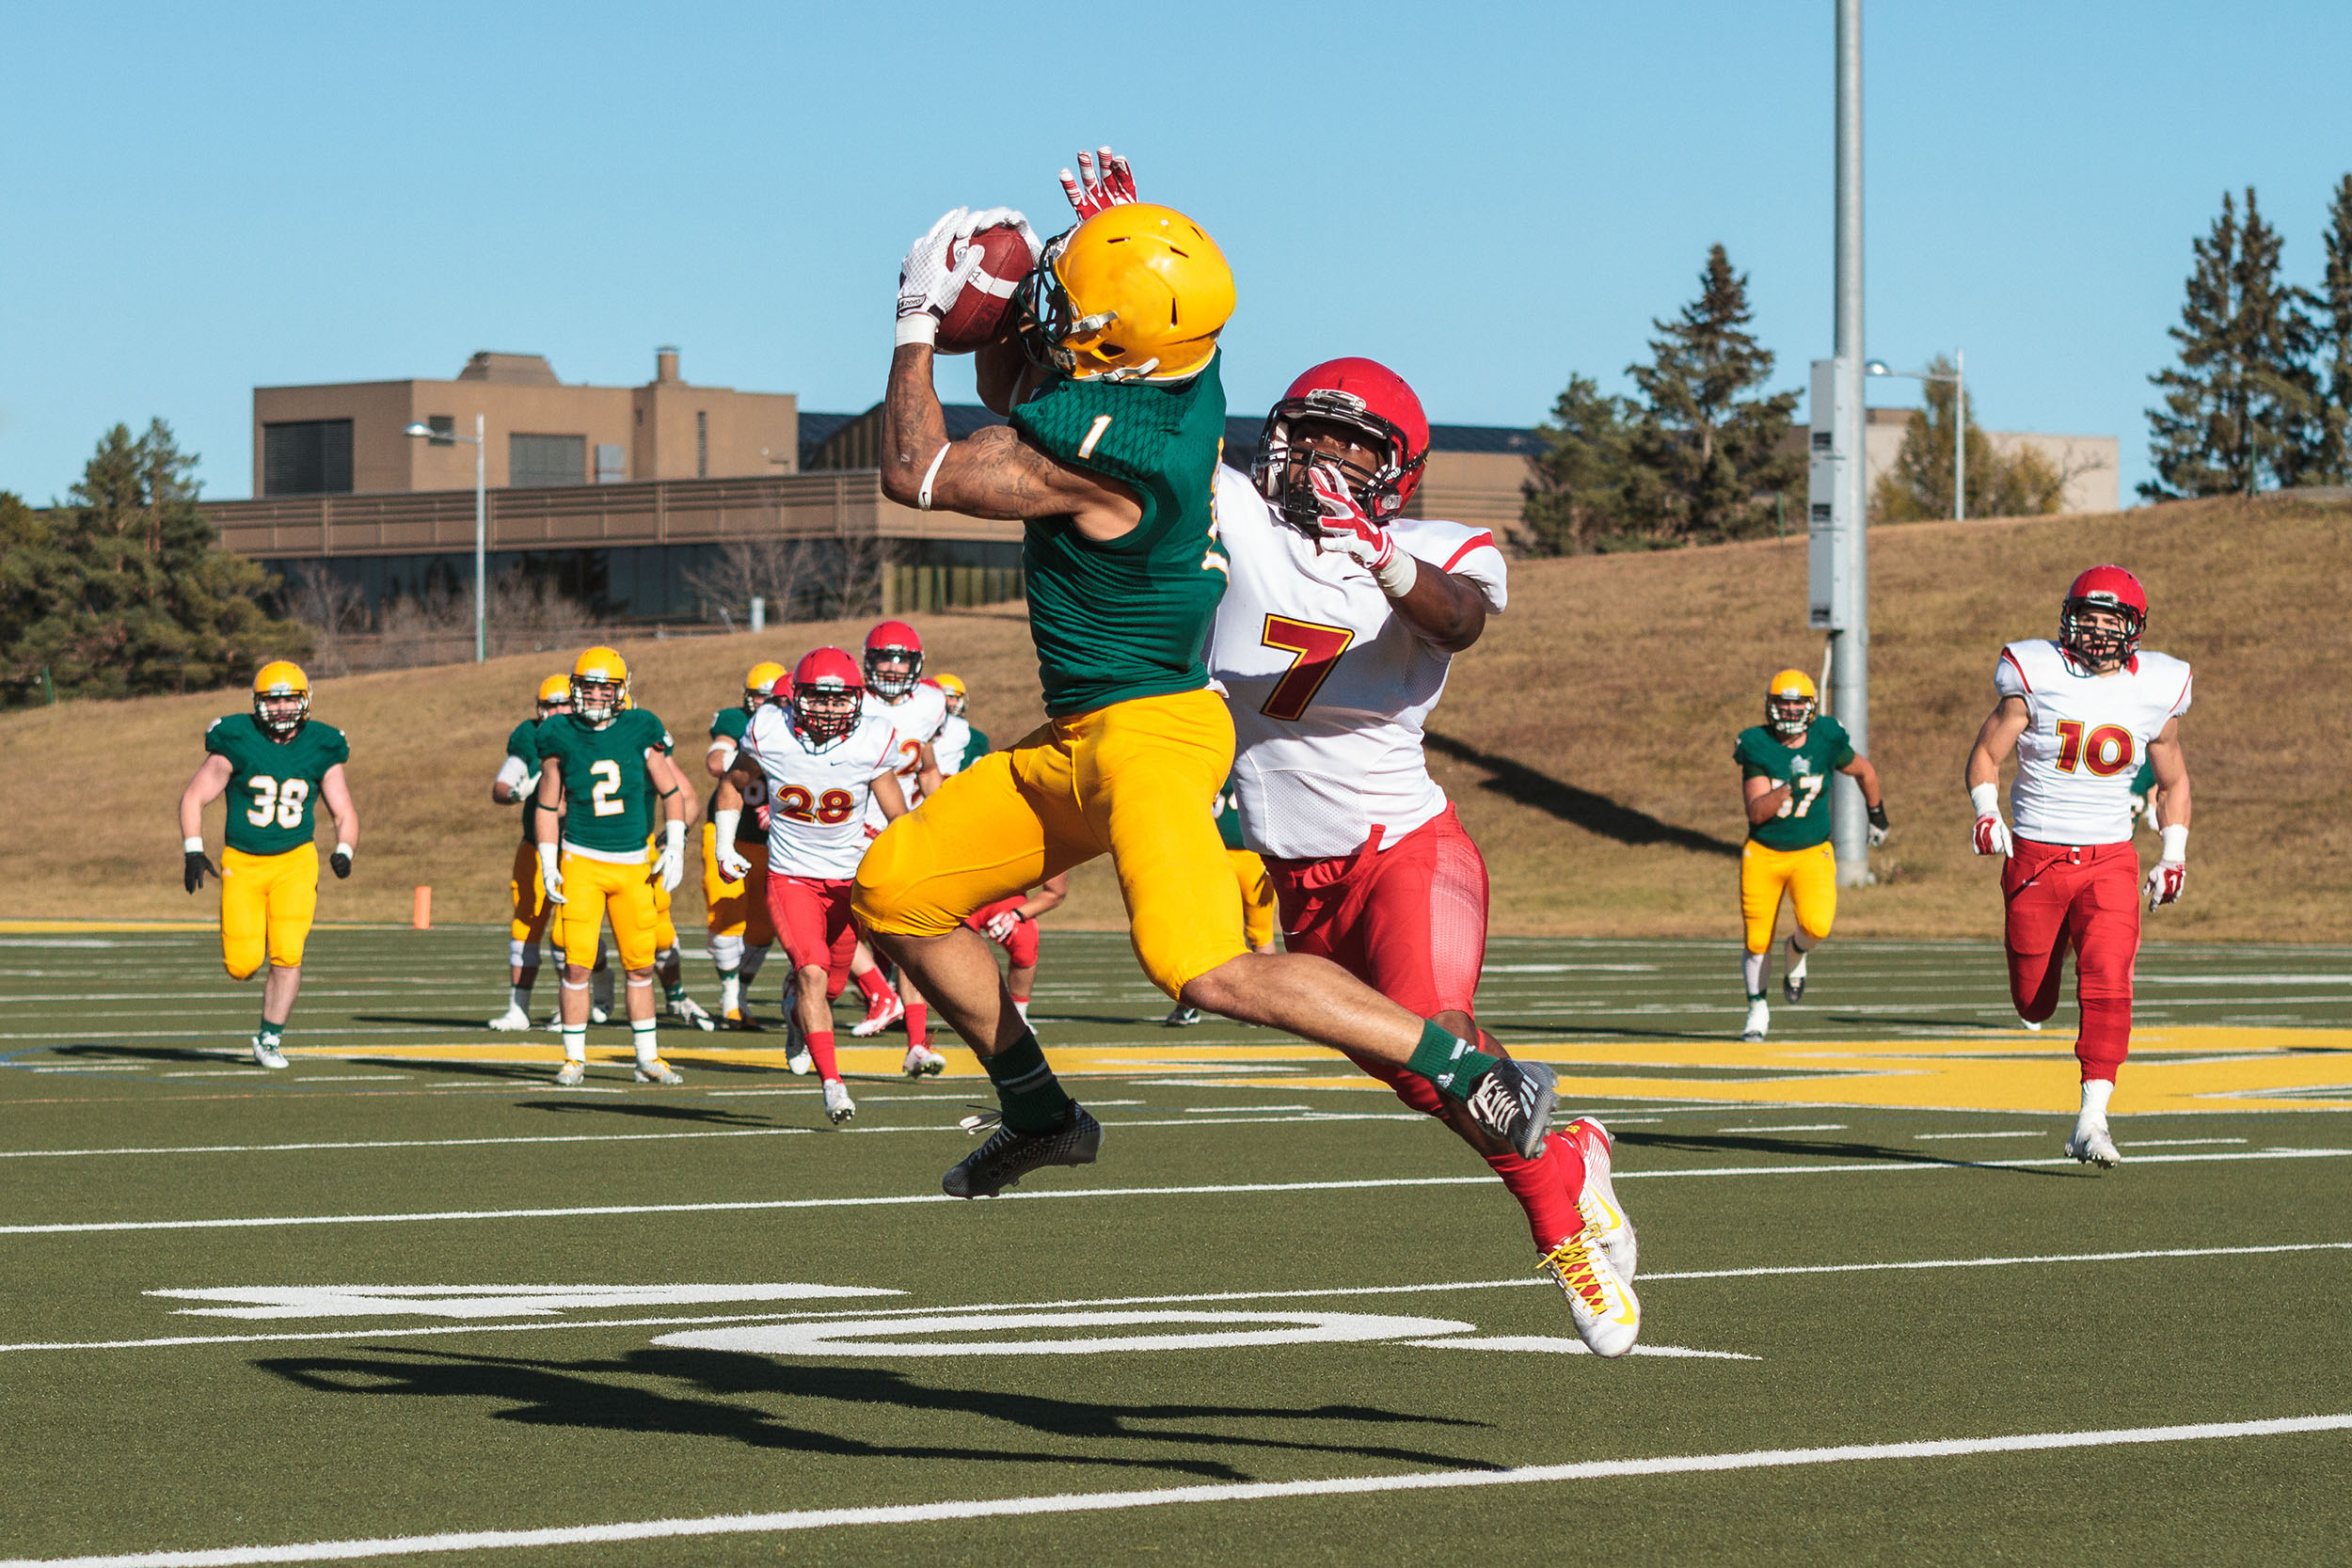
I love sports. Even though I was not athletic growing up, I happily spent several years as a teenager working in the local junior hockey rink and even had ambitions of becoming a sports broadcaster.
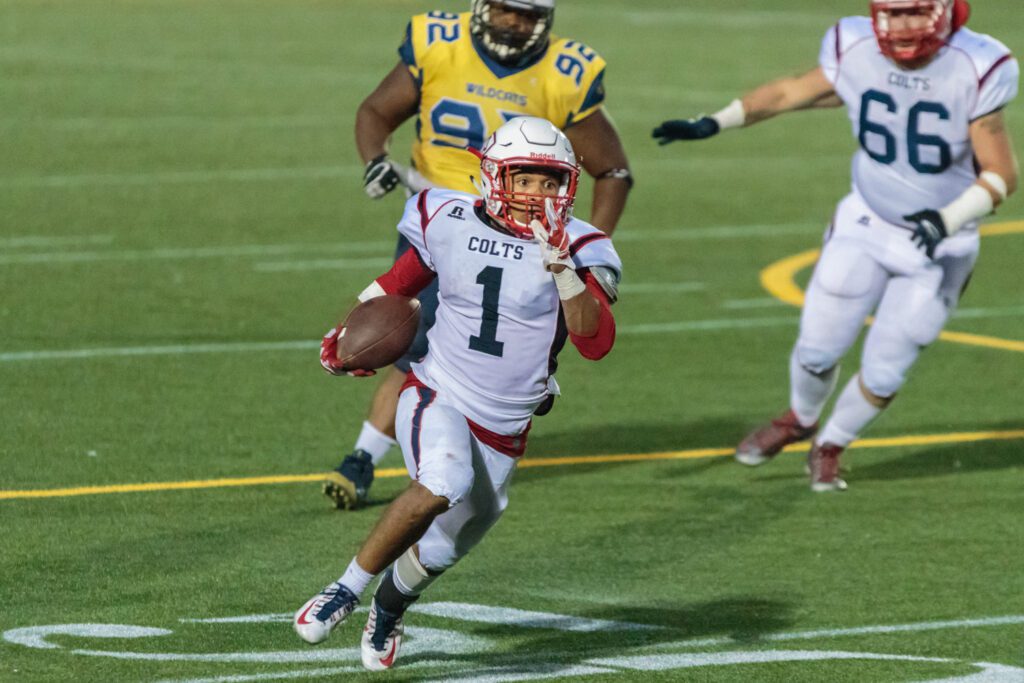
Years later, as a parent, I enrolled my kids in organized sports. In our house, football was the first sport of choice, as well as one of my favorites. Since I already had an interest in photography, I started taking my camera to their games, thinking I’d come home with photos that looked like the ones I had seen in sports articles.
Unfortunately, I had not learned to properly use my entry-level DSLR and set of kit lenses and quickly became frustrated with the fact that I was not capturing the game photos I had in mind. I decided it was time to start seriously learning about photography, so I read books, found internet resources, and started to learn from other photographers I met at my kids’ games. The more I learned, the more it became clear: I not only love sports, but I also love sports photography.
Photograph by Lisa Cannon

Photograph by Lisa Cannon
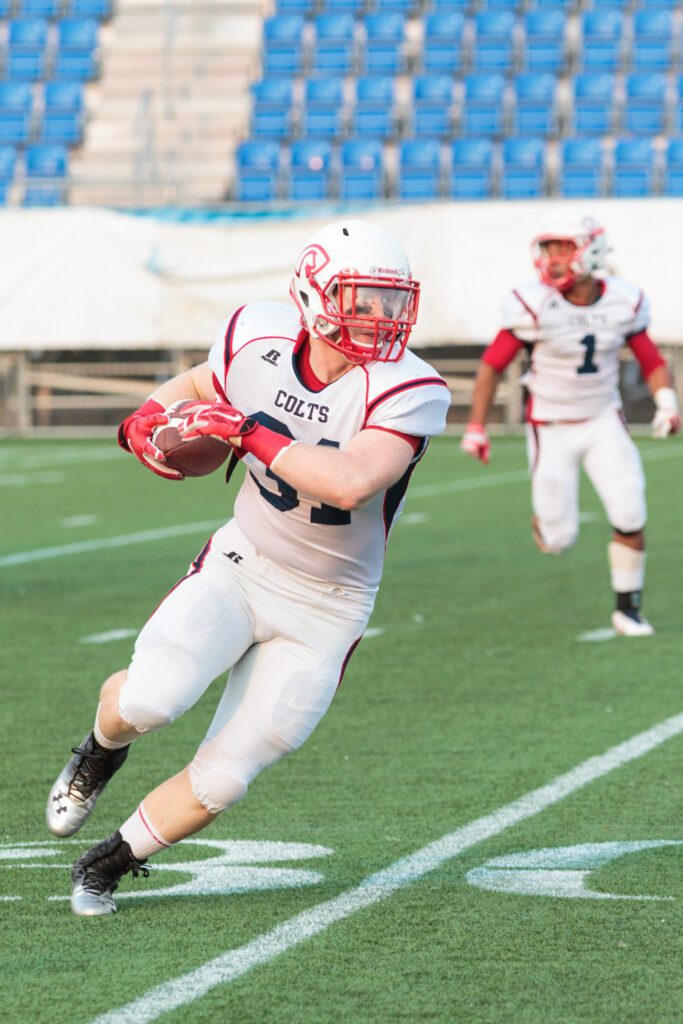
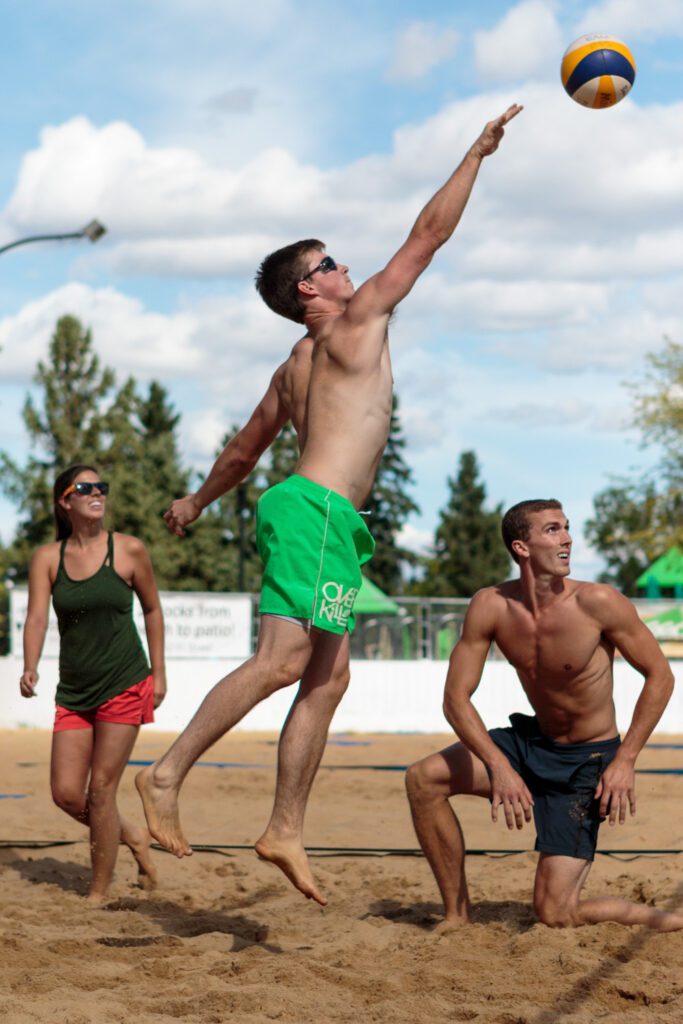
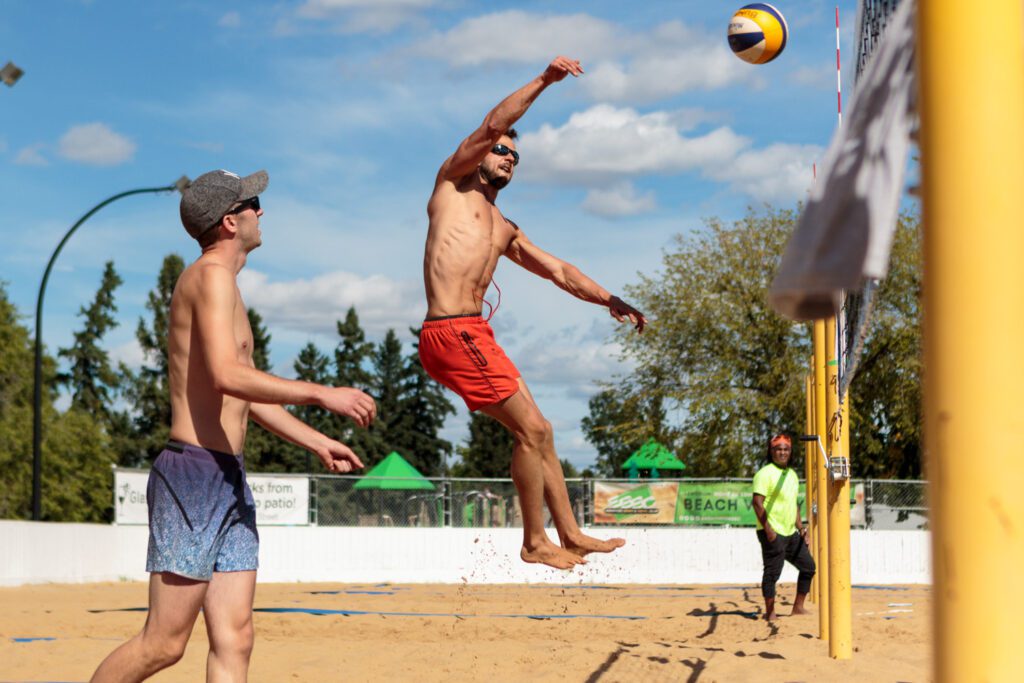
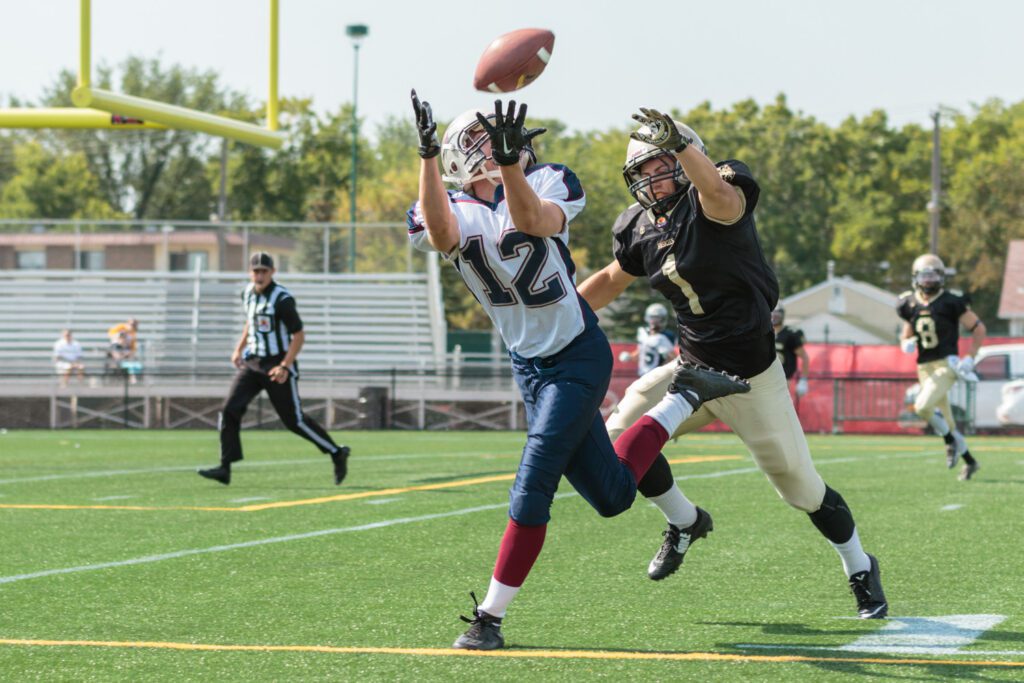
It took a few years of practice and a couple of equipment upgrades for my images to show improvement. The better my images got, the more excited I got from being able to capture highlight moments during the games I covered. As time went on, I was given opportunities beyond my kids’ games to shoot, including sideline spots for PJFC football and various Canadian University sports, working with a group of other photographers covering beach volleyball, and even stepping up to cover a motocross event that found itself without a photographer.
Photograph by Lisa Cannon
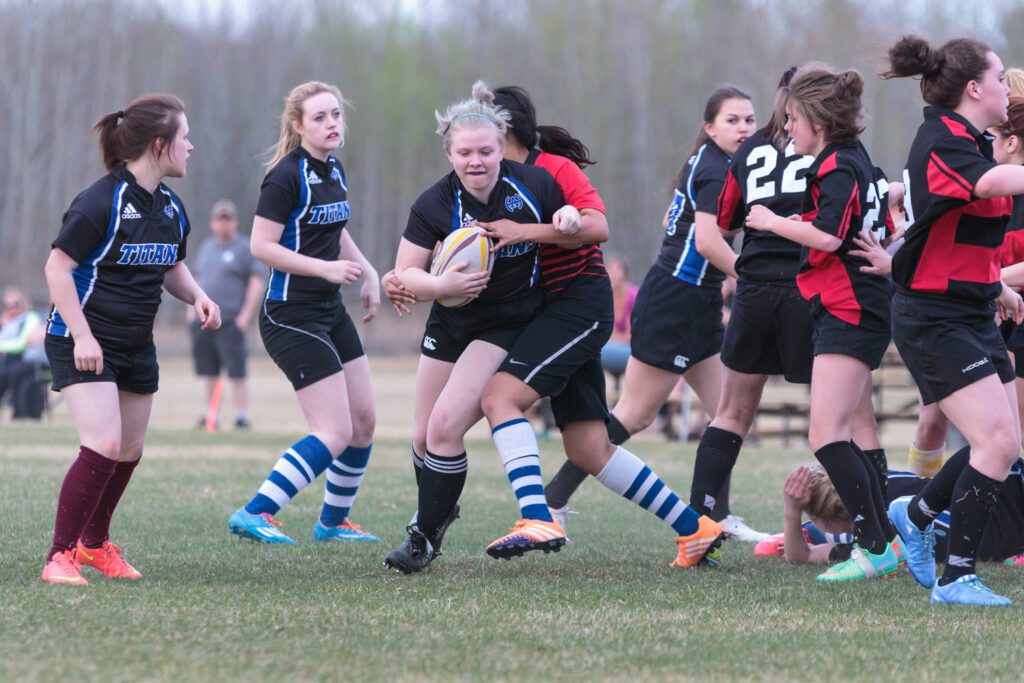
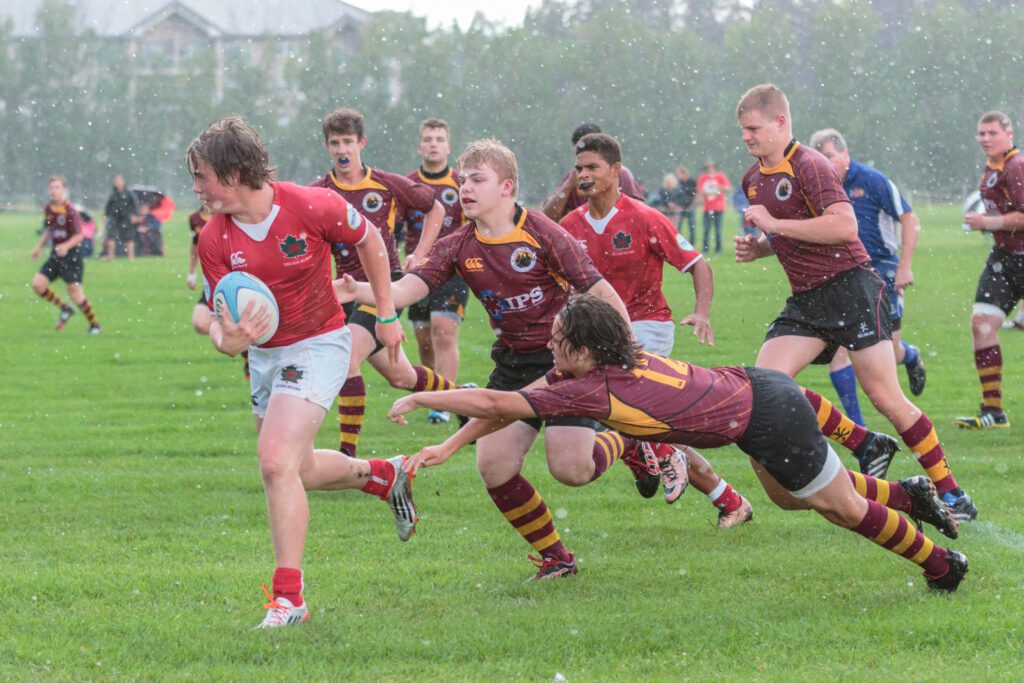
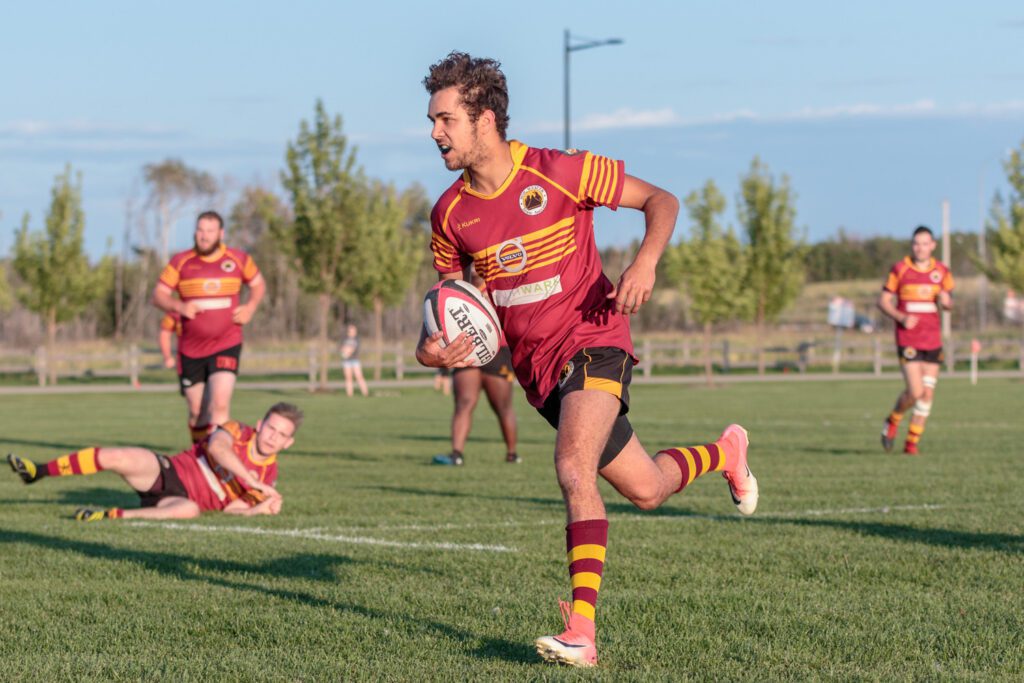
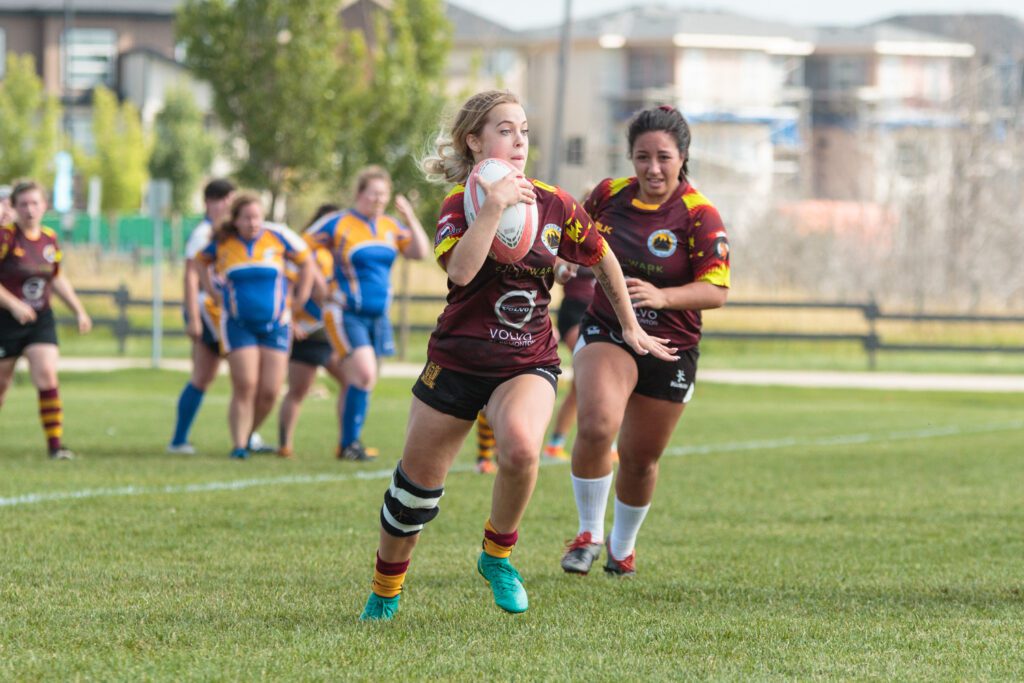
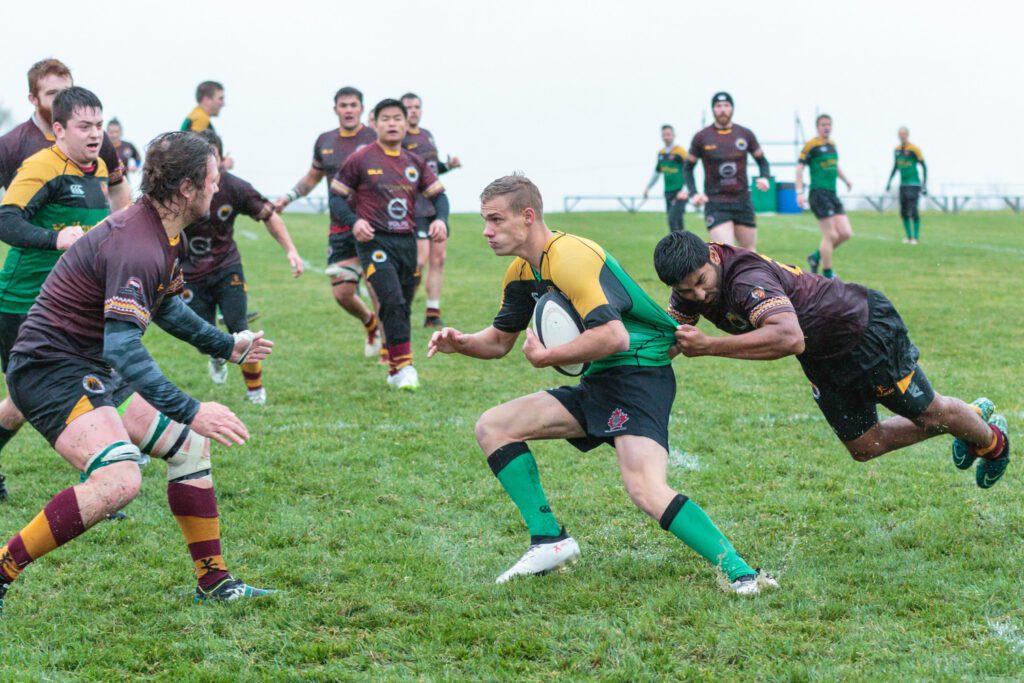
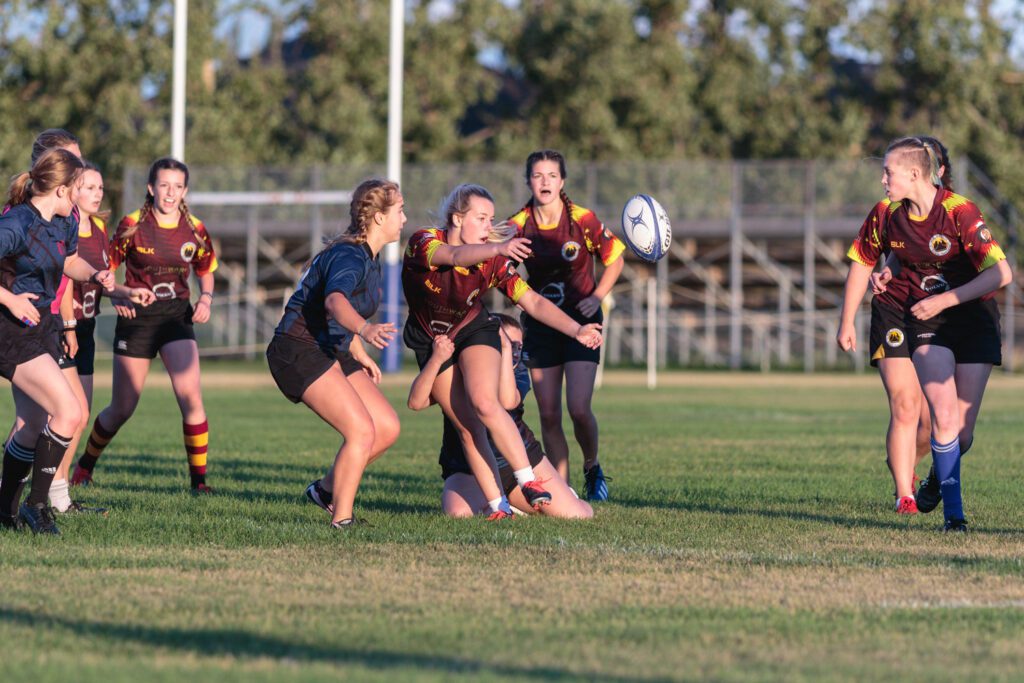
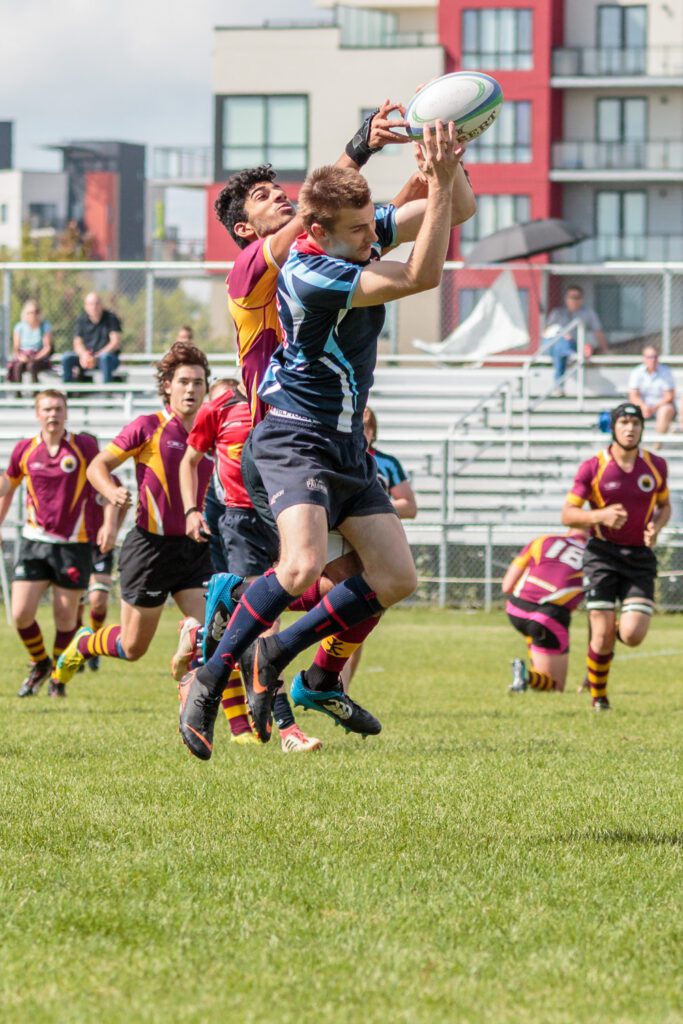
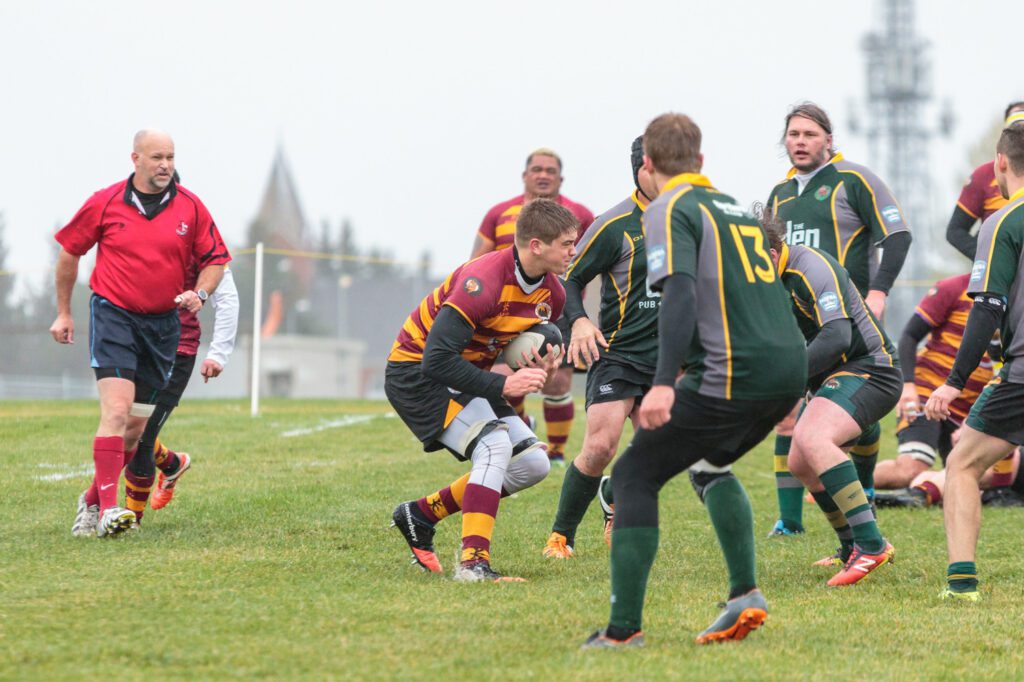
When my kids got a little older, my daughter introduced a new sport to our household when she started to play rugby. Once I figured out the basics, I fell in love with the sport, and the images I could capture during games. I have been fortunate enough to spend several years working with the high school and the rugby club both my kids played with, and this has allowed me the opportunity to continue to learn, grow, and practice my sports photography skills.
Photograph by Lisa Cannon
Photograph by Lisa Cannon
Have you ever wished you could capture better game images of your kids or friends while they play their favorite sport? Or wondered how the photographers at the sidelines capture the game images you see online? In this guide, I will share my top tips to help you level up your outdoor sports photography game.
Here is what I will cover:
- Gear choices
- Camera settings
- Dealing with lighting
- Knowing your sport
- Composition tips
- Shooting with purpose
Recommended Reading: Want to expand your shooting skills and master photography? Grab our set of 65 beautifully designed and printable Action Cards that will give you over 200 photography assignments to help you take your photography to the next level. Check it out here.
Tip 1: Gear Choices
Sports photography is almost always done from a distance for many reasons – two of the most important being safety, and the need to avoid interrupting the action at all costs. Despite that, you want to bring the viewers’ attention to the subject of your image. This means doing what you can to separate them from the crowd and background.
Sports photography is almost always done from a distance for many reasons – two of the most important being safety, and the need to avoid interrupting the action at all costs.
One of the ways to do this is to use the longest focal length lens with the widest aperture you have access to help get a tight and clean composition. Probably the most popular choice for this is one of my overall favorite lenses, a 70-200 mm f/2.8 lens. This zoom range is highly versatile, allowing you to capture action farther down the field while still giving you the ability to adjust as the play moves closer to you. The wide aperture helps to provide bokeh to blur distracting images in the background, bringing the viewer’s eye to your subject. Many of these lenses offer the option of image stabilization, but you do not need it for sports photography.
The shutter speeds you will use to capture sharp photos will compensate for any lens shake that may occur, and the image stabilization system will slow your lens down.
Photograph by Lisa Cannon
Key Lesson: Remember to choose a lens with the ability to focus quickly. You don’t want to miss the action while you wait for your lens to catch up.
Photograph by Lisa Cannon
Having said all that, wider angle lenses can also be used depending on the situation. You may choose to capture more of the team or the playing surface, or highlight the crowd, for instance. If you find yourself shooting something like a cheer squad, a wide-angle can help when they are performing group or throwing stunts.
24-70 mm lens at 51 mm. Photograph by Lisa Cannon
For sports like beach volleyball, I am allowed to get quite close to the action, and 70 mm is simply not wide enough to capture the play, so I often shoot with my 24-70 mm lens. And don’t forget to keep a wide-angle on hand in case the group wants a team photo after the game is done.
One thing to keep in mind, though, is using a wide-angle will not give you the same type of bokeh background as a longer focal length will, even at a wide aperture, so try to pick shots that have plenty of room between the subject and the background if you can, or choose shooting situations that benefit from this fact.

70-200 mm lens at 137 mm. Photograph by Lisa Cannon
No matter the lens you use, one of the most important things to remember is to fill the viewfinder as much as you can before you take the image.
This may mean waiting a little longer for the play to come your way, but you’ll end up with a much stronger image.
Though some cropping in post-processing is quite common in sports photography, you want to avoid depending on it as much as possible. Remember that the more you crop, the more image quality you may end up sacrificing in your final image.
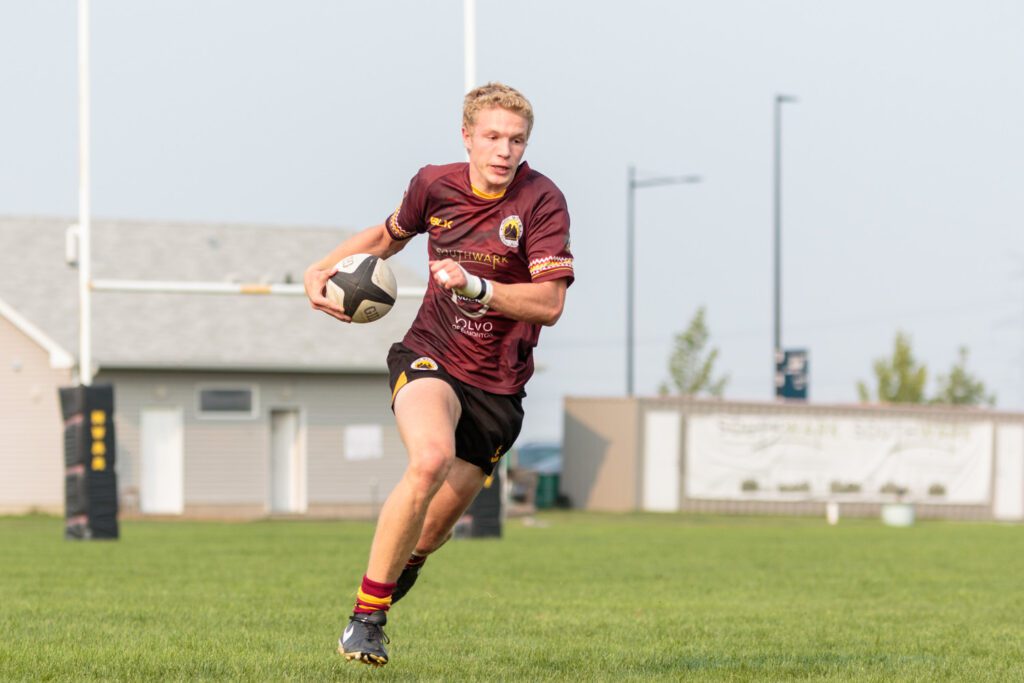
Image shot close in camera. Photograph by Lisa Cannon

Image cropped in close. Photograph by Lisa Cannon
Aside from lenses, the other important gear choice is your camera body.
Many sports are played at high speed; ideally, you will want to use a camera body that offers a higher frame per second rate to help you keep up. There are many options out there, and many cameras also let you adjust the frame rate to suit your needs.
I shoot with my Canon 7D Mark II set at 9 frames per second. It is still possible to shoot with a lower frame rate, but it will mean not only knowing your gear but knowing the sport you are shooting as you will have to time your shots more carefully.
Noise caused by poor stadium lighting, ISO 3200. Photograph by Lisa Cannon
The final thing I want to mention is ISO capability.
If you plan to shoot evening or night games under stadium lights, or even in inclement weather, you may need to push the ISO setting fairly high to maintain the shutter speeds you will be shooting at.
Be sure to choose a camera body that performs well at higher ISO settings when choosing the one you will be shooting with.
Noise due to inclement weather, ISO 3200. Photograph by Lisa Cannon
Key Lesson: Your gear choices do affect the quality of your final images, but there is a wide variety of options available to suit your budget and needs.
Tip 2: Camera Settings
The majority of sports are played at high speed, or have a high-speed element to them, and to capture sharp, clear images you need to shoot with a high shutter speed to match.
With all the different sports I’ve covered, I find I am rarely shooting with a shutter speed below 1/1000s. I find this keeps motion blur from affecting both the players and the ball.
As I discussed earlier, you will also want a wide aperture to help provide a blurred background. I generally use f/3.2 or f/3.5, as this gives me a depth of field that is shallow enough to provide good bokeh but still keep my player sharp. It also helps to let more light into the camera when the lighting conditions are not ideal.
I always choose the lowest ISO setting I can to get the exposure I want while maintaining the high shutter speed. Depending on the amount of light available, that may mean shooting as high as ISO 3200.
If your lighting is extremely variable, don’t be afraid to use the Auto ISO setting. It won’t be perfect, but it will adjust much faster than you will be able to manually, and get you close enough.
If your lighting is extremely variable, don’t be afraid to use the Auto ISO setting.
One of the most helpful things I learned was the use of the combination of back button focus and the AI Servo/AF-C mode for continuous autofocus.
Basic camera setups have both shutter release and auto-focus set to the main shutter release button. Back button focus allows you to separate the two functions to allow you more control over your camera’s focusing system.
Some cameras also have an AF-ON button that is already set to continuous focus, or you can choose which button you want to set your auto-focus to.
You will find the button setup options in your camera’s setup menus, usually under a custom control option.
I have my back button focusing set to the * button beside the AF-ON button as my hands are small and I find that to be a more comfortable setup. Whether you choose to use the pre-programmed button or to choose your own, the important thing to remember is to remove auto-focus from your shutter release button; otherwise, your camera will refocus each time you press the shutter release.
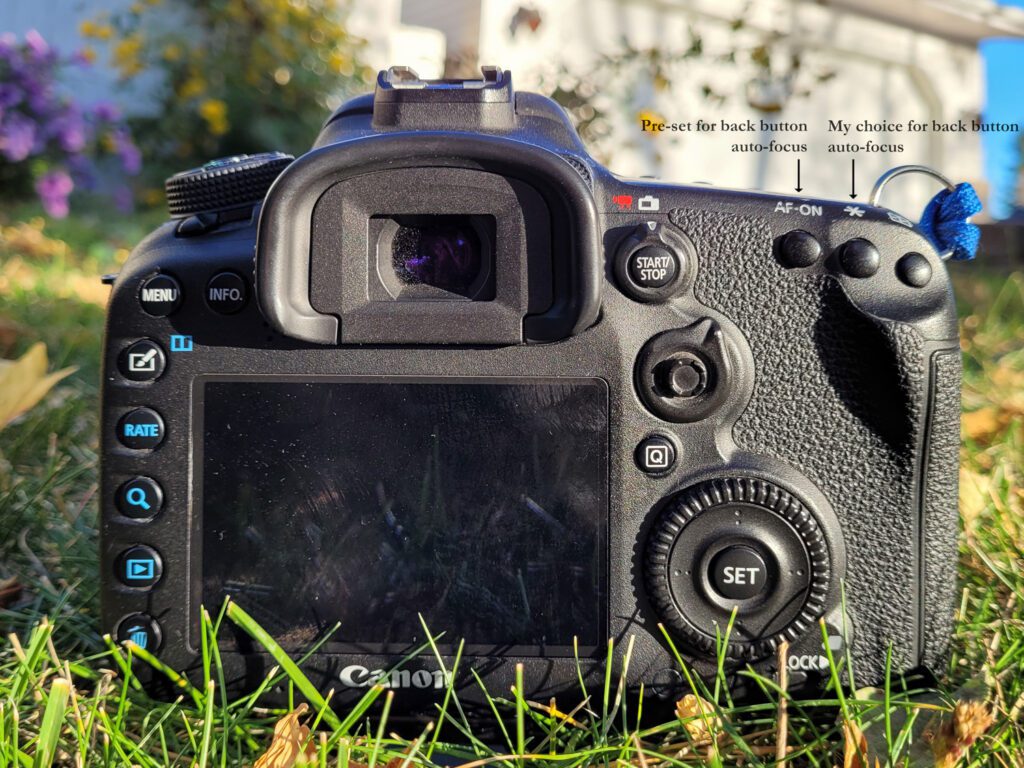
The button layout is on the back of my camera. Photograph by Lisa Cannon
Next, set your camera’s focus drive to continuous focus. On Canon cameras, this is called AI Servo, and on Nikon systems, it is called AF-C.
This will allow your camera to hold focus on your subject as long as you continue to keep your assigned focus button pressed.
This is why it is so important to remove focusing from your shutter release button to prevent your camera from refocusing each time you press your shutter button.
Just remember to release and press the focus button again each time you change subjects. That identifies the object you want the camera to focus on – it can’t do that by itself.
Finally set your shutter drive to the high-speed continuous or burst mode. This means your shutter will continue to fire as long as you press the button.
Key Lesson: Once your camera is set, choose your subject, press and hold your focus button, and when you’re ready, hold your shutter to capture a burst of images.
Recommended Reading: Want to expand your shooting skills and master photography? Grab our set of 65 beautifully designed and printable Action Cards that will give you over 200 photography assignments to help you take your photography to the next level. Check it out here.
Tip 3: Dealing With Lighting
The one thing beyond your control when shooting sports outdoors is the amount and quality of the light. From bright overhead mid-day sun to dull and dreary stormy skies, it can be one of the most difficult things to adapt to.
There are a few things I have learned to help me get the best results, no matter the lighting conditions.
I am fortunate that the teams and venues I work with generally allow me a lot of room to roam along the sidelines, presuming I am not interfering with the teams, officials, or spectators.
This means that I am often able to choose which side of the field I will shoot on. Under very sunny skies I will choose the side that allows me to keep the sun behind me as much as possible, if I can, to help maximize the available light, and keep the player’s faces bright.
Light with high contrast. Photograph by Lisa Cannon
If the direction of play dictates I need to shoot toward the sun, I know I will have to increase my exposure because the athletes will be back-lit, bringing shadow to their faces.
The same thing applies when I am shooting in the evening because the light comes from one direction. Increasing the exposure will help even out the contrast that kind of light creates.
Increasing the exposure will help even out the contrast that kind of light creates.
If I am shooting a sport that requires a helmet, such as a football, I am also careful to set my exposure a little higher to be sure the player’s faces are not lost in the shadow cast by the helmet.
Earlier in this guide, I mentioned that I will set my ISO to Auto if the lighting conditions call for it.
A sunny day with variable cloud cover can cause the lighting conditions to continuously change, or you may find the field you are shooting at has both very dark and very light areas, caused by the shadow of a building or spectator stands. The Auto ISO can quickly adapt to the changing conditions, which allows you to focus your attention on the gameplay, where it should be.

Variable light on the field. Photograph by Lisa Cannon
Key Lesson: You will not be able to take control of the light conditions you are shooting in, so you will need to take control of your camera instead.
The last thing I want to mention is a personal preference when it comes to choosing my exposure values. I overexpose by about 1/3 to 2/3 of a stop when the conditions allow it.
I find I get better results in post-processing by bringing down highlights to balance the exposure than to increase shadows.
Throughout the game, I quickly review my images to confirm my exposure settings and will make any adjustments I feel I may need. I also use the highlight alert setting, found in the playback settings menu on my camera, to be sure I am not blowing out the bright areas of my photos.
Tip 4: Knowing Your Sport
Being able to predict gameplay is often the difference between decent images and great ones.
Understanding how the game is played, what a “big play” might look like, and each player’s job, will allow you to choose your subjects and time your images.
Be sure to research the sport you’re shooting, and even look at other photographers’ images online to get an idea of the kind of shots that work best.
Photograph by Lisa Cannon
Oh, and bonus points if you can arrange to shoot the same team multiple times because you will start to recognize the team tendencies and even individual player habits.
It can mean the difference between capturing a great play or focusing on the wrong side of the field while the action passes you by.
Photograph by Lisa Cannon
Key Lesson: Knowing what to expect from the gameplay helps you to predict the action and increases your odds of getting high-impact images.
Tip 5: Composition
There are a few other things I try to keep in mind while I shoot a game.
I almost always shoot from a low stance if I can, as it makes the players seem larger and more powerful. It can also help to minimize distracting elements on the horizon in the background.
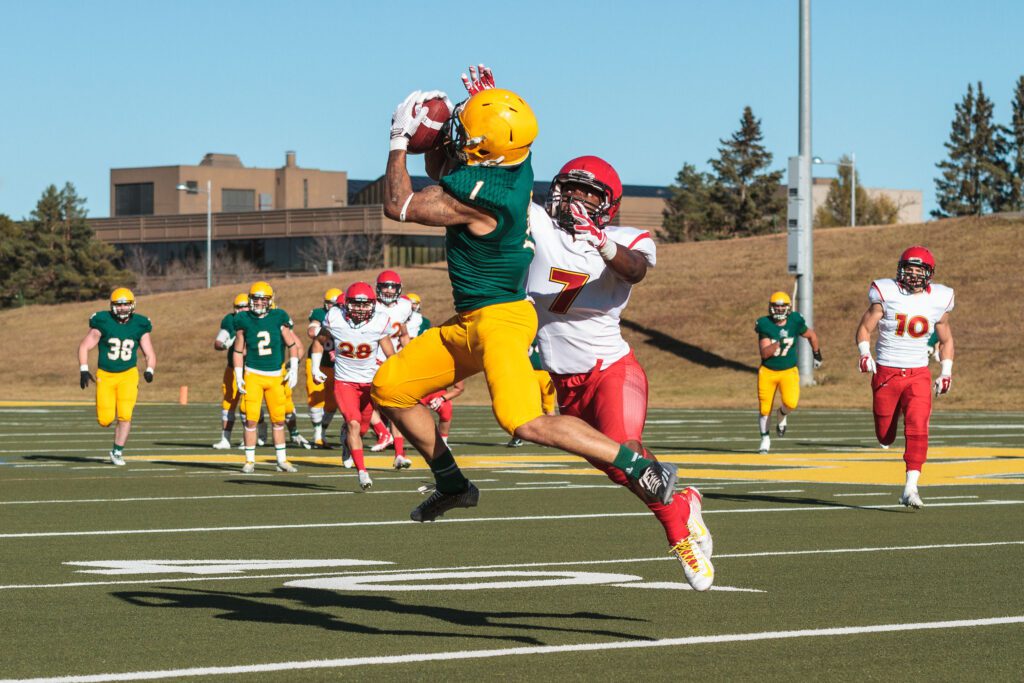
I also want to be sure the main players in my images are recognizable by having each player’s face in my frame if possible. If not, I try for the jersey number instead.
Standing while shooting. Photograph by Lisa Cannon
Finally, I consider it important to keep the ball visible in the images to help tell the story of that moment in the game, especially when looking back at the photos later on. It can help to define things like which team is on offense or defense, or if the player was catching or throwing. It also helps to highlight big moments like tackles or kicks.
The bottom line for me is I want to be able to look back on an image and know what was happening at that moment instead of trying to guess.

Kneeling while shooting, taken from almost the same spot. Photograph by Lisa Cannon
Remember to look for photo opportunities beyond the plays to help capture the atmosphere of the game.
Players often celebrate after they score, so try to catch the smiles, high-fives, and group hugs. Look for moments when a player may be more relaxed between plays and capture a more portrait-style image.
And don’t forget about the coaches and support staff. They’re as much a part of the team as the players.
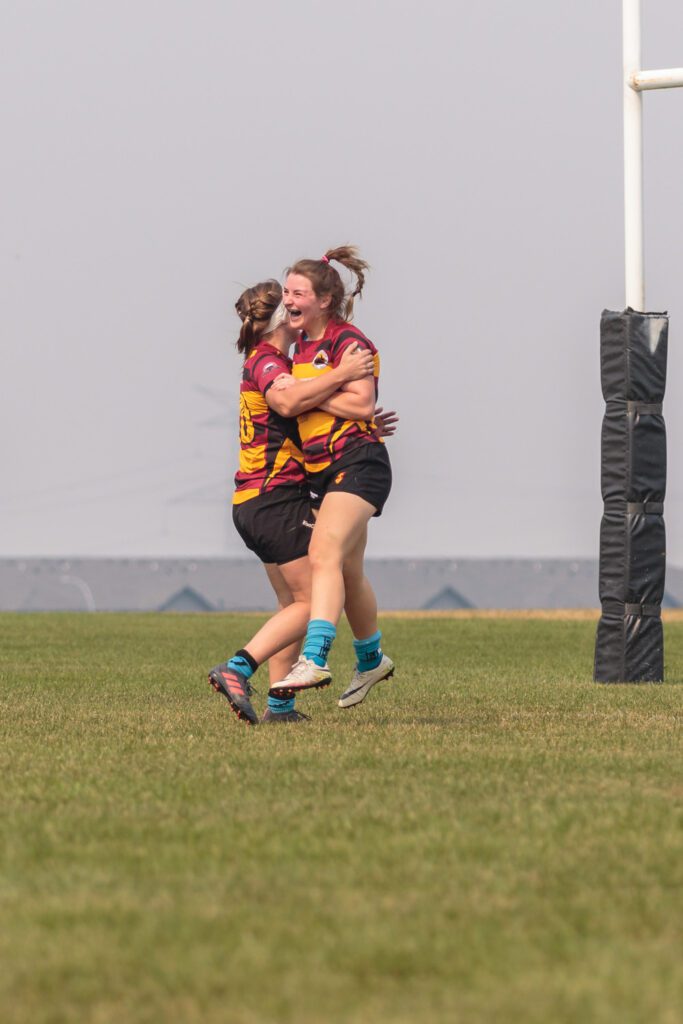
Women’s celebration. Photograph by Lisa Cannon
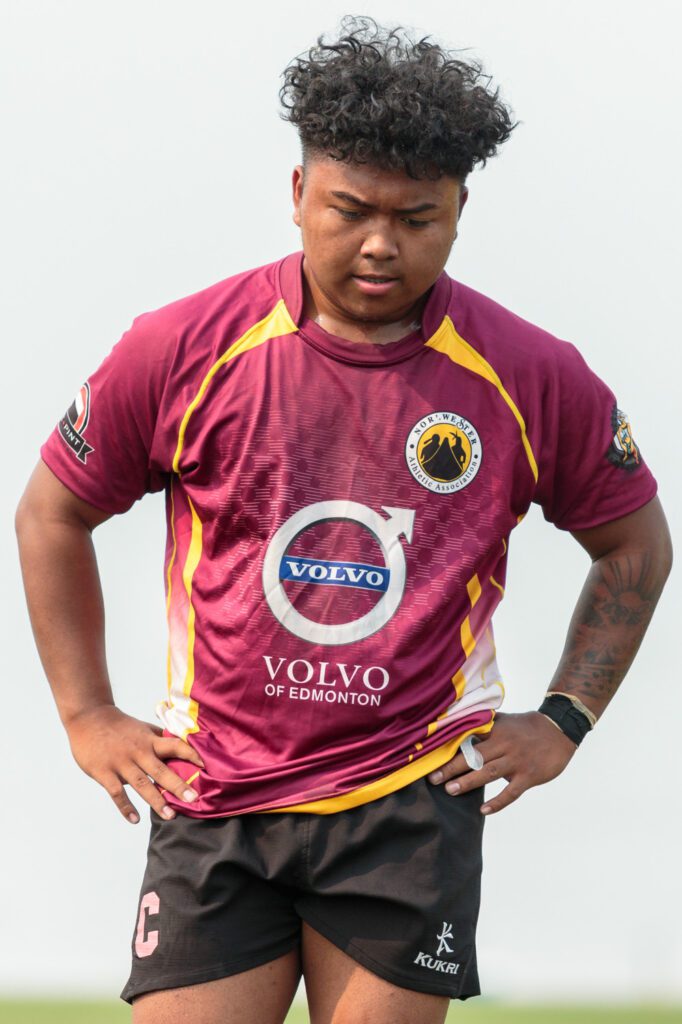
Emotional portrait. Photograph by Lisa Cannon
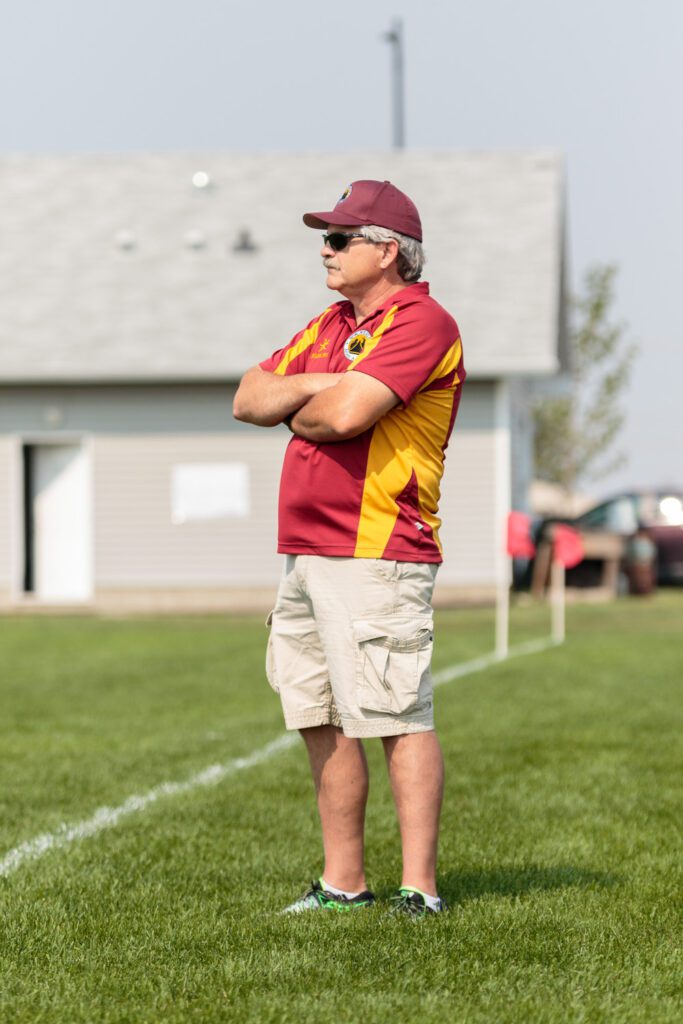
Westers coach. Photograph by Lisa Cannon
Tip 6: Shooting With Purpose
Key Lesson: Learning to slow down and choose your shots will help improve your images.
Recommended Reading: Want to expand your shooting skills and master photography? Grab our set of 65 beautifully designed and printable Action Cards that will give you over 200 photography assignments to help you take your photography to the next level. Check it out here.
One of the areas of biggest improvement I have made over the years is in learning to shoot with purpose.
By that, I mean I try to choose my shots intentionally as often as I can by quickly analyzing what is happening on the field. This is where knowing your sport comes into play.
As many photographers do when they first start, I used to employ the “spray and pray” method – basically taking advantage of the high-speed continuous shutter mode to take bursts of shots without really paying attention to what I was shooting.
This left me with plenty of average-at-best images, and many that just simply ended up getting deleted.
A composite blend of burst images. Photographs by Lisa Cannon
By learning to slow down a little and choose my shooting opportunities more carefully, I still take bursts of images, but I tend to shoot fewer frames per burst and my image quality has greatly improved.
When you learn to control the impulse to “spray and pray,” you can end up with image sequences that can be used to create interesting images by blending the photos.
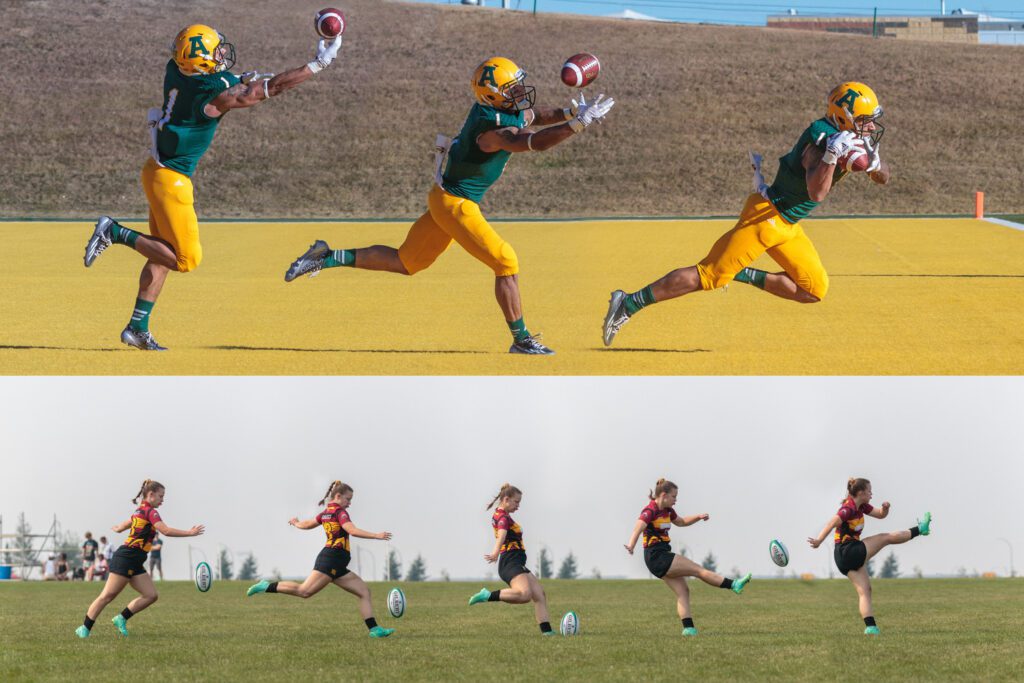
Bonus Tip: Panning
Once you’ve mastered the basics, you may want to look for the opportunity to shoot using the panning method.
This is a way to add a sense of motion to your image by blurring the background while keeping your subject in focus.
To do this, use a fairly low shutter speed that you can still hand hold, usually 1/30 to 1/50 sec, and you will probably need to stop your aperture down to keep your exposure balanced.
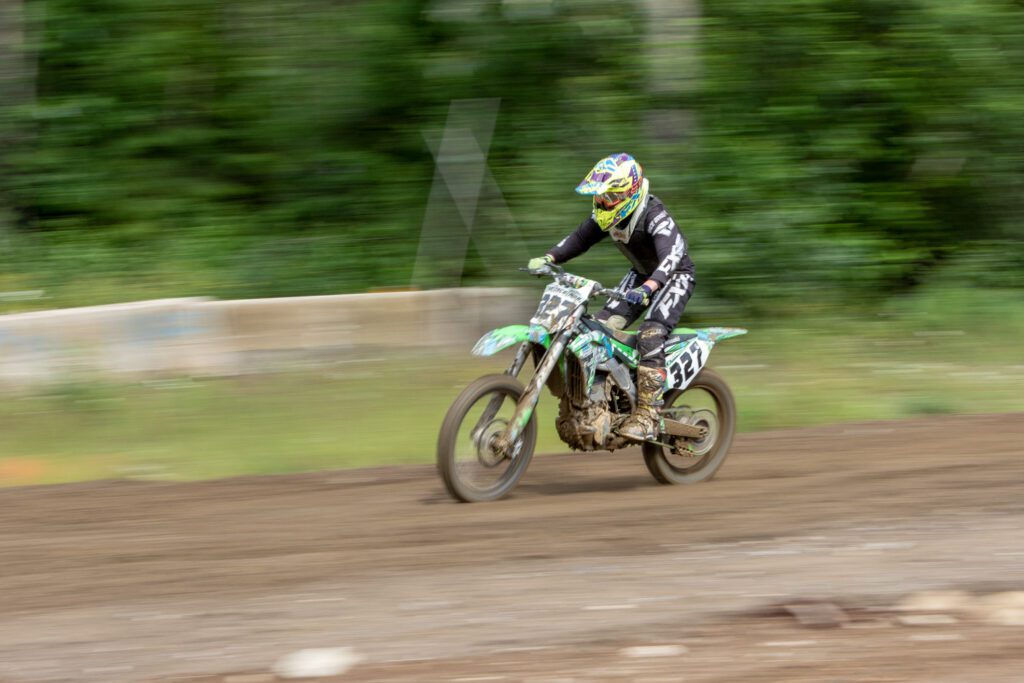
Panning in motorsports. Photograph by Lisa Cannon
Next, focus on your subject and then move the camera in time with them as they move across your line of sight, taking a series of images as you do.
Once you’ve mastered the basics, you may want to look for the opportunity to shoot using the panning method.
Because of the low shutter speed, the movement of the camera will cause the background to blur.
I find I only like using this technique in certain situations like motorsports, as the subject itself does not have visible moving parts.

Panning in athletics. Photograph by Lisa Cannon
I am not a fan of images that have an athlete’s face sharp while their arms and legs are blurred, but that is a personal preference.
Feel free to experiment to find your preference – that’s what keeps photography fresh and fun.
My Final Thoughts
Panning in athletics. Photograph by Lisa Cannon
If I was asked what my photography passion is, I would answer sports photography without a second thought.
I love the excitement not only of the game on the field but in the images I capture.
I always feel like am a part of the game in my way, even if I am not an official part of the team.
I hope this guide inspires you to try it for yourself, so you can experience the excitement, too.
Self-Check Quiz:
- Name three features to look for in an ideal lens.
- What is the best focusing mode to use?
- Does lens stabilization help in sports photography?
- True or false: Shutter speed does not matter in sports photography.
- List three ways you can control the lighting conditions.
- True or false: It is easier to shoot a sport you are familiar with.
- Which is the better method: “spray and pray” or shooting with purpose?
Learning Assignment:
You don’t need to wait for a big game to try out what you’ve learned. The next time your kids head outside, take your camera and shoot while they play or ride their bikes. Your local skatepark or soccer field can also be great places to practice, and you’ll find lots of people are more than willing to show off their skills in exchange for a few images for their social media pages.


