


“Tack sharp” is the term we use in photography. We want our images to be as sharp as they can be. But how do we take sharp photographs? There is not a sharpness setting on our cameras.
We often equate sharpness with a focus on photography. There is some truth to that. Blur softens your image. An out-of-focus photo will never be sharp. But there is more to sharpness than your photos being in focus. Sharpness is about clean lines and crisp detail.

Notice that the tree trunks are sharp in this image, but the cherry blossoms blur. The camera recorded movement in the breeze as motion blur. My settings were 5 seconds @ f/16, ISO 100. Photograph by Jenn Mishra
Focus problems may cause blur, but so can other things like motion and extra noise. To maximize sharpness, you may need to change your camera settings. You also have the option of using different focusing modes.
The way you post-process your images goes a long way to maximizing sharpness. You cannot fix an out-of-focus photo. But you can sharpen lines and clarify textures and details. This gives the perception of a sharper image.
Focus problems may cause blur, but so can other things like motion and extra noise.
In this guide, we will give you three tips for maximizing the sharpness of your images. Within each tip, we will explore deeper and give you more suggestions for increasing the sharpness of your images. There is not a one-size-fits-all strategy for maximizing sharpness. But there are some general tips for creating clear images.
What we will cover:
- How camera settings affect sharpness
- Autofocus options to maximize sharpness
- Post-processing tools that make your images look sharper
Your camera equipment also affects the sharpness of your images. Cameras with larger sensors give you sharper images, as well as good-quality lenses. But for now, focus on getting clarity from the gear you already own. Once you master these tips, you can think about upgrading your equipment.
Recommended Reading: Want a step-by-step guide on photography skills with your DSLR? Grab a copy of our best-selling guide, the DSLR Crash Course.
Tip #1: Tailor Camera Settings to Scene
There are no “right” camera settings. It is all about tailoring your camera settings to the scene you are photographing. But some camera settings will help you get maximum sharpness when taking a photo. Each part of the exposure triangle (shutter speed, aperture, and ISO) can make your photos look sharper or fuzzier, but for different reasons.
Sharpen Photos With Fast Shutter Speed
One of the main causes of fuzziness in photos is motion blur. This is not a focusing problem. The camera is focusing just as it should. The blur in the photo is motion. The shutter speed is too slow for the scene.
At a slow shutter speed, your camera captures motion in the scene as a blur. This includes people walking or trees blowing in the breeze. Compensate for motion in the scene by making your shutter speed faster. How fast depends on the speed of the motion. A faster motion needs a faster shutter speed. It is ok to have some motion blur in your image for artistic effect, but if you want sharp photos, freeze the motion with a fast shutter speed.
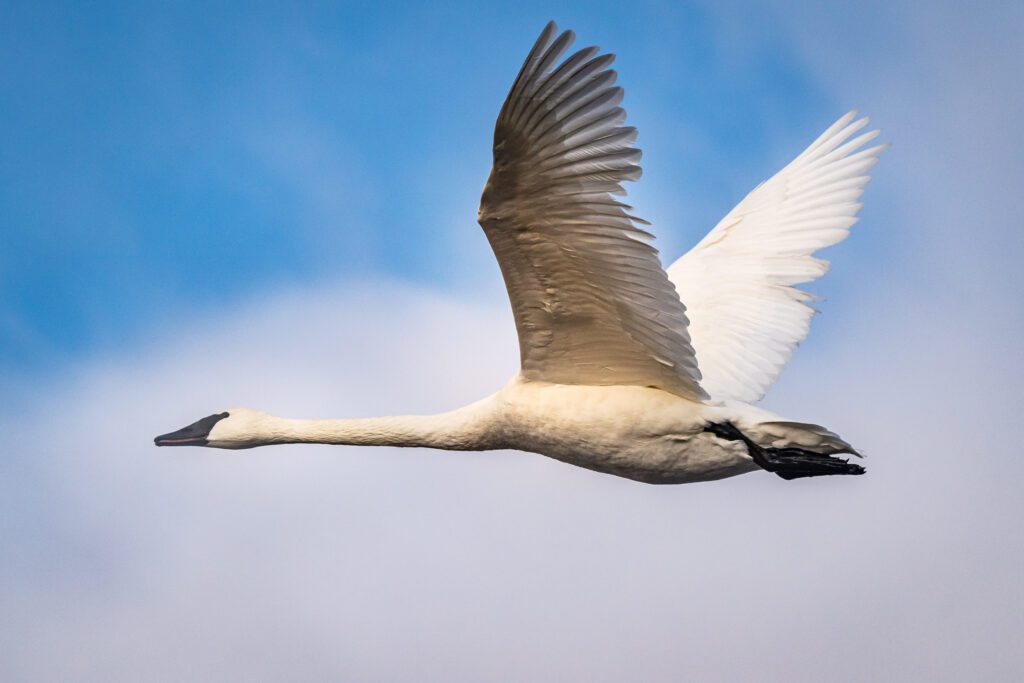
I had plenty of light to work with on this sunny morning. So, to capture this Trumpeter Swan flying by, I set my shutter speed at 1/2000th of a second to freeze the bird in flight. Photograph by Jenn Mishra
Your movements can also create motion blur in the image. This is a camera shake, and it creates blur. Modern cameras and lenses have auto stabilization that compensates for natural camera shake. But even so, there is a limit to how slow you can handhold your camera and get sharp photos.
There is a rule of thumb that helps you choose a shutter speed. When you handhold a camera, the shutter speed should be faster than the focal length of your lens.
If your lens is 50mm, the shutter speed should be faster than 1/50th of a second. With a long telephoto lens of 300mm, the shutter speed should be quicker than 1/300th of a second. Of course, this is just a rule of thumb. Some photographers can handhold at slower shutter speeds. Others are shakier. To shoot at slower speeds, use a tripod to stabilize the camera.
Use the Sharpest Aperture
If you are not getting sharp images, look at the aperture you are using. Each lens has a sweet spot – a place where it is sharpest. This varies with the lens, but the sharpest apertures are often between f/8.0 and f/11. Look for reviews of your lens. Or put your camera on a tripod and take a few photos of the same scene at different f-stops. You may not see a difference until you zoom in on the images. Look carefully at an edge where light meets dark.
Aperture also determines how much of the scene is in focus. This is the depth of field. A wide aperture (low number) generally gives you a shallow depth of field. This means that only part of your image is in focus. The rest is blurred. To get more of the scene in focus, narrow the aperture (use a higher numbered f-stop). Portrait photographers often use a wide f-stop to blur the background. This helps the subject pop. Landscape photographers use higher-numbered f-stops to get more of the scene in focus.

At the sharpest point of my lens, f/8.0, the center of this lotus blossom is in sharp focus. At this focal length (560mm), the depth of field is shallow. Notice how the focus drops away from the center creating a blurred background. Photograph by Jenn Mishra
Narrowing the aperture brings more of the scene into focus. But there is a limit. Narrow it too much, and your photos will be soft again. This softness is caused by diffraction. The narrow opening causes light waves to interfere with each other. Even though your lens may have f/22 or f/36, these apertures will not give you the sharpest photos.
Lower ISO for Sharp Photos
Use a low ISO setting like 100 or 200 to get sharp images. The ISO sets the light sensitivity of your sensor. Lower numbers are less sensitive to light. This is the best setting for making sharp photos. As you raise the ISO, your sensor becomes more sensitive to light, but it also creates noise. Noise is like pinpoints of light on your image. The light can also be colored. Too much noise creates a fuzzy effect in your photos.
As you raise the ISO, your sensor becomes more sensitive to light, but it also creates noise.
With modern cameras, you can increase the ISO a bit and still get acceptably sharp photos. Each camera is different. But you may not see ISO noise until you get over 1000 or 2000. It is ok if you see a little noise in your image. You can remove some noise in post-processing. We will talk more about this later.
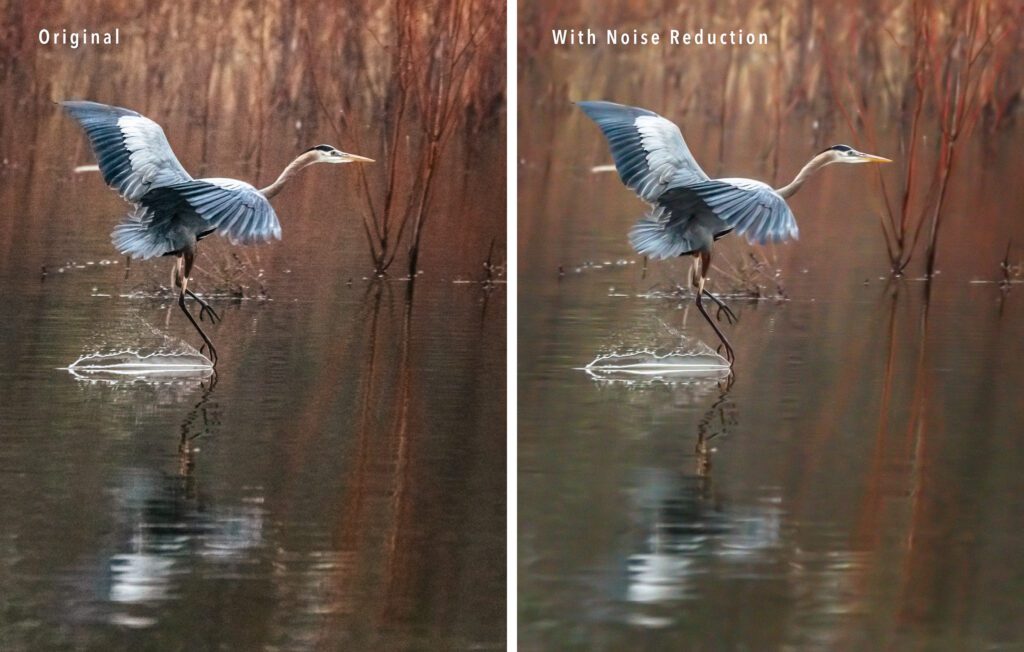
The light was fading as this Great Blue Heron landed so I set my ISO at 6400. This created noise in the image. But much of the noise I removed later in post-processing. Photograph by Jenn Mishra
Lower ISOs mean less light is collected by your sensor. To balance this, use longer shutter speeds and wider apertures.
Recommended Reading: Want a step-by-step guide on photography skills with your DSLR? Grab a copy of our best-selling guide, the DSLR Crash Course.
Tip #2: Change Autofocus Mode
Sharpness has a lot to do with focus. An out-of-focus image will never look sharp. On modern cameras, autofocus will do most of the work for you. But your camera has more than one autofocus mode. Camera models vary, but we will explore some focusing features found on most digital cameras. Changing your autofocus mode can maximize the sharpness of your image.
Limit Autofocus Area
By default, your camera will search the entire frame to find what it thinks are the main subjects. Your camera takes a guess, but you can set your camera to focus on certain zones or even target a select focus area. For accurate focus, identify what part of the image you want to be sharp. Use one of the other autofocus area modes to place the focus point exactly where you want it.
The center of your sensor is the sharpest with the most focusing points. One way to sharpen your image is to focus using the center focus point. This does not mean that you have to place your subject in the center of the composition. Focus on your subject in the center of your frame and then recompose. Shift your subject off-center before clicking the shutter button.

Using an aperture of f/5.6, I used my center focus point to focus on one fiddlehead. I recomposed to place the fiddlehead off-center and let the others blur into the background. Photograph by Jenn Mishra
Your camera may also have movable focus points. You can place these focus points anywhere in the scene. Some cameras have a joystick that moves the focus point. Or your camera may let you touch the back screen to set the focus point. You may be able to select a small or large focus area and be very precise with your choice. Telling your camera exactly where to focus takes the guesswork out of autofocus.
Select Appropriate Autofocus Mode
Your camera also has several autofocus modes. If you are shooting scenes without movement, use the single-shot (or one-shot) autofocus mode. But if you are photographing moving subjects, switch to continuous autofocus. This mode helps you track something that is moving and keeps it in sharp focus.
Turn On Eye Focus

Even the small eye of this Tufted Titmouse was detected by my camera. Photograph by Jenn Mishra
Many mid-to-high-end cameras now have an automatic eye focus setting. This is handy as we almost always want eyes to be in focus. It does not matter if you are photographing people or animals. When you use this setting, your camera focuses on any eyes found in the scene. This setting helps you get the focus exactly where you want it.
Use Manual Focus and Focus Peaking

I used focus peaking on my camera to get only the arching tail of this single Impatiens flower in focus. My settings were 1/100th of a second at f/2.8, ISO 1000. Photograph by Jenn Mishra
Autofocus is good on most modern cameras, but there are times when manual focus is still the best option. Your camera may struggle to find focus in complex or low-light scenes. You may have to take control and use manual focus to help your camera. For instance, you might need manual focus to find a bird or animal hidden in shaded trees. Manual focus is also necessary for astrophotography. Your camera will not autofocus at night.
If you use a mirrorless camera, turn on focus peaking. Focus peaking highlights edges that are in focus by using a color. You can see exactly where your image will be sharpest. Focus peaking comes in handy when shooting macro scenes. Even at narrow apertures, only part of a subject is in focus.
Tip #3: Add Sharpness in Post-Processing
Sharpness is the clarity of detail in your image. You can add clarity and sharpen textures in post-processing. You cannot focus on an out-of-focus image, but you can increase the perception of sharpness using post-processing tools.
Most post-processing programs have at least a couple of tools that sharpen your image. Start with the sharpening tool. In Lightroom Classic, this tool is in the Detail panel under the Develop Module. In the popular post-processing app Snapseed, sharpening is in the Details tool. Sharpening tools do not add detail; they add contrast to edges. Lights are lightened and darks are darkened. This gives the perception of sharpness. Most of these tools sharpen the entire image. To fine-tune where sharpness is applied in Lightroom, hold the option key while moving the Masking slider.
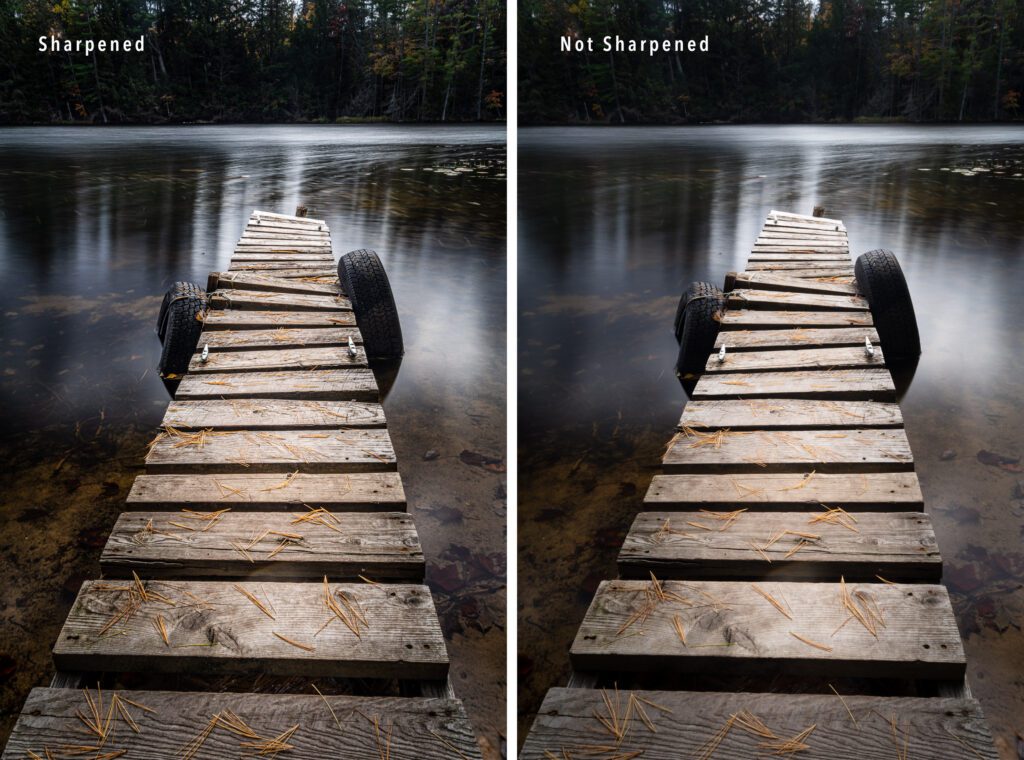
Compare these two images. The one on the left has been sharpened in Lightroom using Clarity, Texture, Dehaze, Sharpening, and other contrast-enhancing effects. The one on the right has not been sharpened. Photograph by Jenn Mishra
Some programs let you bring out the textures in your image. This also increases the sharpness. In Snapseed, this is what the structure slider does. In Lightroom, you can enhance texture using the Detail slider in the Sharpening tool. The Basic panel also includes the Texture slider. The Contrast, Clarity, and Dehaze sliders in Lightroom also increase the sharpness of your image. Each affects your image differently, and they are best used in combination.
You cannot focus on an out-of-focus image, but you can increase the perception of sharpness using post-processing tools.
Some post-processing programs are designed to increase the sharpness of your image. For instance, Topaz Labs have two programs designed to sharpen images. One is their Sharpen AI program that corrects minor focusing issues and removes blur. Another is their DeNoise AI program. This eliminates noise caused by using a high ISO in low-light situations.
Many photographers add an extra dash of sharpness when printing their images. On-screen, these images may look too sharp. Lightroom includes an Output Sharpening tab on their export screen to help achieve optimal results.
Recommended Reading: Want a step-by-step guide on photography skills with your DSLR? Grab a copy of our best-selling guide, the DSLR Crash Course.
Conclusion
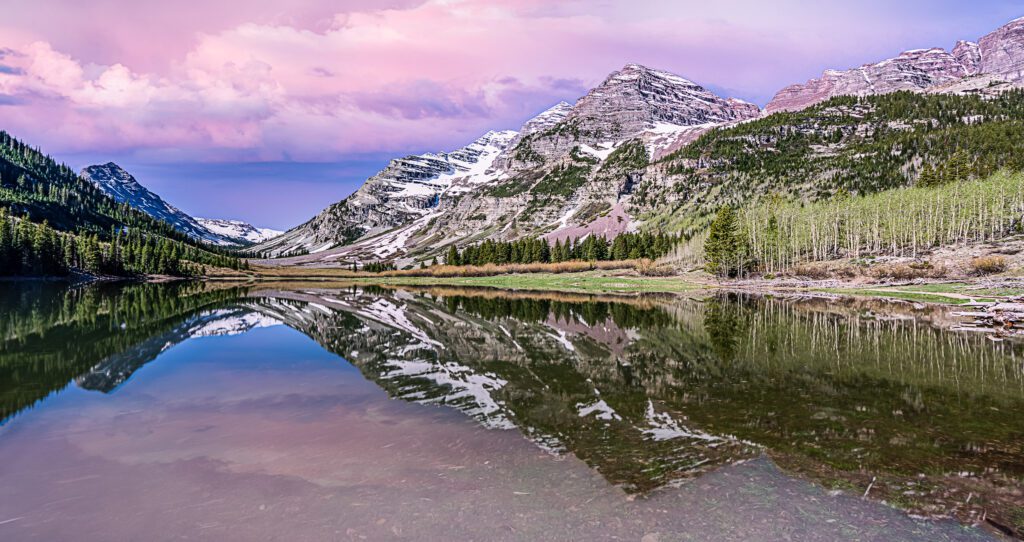
Photograph by Jenn Mishra
To maximize the sharpness of your photos, choose camera settings and focus modes appropriate for the scene. After taking the shot, use post-processing programs to optimize sharpness.
Use the fastest shutter speed, the sharpest aperture, and the lowest ISO that the scene allows. Rather than using the default autofocus mode that analyzes the entire frame, switch to a center or a flexible spot autofocus area mode. These autofocus modes let you set your focus point more precisely. Switch to manual focus for complex scenes and use focus peaking if your camera has the feature. Post-processing programs include many tools that increase sharpness. Start by sharpening edges, details, and textures. Then try out programs specifically designed to sharpen your image.
Sharpness is a considered characteristic in photography. Much of the technology included in our cameras, lenses, and post-processing programs help us achieve sharp photos.
Self-Check Quiz:
- True or false: Sharpness is only about accurate focus.
- How can a slow shutter speed create blur in your photo?
- When handholding your camera with a 100mm lens, what is the slowest shutter speed you should use?
- How does aperture affect sharpness?
- True or false: The highest apertures are the sharpest.
- True or false: Lower ISOs are the sharpest.
- How can you limit the autofocus area on your camera?
- What is eye focus?
- What is focus peaking?
- Name three post-processing tools that affect sharpness in an image.
Assignment:
Go out to a local park or other accessible venues. Practice changing the shutter speed, aperture, and ISO settings to maximize sharpness. You may need to put your camera on a tripod for the sharpest photos. Explore the different focusing modes available to you on your camera. Use center focus and if you can, move the focusing point around in the scene. When you get home, experiment with sharpening tools in post-processing. Look carefully at before and after results.


