


I remember years ago when I joined ‘more serious’ photography forums. The first thing that astonished me was the super-soft backgrounds behind the images on display. I instantly knew that I wanted to do the same, no matter what!
Later I learned that a soft background is not always a positive thing – it also has a negative side. It is something that must be controlled. But how is that done? By controlling something called ‘depth of field.’
What you will learn in this guide:
In this guide, we will have a look at depth of field (DoF), including what it is and the factors directly influencing it, how to manipulate it, and a few ideas about how you can make it work for you.
Recommended Reading: If you’d like to master camera settings to create gorgeous, creamy, blurry backgrounds, grab a copy of Photzy’s premium guide: Beautiful Background Blur.
What Is Depth of Field (DoF)?
When taking an image with cameras on the ‘auto’ setting (or cameras built into smart devices like cell phones – or the old point-and-shoot cameras), you will most likely find that everything is in focus. Why is that? Because these cameras are designed to ‘guess’ what you’re trying to achieve. The safest option is to simply have everything in focus.
You’d rather have everything in focus than have everything but your main subject in focus because of an incorrect ‘guess,’ right?

Photographs from Pixabay
What exactly is the depth of field? Basically, it is the area that is in focus when you take your photograph. We can get extremely technical and kick off by covering things like ‘the circle of confusion,’ but I’m sure that term alone is enough to scare you away. So, let’s keep it simple.
A narrow depth of field is an area with very shallow depth – sometimes as shallow as a few centimeters or inches.
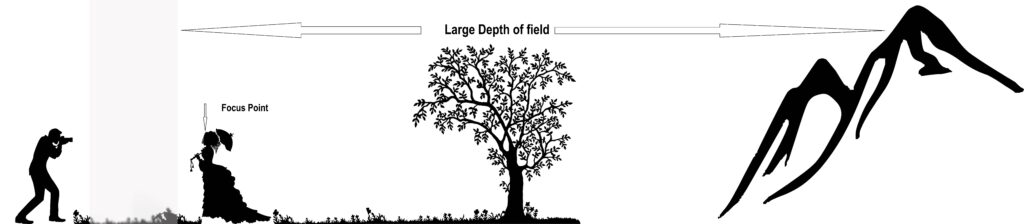
A large depth of field is just the opposite. It could start a few steps from you and stretch into infinity.
How Does Depth of Field Affect You?
Well, it helps to know where a given depth of field starts and where it ends because you’d like your subject to be positioned within that area. Fortunately, your depth of field always starts somewhere in front of the subject on which you focus, and it ends somewhere behind it. That is why one can get away with not knowing its exact boundaries when taking a picture.
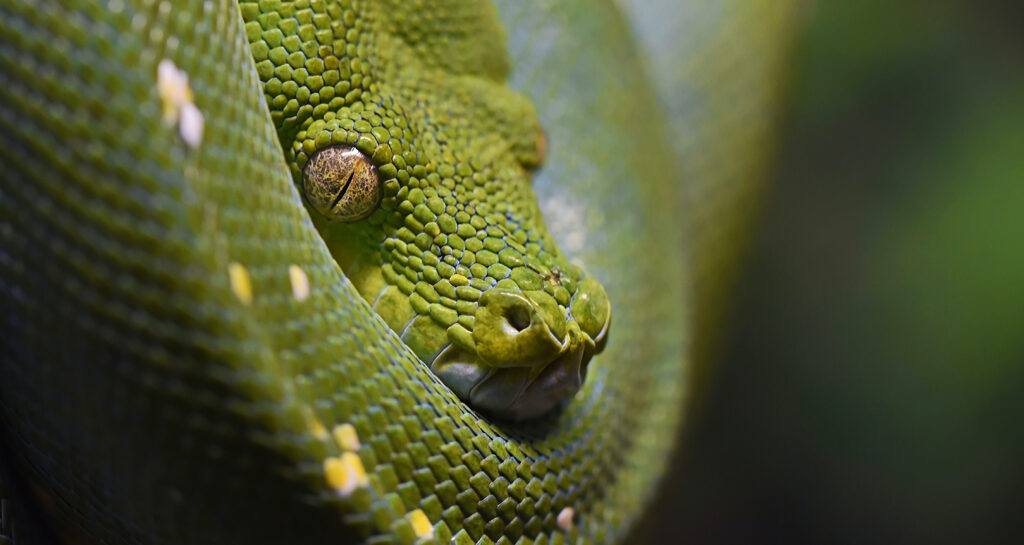
When is it important? Mostly when working with an extremely shallow depth of field and a very large depth of field. For example, when taking a portrait picture of a subject’s face, you may find that one eye is in focus but the other eye (and the rest of the face, including the nose) is not. Or the nose is in focus but not the eyes (especially with long faces such as those in the animal world).
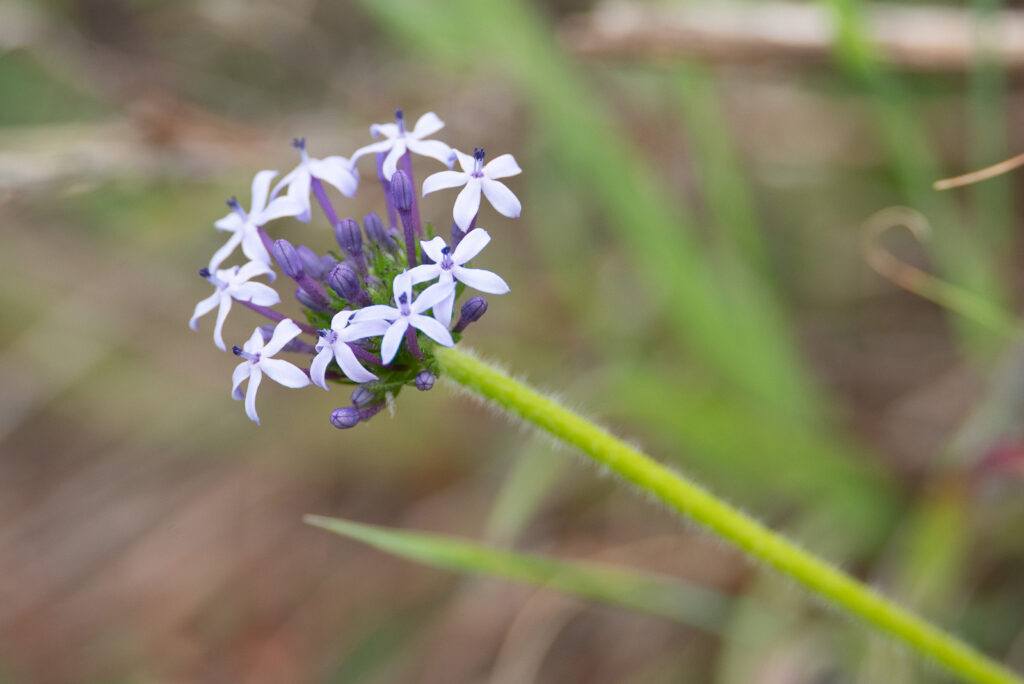
Nikon D600 + Tamron 150-600 G2 @ 600mm | f/6.3 | 1/640s | 800 ISO | 2m distance from flower Photograph by Tobie Schalkwyk
Similarly, you may want to have a soft (out of focus) background, but if your depth of field is too ‘large’ (deep), then your background will be in focus. A large DoF is usually desired when photographing someone or something against a beautiful background. When you want to force focus on your subject only, however, the last thing you want is a sharp (distracting) background.
Key Lesson: DoF is involved in every photograph you take, whether you consider it or not. Most of the time you will still produce ‘acceptable’ images if you ignore them, but your images may not be the best they can be.
Just walking a few steps closer to your subject or widening your aperture can make a huge difference in placing focus on your subject. Always be aware of it, test its limits, and you will see the results in your images.
How Do I Manipulate DoF?
The depth of field is determined by three ‘key’ factors. Let’s have a look at them.
Key #1: Distance
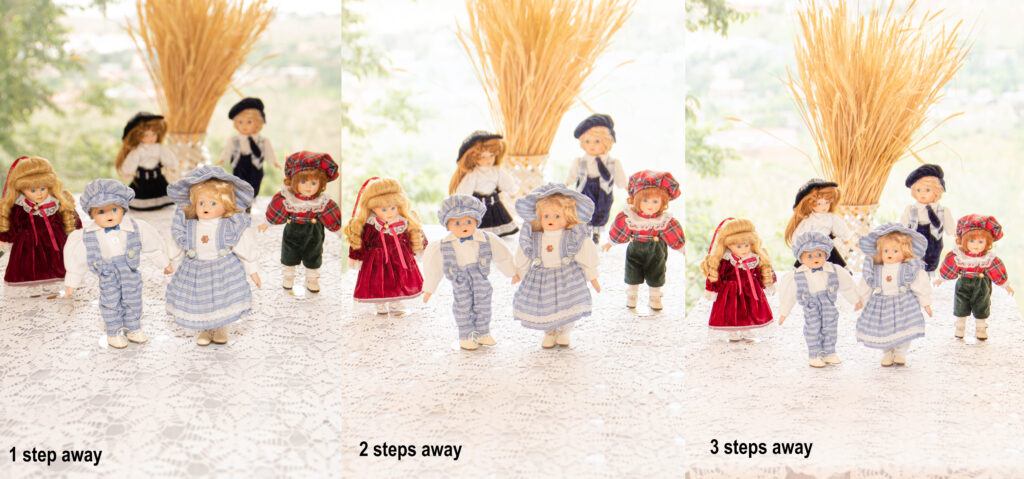
Photograph by Tobie Schalkwyk
The closer you get to your subject, the shallower your depth of field will be.
This example was taken at 35mm, f/2.8. The focus was on the front dolls. See how the eyes of the dolls right at the back are blurred one step away and become clearer at two steps away. At three steps away everything is in focus up to the reeds at the back.
The closer you get to your subject, the shallower your depth of field will be.
This indicates quite a significant increase in depth of field as a result of a relatively small increase in distance from our subject. It should caution us to always be aware of our actions during a shoot. A small, absent-minded adjustment in our position can have severe repercussions.
Key #2: Aperture

Photograph by Tobie Schalkwyk
The wider your aperture, the shallower your depth of field will be.
This example was taken one step away from the front dolls, at a 35mm focal distance.
I started with f/14. See how everything is in focus, even the landscape in the background? This is indicative of a massive depth of field. It is understandable why this is a popular aperture setting for landscapes where everything must be in focus. It is also understandable why it is not a popular setting for portraits where an in-focus background is distracting.
The second shot was taken at f/5.6. See how everything is starting to blur in the background, even the back dolls? This indicates a shrinking depth of field.
The third shot was taken at f/2.8. Only the front dolls are in focus, indicating a very shallow depth of field.
Just for interest’s sake, note what the larger aperture adjustments did to the exposure of the background. This shows why it is necessary to lower the ISO and/or increase the shutter speed as you open up the aperture setting.
Key #3: Focal Distance

Photograph by Tobie Schalkwyk
The higher your focal distance, the shallower your depth of field will be.
This example was done one step away from the front dolls at f/2.8. The focus was on the front dolls.
See how almost everything is still in focus at 24mm (including the reeds at the back), indicating a depth of field of +/- 2m (6’)? At 50mm, a lot of blurs were already introduced at the back but the dolls in the middle are still in focus, indicating a depth of field of +/- 1m (3’). At 70mm everything is out of focus at the back, even the dolls in the middle are somewhat blurred, indicating a depth of field of +/- 15cm (6”).
Key Lesson: It is clear from the above that very little action can make a huge difference in the success of your images. Just one or two steps further away from a group shot may place some of your subjects out of focus – a mistake, not even Photoshop can help you recover from.
Just a few clicks on your aperture dial can make the difference between a sharp landscape or not. Or bring out-of-focus subjects back into focus.
Just increasing your focal distance will add a little extra bokeh, or make it even more beautiful.
The important thing is to pause for a moment before each shot and decide what type of background you’d like to have, or how far back you want subjects to be in focus. Then spend that extra second or two to dial to the DoF settings that would achieve that. Your models and image viewers will appreciate that!
Recommended Reading: If you’d like to master camera settings to create gorgeous, creamy, blurry backgrounds, grab a copy of Photzy’s premium guide: Beautiful Background Blur.
How Do I Know What My Depth of Field (DoF) Is?
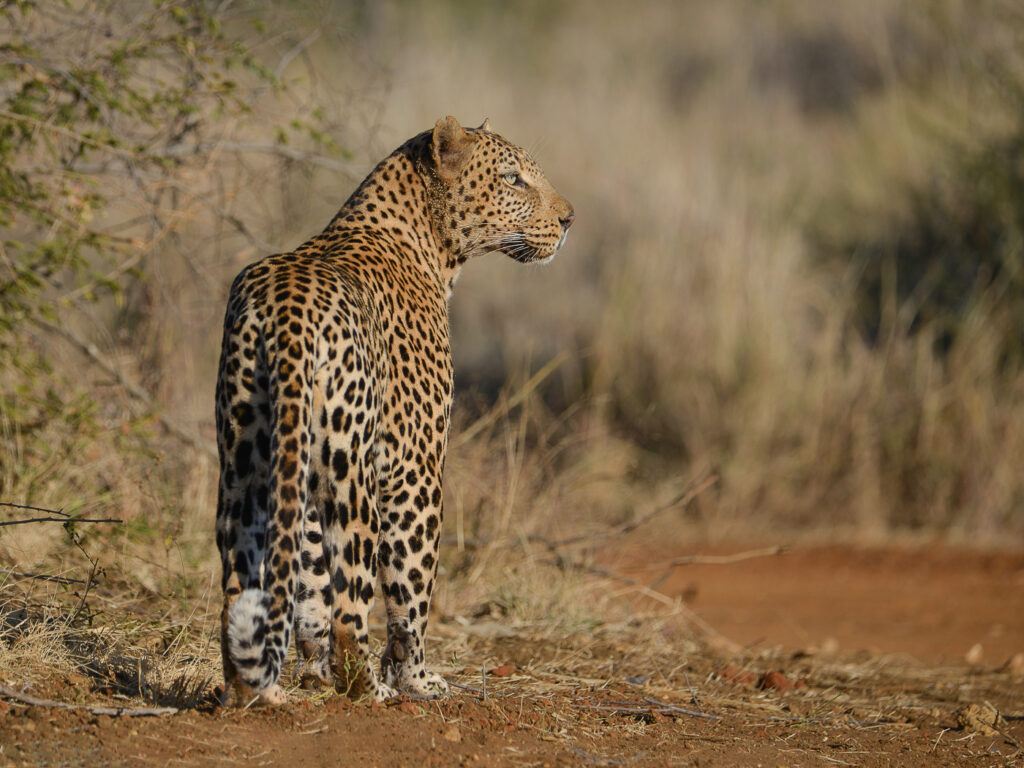
Nikon D600 + Tamron 150-600 G2 @ 450mm | f/6 | 1/800s | 100 ISO | About 30m (100’) from the leopard. Photograph by Tobie Schalkwyk
There are fantastic online and cell phone applications available for helping you to know what your DoF is. Not only do they give you the size of your DoF, but they tell you where it starts and where it ends. Have a chat with Mr. Google and see which of these are right for you.
DoF calculators take your camera make and model as parameters, so it factors in the possibility of 35mm equivalent focal distances applicable to crop sensors.
Example for laptop/PC: https://www.photopills.com/calculators/dof, https://www.dofmaster.com/dofjs.html.
Example for Android: DOF Calculator (download from the Google Play Store).
Note: One nice feature of DoF calculators is that they also give you the hyperfocal distance. I’m not going to discuss hyperfocal distance in this guide as it is a full topic for another day.
In short, the hyperfocal distance is the distance at which you’ll get the sharpest focus at your selected settings. This distance may or may not fall inside your DoF.
Conclusion
The key contributors of DoF are the distance from your subject, focal distance, and aperture.
Decide beforehand what DoF would make the most sense in all your shots. Use your settings accordingly to create that DoF. Use online and mobile apps to assist you when and where possible.
The key contributors of DoF are the distance from your subject, focal distance, and aperture.
A suitable DoF is certainly of vital importance in getting the best shots humanly possible. Use it, and the rewards will be plenty. So will the frustrations be if you neglect it?
Most importantly, enjoy your photography!
- What are the three components determining DoF?
- How will walk closer to your subject affect DoF?
- How will closing your aperture affect DoF?
- How will an increase in focal distance affect DoF?
- What is your go-to aperture setting for landscapes, or what should it be more or less?
- What is the hyperfocal distance?


