


You don’t have to be involved with photography for very long before the word, ‘raw’, will begin to pop-up over and over again.
Internet forums on photography have countless posts by photographers stating, “I ONLY shoot raw.”
Yet, the camera manufacturers continue to provide the jpeg option. Most cameras will allow you to shoot raw, jpeg, or both at the same time.
There are different reasons why you might choose each of these options, and we’re going to discuss the advantages, and disadvantages, of each choice.

Photo by Kent DuFault
Let’s just lay it out in simple terms- what is the primary advantage of a raw file, and what is the primary advantage of a jpeg file?
- RAW gives you far greater control over your image in post-production while maintaining the integrity of the original file.
- JPEG gives you a quick, easy to use file, which takes up less space in storage, and is compatible for use everywhere.
"RAW gives you far greater control over your image in post-production while maintaining the integrity of the original file."
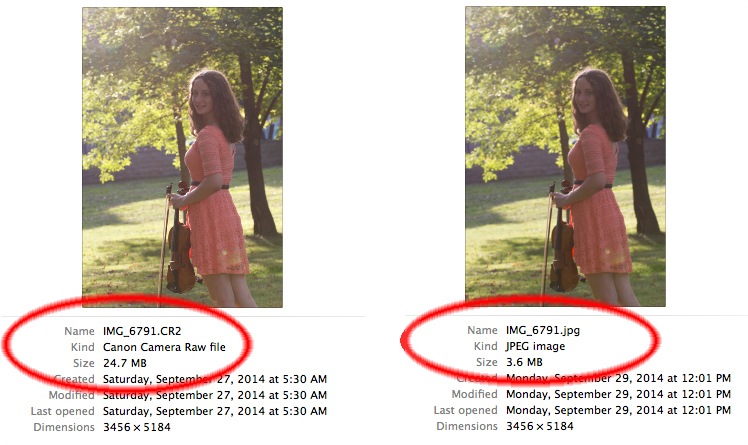
As you can see, the difference in file size between raw and jpeg is quite dramatic. Photo by Kent DuFault
In order to help you define these formats, I’d like you to imagine the film days- before digital photography took over.
The raw file is a digital negative. The jpeg file, however, would be similar to slide film.
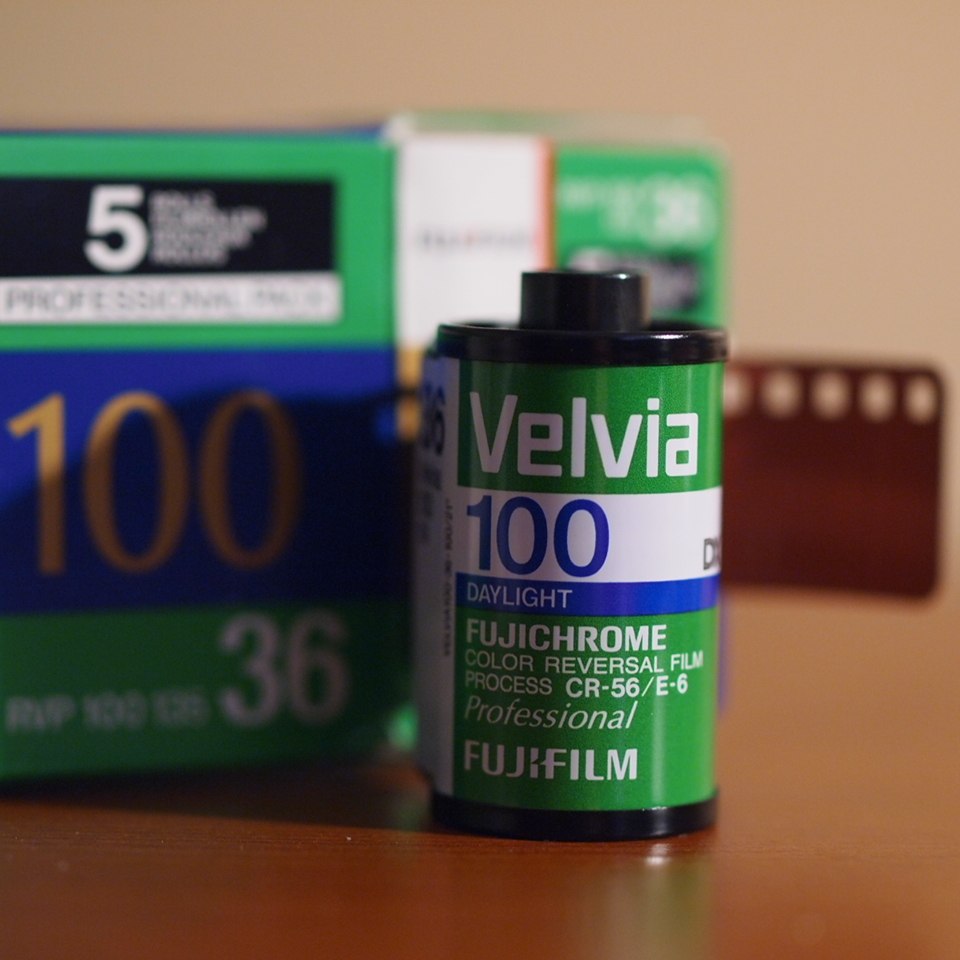
Slide film, also often referred to as transparency, or reversal film, had no negative. Photo by Wilson Hul

With slide film, whatever came out of the camera is what you were stuck with. A jpeg is similar in that it comes out of the camera as a ‘finished’ image. The difference between a jpeg image and slide film is that YOU CAN edit the jpeg image… BUT… all edits create a loss in image quality… and when you save the changes to the jpeg file; they are permanent… and every time you open and close a jpeg file there is some minor loss of image quality due to the compression scheme.
Photo by Al King
Raw, on the other hand, is a digital negative. Let’s go back to the film days, once again. When a photographer shot negative film, the image coming out of the camera was not the final product!

Photo by George Redgrave
The film had to go through another step. It had to be projected onto photographic paper to create a positive image.
It was at this step that a photograph could be completely changed. The photographer, as they created their positive image in the darkroom, could turn it into something that didn’t even resemble the original scene as viewed in the camera.

Solarization was a popular darkroom technique. It was used to radically alter what an original scene might
have looked like. Photo by Karolina Lusikova
Let’s connect this information to the raw digital format.
When the photographer altered her print in the darkroom, was she changing the original image?
No! She still had the negative. It was unchanged.
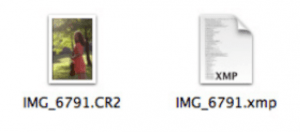
That is how the raw (digital negative) format works. When you process your raw file (perform post-production changes), your original file isn’t changed; the changes are stored in another file called an .XMP file.
Now that we’ve established some of the fundamentals of each format, let’s look
at the benefits of each one, and why you might choose to shoot one, the other, or both.

The raw (digital negative) format allows major changes to an image that are reversible. Photo by Kent DuFault
The RAW Format
We’ve established what the raw format is- it’s a digital negative. This is an important point for you to remember- all the on board settings in your camera regarding saturation, contrast, sharpness, etc. do not affect the raw file.
A raw file is exactly what is coming off of your camera’s sensor. It’s not been processed. It’s raw as in uncooked.
Don’t frustrate yourself by bumping up the saturation levels on your camera settings, only to see that all of your raw files look exactly the same.
Rule #1 with raw – All changes are made in post-production, NOT in the camera.
Many photographers claim, “I ONLY shoot raw.” There are many reasons why you would want to shoot raw. But there are also reasons why you might NOT want to!
Let’s look at the benefits first.
- The raw format has a larger bit-depth than the jpeg format. This means that it can capture and store far more information than a jpeg image. What does this mean to you in real world terms? If you screw up your image, and it’s way too dark, or it’s way too light, or it has a weird color cast, you’re far more likely to be able to correct it using raw processing.
- When you process the raw file in a raw processing application, you are in no way altering the original file. All the changes are stored in a separate file. They are only applied when the image is imported into an editing software suite. And, at any time, you can return to the original file and restore the settings to their original state, or, you can make new changes.
"There are many reasons why you would want to shoot raw. But there are also reasons why you might NOT want to!"
Now- this is important to understand.
We’re talking about changes made in the raw processing application window!
Once you’ve opened the file into your image-editing suite, such as Photoshop, any changes to the file (at that point) must be saved into a new file format- such as .JPEG, .TIFF, .PSD, or an equivalent.
They will not be recorded into the .XMP file.
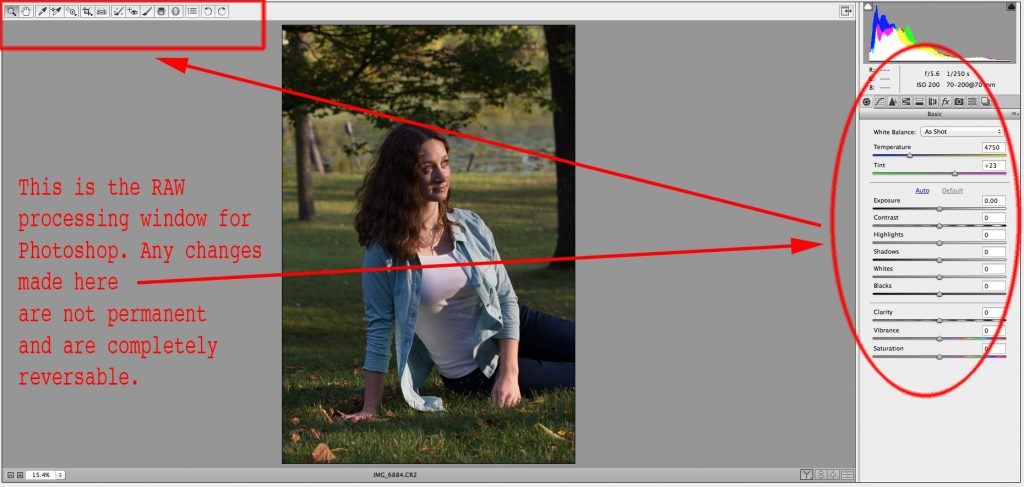
Photo by Kent DuFault

Photo by Kent DuFault
Let’s make a quick notation to Lightroom users…
All changes made to a raw file in the Lightroom Develop Module are stored in a .XMP file. In Lightroom, the processing is permanently applied to the file- when you export it.
I want to make sure you understand this.
- Changes made to your image as it resides in Lightroom (through the Develop Module) are non-permanent.
- When you export your file out of Lightroom, the changes (from the Develop Module) are applied to the file, and they become permanent to the new file that has been exported.
By the way- did you know that nobody seems to know exactly where the term ‘raw’ came from? In 2004, Adobe developed the .DNG file format. A .DNG file IS a generic file name for a digital negative. At some point, someone made up the term ‘raw’. You will find that the terms ‘raw’ and ‘.DNG’ are often sort of thrown about interchangeably.
Don’t let that confuse you. Just remember- Digital Negative…
Your camera will not have a .raw file format! The photograph above had a .cr2 file format; which is ONE OF Canon’s raw file formats.
Don’t be confused by the term ‘raw’ and your camera’s particular ‘raw’ file format.
I have a Fuji camera that prompts me to choose, raw, jpeg, or raw + jpeg in the camera menu settings. But the file produced when I choose the ‘raw’ setting is a .RAF file.
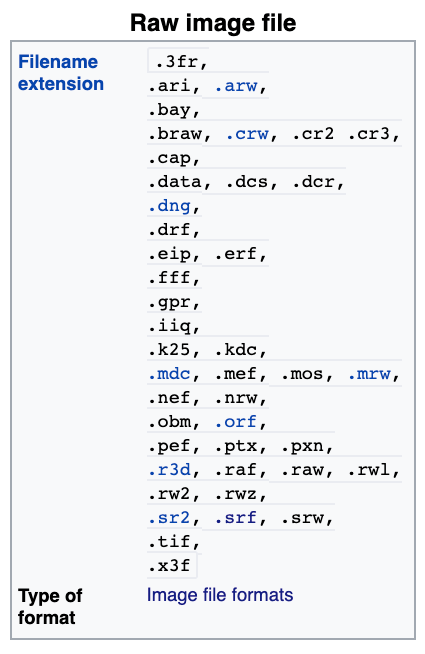
There are many different ‘raw’ (digital negative) file formats. Check your camera manual so that you understand what the file designation is for your particular camera model. Image from Wikipedia
So, if you have almost infinite control over your image in the raw format, and in doing so you don’t harm your original file- what’s the downside to raw?
Basically, there are three downsides- two biggies and a tiny one.
- Raw files are large. They take up A LOT more storage space: both on your memory cards and your computer hard drives. This is less of an issue now that the cost of storage has diminished. However, it’s still a consideration. Also, because the files are bigger, it takes a camera longer to write them. Which means, if you’re shooting a lot of images very fast, you may overrun your camera’s buffer, and you’ll have to wait for the camera to catch up.
- All raw files MUST be post-processed, and this means extra time. If you shoot 300 photographs at your cousin Ginny’s 50th wedding anniversary party, do you really want to sit down and post-process all those images? And… take into consideration what those images are going to be used for: simply posted online? Does the project call for massive post-processing time?
Those were the two biggies. Here’s the little problem-
- There’s a lack of uniformity with the raw format. (We’ve kind of touched on that already). Every manufacturer has it’s own set of parameters. Maybe this lack of uniformity will bite you, and maybe it won’t. This is how it bit me a few years back. I was using Photoshop 4.0, and I had a Canon 20D. I upgraded to a Canon 7D. With that camera model, Canon changed their raw file format from .CRW to .CR2. This meant that my Photoshop program could no longer open my pictures. The changeover was so quick that Adobe didn’t have a plugin for the .CR2 format! The plugin came within a few months. But, in the meantime, I had to convert all my images through a .DNG (digital negative) converter.
You see where I’m going: less fun- more hassle.
I’m sure with time, the uniformity issue will be resolved. But it’s not there yet.
"You see where I’m going: less fun- more hassle."
The JPEG Format
With everything that ‘raw’ has going for it, why would anyone want to shoot .JPEG?
- JPEG is the picture file format that has been around the longest. It’s acceptable everywhere you may want to use your pictures.
- Shooting .JPEG puts time on your side. Sure, you can shoot raw and process to .JPEG; but that takes time. What if you don’t have the time, or you don’t want to take the time? For example, let’s say you’re shooting an event. You have to take 100 awards photos of different people in the morning, and by that evening, deliver 100 5×7 prints. Shooting .JPEG allows you to go from camera to print (or whatever your end use is) immediately.
- If you’re shooting a lot of photographs, storage capacity on your cards could become a problem when shooting raw. With .JPEG you can literally put 5x to 8x more images onto a memory card.
- If you’re shooting a fast moving event, your camera can buffer .JPEG images much
faster than raw images.
Those are all pretty good reasons. What’s the downside to shooting .JPEG?
- It has a compression scheme that causes image degradation every time the file is opened and saved. The degradation is minor. You probably wouldn’t notice it at first. But, you would see it over time. This is a very important consideration when photographing once in a lifetime events such as a wedding or a trip to the Great Wall of China.
- A .JPEG file only has 8 bits of information. This means it can’t record the color depth or capture the contrast range that a raw file can. If you screw up the exposure on a .JPEG file, chances are you won’t be able to save it like you could a raw file.
That was a lot of information to be tossed at you! Let’s go back to two of my opening statements…
Internet forums on photography will have countless posts by photographers stating, “I ONLY shoot raw.”
Yet, the camera manufacturers continue to provide the jpeg option. Most cameras will allow you to shoot raw, .JPEG, or both.
What does this really mean to you and your photography? Is there a place for both formats in your photographic life? Probably…

By the way- did you notice the .JPEG degradation on this image? Photo by Hobvlas Sudonelghm
I boil it down to this
- If I’m shooting a family function or an event where I know the photographs will never be used other than online, or for a very small print; I shoot .JPEG.
- If I’m shooting for an assignment, or for artwork, or ANYTHING that I think has the possibility of needing the highest possible quality; I shoot raw.
- If I’m on vacation, or some similar activity, where I may want to post some photos on Facebook at the end of the day, yet I may want to frame a large print later; I set the camera to shoot both.
I hope this Quick Guide helps you sort out your format dilemmas!
Keep shooting.
Kent


