

Ask any photographer worth their weight about what the most important skill is to have, and you will quickly learn that it isn’t about the best gear, the prettiest subject, or even the fanciest editing software.
In fact, it is mostly free and available at any given moment in time.
And that is light!
Light is one of the most important elements that can quite literally make or break an image. And, not all light is equal.
Many people seem to think that they have to either use natural light (outdoors, window light, etc.) or artificial light (flash, strobes, etc.).
But the light in an image is so much more than just the type of light.
Light in a photograph is all about the quality, direction, and overall impact of the lighting on the subject.
Light is one of the most important elements that can quite literally make or break an image.
Here is what you will learn in this article:
- The different qualities of light
- The direction of light and its impact
- Defining side light
- How to locate directional side lighting
- Finding and using light shapes
- Defining front light
- Finding and using front light
- The benefits of observing light
Not all light is created equal, and light is never really bad.
What is different is how the light changes the subject.
Natural morning light is soft and subtle. Natural light in the afternoon can be harsh and strong. Natural light in the evening is often warm and dramatic.
Artificial light can be cool or warm depending on its source (Kelvin temperature).
When you change the direction of the light falling on the scene or subject, that adds another level of complexity, dimension, and depth to the image.
See, I told you that light was the most important element in a good photograph – even beyond that fancy gear you have been wanting to buy (or just bought)!
To truly take your images to the next level, invest time to really understand, learn, and appreciate the light that you have to work with.
For the sake of this tutorial, we shall focus on the direction of light: side or directional light versus front or direct light.
Other aspects of light can be overhead light and bottom-up light. These tend to be more situational when you want a very defined or specific type of look for your image.
Side/Directional Light
As the name suggests, directional light is the light that hits a subject at an angle.
With side lighting, the light doesn’t face the subject directly. Instead, it comes from either side: the left or the right.
While it is true that light travels in a straight line, it also has direction. Just look at the light streaming through your window to understand this important concept.
If you want a more angular approach, the common types of directional side lighting are 30/45/60 degrees.
The light coming directly side-on at your subject is a 90-degree angle and will tend to exaggerate shadows and dimension, whereas an approximately 45-degree angle between the light and the subject gives a more balanced and dramatic look.

The side light falling on these tulips is dramatic. You can see some of the flowers are in direct sun and others are in shadow. Photograph by Karthika Gupta
One of the best ways to find directional side lighting is to look for intense light that funnels through or enters through, an entryway or window. Then, follow it to where the light lands.
Though they may be easier to identify in darker settings, light shapes can be found both day and night.
The brighter the environment, the more intense the targeted light has to be to provide sufficient contrast to comprise a distinct shape.
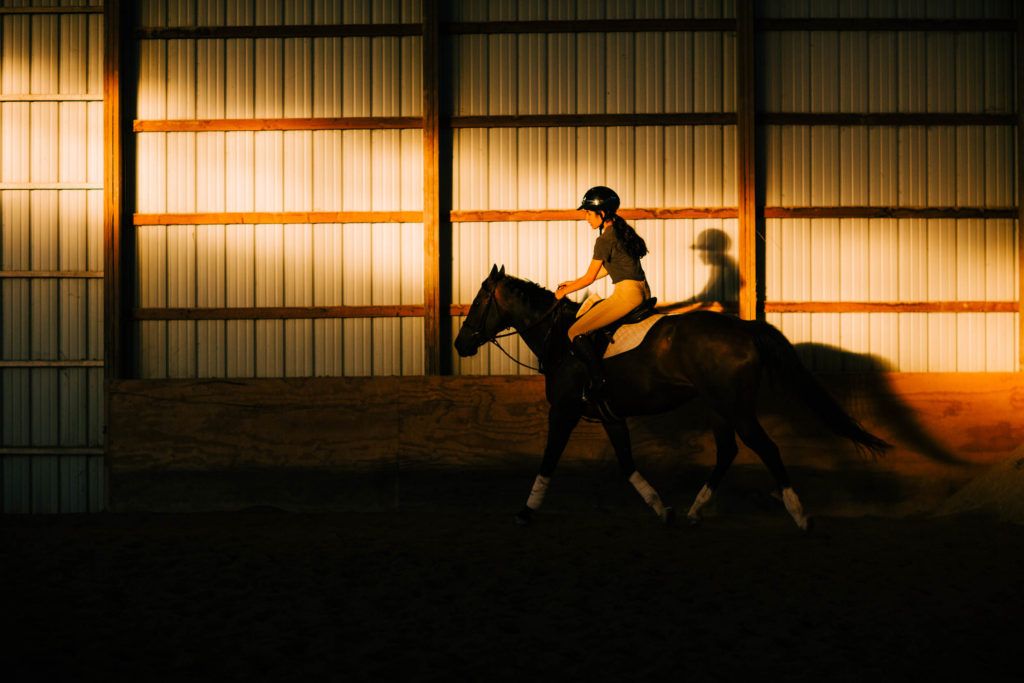
This is one of my favorite images. The light coming from near the roof of the barn cast dramatic, lengthy shadows and light shapes and gave the impression of four elements: the horse, the rider, and their respective shadows, moving as separate entities. Photograph by Karthika Gupta
While this might seem like an extreme example of directional light, it is one of the best ways to creatively explore composition in an image, in my opinion.
This type of light tends to be more dramatic and harsher, almost like having light as another subject in the frame.
One of the best ways to find directional side lighting is to look for intense light that funnels through, or enters through, an entry way or window.
Does the light shape illuminate something meaningful? Or can you move your subject, in whole or in part, into the space of the light shape?

The light from the window was falling directly on their faces, so I stepped away and caught a different angle from the side to give the portrait a more dramatic look. Photograph by Karthika Gupta
If the light source is large (for example, a large window), then having the subject move closer to the window produces even lighting. Even light here is often more complimentary. You can then rotate your subject to produce side lighting.
Side lighting is most commonly used to add texture and dimension to a photograph. It also adds drama and/or emotion to a scene or portrait.
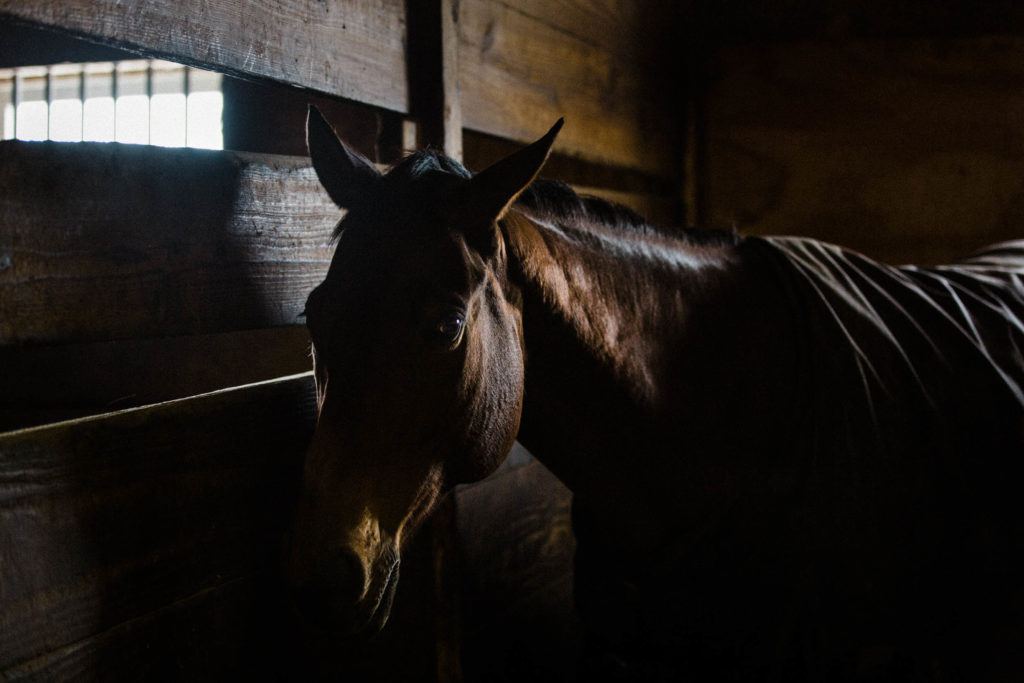
The play of light and shadows is more pronounced when you start to look for directional side lighting, and this can help you create beautifully dramatic images. Photograph by Karthika Gupta
Front/Direct Light
Front lighting is one of the most common forms of lighting in photography.
With front lighting, the light is shining from behind the photographer and directly illuminates the front of the subject.
Front lighting eliminates most shadows on the camera side of the subject as it evenly illuminates your subject.
Front lighting is perhaps one of the safest forms of lighting because it tends to even out all light anomalies (ugly shadows).
This is also why it is sometimes criticized for making subjects appear less interesting because the lack of shadows flattens the image.
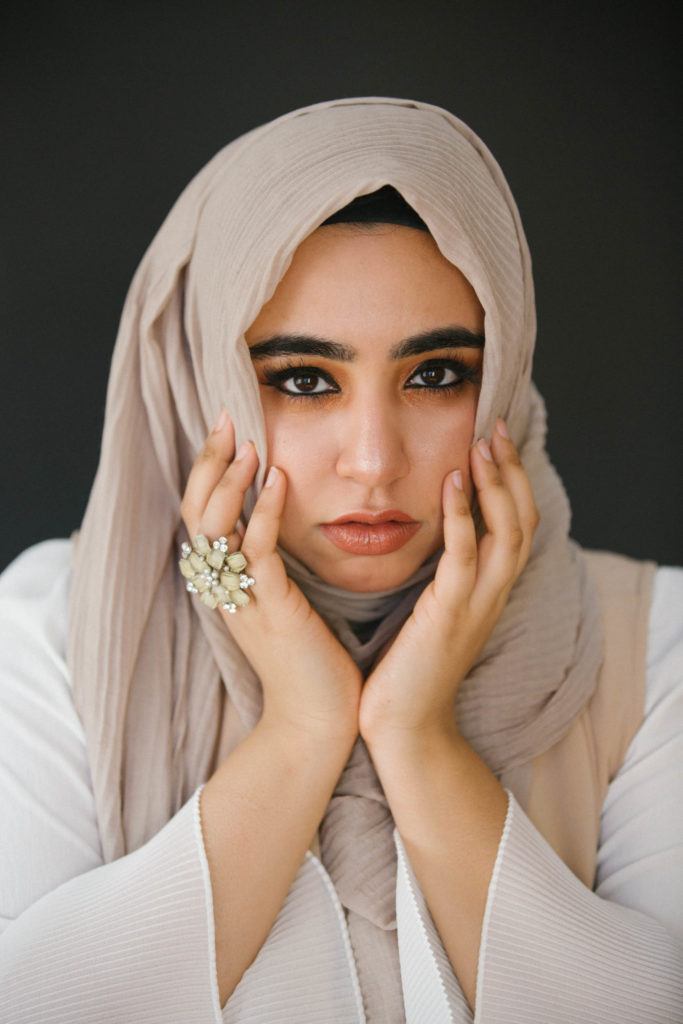
Photograph by Karthika Gupta
While the image above is a stunning portrait, the light is not an overly active participant in this image. This image is ‘safe,’ meaning it’s a bit innocuous with the light.
The focus of the portrait was the model, her face, and her jewelry.
You can see catchlights in the eyes.
Front lighting is used quite often in landscape or portrait photography when the purpose is to equally illuminate the subject from left to right.
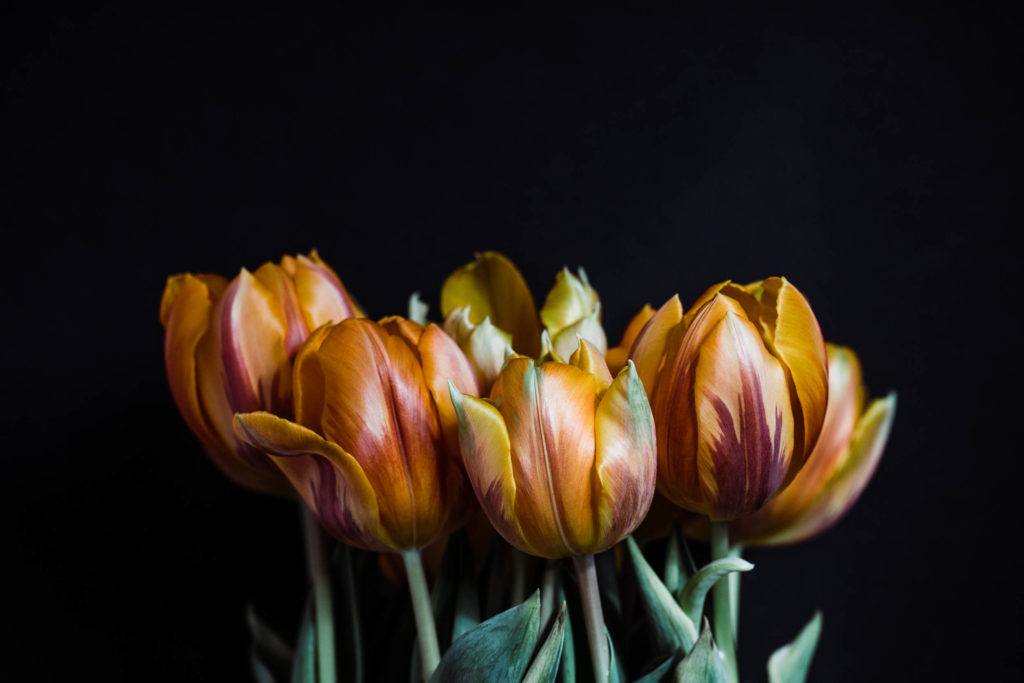
In this image, the tulips are placed directly in front of the window light (i.e. front light). You can see the highlights from the light source on the tulip petals upfront. Photograph by Karthika Gupta
For portraits, front lighting also helps to eliminate shadows that create wrinkles, especially under the eyes and other facial features. Many portrait photographers recommend the use of front lighting for female subjects.

In this image, the subject is placed in front of a window for direct front lighting, as you can easily see in the catchlights in both of her eyes. Photograph by Karthika Gupta
One of the best ways to get educated about light and how it impacts images is to actually just spend some time looking at the light around you.
Whether you live in a small apartment or out in the country, narrow down your focus area and see how the light changes during the day in that area.
Perhaps you will see a wall that catches the light from the trees or a bookshelf that gets illuminated by the setting sun.
Observing light will teach you how to use not just the light, but also the shadows.
This will be to your advantage as you create dramatic awe-inspiring images.