

Spring is arguably one of the best times of the year for photography. The weather is more hospitable, the days are longer, and there’s an energy in the air of renewal. If you’re like me, the opportunity to get out and create images without a jacket, and a safety plan, always feels like a new level of creative freedom.
As with all of the seasons, spring’s beauty is fleeting, so having the know-how and the right equipment is your key to success.
To ensure you’re ready to get out there, we’re going to cover the following in this article:
- Finding photography subjects in spring
- Creating a vision for your spring images
- Spring photography equipment
- Photographing flowers and flowering trees
- Photographing waterfalls
- Processing your spring images
Recommended Reading: If you’d like to learn more and improve your landscape photography, grab a copy of Photzy’s bestselling premium guide: Complete Landscape Photography.
Finding Photography Subjects in Spring

Spring run-off flows into deeper pools where eddies can form to create interesting shapes and features. Photograph by Tomas Alvarez
Since spring is a transitional season, it brings with it some good opportunities for photography subjects that aren’t available year-round. My favorites are flowing water and flowering plants, including trees. There is one additional byproduct of early spring that I’ll get to in a minute.
If I had to choose a favorite subject, waterfalls would be my selection by a long shot. And if you’re lucky enough to have a waterfall nearby, the water will be roaring. Flowing water is an incredible metaphor for life, and I’m always drawn to it.

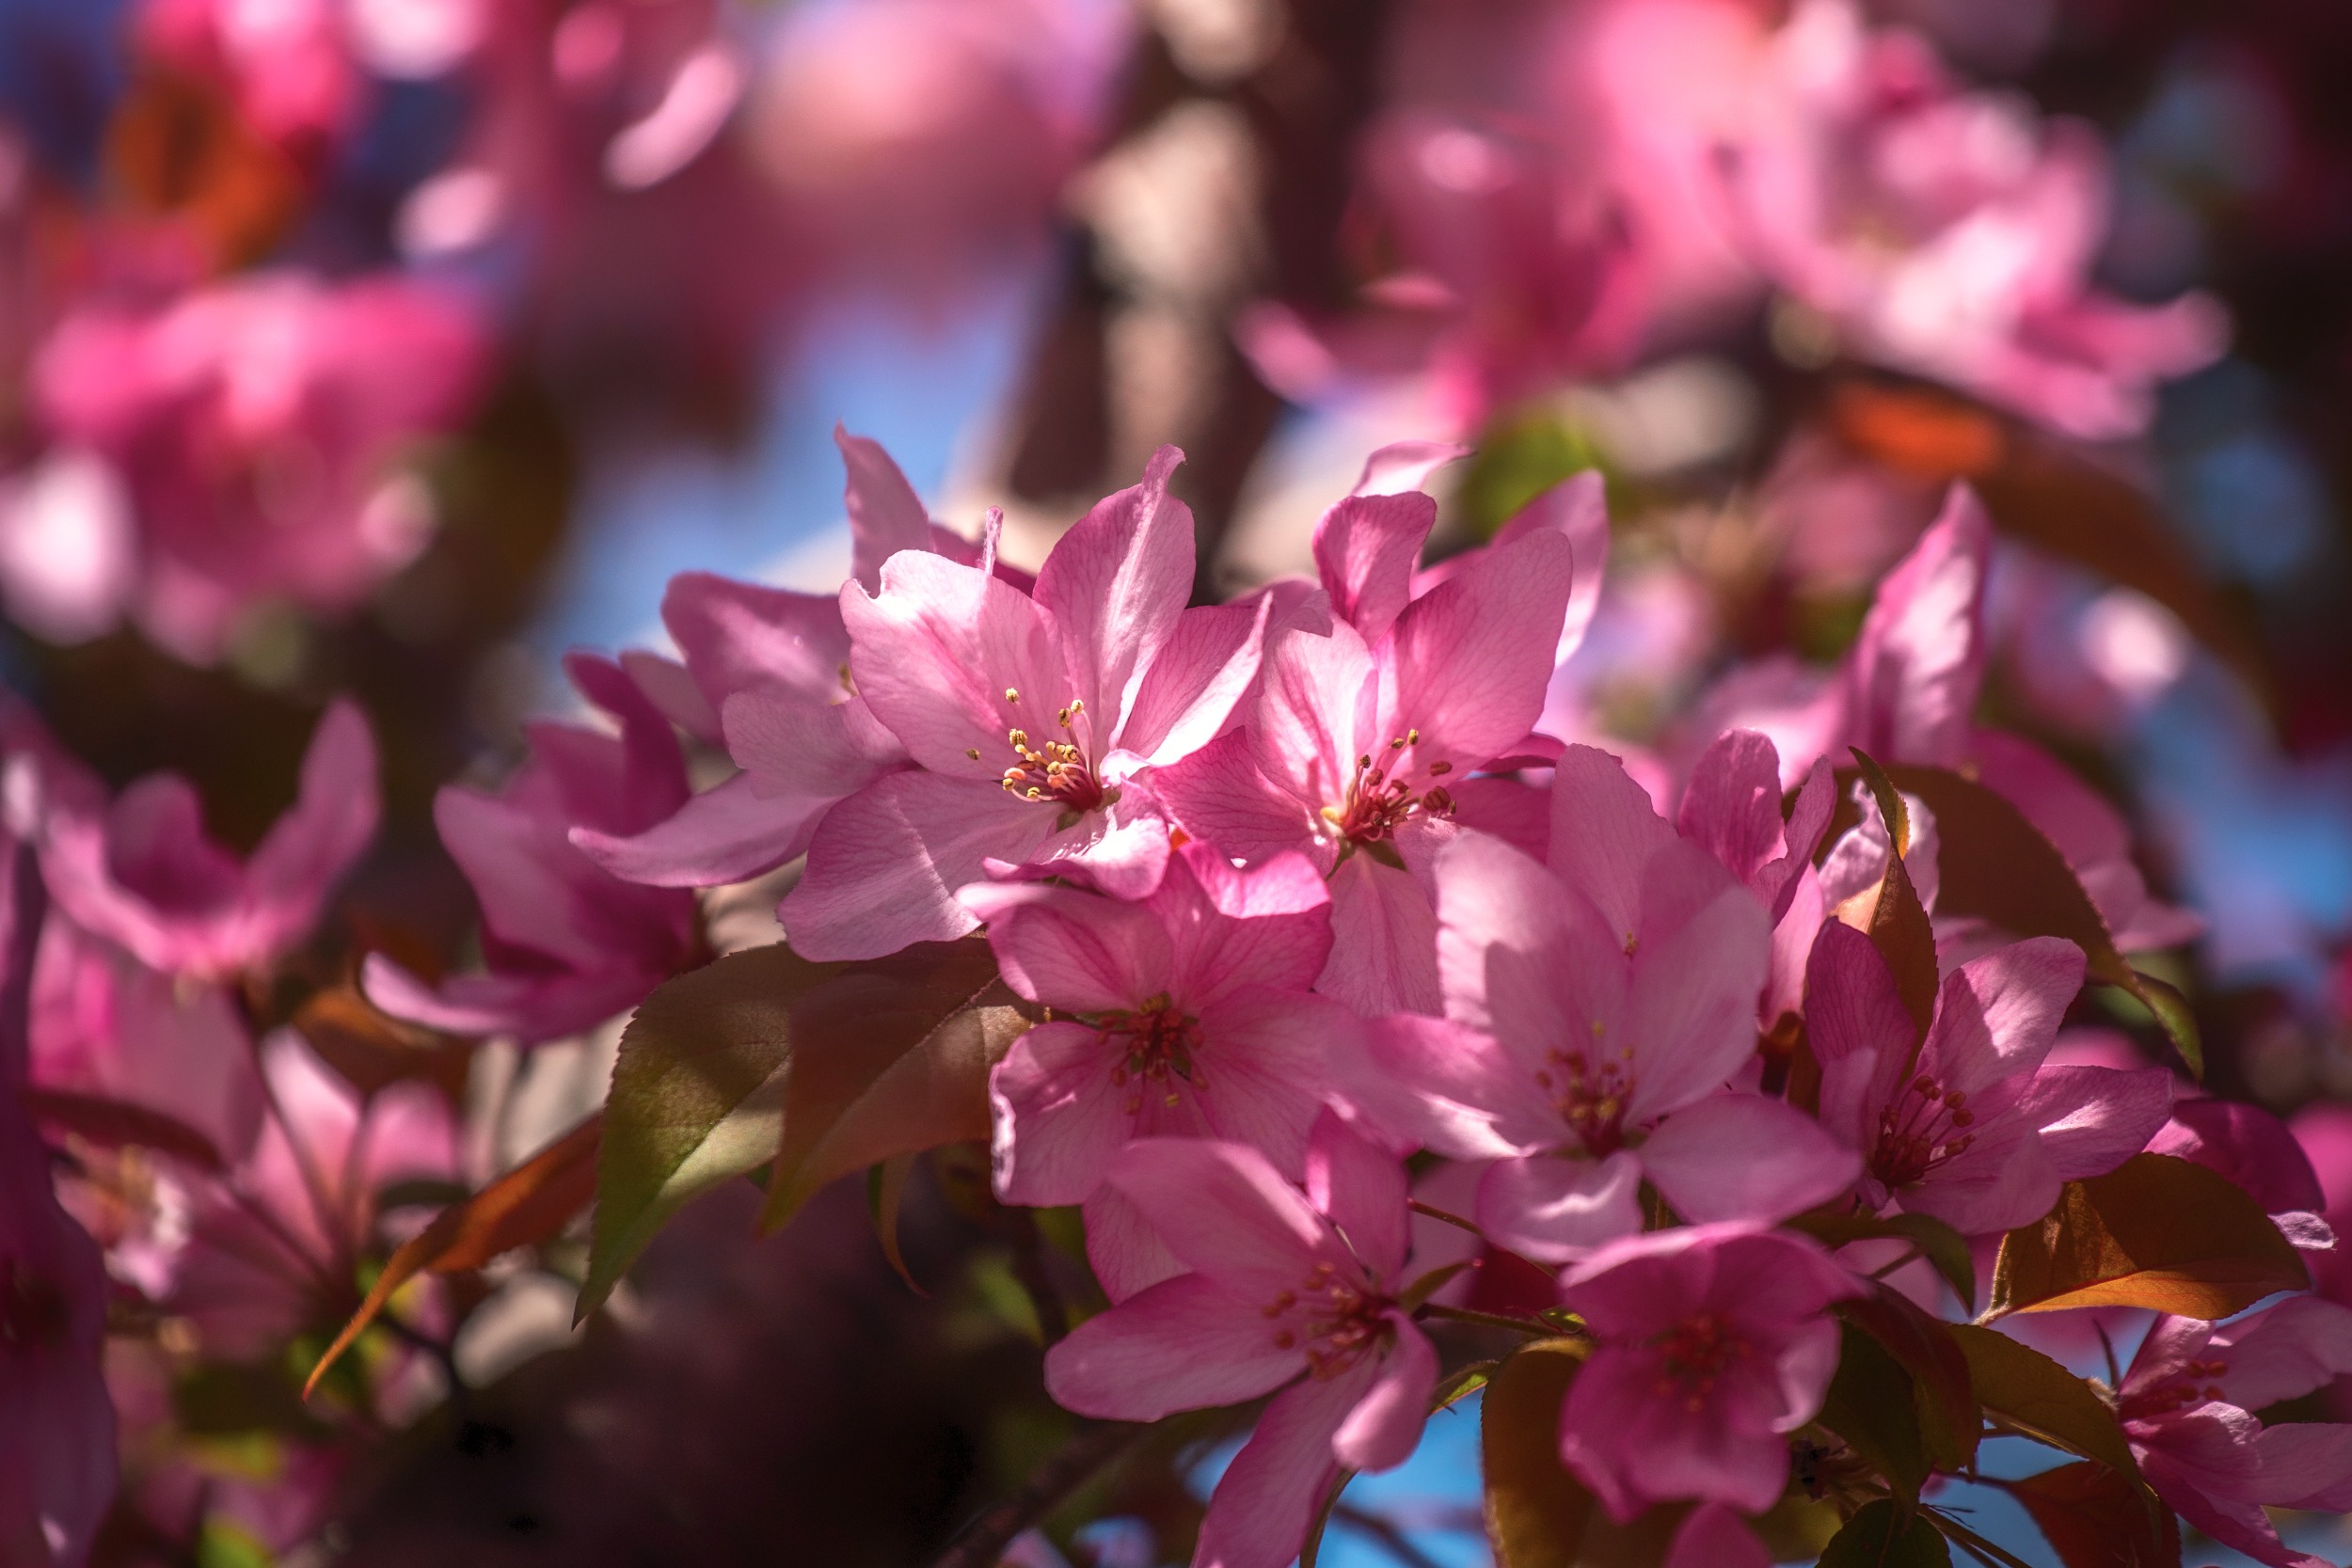
Crabapple tree blossoms are a spring favorite. Photograph by Tomas Alvarez
A close second to waterfalls are flowering trees. I like flower gardens, like everyone else, but a flowering crabapple tree in full bloom never fails to captivate me. I like to get lost in the boughs of blossoms for hours. Flower gardens, even wildflowers, provide an endless supply of subjects, including pollinating insects.

Bare tree limbs allow for a view of Minneapolis not available in warmer months. Photograph by Tomas Alvarez
The additional byproduct of spring I mentioned above is exposed landscapes due to the lack of leaves on trees. While this can be argued to be a benefit of winter, sometimes locations are less accessible, and the days shorter – leading to not quite ideal conditions for the image you want to create.
Creating a Vision for Your Spring Images
Having a vision for your finished photos, before you set out, will help you make better images. Your vision will give you a rough, visual, framework to work from as you photograph subjects. You will also be more efficient, leaving more time and energy for creativity as you explore your location.
How to Create a Vision
Think about the subjects you are intending to shoot. You don’t have to be overly specific with the subject, like a specific kind of flower, but having a rough idea that flowers are your intended subjects is good enough.
What are some attributes of flowers? They’re delicate, soft, often have rich pastel colors, and are typically found in bunches. When we look at flowers, we usually focus on them one at a time and see the rest in our periphery. Using these attributes, we create our vision of soft images (shallow depth of field) with a single bloom, or tight bunch, in focus, with the rest of the image tastefully out of focus.
Having a vision for your finished photos, before you set out, will help you make better images.
What are some attributes of waterfalls? Flowing water, streaks of disrupted flow as water passes rocks that protrude the surface and the contents of the surrounding riverbed. I like to provide as much context of the waterfall’s location as I can while keeping in mind it can become distracting. The vision my mind conjures highlights the waterfall as a series of ribbons that transition from the top of the falls to the pool below, with enough detail about the surrounding channel to determine scale, remoteness, and any other interesting features.
Usually, waterfalls are visually chaotic, but they can be tamed via filters. Flowers present their own challenges, too. Indirect sunlight, light reflections can mute some of the colors, and shooting soft images present its own set of problems.
In the next section, we’re going to talk about some filters that can help you create your vision.
Key Lesson: Before you start your photo session, think about your intended subject and how you can use its attributes to help you create a vision.
Spring Photography Equipment
We’re going to talk about a couple of types of filters that help create images that match our vision. Those filter types are neutral density and polarizers. These filters aren’t necessary, but they help us create images in ways that can’t be done in post-processing software.
Neutral Density Filters
Neutral density filters, often abbreviated ND, are simply shaded glass, or plastic, that restricts the amount of light reaching the camera sensor in measured amounts. They are available on the market as round, screw-on lens attachments, or larger square and rectangular panes that require a screw-on filter holder. The amount of light they allow in is typically measured in stops, though manufacturers like to use an ND Factor as the measurement.

Illustration by Tomas Alvarez
Here is a simple table that will correlate the measured stops to ND Factor. Simply understand that a smaller stop number allows more light to reach the sensor, resulting in more detail in any movement. A larger stop number allows less light, requiring a longer exposure to allow enough light to reach the sensor, resulting in less detail in anything moving.
Typically, you can find sets of 1-, 2-, and 3-stop ND filters sold together as a pack. When I bought my first set of ND filters, that’s what I bought. A decade later, I still have them and use them in a pinch.
As ND filters get darker, the more difficult it is to focus if you use autofocus. Sometimes, you will need to obtain focus before putting on your ND filter and making shutter speed adjustments. In that same vein, darker ND filters require longer exposures, which means your camera needs to remain still. A good tripod and a remote trigger are great accessories to have when using ND filters.
Key Lesson: If you buy circular ND filters, buy a size that fits your largest diameter lens, then buy step-up rings for your smaller lenses. By doing this, you only need to buy one set of filters to use on all of your lenses.
Polarizing Filters
If you’ve ever owned a pair of polarized sunglasses, you know what this filter does. If not, and without getting into the science behind them, just understand that polarizers reduce reflected light, and as a byproduct, they allow subjects to appear more color-saturated than what is seen with the naked eye.
Polarizer filters are sold in circular, screw-on format, made with two plates of polarized glass. Because the effect they provide is based on the combined orientation of the plates, the outer ring rotates. This rotation allows us to pick the area in our image frame that we want reflecting light reduced. Once the polarizer is attached to the camera lens, you simply rotate the outer ring until the reflected light you want to be reduced is impacted.
Note: Polarizer filters are not completely transparent, therefore using one reduces the amount of light reaching the camera sensor like an ND filter. You may need to adjust your exposure to compensate for any reduced light transmission.
Key Lesson: Just like circular ND filters, buy one that matches your largest diameter lens, and step-up rings for your other lenses.
Recommended Reading: If you’d like to learn more and improve your landscape photography, grab a copy of Photzy’s bestselling premium guide: Complete Landscape Photography.
A Final Word on Filters
For the kind of images I like to create, I find that I need to use both an ND filter and a polarizer filter at the same time. Stacking circular filters can work, but it can lead to unwanted diffraction, or glare, appearing in your images. I use an integrated system, which consists of a 100mm square-plate ND filter holder with an integrated, but removable, circular polarizer holder. There are many of these systems on the market, and I use one that works for me and my budget.
Key Lesson: ND and polarizing filters help us manage the light and how it reaches the camera sensor. ND filters reduce the amount of light, and polarizer filters primarily reduce reflected light.
Photographing Flowers and Flowering Trees
When we get to our location, we’re going to utilize the vision we created earlier to set up our photographs. As a quick reminder of that vision, we’re looking to create soft, color-rich images with a few elements in focus. Be sure to take multiple shots with varying compositions. Your compositions can be as simple as the Rule of Thirds, or center-focused.
Experiment and have fun!

Apple Tree Blossoms. Photograph by Tomas Alvarez
Camera Settings
If you would like your camera to select an appropriate shutter speed, set your camera to Aperture Priority mode. To control all the aspects of your exposure, use Manual mode. If you are not comfortable with manual exposure, I’d suggest using Aperture Priority, taking a few shots and paying attention to the shutter speed the camera is using, and then switching to Manual mode and dialing in the same shutter speed. Adjust the shutter faster or slower from there to achieve the correct exposure.
Aperture:
Translating the creation of soft images to camera settings means using wider apertures. Start by opening your aperture as wide as you can. This will give us the shallow depth of field and blurry bokeh fall-off that creates softness.
Shutter:
If you are in Aperture Priority mode, your camera should select the appropriate speed for correct exposure. I typically use Manual mode and will dial in a shutter speed of 1/60 or slower (i.e. 1/40 or 1/30) as my starting point. A shutter speed of 1/60 is pretty much the slowest speed for handheld, non-stabilized camera bodies without blur. Stabilized bodies can get down to 1/15th or so.
Be sure to take multiple shots with varying compositions. Your compositions can be as simple as the Rule of Thirds, or center-focused.
Using a slower shutter speed allows for a little more imperfection to enter the frame, adding to the softness. Outside of a controlled environment, flowers aren’t perfectly still, nor are their leaves or their neighbors.
If you are in bright daylight conditions and Manual mode, 1/60 or slower may overexpose your image. Check your camera’s light meter and make sure you are in range. To help tame this problem, we can use the filters we covered above.
Using the Filters
Polarizer:
Attach your polarizer to the end of your lens. Using the viewfinder, rotate the polarizer until you see a position you like. If there is a clear sky in your shot, you could rotate the filter until that part of the sky darkens, or you can place the effect on the flower petals to remove any glare and enrich the color. Remember that if you are in Manual mode, you’ll need to adjust the shutter speed to accommodate the light reduction of the polarizer.
Neutral Density:
Use the neutral density filters to get your light meter in range. If you have multiple filters, try each of them to see which one gets you closer to zero on your light meter, then use that one. If you only have one, attach it and adjust your shutter speed to as slow as you can with your light meter at zero.
Working with polarizer and ND filters will take some practice to get right. Once you get familiar with the process of using them, you’ll get better at knowing when and how to utilize them and their impact on your images.
Key Lesson: Use a wide aperture and a slower shutter speed to create soft flower photographs. Use ND filters to manage any light challenges and/or a polarizer to reduce glare and reflected light.
Photographing Waterfalls

The raging flow of spring run-off. Photograph by Tomas Alvarez
Using the vision we created for waterfalls, let’s get set up for photographing them. As a reminder, the photo above, simplified, is ribbons of water with some detail of the surrounding area. This keeps the waterfall as the focal subject and provides some context for the viewer. Again, your composition doesn’t have to be complex, but I would suggest framing your image such that the viewer can see the channel of water leading away from the waterfall. Viewers will follow the flow in reverse back to the waterfall.
As with the flower section above, expect some experimentation and make it fun.
Camera Settings
For this camera setup, I advise Manual mode and a tripod.
Aperture:
We’re going to set our aperture to somewhere in the middle of the range, around f/8. This aperture setting is usually the sharpest for most lenses, and it helps us accomplish the goal of capturing some of the rocks and surrounding interest near the waterfall, while not being so detailed as to distract from our subject. If you do not have any ND or polarizer filters, you can close your aperture further to allow for a longer shutter speed. The caveat is the resultant image will lose some sharpness and may have more identifiable distractions, but it’s not the end of the world.
Shutter Speed:
We’re looking for ribbons of water, or something close, so we need our shutter speed slower than 1/10 sec, which is the speed at which the moving water begins to blur. If you want more detail in your water, use a faster shutter speed.
If you have attached a polarizer or ND filter, adjust your shutter speed until your light meter reads close to zero, or your preferred metered-light point.
Focus:
Set your focal point before you put it on your ND filter. To avoid it changing, you can switch your camera to manual focus immediately after you set your focal point. Be sure to try not to bump your focus ring.
Using the Filters
Polarizer:
Because the polarizer also limits some light from entering the camera, it’s a good filter to start with. Attach your polarizer and rotate the outer ring. I usually try to reduce the glare of the water nearest the waterfall so I can capture what is beneath the surface.
Move on to shutter speed adjustment and try a few shots with just your polarizer. If you have ND filters, give them a try, too. I don’t advise stacking, but in the right light sometimes it works.
Neutral Density:
Neutral density filters will allow us to offset the amount of light a slow shutter speed will allow into the camera so we can achieve a proper exposure. The less amount of light they let in, the smoother the water will be.
Put on one of your filters and proceed to adjust your shutter speed.
Key Lesson: Use a mid-range aperture and ND filters to allow you to slow the shutter speed to create an image with ribbony water.
Recommended Reading: If you’d like to learn more and improve your landscape photography, grab a copy of Photzy’s bestselling premium guide: Complete Landscape Photography.
Processing Your Spring Images

Dramatic flowers. Photograph by Tomas Alvarez
How you process your spring photos is up to you. Flowers are great subjects because they can be processed in simple and dramatic fashions. Waterfall images may need a little more post-processing work. Using neutral density filters may require lifted shadows and blacks to even out the exposure.
Flowers are great subjects because they can be processed in simple and dramatic fashions.

Photograph by Tomas Alvarez
If you tried stacking your filters and are using a wide-angle lens, you probably got a little, or a lot of, vignetting in the corners. You can try to adjust the vignetting in post-processing, but it’s easier to crop the image slightly smaller.
Final Thoughts
Spring is a wonderful time for photography and the change it brings offers new and beautiful opportunities. Having the right camera equipment can aid in the capturing of the fruits of spring, a couple of them being flowers and rushing waterfalls. As with any new camera equipment, the filters we discussed will take some time for you to dial into your process, but because of that practice, you’ll learn a lot and be a better photographer for it. It took me a while to get used to using filters, and now I never leave home without them.
Don’t expect to create perfect images immediately. Give yourself some grace and work through the learning process.
If you nailed it on your first try, bravo! Get out there and make some more images!
Self-Check Quiz:
- How can you use your subject to form a vision of your image?
- What aperture settings might work best for flowers?
- What kind of filter reduces reflected light and can increase color saturation?
- How do you adjust a circular polarizer?
- To show ribbons of water, what shutter speed starts to show motion blur?
- What kind of filter allows you to manage light reaching the camera sensor allowing you to use wide apertures and longer shutter speeds?


