


Photo by Daniele Zedda
One of the many exciting aspects of photography is all the different avenues of expression one can pursue. Beginning photographers often start out shooting inanimate objects, which makes sense, as it allows the photographer time to sort out their camera settings. But eventually, most of us gravitate toward photographing our fellow human beings.
The face of man has often been the subject of art.
The pursuit of mankind as the subject matter opens up limitless opportunities: kids, babies, families, nudes, sports, portraits, events, news, weddings, etc.
One variation that appeals to many photographers is “street
photography”.
For those of you that are “really” new to photography, let’s clarify that street photography isn’t necessarily about taking pictures of streets. It’s about taking photographs of the human condition as it occurs in public places.
Photo by Chrishimself
This photograph of a street says little about the human condition.
The origins of street photography date all the way back to the mid 1800’s. However, it wasn’t truly accepted as an art-form until around the time of WWII. Famous photojournalist and war correspondent, Henri Cartier-Bresson, (who was an early advocate of street photography) is credited with creating the term, “The Decisive Moment”

Photo by Vasilennka
The best examples of street photography capture emotion and tell a story.
“The Decisive Moment” is the mantra of street photographers. The implication is that a street photographer must have the skills of anticipation, readiness, and timing. They must click the shutter at peak action and composition- this is their art form. Believe it or not, it’s not all that easy.
There are two primary techniques for street photography. One takes the approach of keeping some distance, while the other has an “in your face” approach.
There is no right or wrong to either method.
Street photography will bring you face-to-face with strangers who may have questions and concerns. The space bubble of both you and your potential subject(s) will be penetrated.
Most beginning street photographers begin with the distance method as this gives some experience without confrontation.
"Street photography will bring you face-to-face with strangers who may have questions and concerns."
The Distance Method
This technique is about keeping physical contact to a minimum. The photographer doesn’t interact with whomever they are taking a picture of.
This type of street photographer often uses telephoto lenses or diversionary techniques to blend into the background.
Telephoto lenses assist with the distance method. But, it does require you to keep an eye out for intrusive subjects moving in and out of your picture area. No matter which method you choose, capturing peak action and expressions are essential.
Street photography requires a good camera with a low noise ratio at higher ISO settings. This is because an electronic flash unit is rarely used in street photography; especially with the distance method. You will often find yourself using an ISO of 400 to 1600.
Quick Tip – Take some general meter readings and determine an ISO setting for your shoot. We recommend shooting in manual mode with manual focus, or, shooting in shutter priority mode with autofocus.

Photo by Vasilennka
Invest in a good telephoto lens; something in the 85mm to 200mm range. A zoom lens can work, but they tend to be bulky and more visible, causing your subject to react.They also have slower maximum apertures. We don’t recommend zoom lenses for street photography.
An excellent technique for the distance method is called,”shooting from the hip”. This is a covert type of shot that is exciting because it’s surprising!
With this technique, the photographer would use a wide angle lens and preset the shutter speed and f/stop.
They then do what is called a “zone focus”.
This is accomplished by putting the lens into manual focus. Consult the chosen f/stop and determine depth-of-field. Adjust the focus ring to give you the widest DOF window possible. Shooting from the hip gives a unique perspective and surprising results!
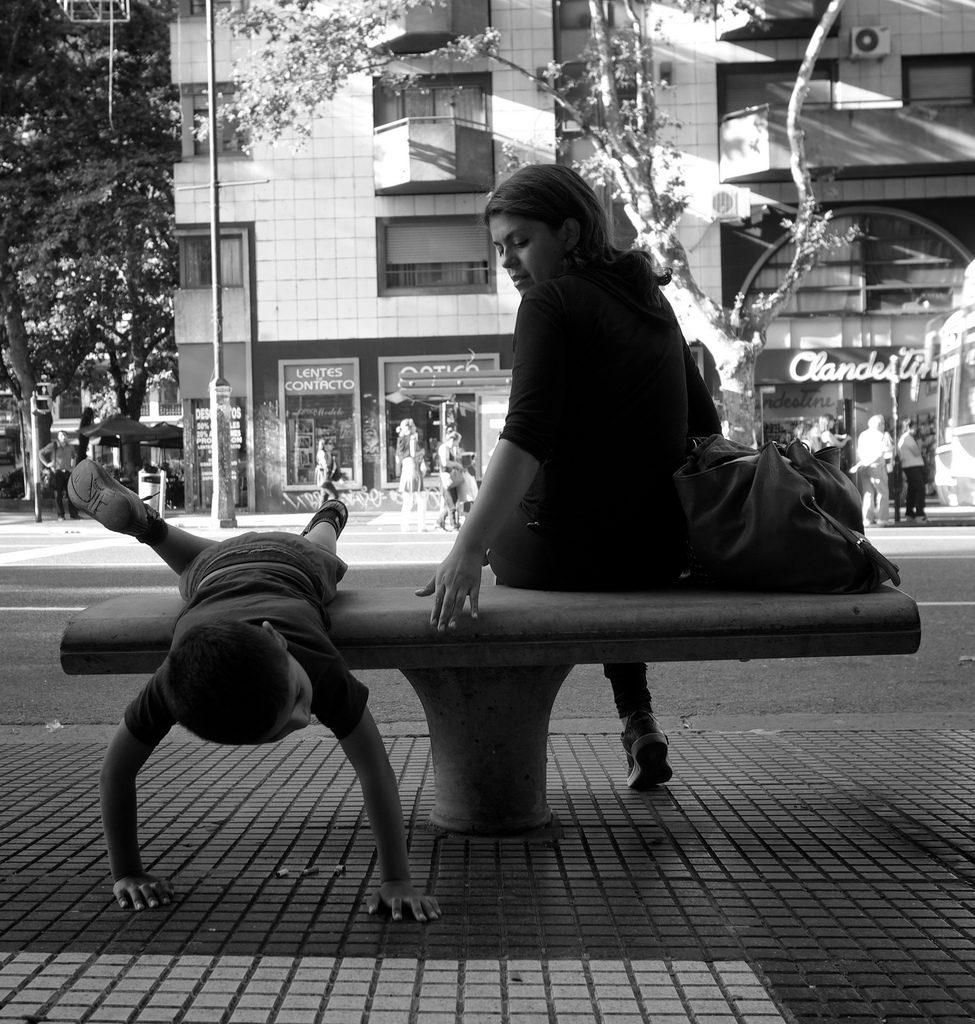
Photo by Nicolas Alejandro
Example-
You are shooting with a DSLR camera and an 18mm lens. You decide on a shutter speed of 125th of a second and your aperture will be f/8.0. You consult the depth-of-field scale and set your focus point so that the DOF window will be from 3 feet to 12 feet.
Important Point – This means that everything between 3 to 12 feet will be in focus.
Walk down the street with the camera at your hip. Point it in the direction of subjects that interest you (they should be within 3 to 12 feet from the camera). Fire the camera from your hip.
This technique conceals the fact that you are taking photographs; the result being an undisturbed view of the human interaction.
The Distance Method Quick Start List
- Use a quality camera with a low noise ratio.
- Use telephoto lenses in the 135mm to 200mm range – preferably with a maximum aperture of f/1.8 to f/2.8 – for a compressed view.
- Use wide angle lenses in the 15mm – 24mm range – preferably
with a maximum aperture of f/1.8 – f/2.8 – for a wide view with maximum DOF. - Avoid the use of bulky zoom lenses that will attract attention.
- Set your metering mode to center weight. This will prevent underexposure from bright backgrounds.
- Set your shooting mode to manual if you’re zone focusing, and shutter priority if you want to be in an auto mode.
The In Your Face Method
With this technique, a street photographer will make contact with their subject(s). This approach leads to a more intimate view of the person(s) being photographed.
It can also lead to confrontation, as you may have to explain your actions.
You will find it helpful to carry a small (3.5 x 5) photo album in your pocket. Fill it with samples of your photography. Strangers will often become suspicious when their photograph is taken. Showing them the album, discussing what you’re up to, and offering a copy will often make your subject more agreeable.
Experienced street photographers will walk right up to a stranger and start shooting away without saying a word. There is no legal standing to keep you from doing this as long as you don’t sell the images commercially. If your intent is to sell the images, keep some simple model releases in your pocket and use them.
"Experienced street photographers will walk right up to a stranger and start shooting away without saying a word."
The “In Your Face” method will often yield more interesting results because you not only capture the subject’s physical side, you also capture a part of their personality.
With the “In Your Face” method you’ll want to use a lens in the 18mm to 50mm range. Again, fast lenses are your friend. Use the fastest lens that you can afford. A 50mm f/1.8 prime lens is a relatively inexpensive lens, and it’s a perfect choice for the street photographer.

Photo by Nicolas Alejandro
Let’s examine some samples of street photography and see what works or what doesn’t.

Photo by Nicolas Alejandro
The distance method will sometimes lead to images that are disconnected. The story is there, but it’s hard for the viewer to discern what the story is. Try to force yourself to get close enough to tell the story.

Photo by Kindgott
This is an excellent storytelling photograph (above). The photographer also made good use of the setting to frame the subjects. New street photographers have a tendency to shoot without much concern for composition. Try to avoid this and use all the tools of composition at your disposal.

Photo by Kent DuFault
Street photography requires a quick eye for story and composition. This image was taken from an open air tour bus in Savannah, Georgia. The photographer noticed the older gentleman giving instruction to his younger protégé. A story was being told through body language.
The photographer recognized the moment and snapped the shot within seconds as the bus rolled by. Keep your eyes open for developing interaction around you.

Photo by Nicolas Alejandro
Shooting from the hip gives excellent results. It also has the added bonus of surprise. Study the technique as given above and give it a try.
Remember to be unobtrusive.
If your camera has a “silent mode” for the shutter, make sure you turn that function on.

Photo by David Holmes2
Set your metering mode to center weight. This will prevent underexposure if there are bright areas in the background.
15 Tips For Getting Started In Street Photography
- Wear dark clothing to blend into the background.
- Anticipate composition and subject matter to tell a story.
- Travel light and unassuming – don’t carry a lot of equipment.
- Use a quality, low noise, high ISO camera.
- Avoid zoom lenses.
- Use wide-angle prime lenses ranging from 14mm to 24mm.
- Use normal to telephoto prime lenses ranging from 50mm to 200mm.
- Use the fastest lenses you can afford.
- Avoid the use of flash.
- Set your meter mode to center weight.
- Set your exposure mode to manual or shutter priority.
- Plan a route and choose a method; Distant or In Your Face.
- Carry a sample book to satisfy inquiring subjects.
- If the camera has a quiet mode, turn it on.
- Try to avoid the standard street image- homeless people


