

Perhaps you do not think you have time for post-processing.
Perhaps you are a purist and believe that what comes out of the camera should be good enough.
Maybe you think that you could never learn to use post-processing software.
Or perhaps you just don’t want to spend the money to buy post-processing software.
If you have a mobile device, I hope to persuade you to download the free app Snapseed so you will be able to do basic post-processing that will produce measurably better pictures.
You only have to learn four edits, which can be completed in less than one minute.
What you will learn:
- What Snapseed is
- Where you can find it
- Why it can work for you and make your life easier
- Four easy steps to a better photograph

Recommended Reading: If you’re interested in improving your post-processing workflow, check out Photzy’s premium guide: Understanding Masking. It has a section for Snapseed, as well as Lightroom and Photoshop.

Why Snapseed?
Let’s start with a word about Snapseed.
It is a robust post-processing app owned by Google that produces non-destructible edits.
Robust is good.
When you use Snapseed, you have a large range of tools. I find the Snapseed tools easier to use than, say, Photoshop.
Because of this I tend to use more of them, and I think I get better results – at least when I am editing pictures that include people.
The non-destructible editing is an absolute must have for me.
When you use Snapseed, you have a large range of tools. I find the Snapseed tools easier to use than, say, Photoshop.
Lightroom edits are also non-destructible while Photoshop edits are destructible, unless you use the advanced technique of layers or perform the edits in the ACR camera processing window prior to moving the image into Photoshop.
What the term ‘non-destructible’ means is that when you save the edit, you can get back to any step in the edit at a later date and even start over (go back to the original) with a complete ‘revert.’
This feature occurs because the edits do not change the original digital pixels, which is what happens when you use a destructible software application or technique.
The Snapseed app has both the Apple and Android versions. It must be used on your smartphone or tablet device. There is no version for desktop computing; although, it appears that Google will soon be rolling out a version of Snapseed that will operate within their Chrome browser.
I use the Apple IOS version of Snapseed.
Apple and Android devices manage files in a somewhat different way, so there are some differences in opening and saving files on the apps.
The tools appear to be identical in both versions.
I prefer to use my iPad rather than my iPhone for editing, because the phone screen is so small. However, a phone will work fine for the four edits we will discuss in this guide.
Step One: You must download the app onto your device.
Step Two: Open the app, and then open a picture to post-process.
Key Lesson: If you are having trouble getting a picture from either a mobile device or from a camera onto your device that has Snapseed, or if you are having trouble simply opening a picture that is on your device, go to Appendix – How to Open a Picture in Snapseed (located at the end of this article).
Step Three: The four basic edits.
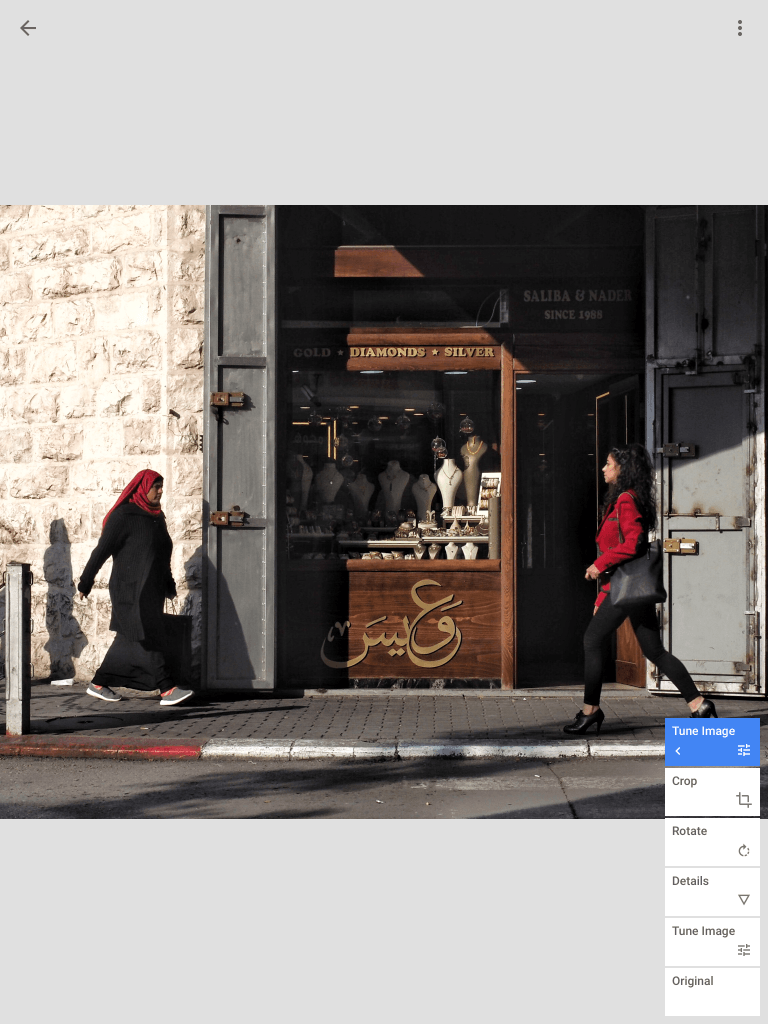
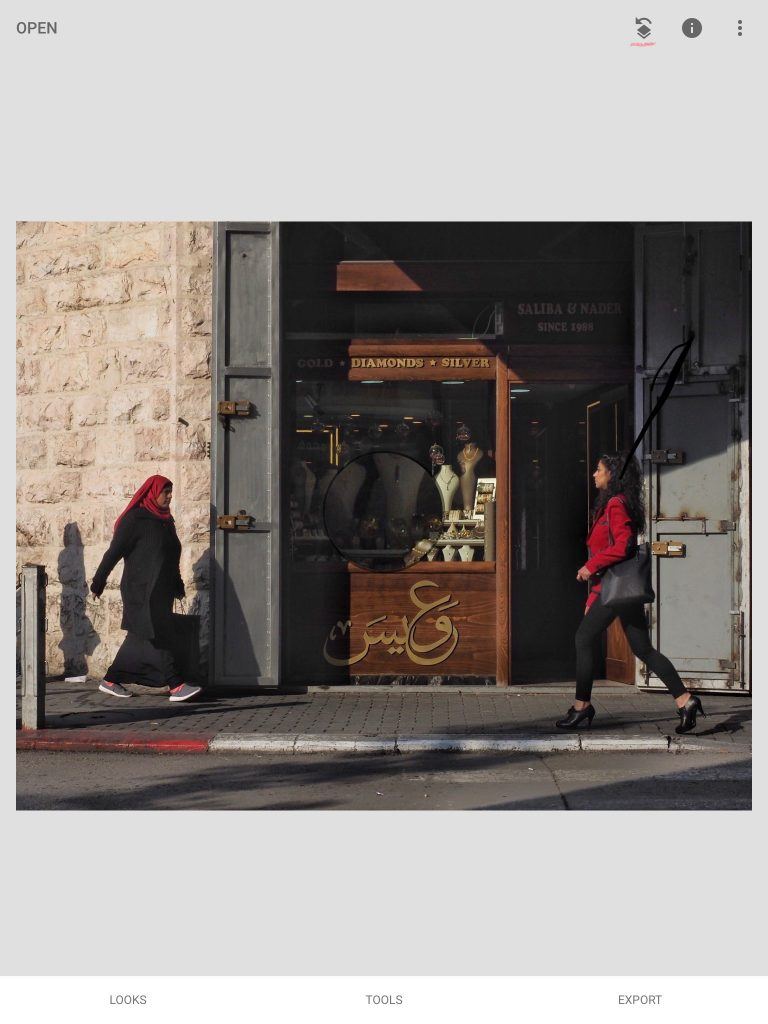
When you open a picture in Snapseed, at the bottom you have three choices: Looks, Tools, or Export.
If you choose Looks, you are offered some excellent presets that offer one-stop post-processing.
I am glad those options were not available to me when I started using Snapseed. I had to experiment, and in the process I learned how Snapseed works.
I encourage you to do the same thing. A good place to start in Snapseed is with the tool that is called ‘Tune Image’ (photo above).
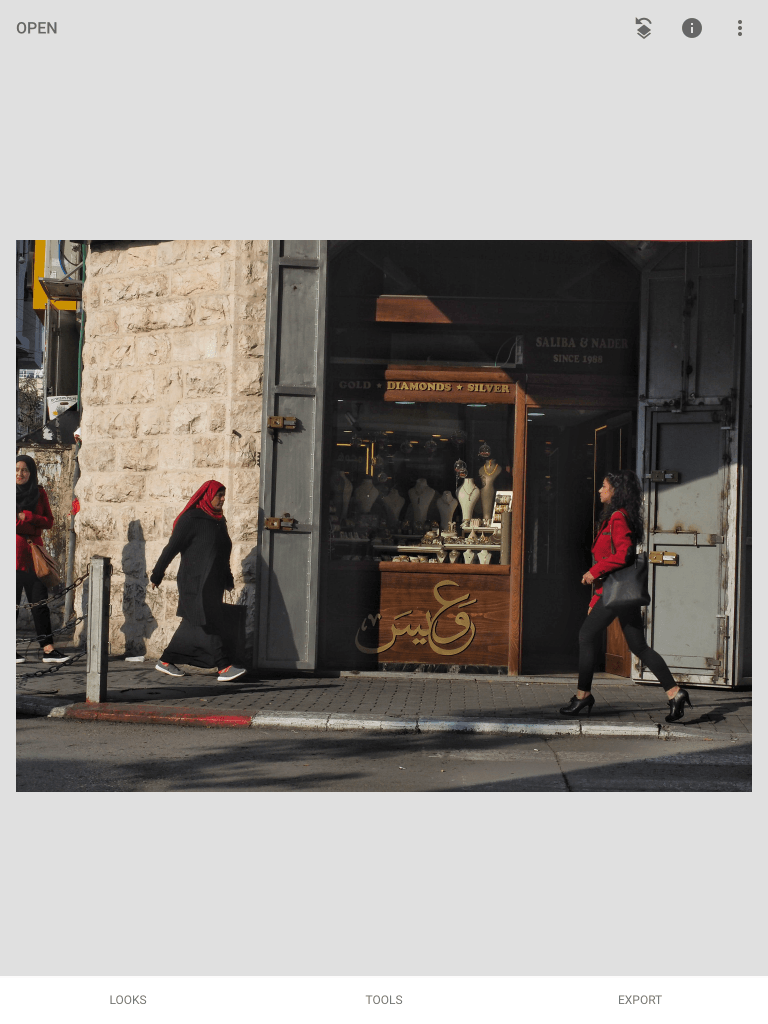
Tune Image

Photograph by Diane Wehr
- Select Tools and then select Tune Image.
There are a total of seven image properties that you can adjust with the Tune Image tool.
To see the hidden menu that contains these properties, either choose Adjust, which is at the bottom, or lightly swipe up or down anywhere in the picture.
Let me just say, I had to practice to get the vertical swipe right so that I could see the menu and choose the property I wanted to change.
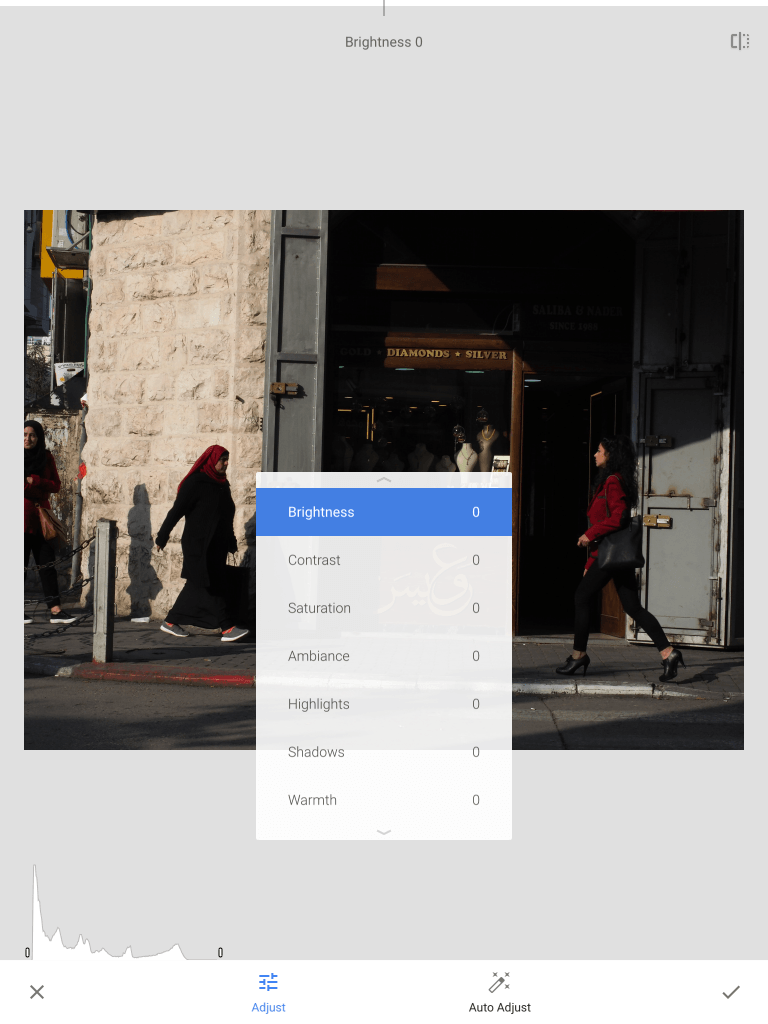
I do find it (swiping up or down) the most convenient way to access the menu, and then choose the needed adjustment. However, it may take you a couple of tries to master the swiping technique.
Auto Adjust
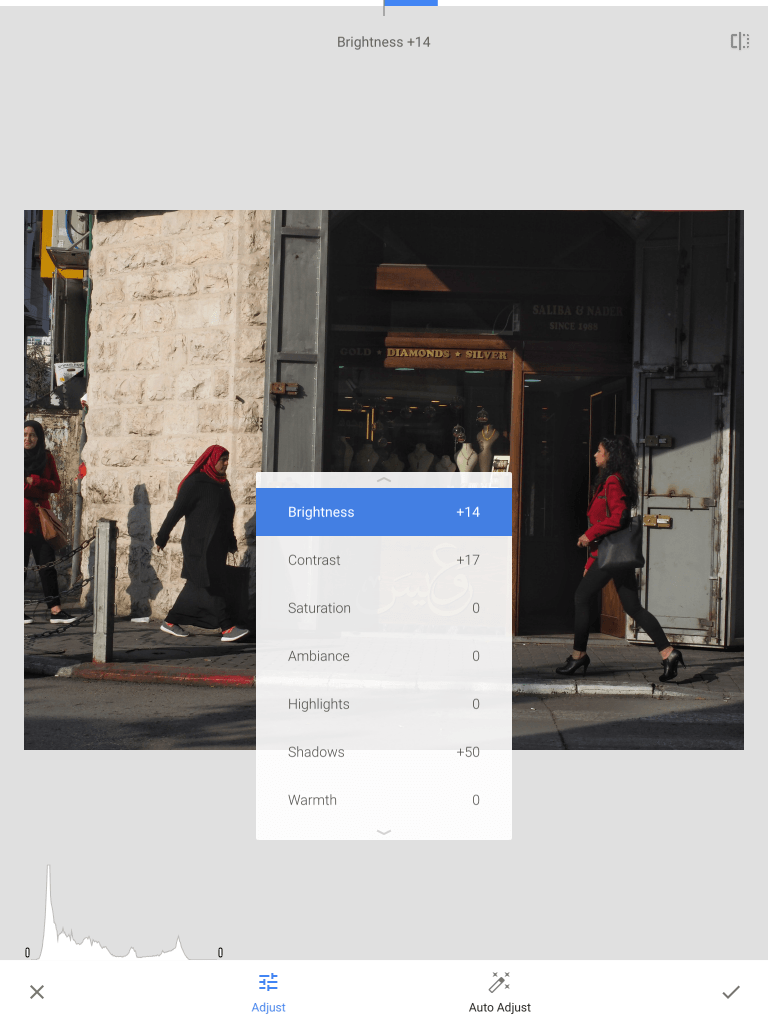
The reality is, it is rare for me to start by opening that hidden Tune Image menu. What I do is choose Tune Image and start with Auto Adjust. The Auto Adjust icon is at the bottom of the page. It looks like a magic wand with stars. Auto Adjust will likely change several of the properties. In this edit, Brightness was increased to +14, Contrast was increased to +17, and the Shadows were increased to +50.
- Choose Tools then Tune Image then Auto Adjust, or just Auto Adjust if you are still in Tune Image window.
Ambiance
Most often, I am fairly satisfied with the Auto Adjust outcome after it finishes.
But I’ve discovered that the Auto Adjust never changes the property called Ambiance, and I always want to change that.
Who doesn’t want ambiance in their pictures?
The question is, what is Ambiance?
Truth be told, no user in the photographic community seems to know ‘exactly’ what it does.
The best explanation is that the Ambiance adjustment lightens up shadows without disturbing the deep blacks.
Interestingly, there is no equivalent single tool in Lightroom or Photoshop.
You need to master the ‘horizontal swipe’ to choose the amount of a property (or setting, if you will) that you want to apply to a tool such as Ambiance.
You can tell how much of the property has been chosen by the display at the top of the screen. Let’s practice.
- Choose Ambiance
- Select +20 by slowly swiping to the right.
I suggest that you go through every property and practice swiping all the way to the right, and then all the way to the left, to see exactly what changing that property does to your image.
This is a cool feature! If you would like to see a before and after comparison of the picture, press down anywhere on the screen.
I suggest that you go through every property and practice swiping all the way to the right, and then all the way to the left, to see exactly what changing that property does to your image.
Pressed down is the ‘before’ picture. When you let your finger up, it returns to the image with changes.
The selections you make in Tune Image, or any Tool, or Look, do not become permanent until you choose the “✓” icon in the bottom-right corner of the screen.
To get back to the opening screen with no changes, choose the “X” icon in the bottom-left corner of the screen.
- Confirm your choice with a “✓” or an “X.”
Key Lesson: The Tune Image tool is a great place to start your post-production by completing some basic adjustments. Swiping left or right within any tool window moves the properties (adjustment) up or down. You can preview your changes by pressing down on the screen. Once you’ve completed your adjustments within that tool you can confirm the adjustment by pressing the checkmark icon, or you can exit without making the changes by pressing the ‘X’ icon.
At this point in the tutorial you should be able to open a tool, open its menu of properties, choose a property, and then choose the strength you want to apply.
You should be able to see the before and after picture, and then be able to select to keep the changes or return to the opening screen with no changes.
Toward the goal of four edits in 30 seconds, you should be able to do the first edit, which is choose Tune Image, choose Auto Adjust and set the Ambiance.
Details
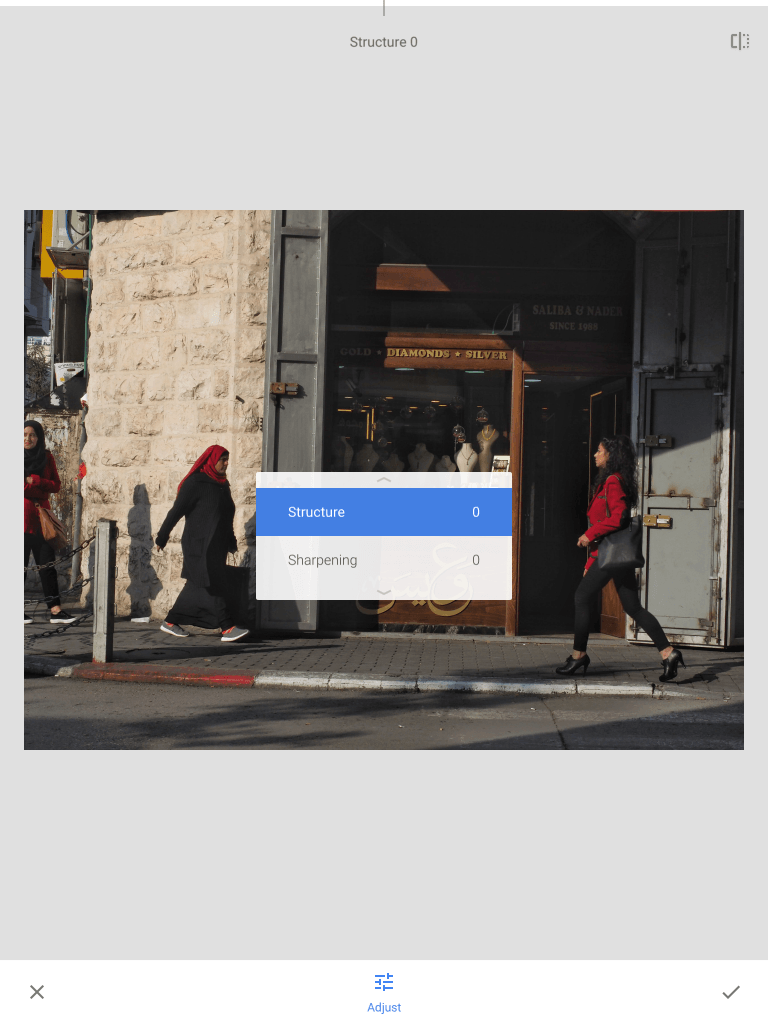
There are two properties that you can adjust within Details: Structure and Sharpening.
Structure
- Open the Details Tool Menu
- Choose Structure
Sharpening
This sharpens the edges, just as you would expect. I never sharpen more than about +10, but I almost always sharpen because I shoot RAW images and that is generally needed for the best post-processing results.
Perhaps that answers a question you may have.
Will Snapseed process RAW image files? The answer is, “It depends.” You have to have a fairly new Apple device. I do not know if there are issues for the older Android devices.
Choose Sharpening
- Select +10 or less
- Confirm your choice with a check mark
At this point in the tutorial, you should be able to use the Details tool. Toward the goal of four edits in 30 seconds, you should be able to do the second edit, which is choose Details, choose Structure and set it to approximately +20, and then choose Sharpen and set it to approximately +10 or less.
Rotate
When you open the Rotate tool, it automatically rotates the image so that some line in the image is either perfectly vertical or horizontal.
I really like this tool, and because of that I always find it irritating that Lightroom doesn’t level an image automatically like Snapseed!
I really like this tool, and because of that I always find it irritating that Lightroom doesn’t level an image automatically like Snapseed!
- Choose Tools and then Rotate
- To override the choice, put your finger anywhere on the picture (a bottom corner works best for me) and rotate as you wish
- Choose Flip if you want to flip the image horizontally
- Choose Rotate Right and you will rotate the image right in 45° increments
- Confirm your choice
Recommended Reading: If you’re interested in improving your post-processing workflow, check out Photzy’s premium guide: Understanding Masking. It has a section for Snapseed, as well as Lightroom and Photoshop.
Crop
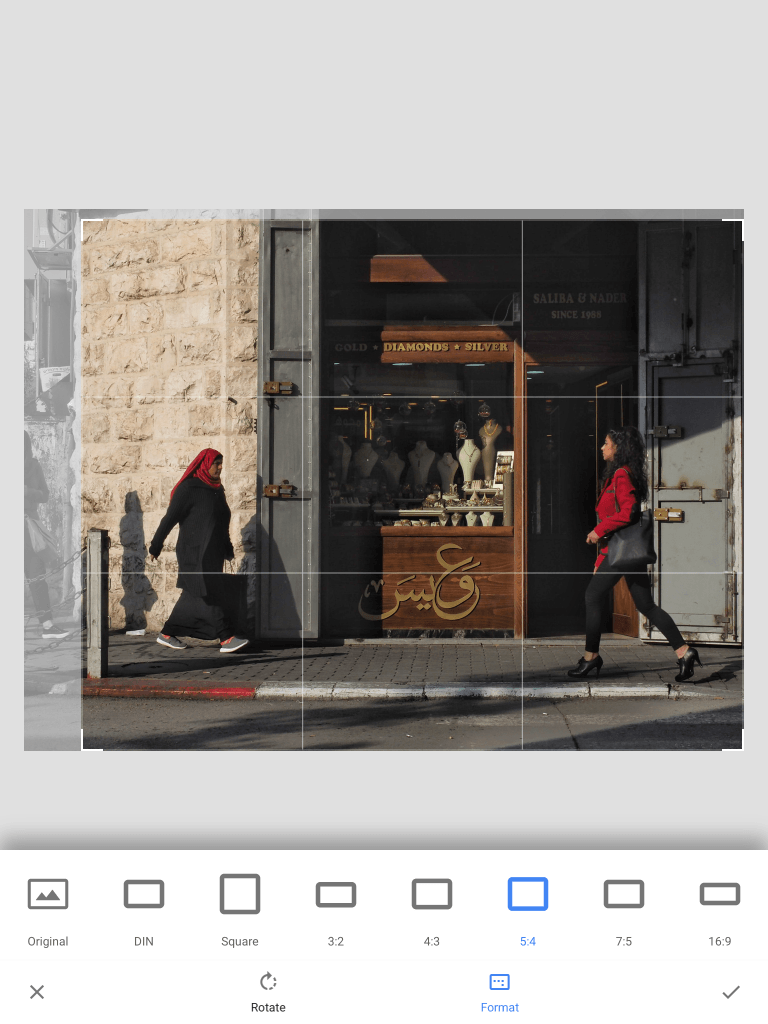
- Choose Tools then Crop
- Choose the Aspect Ratio
- Zoom into the image, if you wish
- Move the zoomed area to the part of the image you want
- If you want to get back to the aspect ratio choices, choose Format
- Confirm your choice or ‘X’ to leave without changes
How to Apply a Property to Selected Parts of an Image
This brings us to the next important feature that Snapseed has that Lightroom does not have (at the time of writing).
In this image that I am editing, I want deeper blacks and lighter highlights in the right two-thirds of the picture, but not in the left one-third of the picture, because it causes the bricks to become too light.
To accomplish this task, I am going to choose the Tune Image Tool and then apply changes on top of the changes that I have already made (previously in the article).
- Choose Tune Image
- Raise Highlights to 100
- Reduce Shadows to -26
- Confirm the choice with a “✓”
- Choose the Stacked Square with a Curved Arrow over it
- Choose View Edits
At the bottom right-hand side of the screen, you can see the edits that you have made starting with the original file at the bottom.
I like to Preview the image by clicking each box from the bottom to the top.
Clicking on each box changes the Preview Image in turn, and you can see the effect of the edit as it’s added.
As you choose a particular edit box, a menu appears on the left with three symbols.
The first icon on the left is the Trash Can. If you want to get rid of that edit, into the trash it goes by clicking the icon.
The rest of the edits in the Stack are not affected.
The symbol on the right side is the icon used for Adjustment. If you choose it, you will go back to the Tool, and you will be able to modify your original settings. Again, you must choose the check mark to confirm the change or choose “X” to get out of the screen without a change.
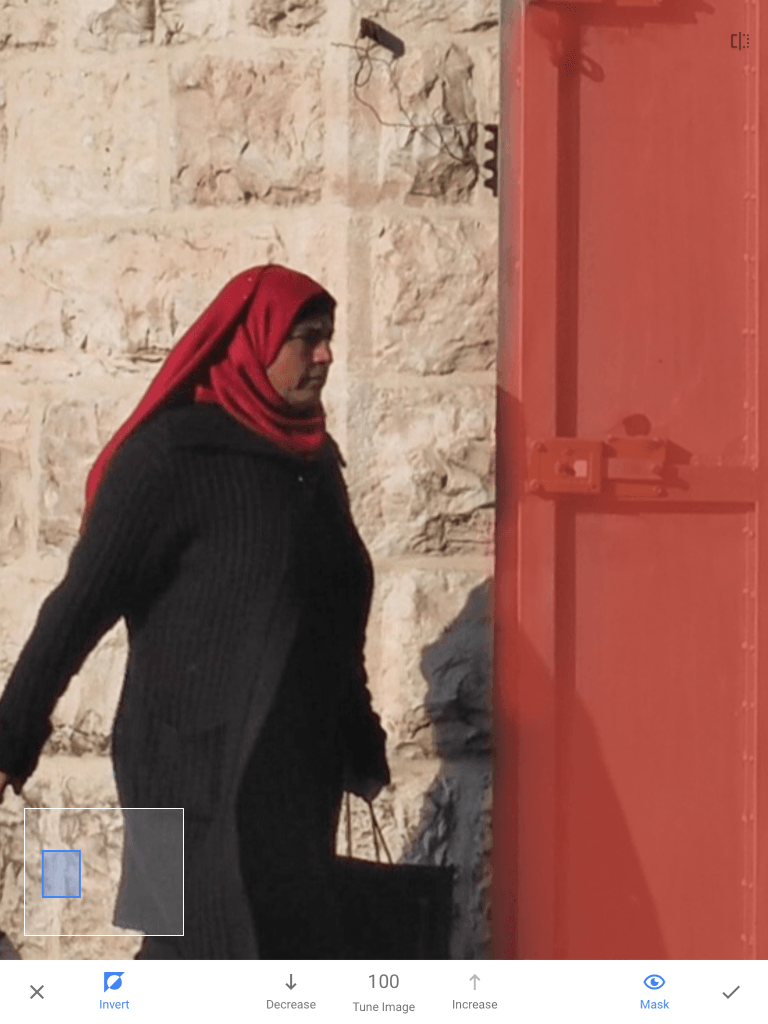
What we are interested in for this exercise is the middle choice: the square with a brush in it.
This choice is a Masking Tool, and it allows you to select parts of the image for an edit to affect while leaving the other parts unaffected. This is one of the most powerful features in Snapseed!
To select it, simply rub your finger over the parts of the image that you want to have a 100% change. You are using your finger like a paintbrush, and you are painting a mask, just like in Photoshop.
A red mask will show you what you have chosen, although you can turn off the mask by choosing the toggle ‘Mask’ at the bottom of the screen.
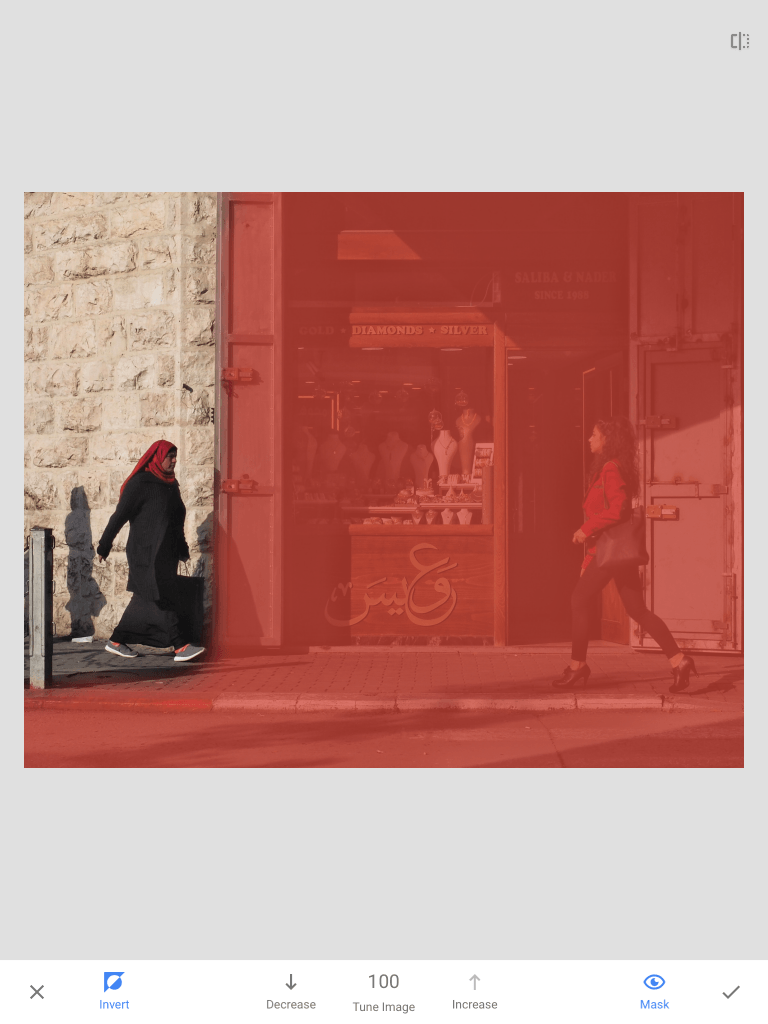
Try that. Turn the mask on and off.
I applied the Tune Image setting (that was our last edit in the stack) to the right side of the image by painting a mask there.
By the way, you can invert the mask by pressing the Invert button on the bottom left.
The inverted side (with the mask) will now have the selected property applied.
Key Lesson: To make the masking process a bit easier, because fingers are large and screens are small, you can zoom in by pinching the screen out.
- Choose the edit Tune Image
- Choose the square with a brush in it
- Mask the portion of image you want the edit to apply to
- Confirm your choice
Before you exit the Edit Screen stack, you must choose the last edit at the top of the list. If you do not do that, when you return to the picture you will be on the last edit you chose to look at, not the last edit you actually made.
Once you’ve highlighted the top edit box, hit the left-pointing arrow at the top left of the screen and you will exit Edits and go back to the Home screen.
At this point in the tutorial, you should be able to get to the screen that shows the successive edits and modify one or more by throwing it in the trash, adjusting the original choice, or choosing to apply the edit to only selected parts of the image.
And now what you wanted to try from the beginning!
Recommended Reading: If you’re interested in improving your post-processing workflow, check out Photzy’s premium guide: Understanding Masking. It has a section for Snapseed, as well as Lightroom and Photoshop.
Looks
On your Home screen in the bottom left-hand corner, you can choose “Looks.”
The first two presets, Current and Last Edits, may not be visible in the row if you are using Snapseed for the first time.
The rest, starting with “Portraits” and ending with “Silhouette,” are editing presets.
I suggest you try every one of them and look at the before and after pictures.
If you choose one, I suggest you go to Edits to see what Tools have been used to make the preset. It is a good learning exercise.
Once you have saved an edit, you will have the “Last Edits” choice as a preset on the next picture.
It will copy all of the edits from the current Save, except for Rotation and Crop.
You have to be a little careful, because if you have used a Brush to select parts of an image for a property to be applied, it will select the same parts of your new picture, which may not be good at all.
This is a way to batch process, albeit one picture at a time, if you have pictures with similar light.
Save
This is where the IOS app and the Android app differ.
IOS App
When you open Export on the Home Screen, you have three choices: Save, Save a Copy, and Export.
If you choose Save and then allow Snapseed to modify the picture, the app will save over the original picture.
You can always reopen the picture and change any edit, or even revert to the original file, if you want.
If you want to save a new image with its edits, choose Save a Copy.
If the original has not been saved, what you have if you go back to Photos Album in IOS is before and after pictures. The ‘before’ picture will still be located in the same position in the camera roll. The ‘after’ picture is added to the end of the camera roll.

I sometimes edit a picture, save it, and then save a copy of it, and finally revert back to the original so I can try different edits just for comparison.
If you choose Export, the exported image is flattened.
You cannot go back and alter previous edits, or revert to the original, when you open the exported image.
If your original file was shot in camera RAW, exporting it will change the image file format into a .PNG.
Android App
When you open Export on the Home Screen, you have three choices: Save, Export, and Export As.
When you choose Save, a copy of the image with changes is saved, not in the original file folder but rather in the Snapseed file folder that is in the device’s internal storage.
If you choose Export, the exported image is flattened and saved in the Snapseed file folder.
You cannot go back and change the edits, or revert to the original, when you open the exported image.
If you choose Export As, it will flatten the image and save in the file folder of the original image.
You can rename the file before it is exported.

Appendix – How to Open a Picture in Snapseed
A photo has to be on the device in order to open it in Snapseed.
Since I always use my iPad for photo processing, but never use it to take pictures, all of the photos have to be transferred from either my iPhone or a memory card from my camera.
iCloud moves the pictures from my iPhone to my iPad anytime that both are connected to Wi-Fi.
In the Android version, you could use Google Drive.
I use a small Apple card reader to get pictures from a memory card onto my iPad.
Some cameras allow a Wi-Fi transfer of files between the camera and a mobile device.
Also, some Android devices include an SD card reader, in which case you could put the camera memory card in that slot.
If all else fails, I have found the app PhotoSync efficiently moves photos from all sorts of devices, including my desktop. There is an Android version for that app that you can find in Google Play.
In Android devices, picture files can be stored in a lot of places including the Images album, an SD Card slot, Downloads, Google Drive, and possibly even Microsoft One Drive.
Press the Open button on the upper left-hand side of the Snapseed screen, then pick the drive that has the picture you want to process and finally select the picture.
On the Apple device there is one place where photo files are stored, and that is in Photos, which then has collections of pictures in sub-files called albums.
Just as in the Android app you select Open, Open from the device, then Photos, then the sub-file (album) and finally the picture.
Self-Check Quiz:
- What four tools can be used to do a basic edit in under one minute?
- After a tool has been used, how do you choose to keep that edit? How do you discard that edit?
- How can you see the editing sequence in a picture?
- What is the difference between Save, Save a Copy, and Export?