Introduction
If there was ever something that gave new meaning to the saying, “It’s the best thing since sliced bread,” then it’s image stabilization.
Without it, our work as photographers would be so much harder. Lots of our images would be crappy, to say the least. We would have to make weird and wonderful plans to take in-focus pics and we would have a few more swear words in our arsenal!
If these statements have not convinced you that image stabilization is something we cannot live without, then just hang in there. It will come.
What will we look at in this guide?
In this guide, we are going to have a look at image stabilization in digital cameras: what it is, what it is called by whom, and how to use it best. We will even have a look at when not to use it. Yes, believe it or not, sometimes you may want to disable it.
Recommended Reading: Want a step-by-step guide on photography skills with your DSLR? Grab a copy of our best-selling guide: the DSLR Crash Course.
What Is Image Stabilization?

Let’s look at the visible, most obvious definition of image stabilization.
It is the perception (yes, it is only a perception!) that the image in your viewfinder (or on your LCD screen) is stable. Or to put it differently: that you are holding your camera perfectly still.
Without image stabilization, our work as photographers would be so much harder. Lots of our images would be crappy, to say the least.
In some cases (depending on what image stabilization mode you select), the subject would not appear to be stable to your eyes, but it does appear to be still to your sensor.
Fact is, it’s all about having a subject or scene perceived to be motionless in the frame, to achieve a sharp (non-blurred) result.
Terminologies
Image stabilization is known by a few names, depending on the brand of your gear. Whether it is to avoid patent issues or just because each brand wants the ‘best’ term for it is beside the point. Let’s have a look at a few of them:
Canon: ‘Image Stabilization’ or ‘IS.’
Well, at least this one is straightforward and a good indication that Canon was the first to release this technology (in 1995).
Nikon: ‘Vibration Reduction’ or ‘VR.’
Nikon did not fall too far behind Canon with their first VR lens, released in 2000.
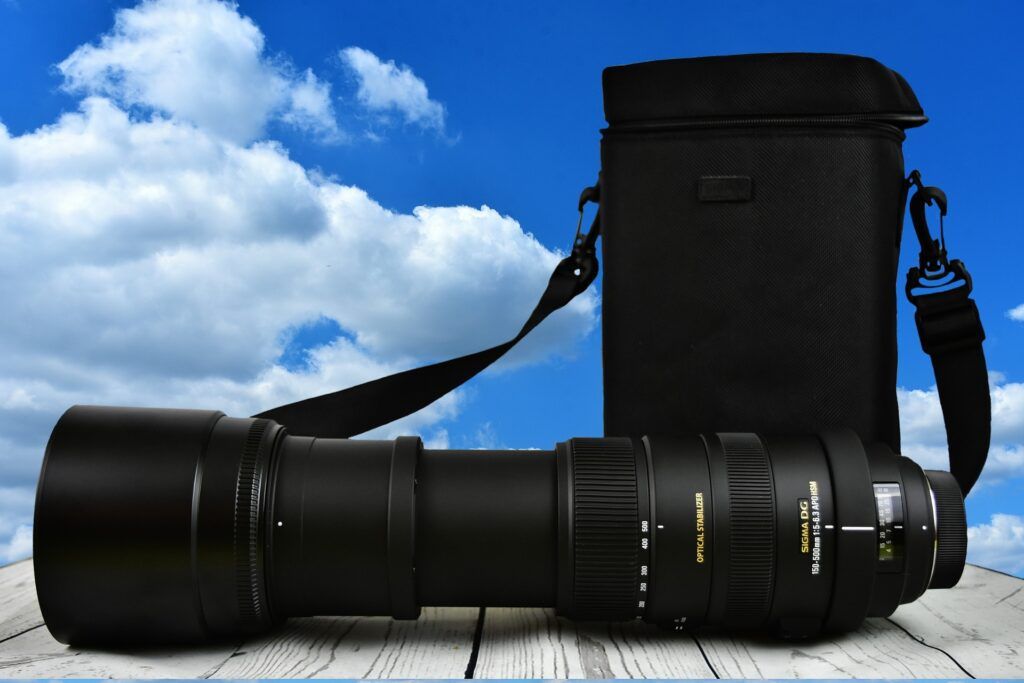
Sigma: ‘Optical Stabilization’ or ‘OS.’
Tamron: ‘Vibration Compensation’ or ‘VC.’
Sony: ‘Optical Steady Shot.’
Other camera brands’ image stabilization terminology has been made up by hybrids of the above terms.
Two Types of Image Stabilization
There are two types of image stabilization, each with its pros and cons.
Image Stabilization Type 1: In-Lens Stabilization (IS or OIS)
This was the first image stabilization technology introduced by Canon and Nikon. It was quite expensive in the beginning as the demand was slim. The cost of exchanging lenses just for the sake of image stabilization was an effective deterrent as far as photographers were concerned.
The natural process of acquiring lenses saw this technology creeping into the camera world, however, eventually bringing the cost down and spreading its use even further.
In general, stabilization built into lenses is known as Optical Image Stabilization.
Image Stabilization Type 1: In-Body Image Stabilization (IBIS)
This was the solution adopted by many camera brands not having Canon and Nikon’s massive budgets to build IS into their lenses. It was much cheaper to build image stabilization into their new camera models.
In-body image stabilization is also known as Electronic Image Stabilization.
The Pros and Cons of the Two Image Stabilization Types
What are some of the advantages and disadvantages of the two types of image stabilization? Why is it important to you? What should you keep in mind when having to choose between the two?
Advantages of In-Lens Image Stabilization
- Optically stabilized lenses are more effective than cameras. Both Canon and Nikon claim that image stabilization can be fine-tuned more effectively in lenses rather than in-camera bodies. Lenses can apply the image stabilization technology built into it, regardless of the camera bodies they are mounted on.
- Lens stabilization is more effective on long zoom lenses. Long lenses have much wider ranges of sensor movements. This cannot be accommodated by in-body image stabilization.
- Lens stabilization does better than in-body stabilization in low light. The camera’s metering and autofocus sensors return more accurate results when receiving a stabilized image from the lens.
- Lens image stabilization is visible in DSLRs’ viewfinders. Because a stabilized image from the lens is hitting the camera’s mirror.
- Lens image stabilization works in film cameras. This is a huge advantage for those among us who hang on to this hard-to-die practice.
Disadvantages of In-Lens Image Stabilization
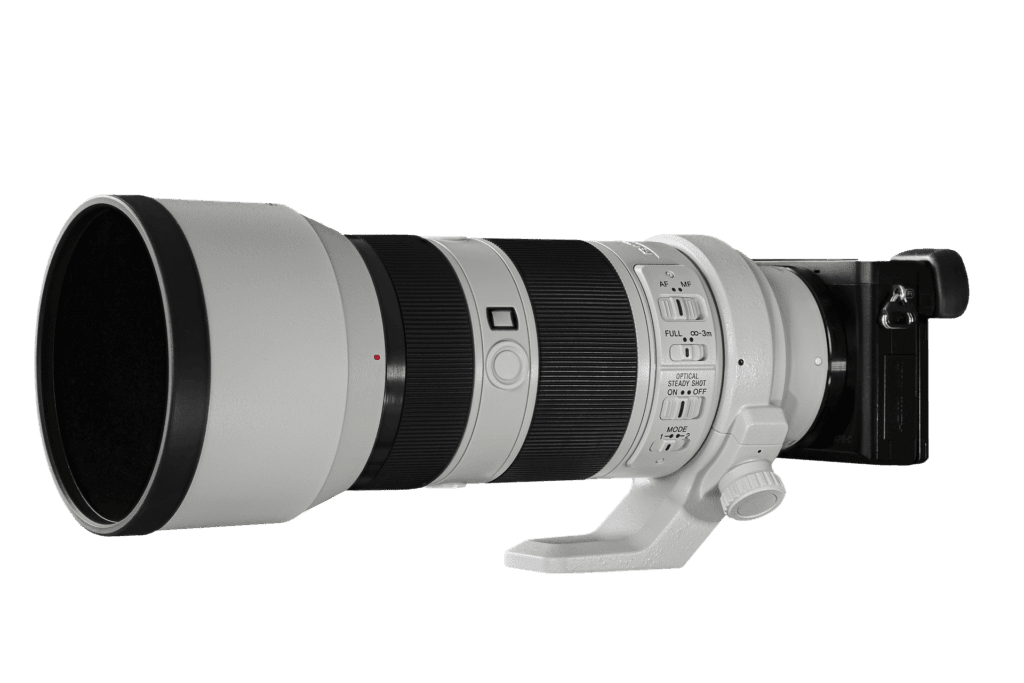
The fact that this lens’s image stabilization button is named ‘Optical Steady Shot’ is an indication that it’s a Sony lens. Photograph by Thomas Wolter
- Optically stabilized lenses are more expensive. Technology = money. No rocket science behind this one.
- Lower quality bokeh. When light passes through an image stabilized lens, it shifts from its optical path. Very few people are aware of this. Keep it in mind when doing your best to produce super bokeh.
- Weight. Image stabilized lenses are heavier than their non-stabilized counterparts. But compare that against the weight and inconvenience of a tripod carried along to introduce your own image stabilization.
Advantages of In-Body Image Stabilization
- Cost. It is much cheaper to build image stabilization into cameras than into lenses with all their moving parts. An added cost advantage is that you can use it with any of your lenses that do not have built-in image stabilization.
- More suitable for video. I’d like to mention this even though my goal was not to discuss the video in this guide. The fact is, most mirrorless cameras are quite good at video recording (compared to DSLRs) and it is exactly these cameras that brag with in-body image stabilization.
In-body stabilization includes anti-roll features. In other words, it attempts to fight horizon tilt during video shoots. This is not something lens image stabilization caters to.
Recommended Reading: Want a step-by-step guide on photography skills with your DSLR? Grab a copy of our best-selling guide: the DSLR Crash Course.
Disadvantages of In-Body Image Stabilization
- Not as effective at long focal distances. The relatively large movement hitting your sensor at a long focal range cannot be handled efficiently by your camera’s image stabilization technology.
- Feedback loop. When using in-body image stabilization in a tripod-mounted camera, your camera’s system detects its own vibrations and starts moving the image around, even when everything else is completely still. The result is a blurred image.

White-breasted cormorant on a perch. A case for image stabilization, unless your camera is on a tripod or bean bag. Photograph by Tobie Schalkwyk
Image Stabilization in Terms of f-Stops
The level/degree of optical image stabilization is expressed in terms of f-stops. This gives you, as a photographer, a method to measure the degree of image stabilization between different lenses.
But what does this mean in practical terms and is it handy otherwise?
Yes. Let me explain it using an example:
- The reciprocal rule of photography states that at 500mm, your slowest shutter speed should be 1/500s. This assumes that you are shooting without IS.
- My Tamron 150-600mm G2’s IS rated at 4.5 f-stops.
- This means theoretically I should get good quality shots at 1/25s.
Will I be brave enough to risk that on a once-in-a-lifetime scene? Well, no I don’t think so. But I will certainly feel kind of safe playing around at anything between 1/160s and 1/500s, depending on my subject.

Photograph by Tobie Schalkwyk
I decided to test my Tamron 150-600mm’s image stabilization f-stop figures (4.5 f-stops) in the image above. The shot was taken at 600mm and 1/40s; thus roughly 4 f-stops slower than recommended by the reciprocal rule. No sharpening was applied in post-processing.
The image is not perfectly sharp, but considering that the wind was moving the branches slowly and that the bird was also moving all the time, I don’t think it was a bad attempt at all. Had I increased the shutter speed to about 1/160s (2 f-stops slower than recommended by the reciprocal rule), it most likely would have been perfect.
My challenge was obtaining the correct exposure so I had to dial the ISOs right down to 100 (which is not a bad thing) and close the aperture to f/10 (which may be a bad thing). Fortunately, the background (the opposite side of a gorge) was quite far away; otherwise, a messy background created by the f/10 aperture setting would have spoiled the image.
Key Lesson: Image stabilization can buy you a few f-stops in terms of shutter speed. There are practical issues, however, which may limit to what extent you can utilize this.
The fact is, it reduces camera shake by x number of f-stops but it does not stabilize the movement of your subject.
For that reason, I would not recommend going slower than 1/320s for humans. For animals, perhaps not slower than 1/500s. For hand-held still life shots and landscapes, you can really test its limits.
Different Modes of In-Lens Image Stabilization
Some lenses have different selectable ‘modes,’ each for a different purpose. These can be viewed as subsets of image stabilization.
Image stabilization can buy you a few f-stops in terms of shutter speed.
I am not even going to try and cover all the different modes with all brands and lenses because some of them will overlap with others, just using different terminology depending on the brand. All I want to do is make you aware of this so that when you see ‘mode’ settings on your lens (or in-body), you know what it’s about and you can study your lens or camera’s modes specifically.
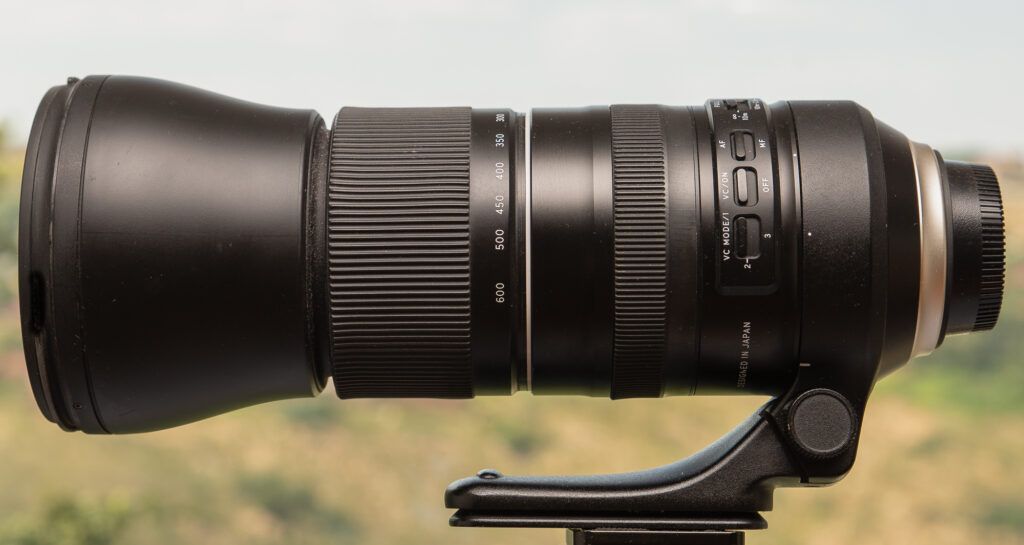
Let’s have a look at my Tamron 150-600mm G2 lens’ modes. I will start each mode discussion by quoting Tamron:

Photograph by Tobie Schalkwyk
VC Mode 1
“The standard mode that strikes a great balance between the stability of the viewfinder image and the stabilization effects.” This is the standard mode where your subject appears to be frozen in the viewfinder.
VC Mode 2
“Exclusively used for panning.” Quite self-explanatory. Keep in mind that image stabilization should be enabled on the lens for this work.
VC Mode 3
“Prioritizes the stabilization of the captured images and forgoes the stabilization of the viewfinder image.” In this mode, your subject will appear to be non-static in the viewfinder, but your captured image will have been stabilized. This mode is said to add one stop of image stabilization.
Key Lesson: The wonderful world of image stabilization does not stop with lens/camera stabilization. Some cameras and lenses offer you a set of features within those parameters. Check out your lens(es) and camera(s) for those features.
Read up on them in the user guide and Google-search them so that you can utilize them optimally. In the end, they’re going to serve you well.
Recommended Reading: Want a step-by-step guide on photography skills with your DSLR? Grab a copy of our best-selling guide: the DSLR Crash Course.
“When Should I (Not) Use Optical Image Stabilization?”

Nikon D600 _ Tamron 150-600mm @ 600mm | f/6.3 | 1/1000s | 320 ISO | Handheld | A Bateleur staring down the lens. Kruger National Park, South Africa. Photograph by Tobie Schalkwyk
As mentioned, there are instances when optical image stabilization does more harm than good. Let’s have a look at when you should rather disable it.
- When shooting/tracking moving objects. In this case, OIS serves no purpose and in fact, can slow down your auto-focus. Be on the lookout for special panning features on your lens to use instead.
- When mounted on a tripod (unless your tripod is placed on a moving/vibrating surface). No camera shake is at play and, as mentioned, it may spoil your bokeh and in fact be the cause of blur.
- When noticing unexpected degradation of image quality at high shutter speeds.
- Long exposures. If for no other reason than to save battery power. Most mechanical OIS systems deploy gyros (fast spinning weights) which burns quite a bit of energy.
Conclusion

Photograph by Tobie Schalkwyk
Image stabilization is certainly one of the best things developed since sliced bread. Without it, our lives of photography would have been miserable and the outcome of our shoots unpredictable.
There are times when it’s silly not to use it, and there are other times when it makes good sense to disable it. It’s absolutely worthwhile to know when to use it and when not. It will pay you back in huge rewards in terms of image quality.
Let’s use this fantastic technology to the best of our ability. We pay quite a lot of extra bucks for our IS lenses (perhaps not so much extra for IBIS, but even so), so why not?
Self-Check Quiz:
- What are the two main types of image stabilization in photography?
- When should you disable IS?
- Name one main advantage of in-body image stabilization.
- When could you expect problems when using in-body image stabilization?
Assignment:
A. Do your IS lenses have IS modes? If so, what are each for?
- How many f-stops do each of your IS lenses provide for?
- Determine the theoretical slowest shutter speed you can set for your lens if handheld, all other factors discounted.
B. Do you have a lens or two without IS? How will you compensate for the camera shake?