One of my favorite television programs growing up, was a series called MacGyver. It was the story of a secret agent who found himself in all kinds of predicaments. Using everyday materials that he found nearby, and his ever-present Swiss Army knife, he would create a poison or an explosive to work his way out of a problem.
The science behind MacGyver’s creations was somewhat questionable and a little vague, but the idea that you can use materials around you to create something amazing and useful has stuck with me into adulthood.
This idea, and my love of saving money, has led me to build a kit of photography supplies out of things I have around the house or inexpensive items from the store. I have approached photography problems from the same angle that MacGyver approached his.
To add to my delight in “MacGyvering” things, I have discovered that there are many photography hacks that can be found online. Hacks from building your own ring light to creating a soft box are right there at your fingertips!
The possibilities are endless, and the learning that occurs when you create your own light modifier or build your own reflector is invaluable to a beginner photographer.
I am going to walk you through some of my favorite DIY photography hacks. By the end of this article you will be able to:
- understand ways in which you can utilize available light sources in your home for creating images,
- use materials around your own home to create tools to support your photography, and
- make your own tools using materials from your home or purchased inexpensively.
Recommended Reading: Want to create gorgeous, perfectly lit flower photographs? Grab a copy of Photzy’s premium guide, Photographing Fabulous Flowers.
Reflecting Light
The most basic reflector is using the ceiling or wall to bounce light onto your subject.
The most basic reflector is using the ceiling or wall to bounce light onto your subject. Placing your flash so that it points to a nearby wall can work to effectively provide a nice soft light. This works best if the wall is white or close to white. The light bouncing off the wall spreads out and creates a more natural, softer light.

Photograph by Leanne Cleaveley
Photograph by Leanne Cleaveley
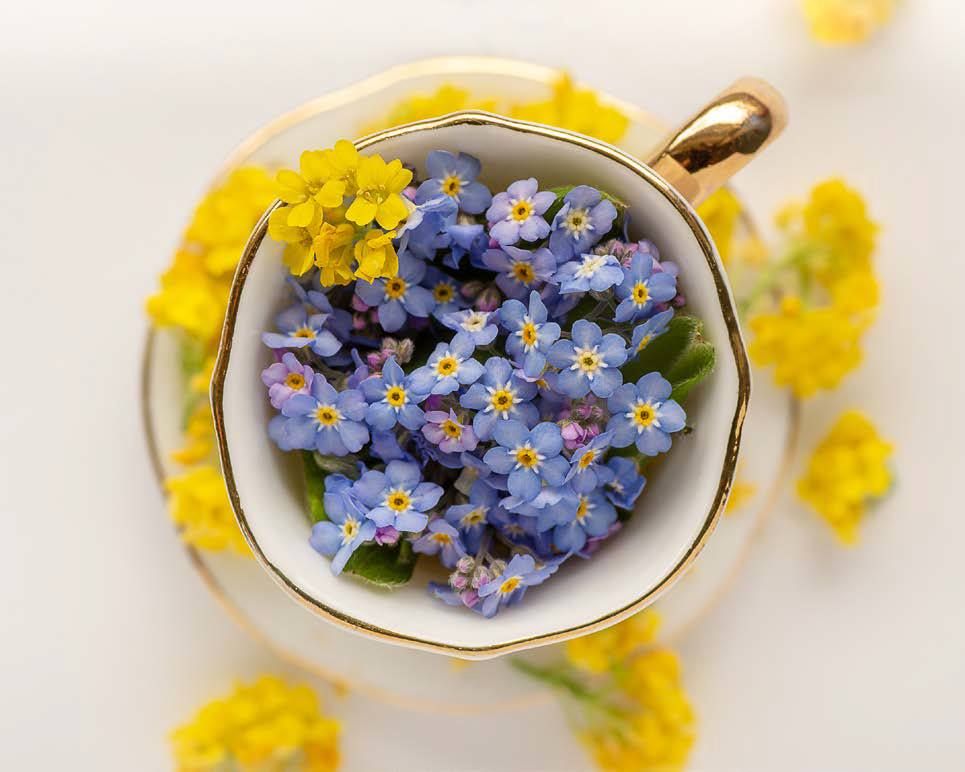
In a pinch, I have simply grabbed a piece of white paper and placed it where I needed to create some fill light when shooting. The images above are examples of how a piece of paper can balance the light in an image. The top image, shot using window light, is shadowed at the bottom of the frame. For the bottom image, a piece of white paper was used to bounce the available window light back at the subject, adding fill light to those shadowed areas.
This works for a small subject, but what do you do when your subject is larger? I find foam board works for this purpose. Bought in larger poster-sized sheets, it is handy to have a couple of boards nearby to use as a reflector.
It is worth experimenting with different materials as well. Aluminum foil, when used as a reflector, can provide more light and more contrast. But you need to be careful as it can be quite harsh, and depending on your light source and how close it is to your reflector it may provide bright spots of light.
Other things you might have around your house that are worth experimenting with are disposable aluminum pans, foam meat trays (the white ones work best) and even a sunshade from your car. Look around your home and see what you have that works.
Key Note: Many materials from around your home can be used as light reflectors, but make sure that the material is large enough for your subject and provides the type of light that you want.
Light Sources
At times, my DIY projects were simply stop-gaps until I could afford another piece of photography equipment. However, I often find myself returning to those stop-gaps, even after I purchase the commercial version because they work so well.
Before I could afford to buy an external flash, I used a table-top LED lamp to cast light where I needed it. I still go back to this light, especially if I need to “see” exactly how the light will fall on my subject (this is difficult to do with a flash).
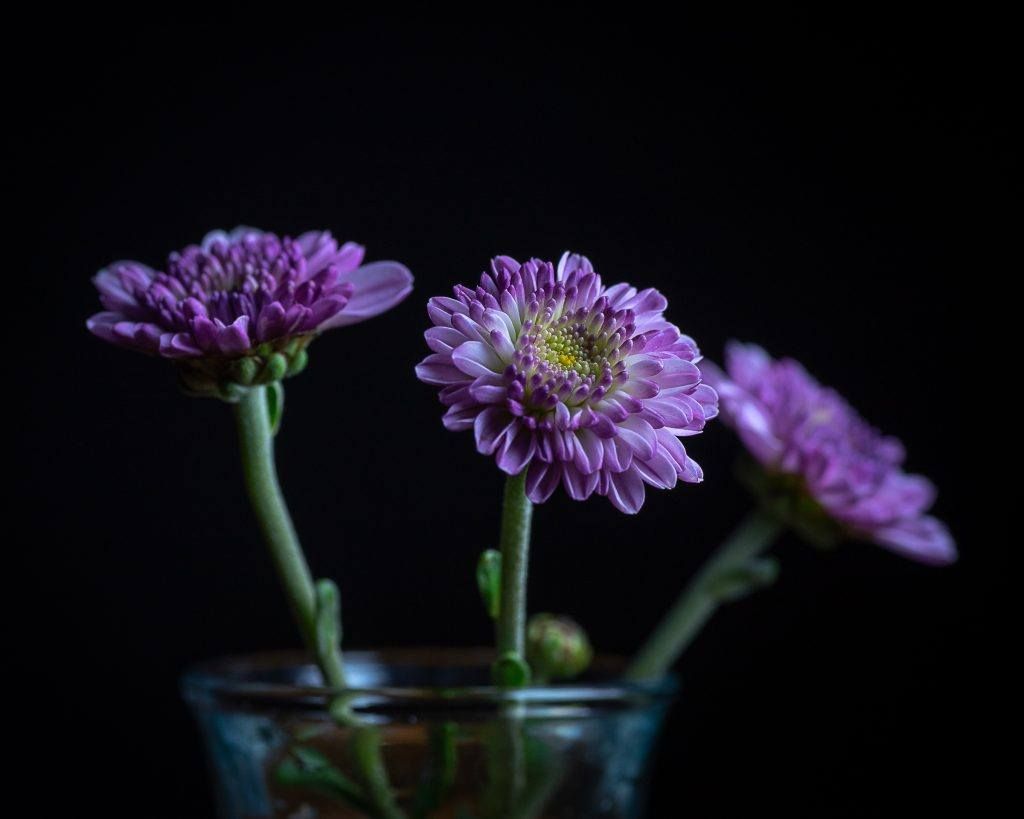
Another light that I discovered, after finally purchasing my external flash, was my sun lamp. I often use it to shoot indoor plants and flowers, as the light it provides looks very natural. And again, it provides a steady source of light so that I can see exactly where my subject will be lit.

This image shows a similar setup to the one that was used to create the next image below, with the three flowers. Experimenting with light sources you already own can be very rewarding. Photograph by Leanne Cleaveley
The learning that occurs by using a steady light source is invaluable for beginner photographers. By moving the light around to different positions above and below the subject, or by moving it farther away or closer, a photographer learns how the quality and quantity of the light provided changes and how that affects their subject and the image they are creating.
I have even used a small LED headlamp to provide a little extra light where it was needed when shooting macros of snowflakes. Again, these are great for smaller subjects and allow you to see how the light will affect your image.
Key Note: Using light sources from around your home, such as lamps, helps you to save money and ‘see’ how light affects your image. They also allow for greater creative control and effects that you might not achieve with a commercial flash.
Recommended Reading: Want to create gorgeous, perfectly lit flower photographs? Grab a copy of Photzy’s premium guide, Photographing Fabulous Flowers.
Photograph by Leanne Cleaveley
Modifying Light
A light modifier is any tool that changes the quality or quantity of a light source you are using. Reflectors are the simplest form of a light modifier, but there are others that provide different effects depending on your needs.
Diffusers that snap onto your speedlight, softboxes, ring lights, barn doors, and beauty dishes are all examples of light modifiers designed to do different tasks.
I still remember the first time I saw a photographer “MacGyver” a light modifier to solve a problem. My husband and I were getting passport photos done and getting one of our nine-month-old daughter was proving more than a little difficult. Her light, shiny baby skin was causing unwanted highlights. So the photographer took a piece of tissue and used it to cover the flash, to diffuse it. It worked like a charm!
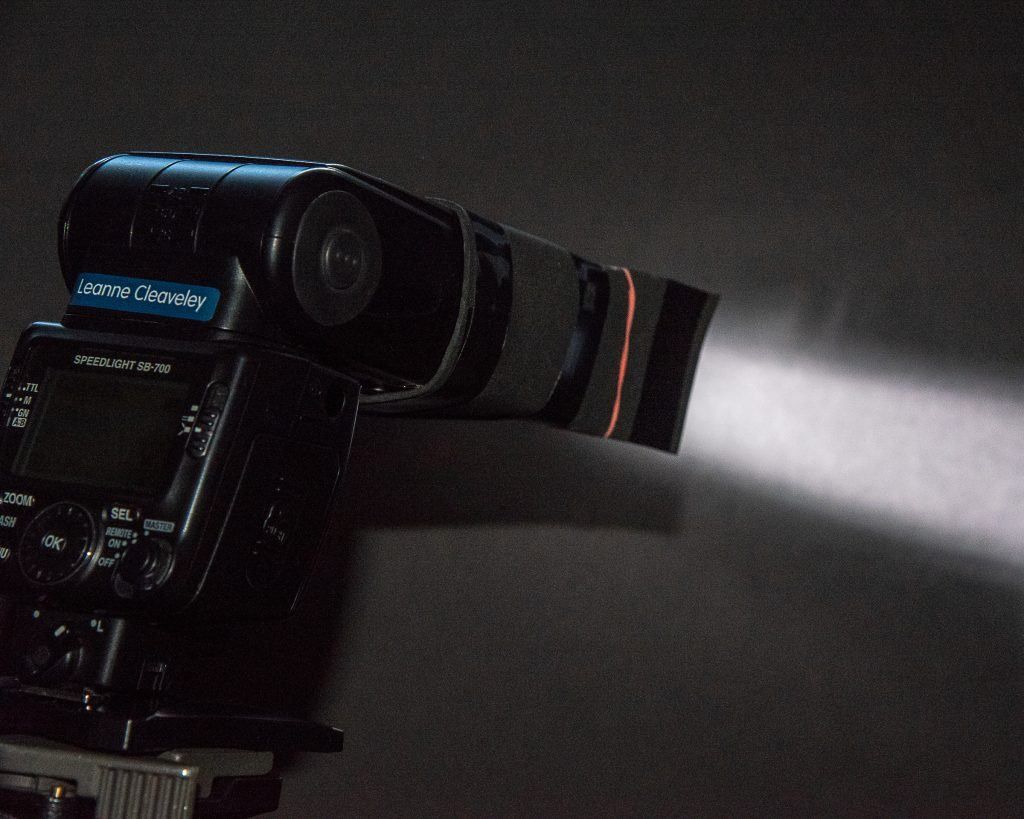
Barn doors can focus light into a very narrow line with a very sharp light falloff, as shown in this image. Photograph by Leanne Cleaveley
Light modifiers range from small and inexpensive to large and pricey. I have designed a few different light modifiers from materials I had around the house or purchased cheaply. My two favorites are a version of ‘barn door’ and a homemade beauty dish that I attach to my speedlight.
Reflectors are the simplest form of a light modifier, but there are others that provide different effects depending on your needs.
Barn doors are a modifier typically used on larger studio lights. They focus or direct the light to where the photographer wants it. The first time I used them was when I was trying to shoot smoke photos. You want the smoke to be well lit, with the background remaining black.
I was struggling with angling my speedlight so that it didn’t hit the background directly or reflect off of nearby surfaces. I was working in a small space, out of necessity, so I decided to cut some black cardboard that would prevent the light from hitting unwanted spots. I used an elastic band to fasten them to my flash and the problem was quickly solved.
I have since found that thin, black art foam (the kind that can be purchased in the craft section of a dollar store) works well to create a much more durable, reusable barn door for my flash.
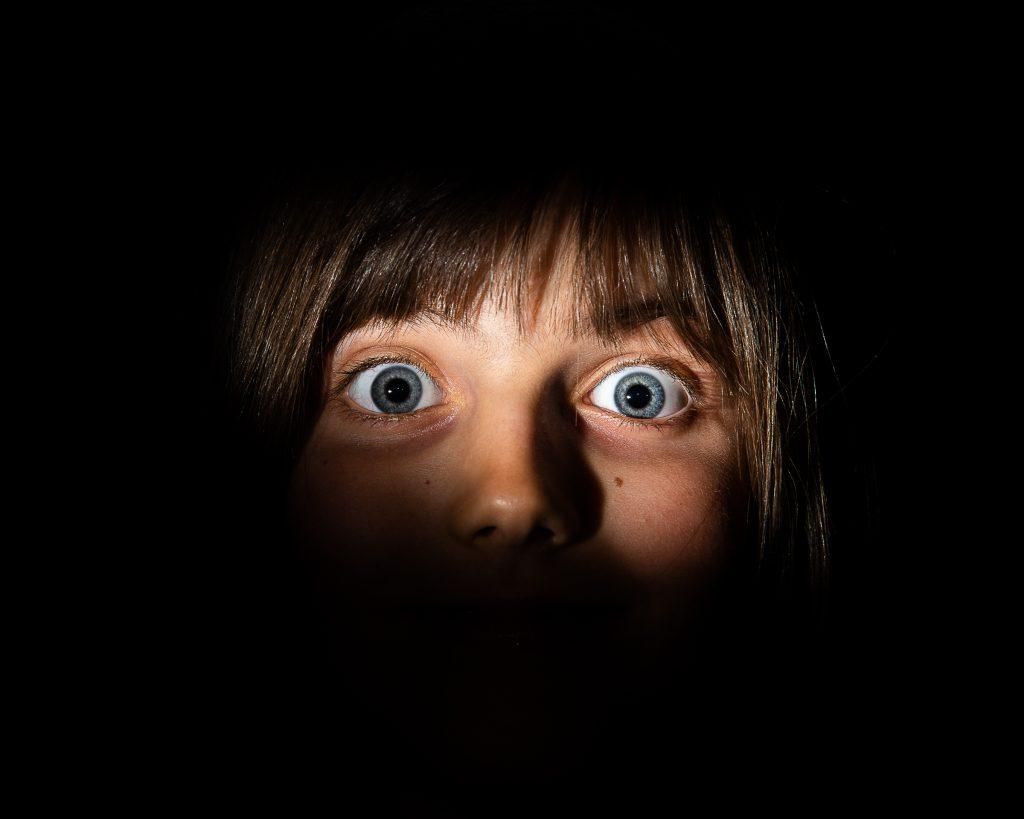
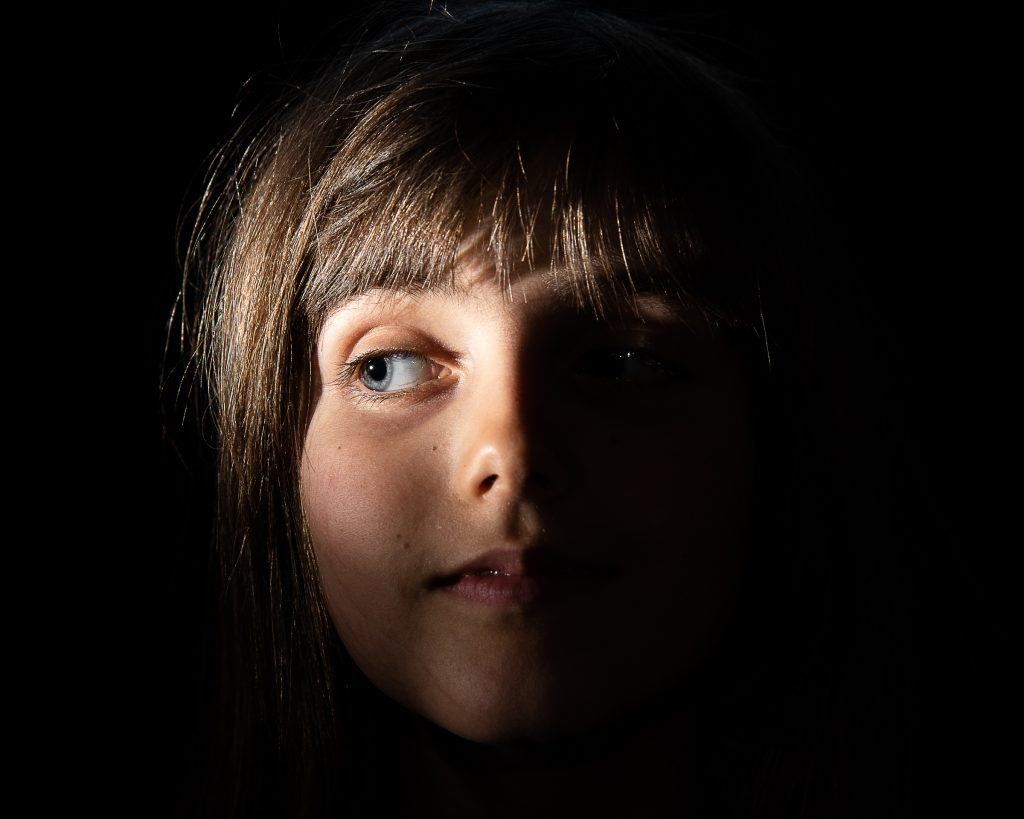
Both of these images were taken using a homemade ‘barn door’ light modifier. The ability to ‘sculpt’ your light allows for ultimate creativity! Photograph by Leanne Cleaveley
By closing the flaps on my DIY barn doors, I can narrow and concentrate the beam of light even more. The strong beam of light can be used to add a “spot” of light where there is shadow or create dramatic, creative shots like the images above.
The other homemade light modifier that I really love is my beauty dish. There are all kinds of tutorials for making your own beauty dish online, and I would recommend perusing a few and considering the materials you have at hand.
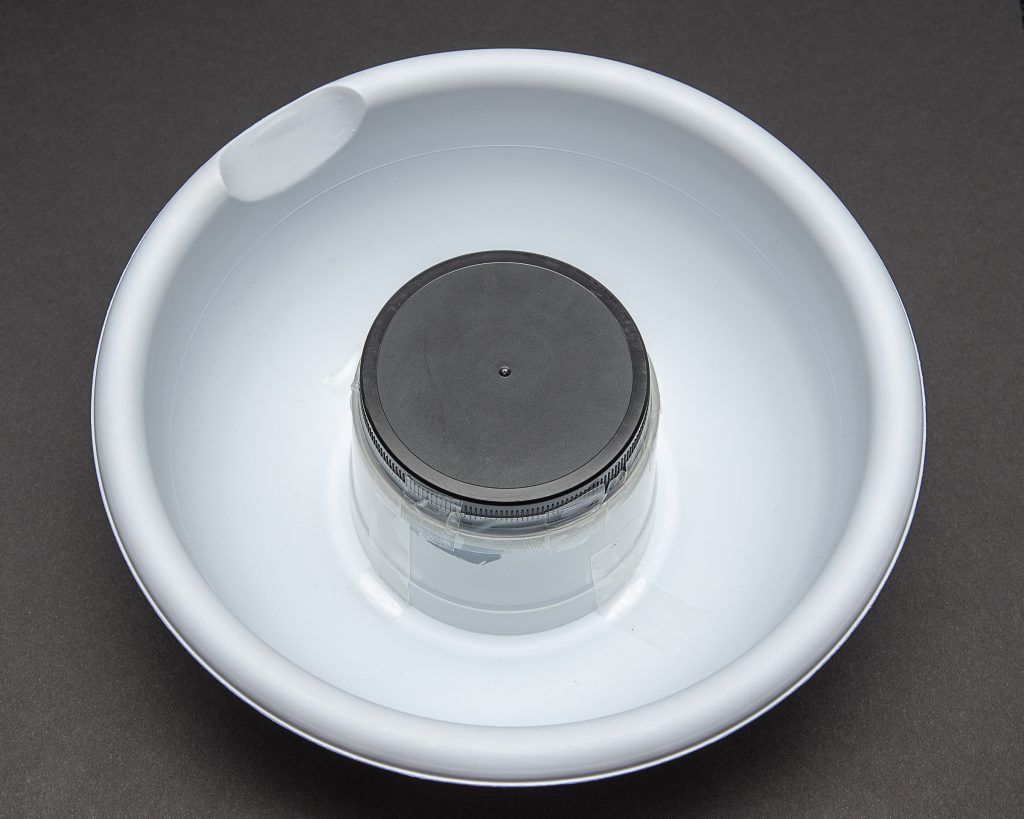
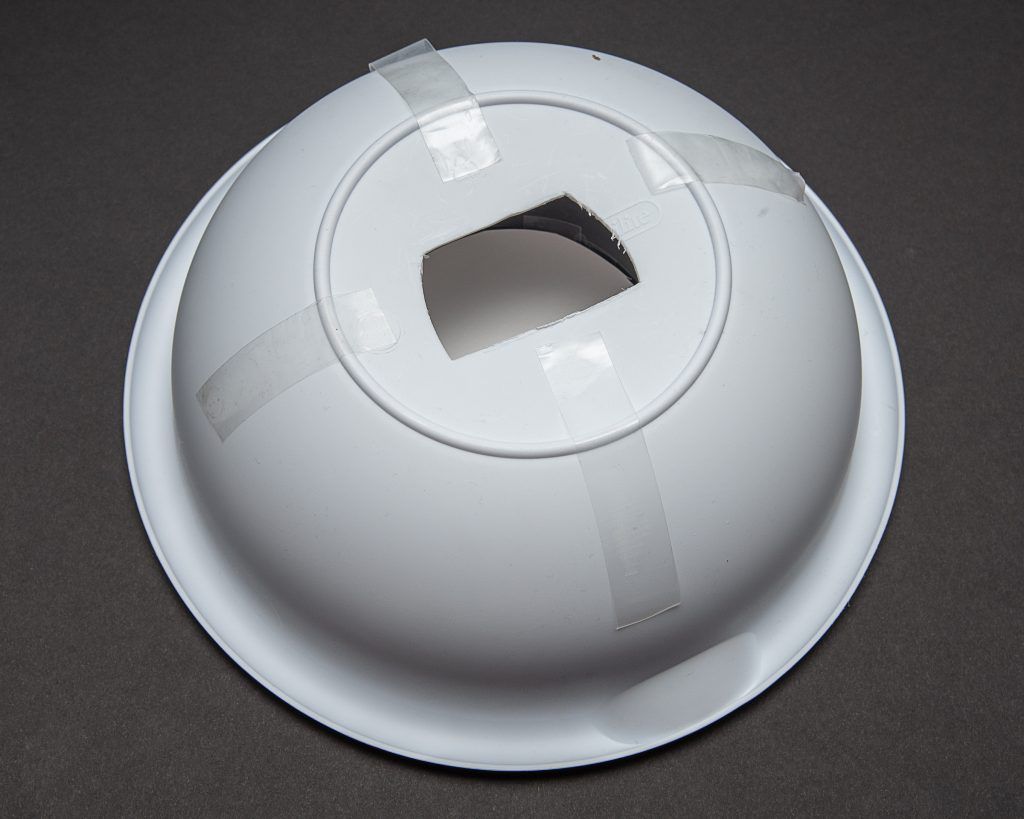
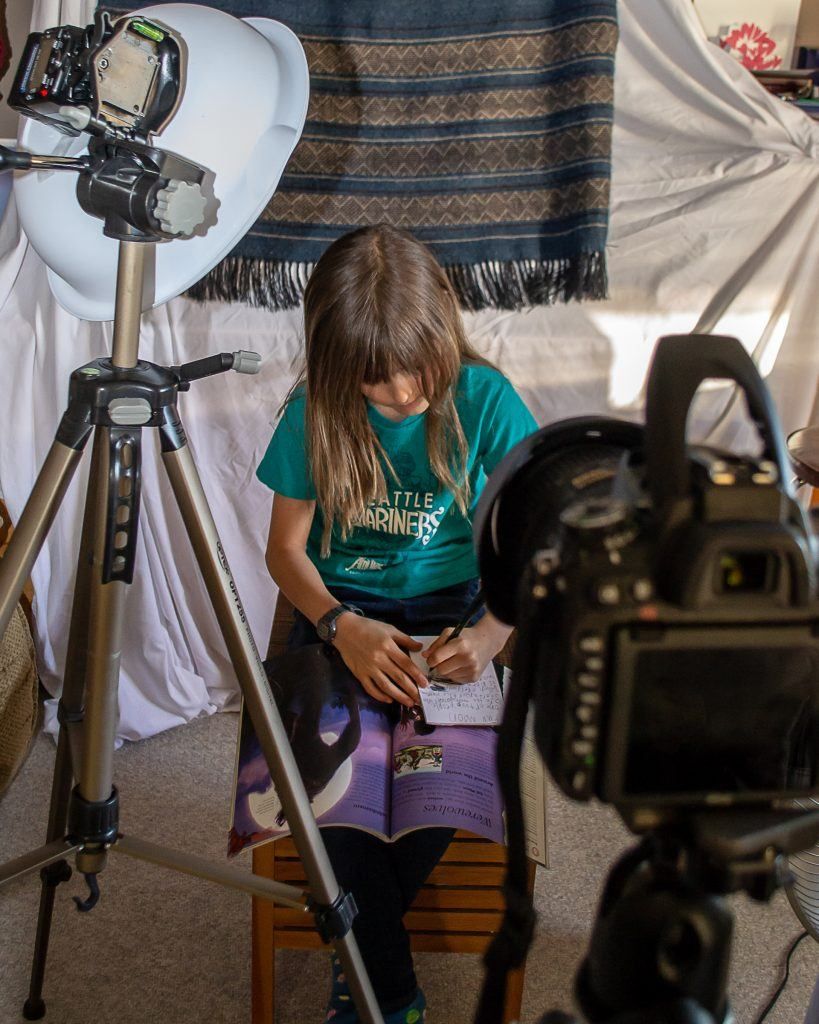
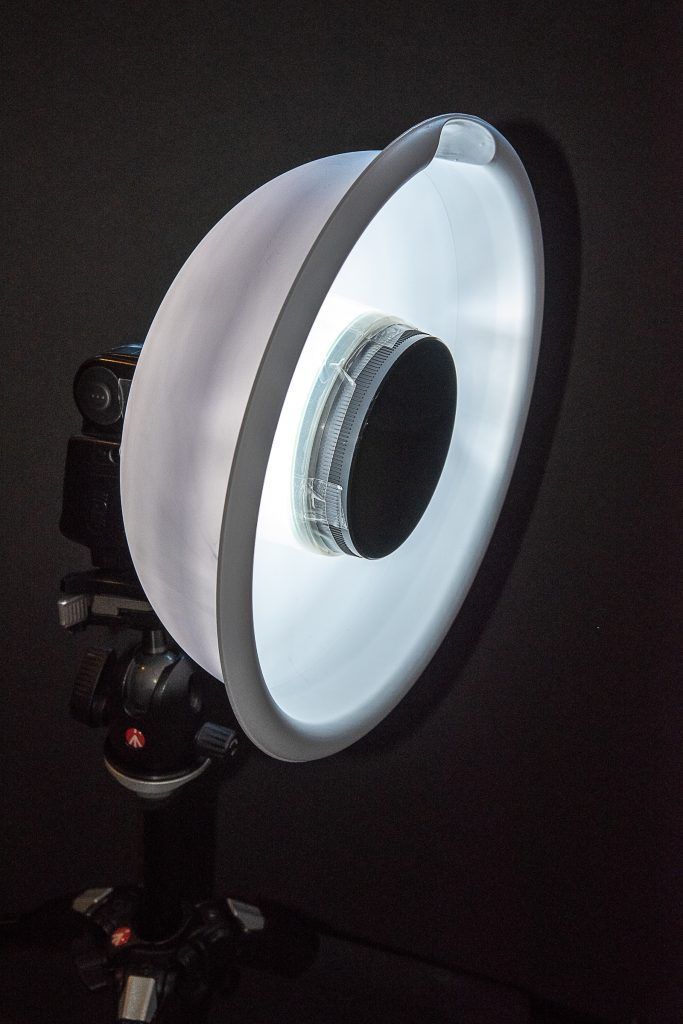
Front and back views of my DIY beauty dish. With only a few materials and the little bit of time it took to cut out a slot for my speedlight, I have a very effective tool for portrait photos. Photograph by Leanne Cleaveley
Mine was made from a white plastic bowl, the clear cylinder that holds a stack of CDs, some heavy-duty tape (I used clear hockey sock tape that my husband may or may not miss), a black lid, and white paper (cut to fit the end of the cylinder, for the flash to deflect off of).
The trickiest part was cutting the bowl, so that the flash would fit. I used an X-Acto knife that I heated up with a lighter between cuts. Take your time and use caution if you use this method! Taping it all together was fairly easy. I have visions of gluing it someday, but it has held up very well with the tape so far.
Photograph by Leanne Cleaveley
Photograph by Leanne Cleaveley
The beauty dish is then mounted on a light stand (or in my case, a second tripod) and angled to provide a lovely light for portraits as seen in the images above.
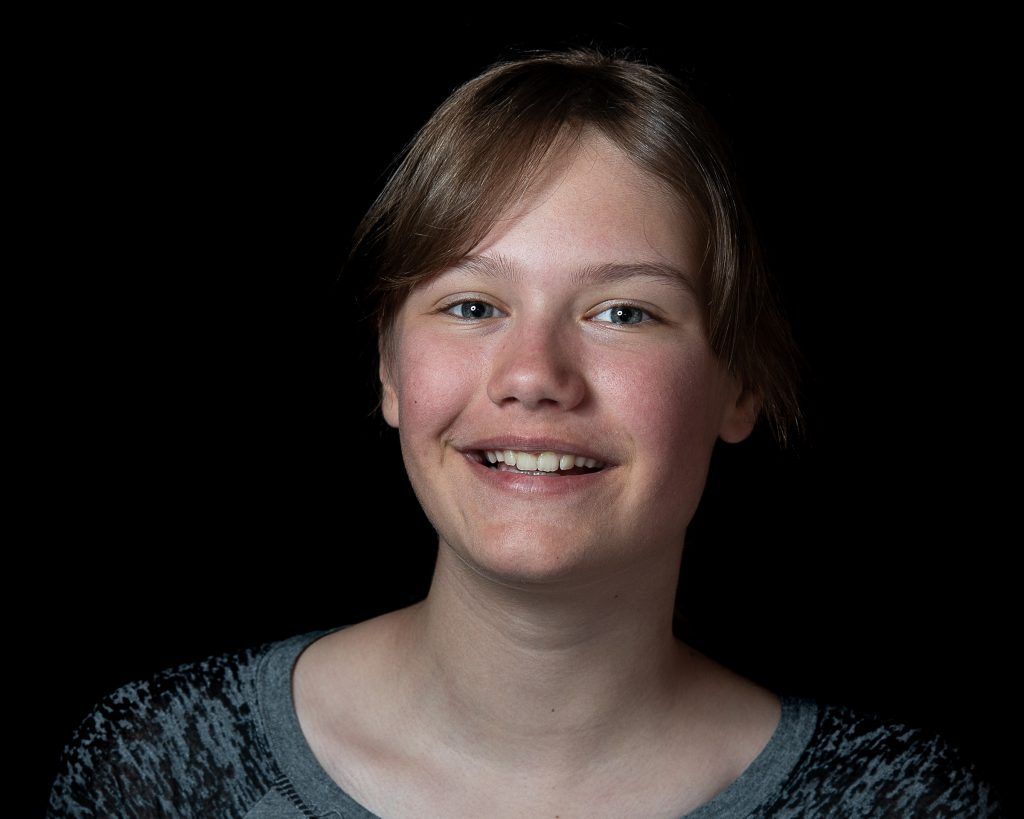
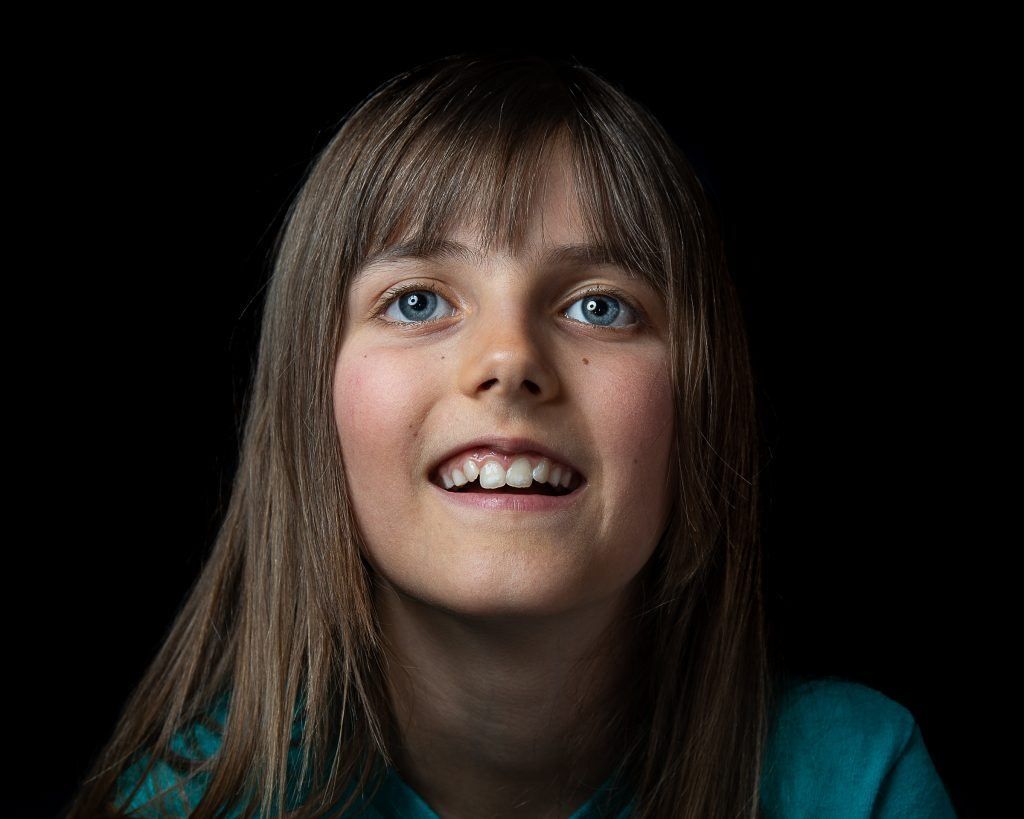
The dish both focuses and softens the light from the flash, while allowing for a pleasing falloff effect. It also provides a lovely and distinct catchlight in the subject’s eyes. You can see this effect in this next image:
Photograph by Leanne Cleaveley
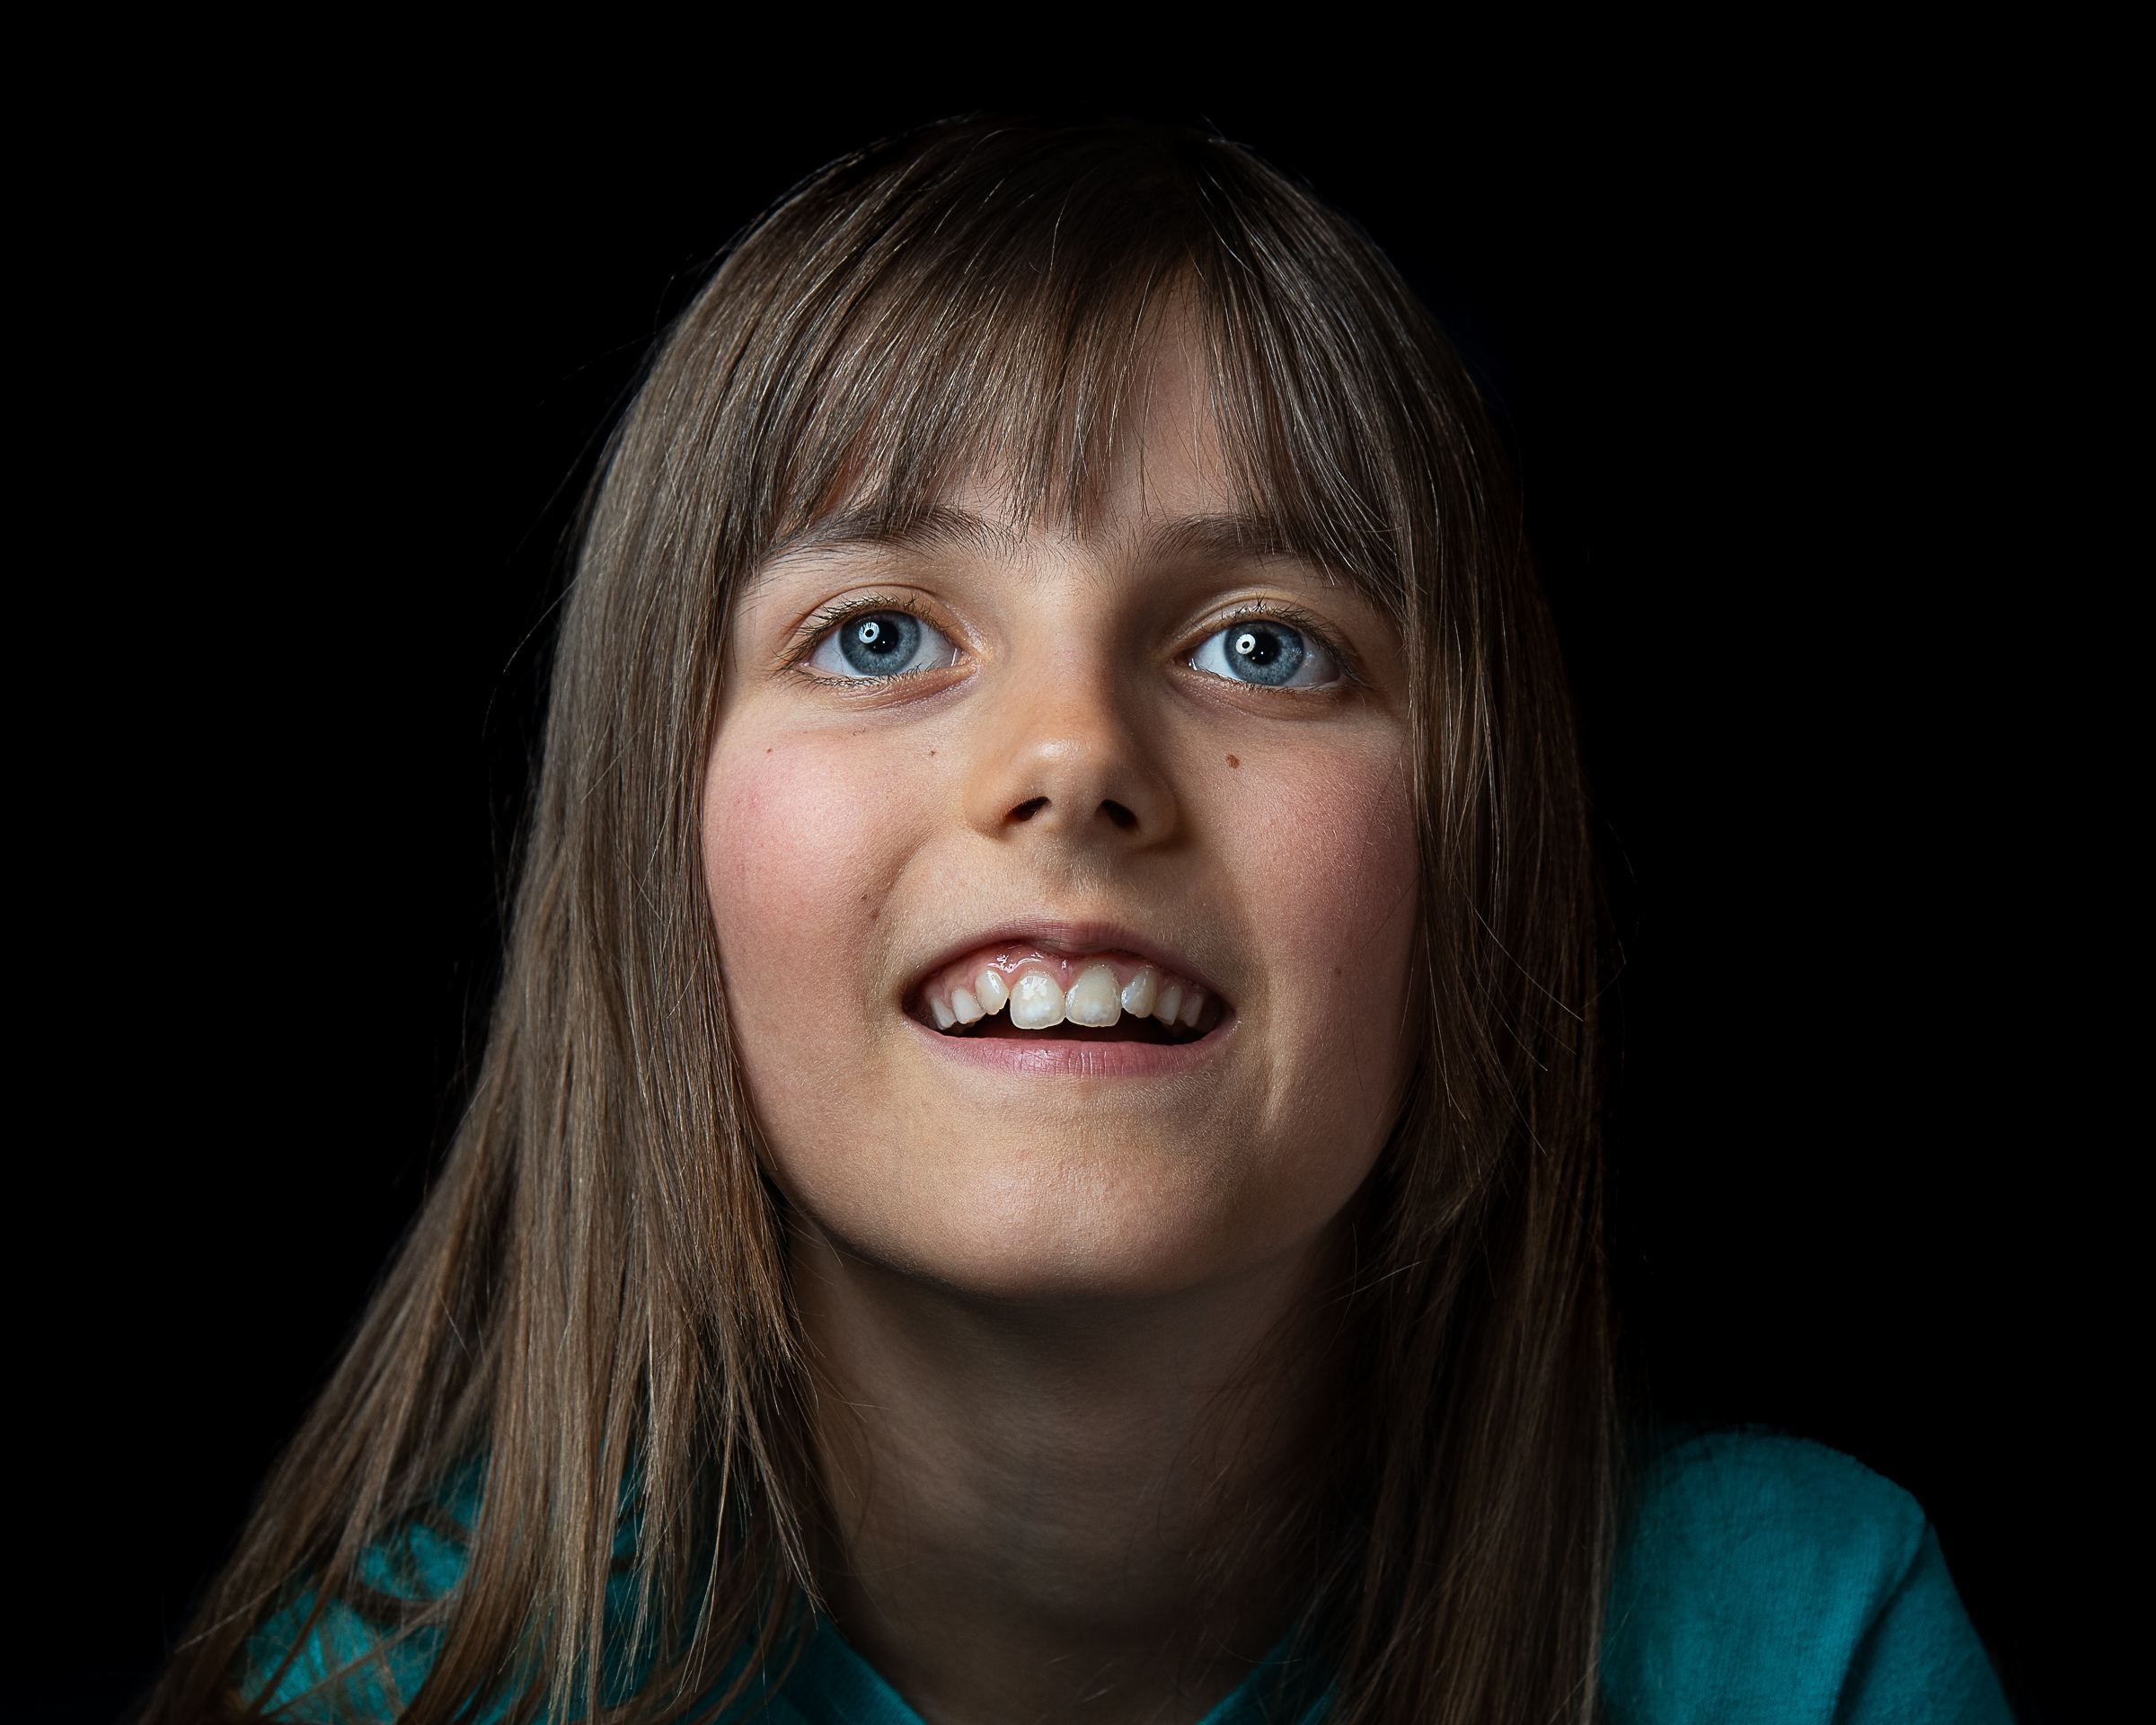
In this image, the beauty dish and flash are set up on the right side of the subject, providing more light to that side of the face. The left side, which is further from the light source, is darker and eventually falls away completely to a black background.
You can use this effect to your advantage, in highlighting certain features and really making the subject stand out. Alternatively, a homemade reflector can be used to bounce some light back at the subject’s darker side, to provide some fill light.
Key Note: With materials that cost a few dollars, and some items from around your house, you can create effective light modifiers to perform specific tasks.
Backgrounds
So far we have looked at lots of homemade lighting options, but there are many other great DIY tricks for achieving great images. A quick and easy way to change an image and add impact is to alter your background.
For smaller items, almost anything can work as a background, provided your depth of field and proximity to your subject allow for a sufficiently blurred background. I have used dusters, pillows, a jacket, and magazine pages as backgrounds when shooting small subjects.
For larger subjects, you can utilize sheets that are draped over furniture, a large piece of foam core (I have ones in black and white), and even a curtain. I have also draped material over a laundry stand to make a background for portrait shots. Look around your house and see what you already have at hand.
Stability
You can go out and buy commercial sandbags for adding some stability to your tripod, or you can make your own. I had some old ankle weights, used for exercise (when given a choice between exercise and photography, I always choose photography!), which work very well for supporting my tripod.
If you have a hook on your center arm, you can use your camera bag as a weight to add some extra support as well. I have even used a cloth bag, with some rocks placed inside, for an impromptu tripod weight when shooting in windy conditions.
Key Note: You can buy commercial weights to stabilize your tripod or use a few materials from around your home to create your own. Sand, rice, and beans in a bag all work well for providing extra stability.
Quick Fixes
I like finding everyday objects that double as photography tools. When I was shooting on a recent trip to the ocean, I realized that I was getting water drops on my lens, quite often.
I would never suggest that you forego proper protective gear for your camera, but in a pinch, a shower cap is perfect for pulling over your lens shield and the body of your camera.
Recommended Reading: Want to create gorgeous, perfectly lit flower photographs? Grab a copy of Photzy’s premium guide, Photographing Fabulous Flowers.
I like finding everyday objects that double as photography tools.
Salt water can wreak havoc to your camera and lenses, so don’t make the shower cap your main protection if you plan on shooting near the ocean frequently. But for a fast stop-gap, this multi-purpose item can work well. I always keep a couple in my camera bag just in case.
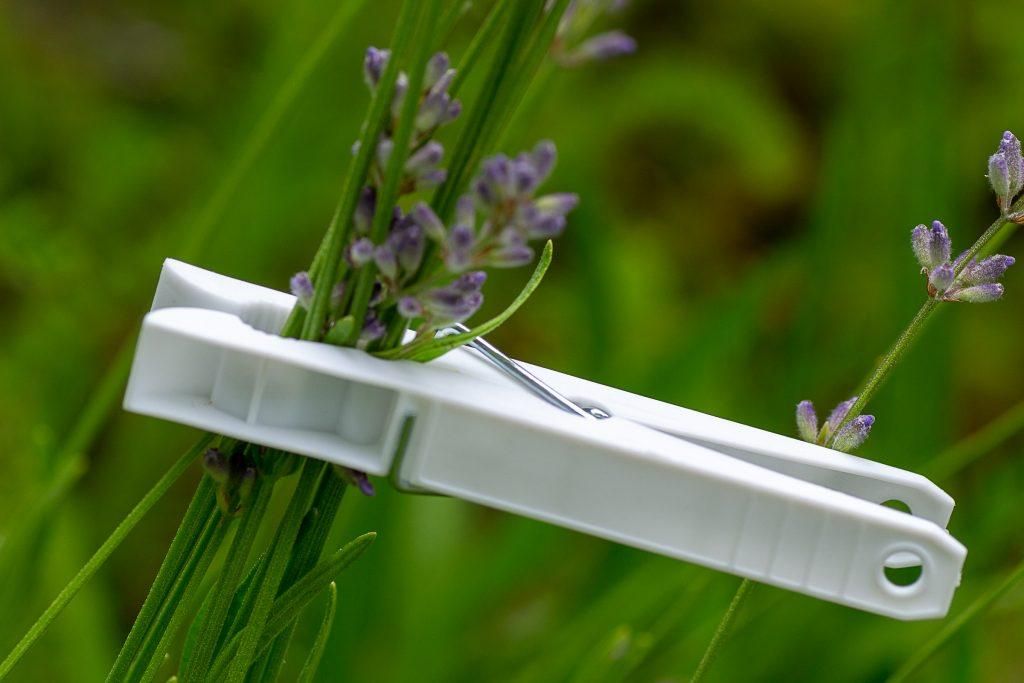
Another thing I keep handy in my camera bag are laundry clips. For the flower photographer, these are quite handy. If you have some distracting stems, you can clip them out of the way. I have also used the clips to hold back material and attach to backgrounds to hold them in place.
Photograph by Leanne Cleaveley
Conclusion
Becoming a ‘do-it-yourselfer’ is as simple as looking at materials you already own from a photographer’s point of view. What can you use that will help you create or improve an image?
From repurposing an item like a shower cap to building your own light modifier, you too can create your own homemade photography tools. And while you are doing so, you might find that some valuable learning occurs.
By building your own beauty dish, you discover how it works. I think this knowledge helps you use it more effectively and contributes to your photographer’s skillset as a whole.
I hope that this guide inspires you to try some of my favorite DIY projects and explore some of your own. Like my hero, MacGyver, you might find out how rewarding and helpful homemade tools can be.
Have fun building and creating!
Photograph by Leanne Cleaveley
Self-Check Quiz:
- Name two materials you can use that would make a good light reflector.
- What item can be used to reflect light for a small subject? And what about a larger subject?
- In what situation might a steady light source, like a lamp, be more advantageous than a flash?
- A piece of tissue over a flash is an example of which type of photography tool?
- A beauty dish can both _______________ and __________________ light.
- What tool can be used to create a concentrated beam of light?
- Look around the room you are in and list five items that might be used as backgrounds.
- What inexpensive item can you use to protect your lens and camera in a ‘pinch’?
- How might a laundry clip help you when photographing flowers?


