
Photo by David Veldman
There is something magical about exploring and photographing old and abandoned areas. Human creations feel strange and almost otherworldly. Despite an overwhelming sense of loneliness in these places, we can still feel the imprint of the lives that touched that place.
People like to be around old things. We have museums to provide us with a link to our past, we pay highly for antique items of questionable practicality, and the nostalgia for ‘retro’ never seems to go out of style.
In recent years, more photographers have taken an interest in both the old and the abandoned. Urban exploring is now a common term and many talented artists have begun to seek out the old and decaying to scrutinize with their lenses. In particular, beginners to photography find themselves drawn to this genre, and you will be pleased to discover that many non-photographers are avid fans of this style too. Another advantage is that this subject does not require an expensive camera or large amounts of additional gear to get great images.
I began my photographic journey with an interest in the old and abandoned. One winter day a few years ago, I picked up my first camera—a used Fuji HS10. I was driving home, my mind swarming with possibilities, when I caught sight of a dilapidated farmhouse clinging to life in an overgrown field. I immediately pulled over and took a few of the first shots that would serve to addict me to photography in general and to old buildings in particular.

Photo by David Veldman
To this day, I still photograph and film abandoned areas, although my interests have diversified. As I became more confident, I began to take an interest in old, historical sites that were not necessarily abandoned. This required a more outgoing approach and I began to openly call and e-mail organizations to request access to their facilities. To my surprise, most organizations were welcoming and friendly, so don’t be afraid to pick up the phone and introduce yourself as a budding photographer.
So now that I may have interested you in shooting abandoned or simply historical areas, it’s time for an introductory tutorial! While the above focused slightly more on abandoned areas, these tips apply equally to any historical building as well.
Get a Tripod
Chances are you already have one, but it’s possible you don’t. Sometimes the humble tripod is overlooked, but for this type of photography, particularly, it is probably the most important tool you will use. More often than not you will be shooting in low or no light, and getting a clean shot handheld is not easy. I figured this out early on when all of my shots were either blurry from a slow shutter speed or excessively noisy from high ISO. Generally speaking, the most desirable way to shoot in old buildings is using a long shutter speed. Flashes and lights tend to look unnatural. In the below picture I shot in a pitch-black room with a 13 second exposure and used a flashlight to light paint the scene.
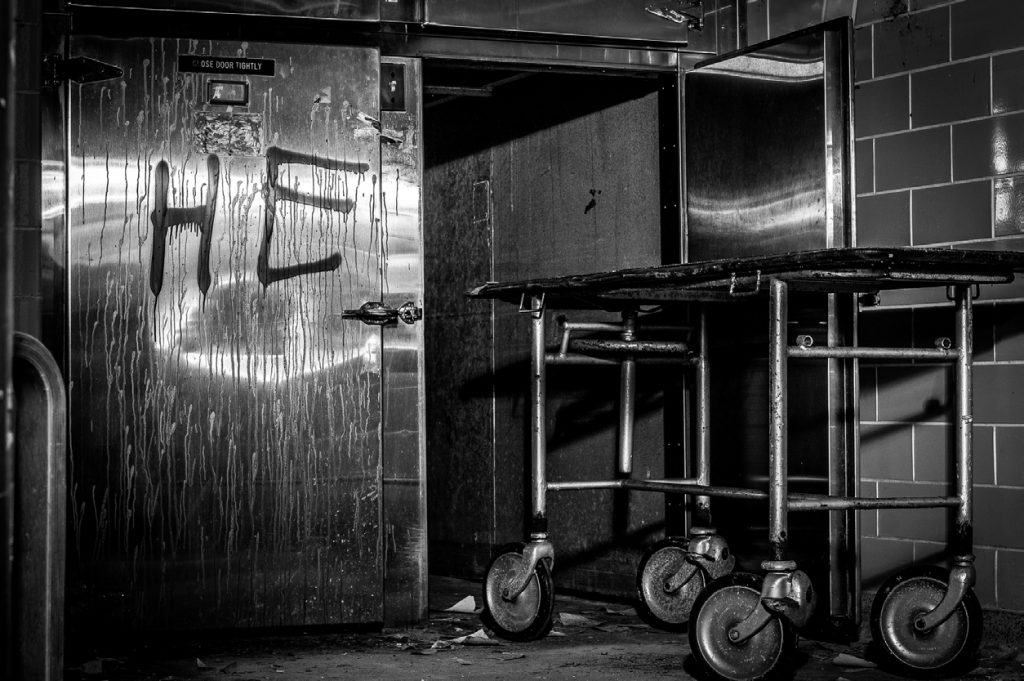
Photo by David Veldman
This isn’t a buying guide, so I won’t say much about selecting a tripod other than you get what you pay for. Pricier tripods are more durable and stable. Cheap ones will be flimsy but in many cases can still get the job done. A tripod will allow you to use the next few techniques mentioned.
Use a Long Shutter Speed Instead of a Wide Aperture or High Sensitivity
In case you’re unfamiliar with these concepts, Photzy has tutorials that will introduce you to the ‘big three’ that affect the motion, depth of field, and noise in your shots.
Aperture is the amount of light allowed into your lens relative to the width of the lens and is measured using f-stops. A fast lens like an f/1.8 will allow in a lot of light, but as a consequence your depth of field (or the area actually in focus) will be much narrower. Generally speaking, this is undesirable when photographing architecture, but it can be useful when you are isolating a smaller subject or trying to create a sense of depth.
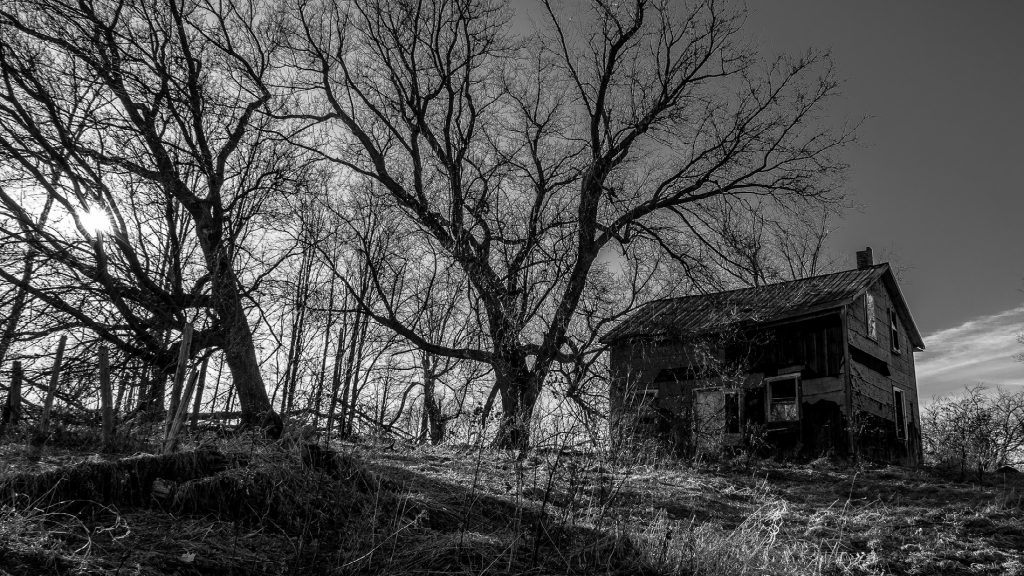
Photo by David Veldman
The shot (above) was taken at f/8, which allows the majority of the scene to remain in focus.
Increasing the ISO or sensitivity of the sensor has the side effect of increasing noise in your images, which is almost always undesirable and can be a real problem with non professional grade cameras.
This leaves us with shutter speed, and because we are shooting a static object there is no problem with shooting longer exposures. Keep in mind, a shutter remote is also useful to prevent camera shake.
See how important that tripod is now?
A shutter remote is also useful to prevent camera shake.
Prepare To Deal with a High Dynamic Range
When I first started shooting inside of buildings, I quickly realized that I had a problem. When I exposed long enough for the interior, any windows or obvious light sources were becoming ‘blown out’. When I exposed for the light source everything else was too dark. This is because the difference between the bright areas and the dark areas was too extreme for the camera sensor to capture.
Naturally I found this more than a little frustrating, and my poor wife had to listen to me muttering under my breath about ‘blown highlights’ while I processed my shots. Fortunately, there are several ways to fight back against this high contrast enemy.
The first way is by shooting Raw. Raw is the full sensor readout from a camera, not edited or processed by the camera at all. There are some small downsides to shooting Raw, however, for the most part, you should be shooting Raw to extract the maximum detail and dynamic range you can from your camera. A specialized program is needed to make full use of a Raw file, and they are larger than regular .JPEG. Nonetheless, the cost is easily offset by the ability to control sharpening, color, and, to some extent, dynamic range.
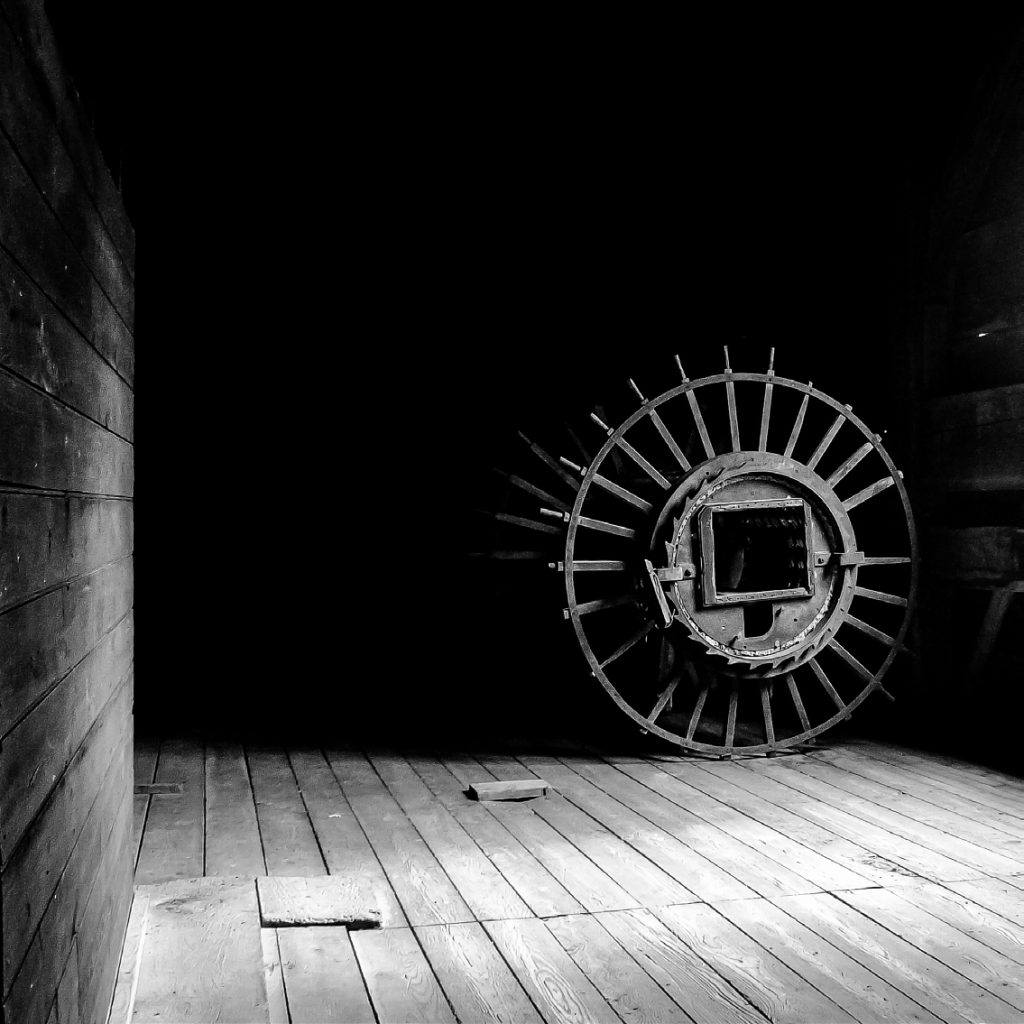
Photo by David Veldman
To this day I vividly remember opening my first Canon G11 Raw file in Lightroom and making loud noises of amazement as I moved the highlight slider back and watched previously undiscovered detail leap out from the sky.
The second way is HDR. HDR stands for High Dynamic Range and it has a bad rep among photographers. Yes, HDR can be ugly if used improperly, but overall it’s just another tool in the photographer’s arsenal to deal with dynamic range issues. Kent DuFault has a Photzy tutorial that explains it in great detail, however in its basic form, HDR is taking multiple images, some brighter, some darker, and stacking them to create an image that shows detail in light and dark areas.
Once again, you’ll need that tripod! Lastly, you can embrace the contrast. I don’t often leave home without my camera bag and tripod, but on this occasion I did. This (above) was inside of a historical mill in Ontario, Canada, and harsh light was pouring in through a window just to the right of the frame. I couldn’t shoot HDR, or a long exposure, but I really wanted to capture the pleasing repetition of circular and square shapes.
Therefore, I simply moved the window out of the frame and shot a high contrast image, letting the dark areas sink into complete black. I think the image works despite being technically imperfect, and I hope you consider trying something like this.
Shoot Wide
This should be easy as even an entry level DSLR kit lens usually zooms out to around 20mm. While portrait shooters will often use an 85 or 135mm prime to isolate backgrounds and flatten perspective in a pleasing manner, those lenses will be next to useless in many cases here. Even when shooting outside there is a limit to how far away from a building you can get. Despite using a 24mm equivalent, I have still found myself literally standing in the middle of a road. Try to avoid this if at all possible, for obvious reasons. Also remember that any lens wider than approximately 10mm will result in a distorted ‘fisheye’ effect.
Capture Details
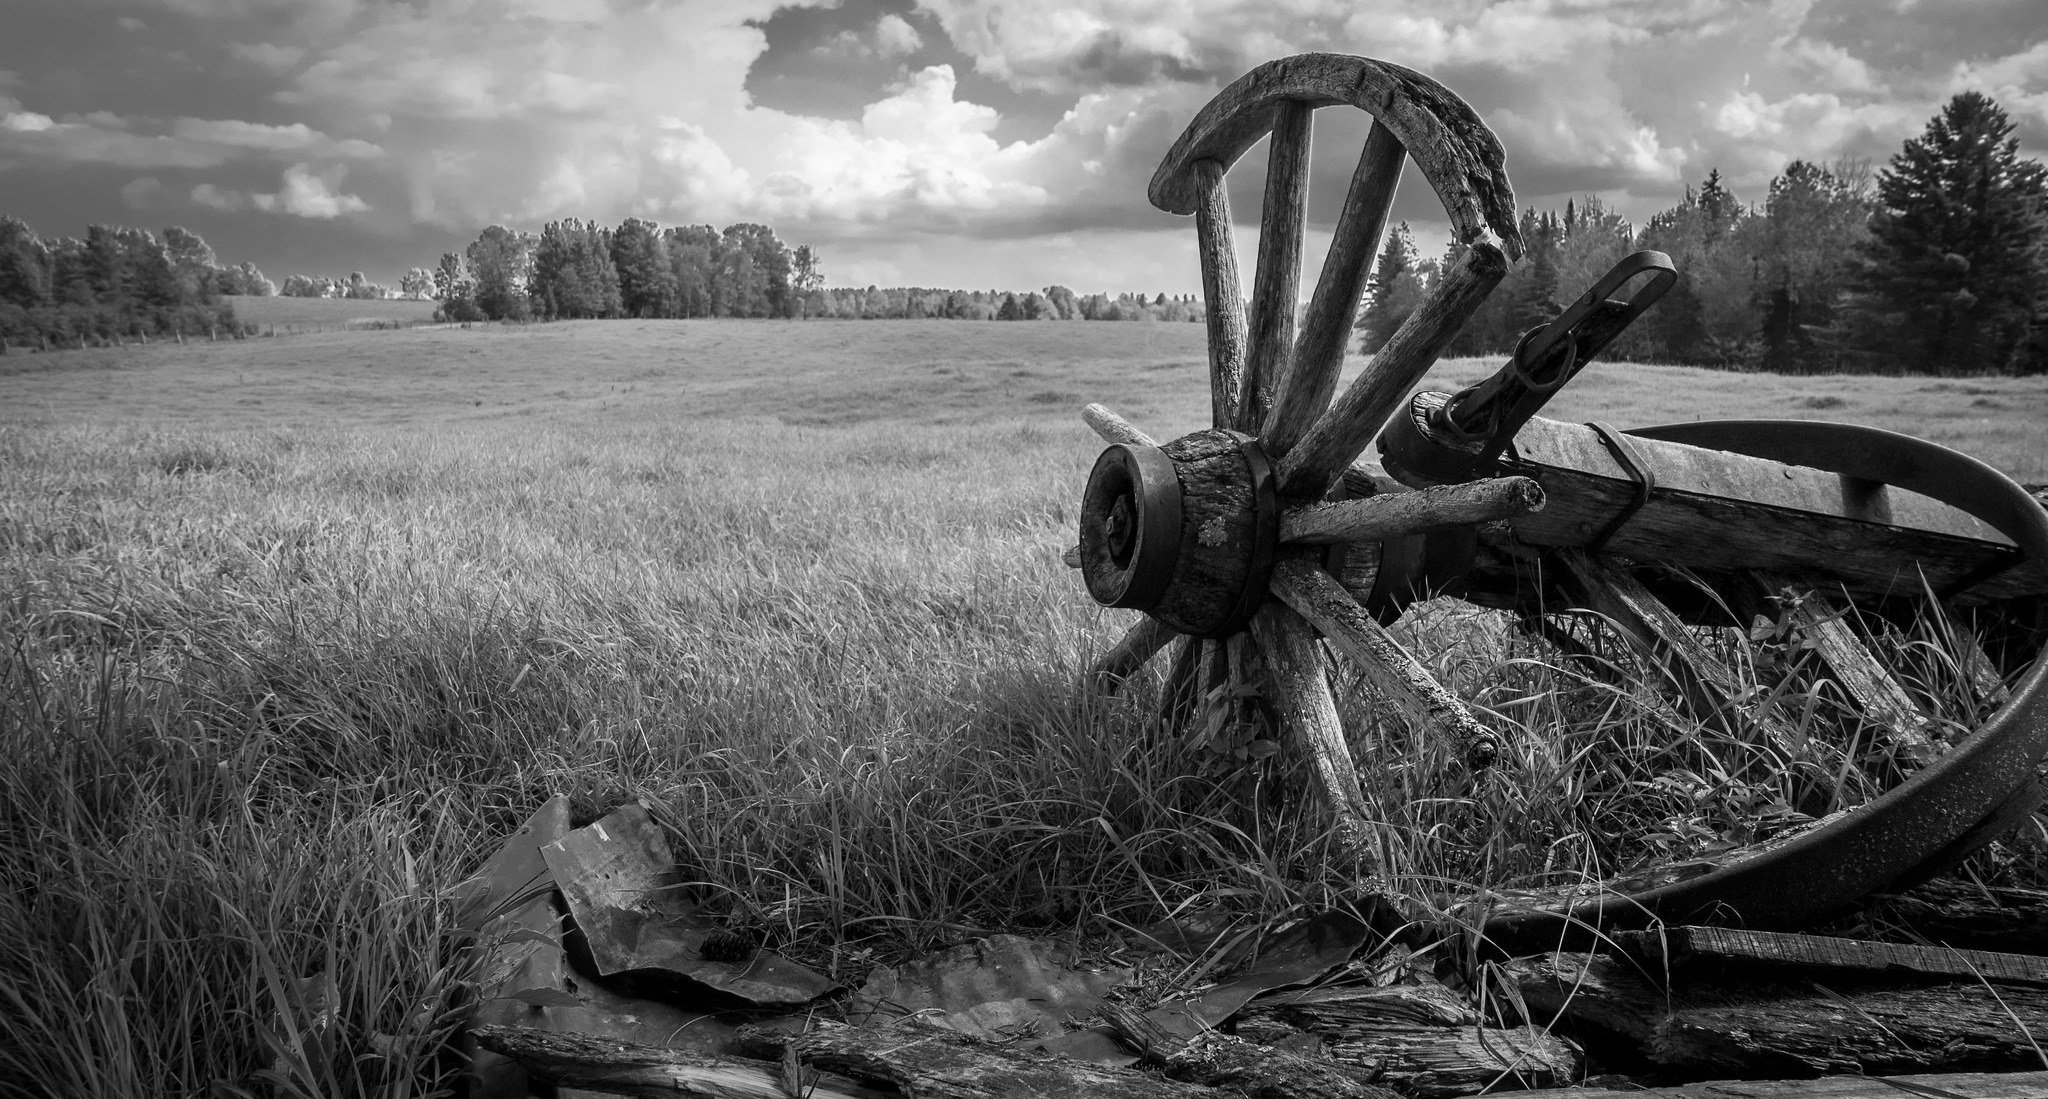
Everyone wants to see that wide shot—the arching ceiling, the falling roof or the lovely landscape with a crumbling farmhouse. But sometimes it’s ideal to get in close and focus on one particular aspect that really captures the mood of a location. It could be a peeling ceiling, a solitary book left behind on a table or a musical instrument left to rot (you’d be surprised at the amount of pianos and organs people leave behind). In the picture below, I was shooting in a historic church and decided to get up close and personal with the 105-year-old organ they still use today.
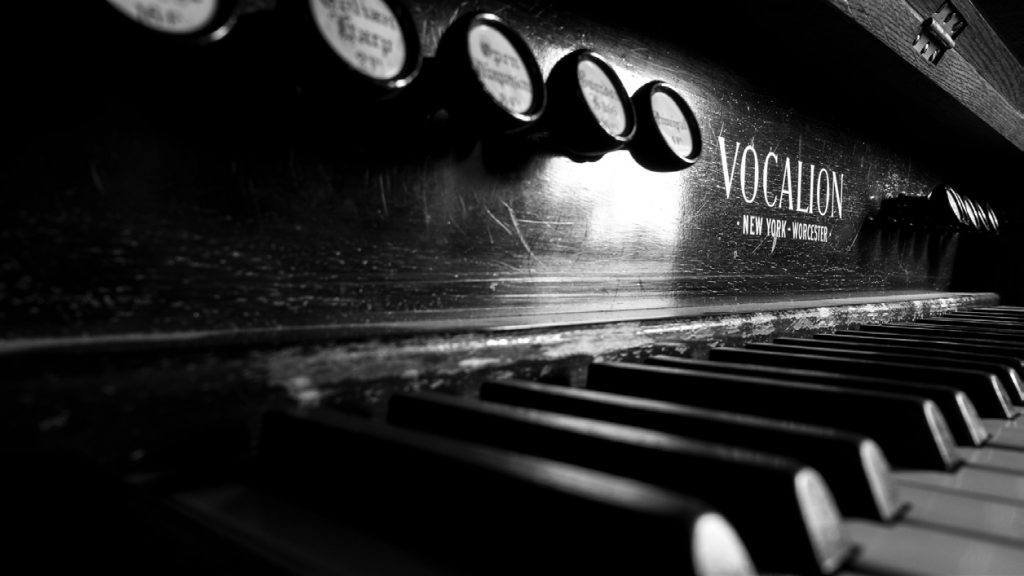
Photo by David Veldman
Try the Unusual Angle
When you first enter a location, the obvious shot will present itself to you immediately, and you’ll probably open your tripod, hit the shutter and capture it right away. That’s fine, but after you’ve taken that shot, pause for a moment and walk around, examining different angles. Crouch down and see the world from the ground; elevate yourself and look down on things. This is really a general tip that applies to all types of photography, but it will help to elevate your images beyond the normal composition.
Capture The Feeling
There’s a big difference between a building that is abandoned and a building that ‘looks’ abandoned. The same goes for a historical building. It’s not enough to merely caption the photo ‘Old Building’. You need to try to capture the essence of age or decay. There are several methods for doing this, and you have to find one that works for you.
For starters, consider focusing on textures, particularly those created by light contrasts. New tends to be shiny and smooth; older things are often weathered and patterned. This ties in with the earlier point regarding capturing detail.
Another way is to use juxtaposition. If you contrast the new with the old, you heighten the sense of age. Picture a shot of a century-old historical building surrounded by gleaming skyscrapers and you’ve got the idea.
Photo by David Veldman
Experiment with shooting in black and white; while not a magic bullet for perfect shots it can be very effective in many cases. Abandoned buildings often quickly lose their colorful paints and furnishings, so converting to black and white rarely results in a loss. In addition, we are mentally conditioned to associate black and white with ‘old’.
Shooting black and white requires a slightly different eye than shooting in full color.
Contrast, shapes, and shadows become predominant; use this to your advantage when constructing a ‘mood’.
Visualizing black and white can be difficult so enlist your camera to help you. If you can’t set your live view to monochrome, consider shooting black and white JPEG plus Raw. You’ll get an idea of what your final product will look like, but you’ll be able to convert your images later for superior quality.
Visualizing black and white can be difficult so enlist your camera to help you.
Consider Joining a Community
Not everyone is interested in the social aspect of photography, and that’s fine as well. However, if you are, there are benefits to being part of a local photographic community or Abandonment Tracking website.
I joined a local group early on and found it to be a useful resource. Not only did members share locations with those they trusted, we also participated in face-to-face meets, which resulted in friendships that I still maintain to this day. Sharing an interest with likeminded photographers is really a fantastic
experience.
In addition, it is wise to explore with a buddy as any historical or abandoned building can pose safety threats, and even a small injury when alone can create a serious situation.
Photographing the old and abandoned poses its own unique challenges. Still, it is a rewarding genre that both photographers and non photographers enjoy. It is also a low-cost genre to participate in. I hope you found this tutorial helpful and I’m sure that in no time you’ll be taking images you can be proud of.
The author would like to remind the reader that in most regions of the world trespassing is a criminal offence. While laws may vary, fines and even jail time are used as punishments, particularly in residential areas and at night. Always seek the permission of the landowner before attempting to venture onto an abandoned area.


