

When cruising through a photo sharing app or website, you are bound to see thousands of photographs of flowers. They are about as common as sunsets as a subject.
It is not surprising that flowers are so popular for photographers to shoot; they display nature’s beauty, texture, and color in a myriad of ways.
So, how do you take a very popular subject and add your own flare and your own style? One way to approach flowers with a different twist is to shoot using a macro lens.
I must admit, when spring hits and all the flowers are popping out in the backyard, there is nothing more satisfying than grabbing my camera and macro lens and heading out to capture those beauties.
Many macro photographers get lost in shooting something close-up just for the sake of capturing something close-up. I am guilty of this too. The results are not always stellar. But macro photography allows for some unique advantages in isolating and drawing attention to a subject.
When spring hits and all the flowers are popping out in the backyard, there is nothing more satisfying than grabbing my camera and macro lens and heading out to capture those beauties.
In this article, I will show you how you can use a macro lens to create flower photographs that really “pop.” We will look at the following techniques:
- How a narrow depth of field can help you isolate your subject when shooting flower macros
- How to use light to best highlight flowers’ attributes
- Ways to avoid unwanted blur in your macro shots
- Some suggestions for how to get creative when shooting flower macros
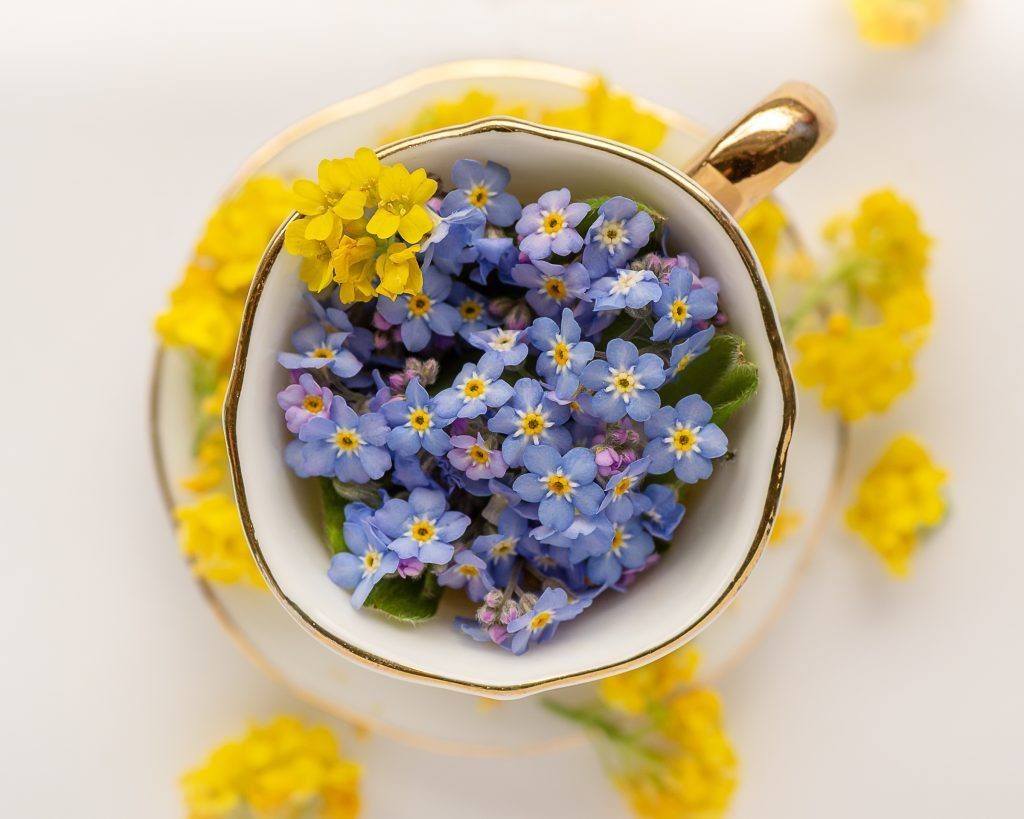
Photo by Leanne Cleaveley
Depth of Field
One of the wonderful things about shooting flower macros is the amount of control that you have over depth of field (DOF). Depth of field refers to how much of the photo is in focus. A shallow depth of field will have soft, blurry parts with a very narrow piece of the photo in sharp focus. A wide depth of field will have most or all of the photo in sharp focus.
Why is it so great to have a narrow depth of field? Well, it means you can have influence over what your audience “zooms in” on. If you want your viewers to notice the stamens of the flower, you can choose to use a very shallow DOF and leave the petals and other details of the flower soft and out of focus.
Our eyes are drawn to the sharp, ‘in focus’ parts of the photo. So using an f-stop of 9 or less, for example, and moving close to your subject (you are shooting macro, so you will want to be close) can give you a shallow DOF and allow you to “guide” your viewer to notice the things you want them to see.
Key Note: Getting close to your subject (around 12 inches) and shooting with a low f-stop (f/6.3, for example) will give you a narrow area of focus (millimeters, actually!), leaving things in the foreground and background soft and out of focus.
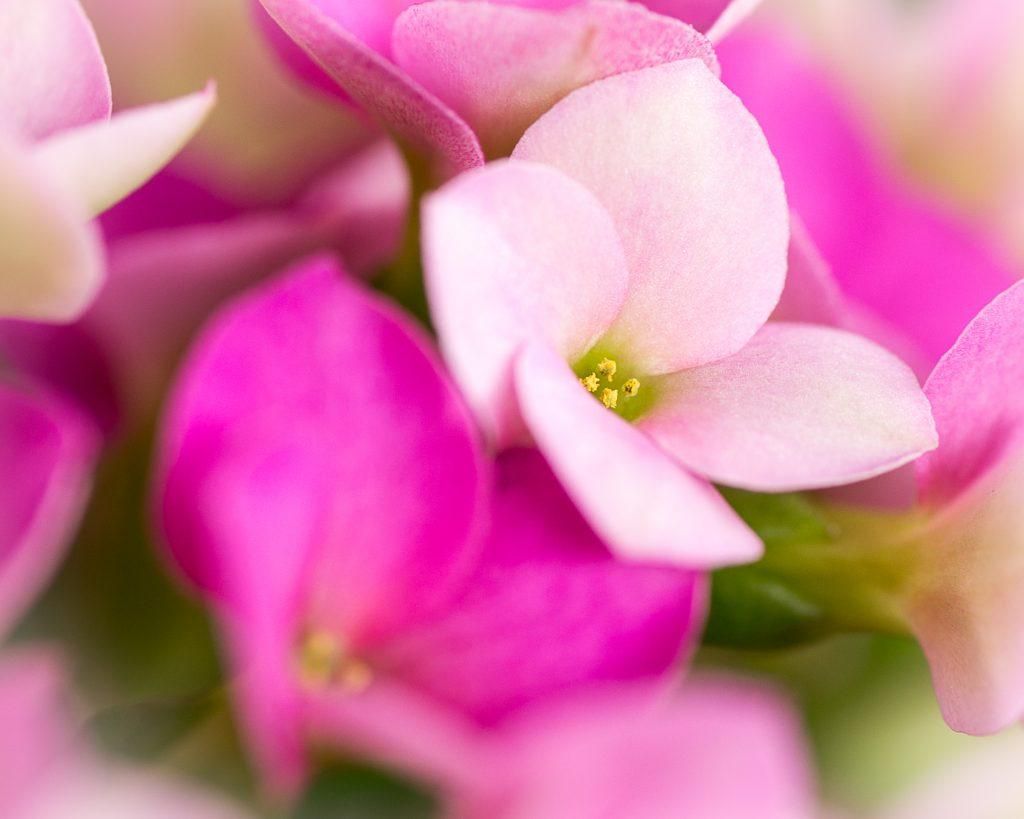
Photo by Leanne Cleaveley
This photo is a good example of what a narrow DOF can achieve. Note how the closest flowers, in the foreground, and background flowers are soft and blurry. I used the stamen of the light pink flower as my focus point to achieve this result.
Alternatively, you can choose to have more of your photo in focus to guide the viewer’s eye through the photo and show more detail. In macro photos, this can sometimes be slightly more challenging, as a wider DOF, such as f/22, usually involves a smaller aperture, less light, and not much more in the way of focus area.
The problem mentioned above can be overcome with a longer shutter speed, artificial light (such as a flash), or a higher ISO. A tripod is useful when shooting longer exposure shots and I recommend you use one.
Another option is to take several photos of the same subject, with different parts of the subject in focus. During post-processing, these shots can be “stacked” in a way that allows more of the photo to be in focus. This process, called focus stacking, has become very easy to achieve with today’s editing programs.
You should be methodical when shooting a subject to focus stack. Be sure to start with the nearest part of the subject (or start at the back, but work in order) in focus and then zoom in a tiny fraction and take your next shot. Depending on the size of your subject, it may take several shots to get the entire thing in focus.
If you are curious about what the depth of field is for your equipment, there are online calculators that can give you that information. You simply enter your camera and lens model, aperture, and distance from the subject. This data can help you in considering how many photos you need to take for focus stacking, or how much of the subject will be clear when shooting.
Key Note: If you plan to try focus stacking your subject, be sure to use a tripod and make small precise movements when zooming in.
Recommended Reading: Want to create gorgeous, perfectly lit flower photographs? Grab a copy of Photzy’s premium guide, Photographing Fabulous Flowers.
Backgrounds
As mentioned above, a shallow DOF can be useful for turning distracting details into an eye-pleasing blur. The same is true for backgrounds. Shallow DOF and proximity to your subject can soften hard edges and lessen distracting elements. A soft, blurred background allows your viewer to zoom in on your subject.
Key Note: Soft, blurred backgrounds are easy to achieve with a shallow DOF.
Don’t be afraid to move around to find that great background. But if it doesn’t appear, have a piece of fabric or craft paper handy to place behind your flower. Consider contrasting colors and textures that complement your subject.
Key Note: Have some fabric or colored craft paper in your macro kit for when the background is distracting or detracts from the photo.
Other flowers in the background can create a lovely effect as well, creating repetition of form and color. Water droplets and bright, reflective materials can create a wonderful bokeh effect for your background, as I will talk about later.
Light
My preferred type of light when shooting flower macros is natural light, but you can achieve some very interesting results with artificial light as well. At times it is necessary to use a little artificial light to assist the natural light and add a punch of light to spots where it is needed.
I am in love with the soft light that comes through a window. I will often set up my flowers in a spot like this and shoot away. The natural window light brings out the textures and colors of your subject in ways that other light just doesn’t. If your window light seems a little harsh, try hanging a sheer curtain to diffuse it.
Key Note: Soft, natural light, like the kind that comes through a window, is the best for bringing out the texture and color of your subject.
One issue with macro lenses is how close you must get to your subject and how often that proximity comes at the expense of light. Many times, I have found my lens blocking the available light. One way to combat this problem is to use a reflector.
You can buy commercial reflectors or make your own. Something as simple as a sheet of white paper can be effective in reflecting light back at your subject. I often keep a piece of white poster board handy for just this reason.
Key Note: Use a reflector to bounce light back onto parts of your subject to bring details out of the shadowed areas. A simple piece of white poster board can achieve this.
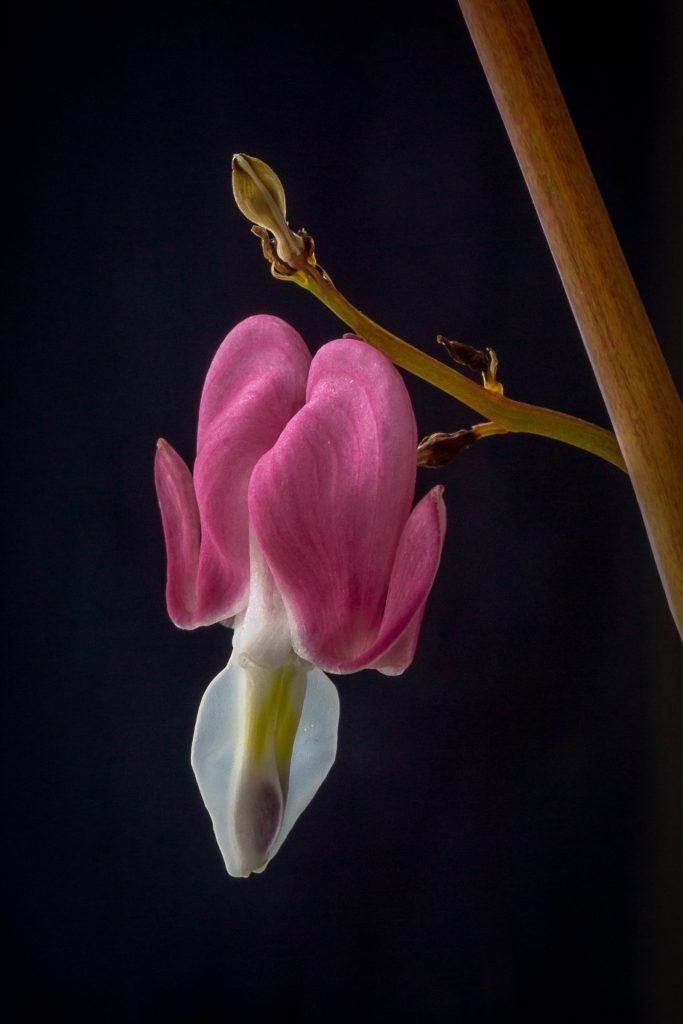
Photo by Leanne Cleaveley
Another lighting technique I like to deploy is backlight. You can use artificial or natural light to achieve this. Backlighting flowers can be particularly useful in highlighting the transparency and delicate appearance of petals.
Artificial light, shone on a subject with a dark background, can be quite striking as well. Be sure to angle your light in a way that provides light for your subject without lighting your background. You can create your own “barn doors” (a tool used for controlling where the beam of light shines) by using a piece of cardboard and placing it where you don’t want the light to shine.
I highly recommend using an external flash when photographing flower macros. It will give you more versatility in where you place your light, and you can achieve a very natural looking light with little effort. I often play at moving my external flash closer and further away (or changing the intensity of flash) to see how it affects my shot.
Avoiding Blur
Flower macro photography is one area where I always use a tripod, without exception. There are too many things working against you to leave this one up to chance.
The tiniest movements – wind, vibrations from our feet when people walk, camera shake – can all cause blurry photos.
So, find a good sturdy tripod (avoid the cheap ones – listen to a thrifty photographer: this is one area you don’t want to go cheap on!) and learn how to use it.
I have a setup that involves shortening and angling out the front two legs so that the tripod leans in to the flower I am shooting as I want to get close for my macro shots. Sometimes I will put a weight on the back leg for extra support.
So find a good sturdy tripod (avoid the cheap ones – listen to a thrifty photographer: this is one area you don’t want to go cheap on!) and learn how to use it.
Did you notice I mentioned wind as a cause of photo blur? This one is tough. I live in a very windy city and there isn’t much you can do to deal with this problem easily.
You can wait for a calm day or take a cutting and bring your subject indoors. Hopefully, if you choose the latter approach, the flower belongs to you or an understanding neighbor!
I have tried placing windbreaks around my subject, but even the smallest movement can be an issue. Weigh the benefit of waiting against the cost of a very difficult shoot and hopefully you will find some patience.
Key Note: Avoid shooting in the wind, as even the tiniest movements can cause blur in your flower macros.
To be sure that you get the parts you want in sharp focus and the blur where you want it, I recommend you use manual focus. This is especially important if you are shooting at a low f-stop. You may want to focus, shoot, and check, just to be sure that you have the parts you want in sharp focus.
There is nothing worse than shooting a bunch of photographs using automatic focus, only to find that the camera wasn’t focusing where you wanted it to.
I started out using only manual, then acquired a macro with automatic focus. I used it only a few times and went back to manual. You have much greater control over your composition and less chance of errors.
Key Note: For greater control over what is in focus, use the manual setting on your lens.
Recommended Reading: Want to create gorgeous, perfectly lit flower photographs? Grab a copy of Photzy’s premium guide, Photographing Fabulous Flowers.
Getting Creative
There are lots of ways to get creative and make your flower macros stand out. From shooting abstract to using props, there are many ideas for taking your flower macros from ho-hum to wow. I’d like to share a few of my favorites with you below.
Go Abstract
Flower macros present a unique opportunity for photographers to practice abstract photography. By isolating a fragment of a flower, you can draw attention to color, texture, shape, and form to convey a feeling or impression.
Personally, I love photographs that make an impact without having your full comprehension of what the subject is. Sometimes you have an “aha” moment when you realize that it was a daisy you were looking at all along. Other times, you are left with the mystery of that color, form, or shape.
Change Your Angle
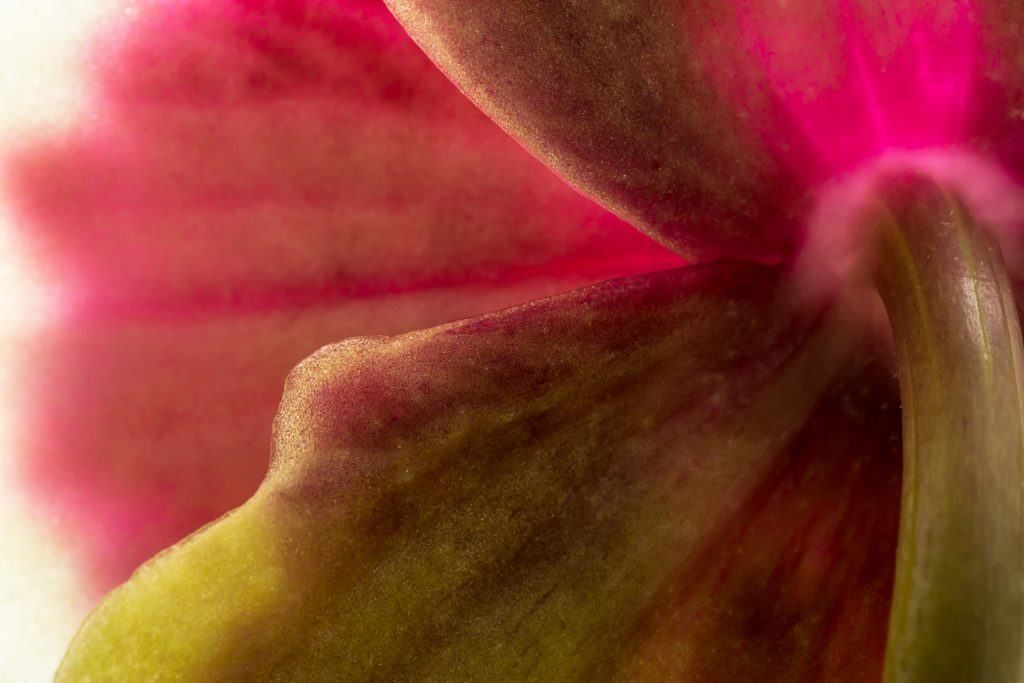
Photo by Leanne Cleaveley
How often do people photograph the back of a flower? Try shooting your flower from different angles – above, below, beside. Try flipping it (or yourself) upside down.
Get Closer
You’ve probably heard experienced photographers advise, “fill your frame.” Flower macros provide a unique opportunity to get very close to your subject. Have your flower touch the edge of the frame or spill over it entirely. Sometimes, when moving closer, you find a more flattering composition.
How close can you get? That depends on the length of your lens. The minimum focus distance on my lens is around 11 inches, which is a typical distance.
Another advantage of getting closer and having a narrow DOF is bokeh. In the photo below, the bokeh is a result of light reflecting off the far petals in the photograph. I like the soft, dreamy effect it conveys.
Photo by Leanne Cleaveley
Play the Numbers
Shoot flowers in bunches. Having lots of flowers in focus, or in the background, can make for great patterns and repetition.
Got a field of flowers? Get down low, find one standout specimen to shoot, and let the rest become a lovely soft background.
If you are shooting a small group of flowers, try and shoot in threes for a more pleasing composition.
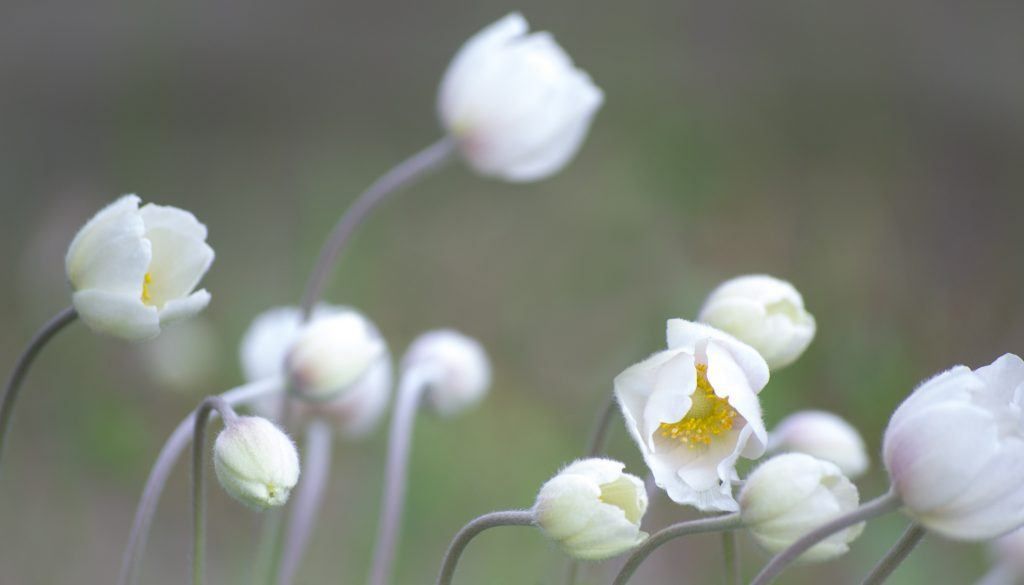
Photo by Leanne Cleaveley
Color It Up
Look for contrasting colors to make your flower “pop.” Or shoot in all cool or all warm colors.
Try Black and White
You don’t see too many black and white flower photos out there. I really enjoy playing with black and white when shooting flowers. Sometimes you will notice things like texture or tone that you may not “see” when looking at your subject in color.
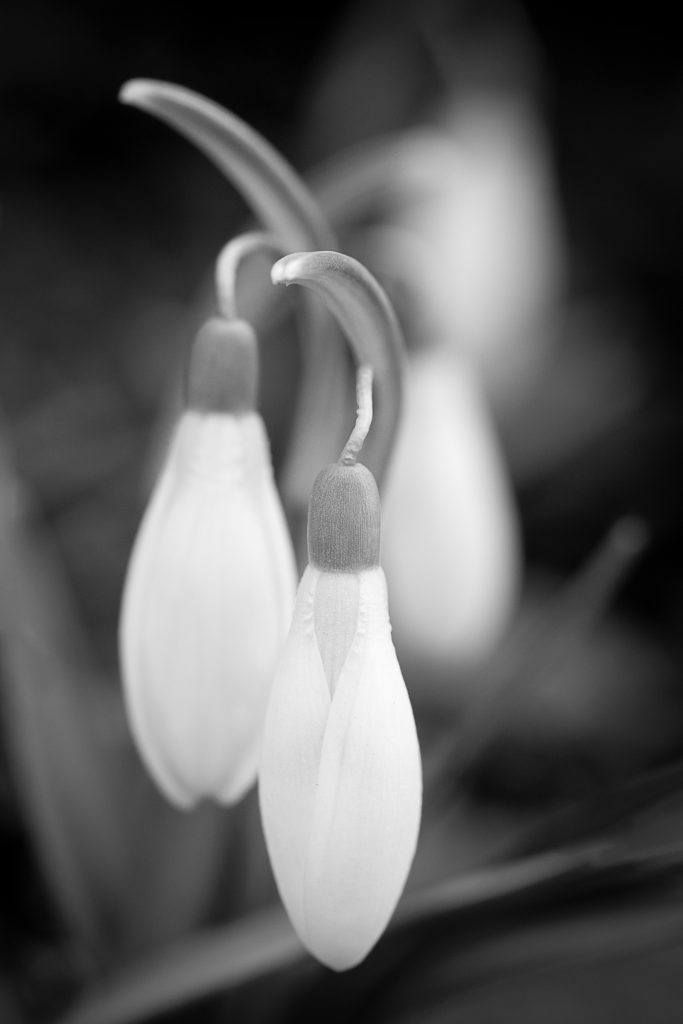
Photo by Leanne Cleaveley
Use a Prop
Try shooting your flower on or in something interesting. Vases are great, but why not use something different? Flowers sticking out of a watering can spout, a spoon full of flowers, or flowers laying on something reflective will amp up your photo and make it more interesting.
Photo by Leanne Cleaveley
This image was shot using a thimble-sized teacup and a shallow depth of field. Get creative, have fun, and make something memorable.
Shoot the Imperfections
Most people look for perfect specimens, but imperfect flowers have character and interest that perfect flowers lack. For interesting juxtaposition, try shooting a perfect specimen beside one that is old and imperfect. Or a flower bud against a mature flower.
Young and Old
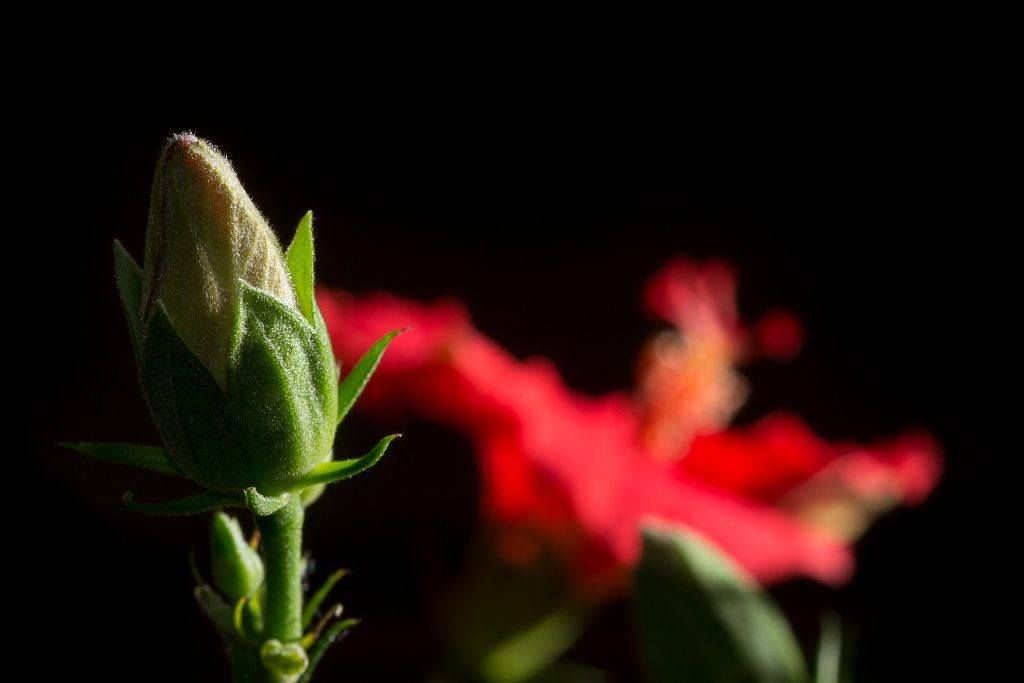
Photo by Leanne Cleaveley
Don’t wait for flowers to come to full bloom before you photograph them. Shoot buds that are just opening, and flowers drooping and dropping their petals. People seldom stop to smell (or photograph) the roses that are spent; their petals falling to the ground. Or what about a flower that has gone to seed? Create a shot that makes viewers look twice!
Singin’ in the Rain
Try shooting right after it rains. Beads of water collect on the surface of the flower, creating interest. And water drops in the background create great bokeh. Try adjusting your aperture a bit to see how that bokeh changes. The quality (size and softness) of your bokeh can change with a small adjustment in aperture. No rain? Try “misting” your flowers using a hose nozzle.
Welcome Guests
Insects frequent flowers, so don’t be surprised if you catch a shot of one visiting! I am often (pleasantly) surprised to find a spider, ant, or bee hanging out on a flower that I am photographing. Go with it – you may catch a great shot, even if it wasn’t in the plan.
Recommended Reading: Want to create gorgeous, perfectly lit flower photographs? Grab a copy of Photzy’s premium guide, Photographing Fabulous Flowers.
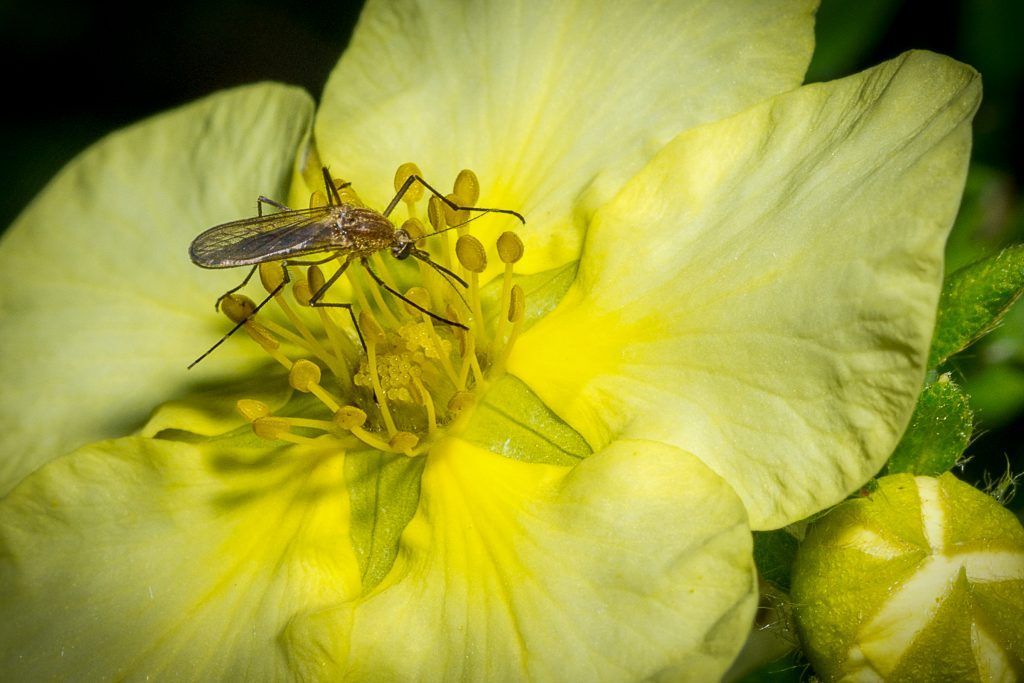
Photo by Leanne Cleaveley
Tidying Up
I don’t often talk about post-processing, but there is a tool I use without fail when editing my flower photographs. That tool is the spot-removal tool.
Flowers have this beautiful, and sometimes annoying, thing called pollen. Pollen is fine and may even be the thing you choose to focus on, unless it ends upon a part of the flower that distracts your viewer from the thing you want them to see.
Flowers can also have tiny specks of dirt and dust that you won’t see on your camera review screen or through the viewfinder. They often show themselves in post-processing when viewed on the larger screen.
So once you have loaded your photos and begun the weeding and editing process, take some time to enlarge your photo and hunt for distracting bits of pollen, dirt, and other debris.
Flowers can also have tiny specks of dirt and dust that you won’t see on your camera review screen or through the viewfinder. They often show themselves in post-processing when viewed on the larger screen.
Use the spot healing tool to clean up these pieces, as they can be very distracting when viewed at a larger size and detract from your photo as a whole.
Conclusion
One thing I will recommend to anyone starting out shooting flower macros is to spend some time on photo sharing sites looking at shots of flowers. You will see what works, what doesn’t, and what has been done a thousand times. You will also see some outstanding photos that will give you ideas.
Hopefully this guide has also given you some ideas to get out there, shoot macro, and create some amazing flower photos. Have fun!
Self-Check Quiz:
- What are two things you can do to achieve a narrow depth of field when shooting flowers?
- What piece of equipment is useful for providing light to shadowed areas of your subject?
- If your window light is too harsh, use a ____________ to diffuse it.
- Focus stacking can be achieved by taking several shots of your subject at different focal lengths and then “stacking” them using post-processing software. What piece of equipment should you always use when doing this?
- Try to avoid shooting on _______________ days, and always use a _____________ to get sharp images.
- Bokeh can be achieved by using a _____________ depth of field and getting _____________ to your subject.
- To be sure you are getting the right part of your photo in focus, use the _________________ setting on your lens.
- What is an effective post processing tool for removing unwanted pollen or dirt in your photo?
- List five ways you can get creative when shooting flower macros.