


Reflections are a simple yet effective way to take interesting and different photographs. Reflections can add depth and interest to an image or simply give us a new perspective on a well-known landmark. In this guide, I’ll teach you about the main types of reflections we use in photography and how to photograph them correctly.
Here’s what we’ll cover:
- Camera gear
- Camera settings
- Reflections in water
- Reflections in glass
Recommended Reading: If you’d like to learn more and improve your landscape photography, grab a copy of Photzy’s bestselling premium guide: The Complete Landscape Photography Guide.
Camera Gear
Ideally, you’ll want to be using a camera with interchangeable lenses (lenses always being the gear that’s worth spending the money on). The lens you use will depend, to a certain extent, on what reflection you’re photographing. Reflections in lakes, for example, need a wide-angle lens so that you can ensure you get everything in the frame in the shot. But if you’re photographing smaller reflections, or perhaps reflections in glass, you may sometimes want to use a telephoto lens to zoom in with and cut out any distractions around your subject. I’d highly recommend having both in your kit bag.
A tripod is essential for reflection work as you need to keep your camera rock-steady, particularly if you’re photographing reflections in water (which will have some movement). Make sure that you have a remote release or app on your phone to fire the shutter without causing the camera to shake.

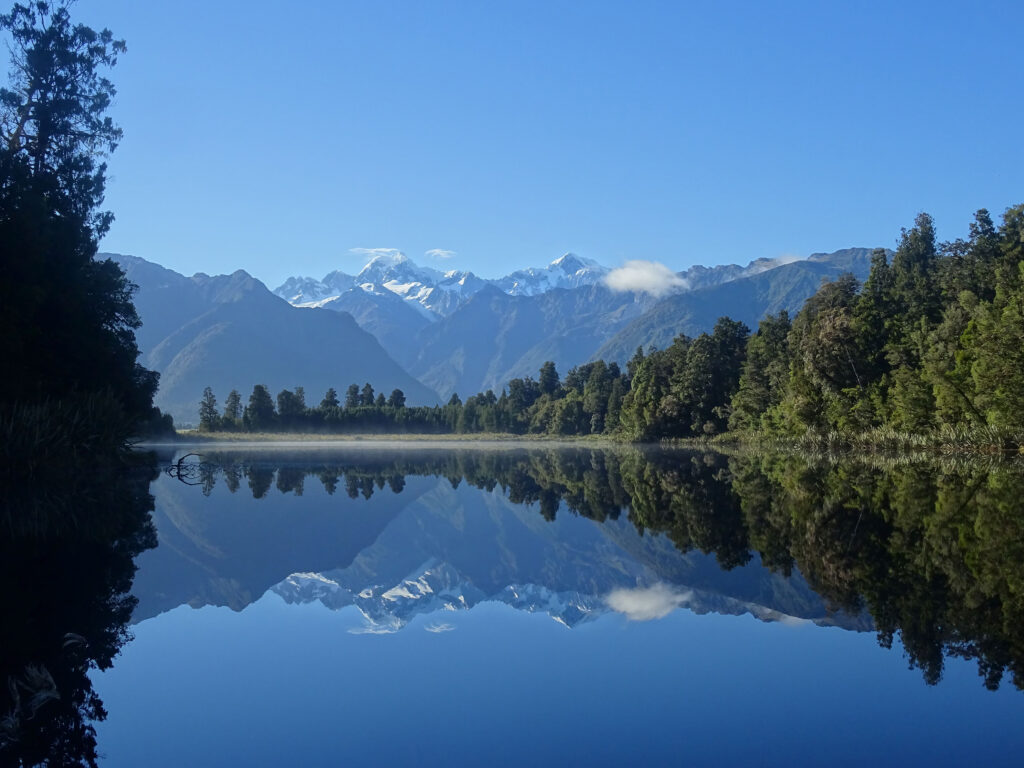
The classic reflection shot has an image perfectly reflected in the water below it. Photograph by Juan Davila
The other crucial piece of kit for reflection photography is a neutral density (ND) filter. An ND filter restricts the amount of light coming through your lens, allowing you to shoot at slower shutter speeds without overexposing an image. I’d also recommend carrying a graduated neutral density (GND) filter, which allows you to get the correct exposure on one half of the image without overexposing the other half. It’s particularly useful for balancing exposure discrepancies between the sky and the foreground.
Key lesson: ND filters are classified by the amount of light they block and are usually measured by the reduction in f-stops. Therefore, the more f-stops an ND filter reduces, the less light it will allow to pass through it (i.e., a 2-stop ND filter blocks double the amount of light of a 1-stop ND filter). However, you do need to remember how the number of an ND filter corresponds to the number of f-stops you’re losing. So, an ND2 is actually a 1-stop ND filter, meaning that it allows 50% of light to pass. ND4 is a 2-stop, allowing 25% of light to pass, and an ND8 is a 3-stop, with 12.5% of the light passing through and so on. So, the higher the number on your ND filter, the more light it will block.
Camera Settings
First things first, here are the basic settings that you’ll want to apply to your camera when you’re out shooting. I always shoot in RAW so that I’ve got as many details as possible to work with in post-production, and this can be particularly important in reflection work.
Your focusing mode should be fine on the AF-S/Single shot, but I’d suggest you pick your AF point or group of points yourself so that you can tell the camera where best to focus. Keep your ISO as low as possible. You want viewers to focus on the reflection, not any digital noise causing a distraction.
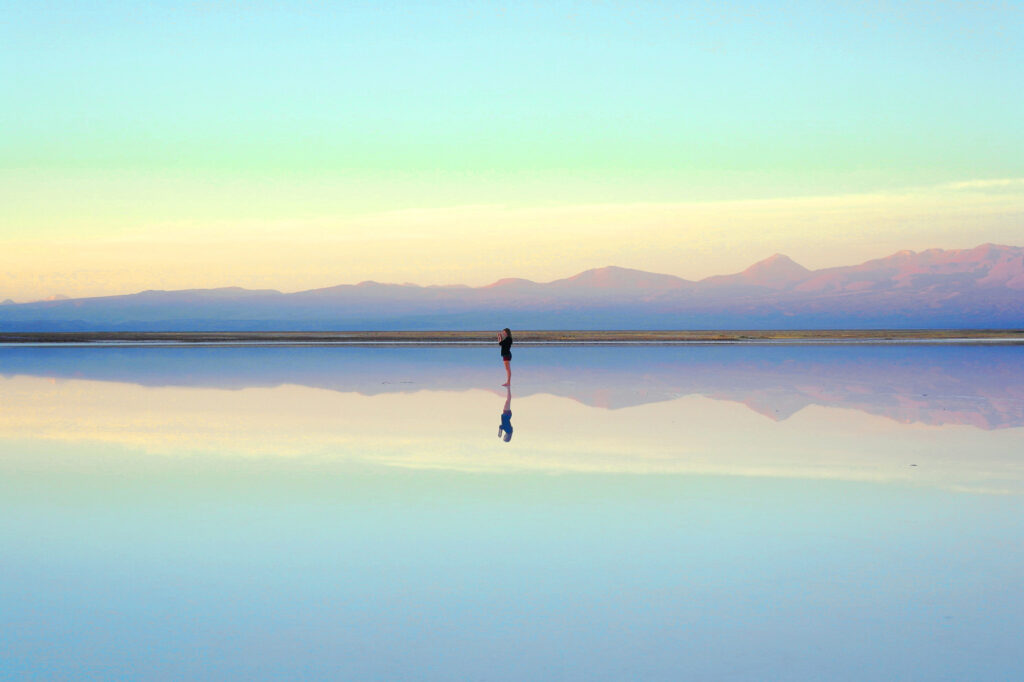
Effective reflections can be achieved with very simple and delicate reflections. The addition of a person in this shot gives added focus to the reflection. Photograph by José M. Reyes
Shutter speed and aperture are both going to vary, depending on what you’re photographing. If there’s any movement in your image, you’ll want a faster shutter speed to freeze motion so it doesn’t spoil your shot. Of course, the classic landscape reflections tend to use longer shutter speeds to saturate the reflection, making the scene more dramatic.
Key Lesson: Most reflection photography requires a large depth of field so that all of your images are sharp. Remember that this means using a small aperture (f16/f22). If you’re using reflections in smaller amounts of water (say a raindrop), though, you might want to use a small depth of field (f4, for example) to blur out distracting backgrounds.
Reflections in Water
The ‘classic’ reflection shot is a landscape reflected in water (think mountains reflected in a lake). To get great shots, you need to have ‘still’ water, meaning enclosed water spaces such as lakes, lochs, and ponds often work best. Whilst ripples can give interesting results, more often than not, they’ll disrupt the image, so you’ll need to avoid even the slightest breeze! (N.B. watches the weather forecast and looks for high-pressure systems, as this means the chances of windless, still, conditions are improved.)
There are no set rules about the time of day to photograph water reflections, but, like most landscape photography, you’ll probably get the best results if you photograph in ‘The Golden Hour’ (i.e., the hour after sunrise and the hour before sunset). This is because the sun will be low and direct, which will reduce the possibility of sparkling light reflections on the water.
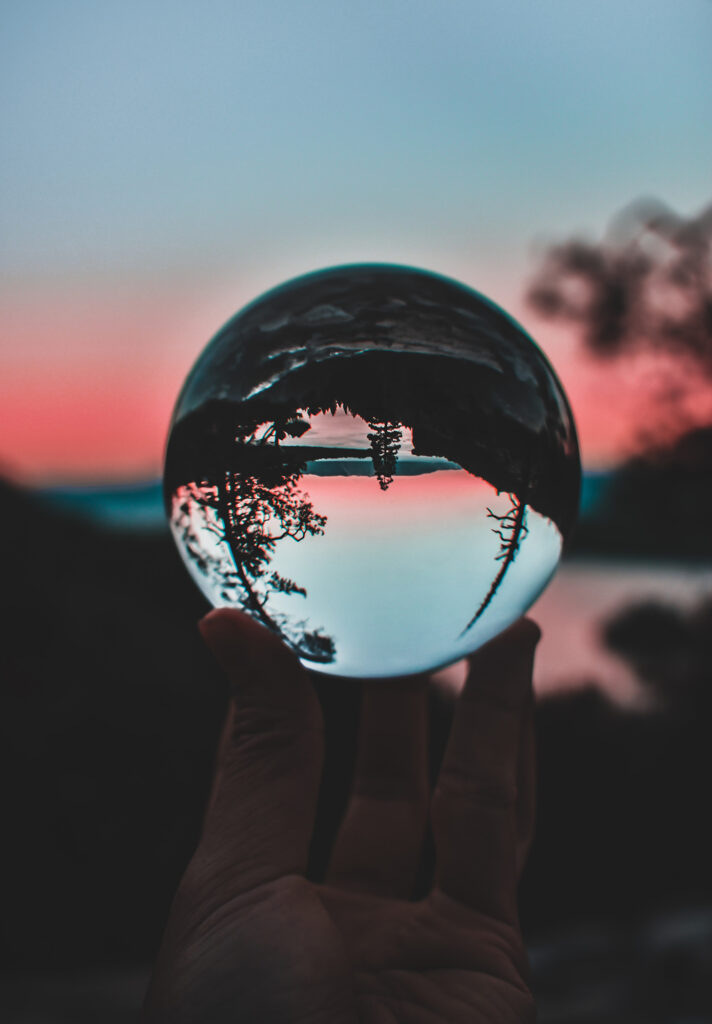
Think outside the box when it comes to reflections – a clear ball makes a great surface for a reflection. Photograph by Mathilda Khoo
Effective landscape reflections need a large depth of field, such as f16 or f22, which will mean you’re using a small aperture that won’t let much light into your camera lens. A low ISO will ensure that your image doesn’t have any noise but will also mean little light coming into your camera. Of course, if you’re shooting in sunny conditions, you may be able to use a faster shutter speed that allows you to handhold your camera. But for the best results, I recommend using a long exposure and a tripod.
Effective landscape reflections need a large depth of field, such as f16 or f22, which will mean you’re using a small aperture that won’t let much light into your camera lens
Another reason to use a long exposure is the addition of a Neutral Density graduated filter (ND grad filter). The body of water will often be darker than the sky, so an ND filter can be used to balance out this difference. Because the filter is graduated, you can place the darker side over the sky, leaving the water untouched. Composition-wise, don’t be afraid to break the rule of thirds. For perfect reflections, you need your horizon to be exactly centered within the frame so that whatever you photograph above it is identically reflected below it. This creates symmetry.
Don’t forget that you can try lots of other reflection shots using water. A small depth of field to isolate raindrops hanging off trees or plants is a tricky shot to pull off but can produce beautiful images. Even puddles can produce interesting shots – think bright lights in a city reflected in a puddle. As with many aspects of photography, you can try out any water reflection that grabs your imagination.
Reflections in Glass
The less obvious type of reflection photography is shooting into a glass, most commonly glass buildings. If you live near a city, you’ll know that large glass-fronted buildings are extremely popular in modern architecture. Flat glass fronts will give you perfect reflections, or you can add a creative twist with curved or multi-paneled surfaces. These can give you interesting abstract shots and perhaps a little more scope with what to photograph.
Again, care needs to be taken to get the right shooting conditions. As with water reflections, you won’t want high, strong sunlight, as this will cause a lot of glare and sun flares on your imagery.
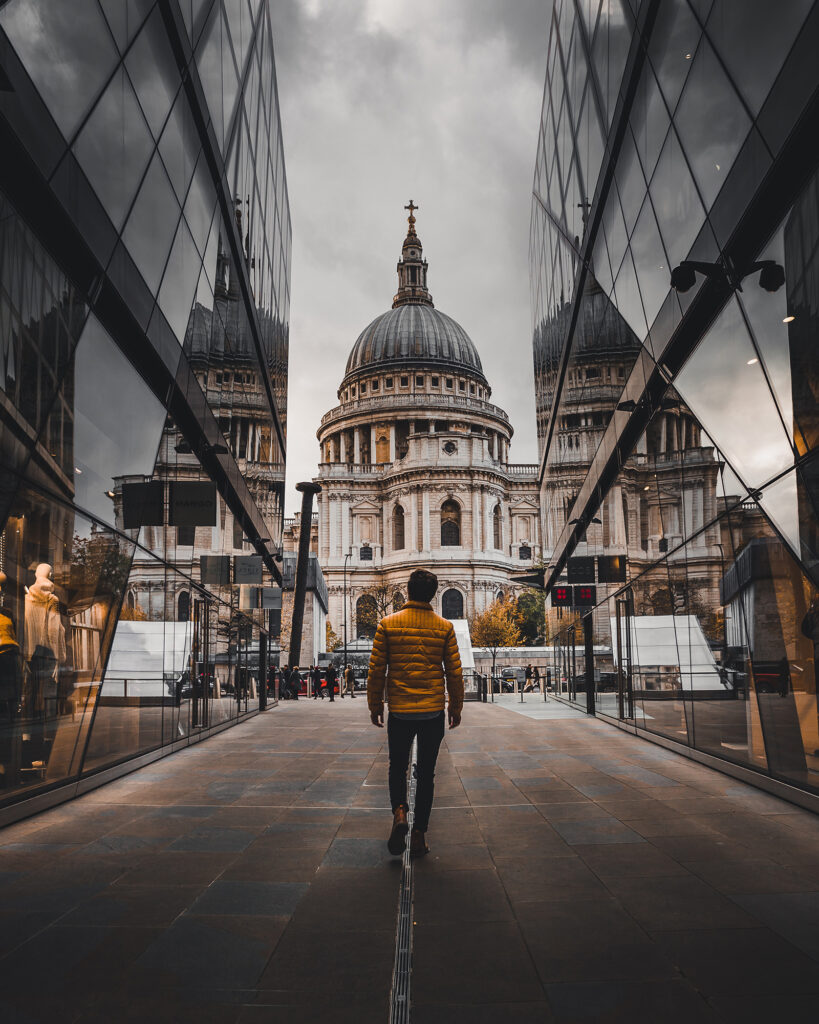
The iconic St. Paul’s Cathedral in London is cleverly reflected in the glass buildings on either side of it. Photograph by Luke Stackpoole
The Golden Hour will produce beautiful lighting for reflections in glass, allowing you to pick up the pink and gold tones in the light, leading to soft and stunning images. However, you do have a bit more scope with reflections in the glass. You can shoot at other times of day if there are clouds in the sky – shoot when the sun is behind a cloud.
The Golden Hour will produce beautiful lighting for reflections in glass, allowing you to pick up the pink and gold tones in the light, leading to soft and stunning images.
Reflections in glass also allow you to experiment with different depths of field. If you’re photographing a well-known landmark in a flat pane of glass, you will want to use a large depth of field so that the whole shot is in focus. However, if you’re photographing on curved or multi-paneled glass, you can choose either to have the whole shot sharp or use a smaller depth of field to pick out individual details to create an artistic shot. Shutter speed will depend on your other settings and the amount of light available but should be less crucial than it is with water. Of course, if you use a long exposure and you have traffic or train lines in the reflection, you can add an interesting element to your images with blurred vehicles.
One thing to note is that reflections in glass may need a little more retouching than reflections shot in water. You can’t guarantee that the glass you’ll be photographing will be entirely clean, so be prepared to remove any marks or dirt on the glass in post-production.
Conclusion
I’ve spoken about some of the more obvious types of reflection in this guide, but obviously, you can experiment with any reflective surface. Shooting reflections gives you, the photographer, the chance to create both classic landscape shots or more abstract work with glass. And it’s great fun!
Recommended Reading: If you’d like to learn more and improve your landscape photography, grab a copy of Photzy’s bestselling premium guide: The Complete Landscape Photography Guide.
Self-Check Quiz:
- Which filter is particularly helpful for reflection photography?
- Is f22 a small or large aperture?
- What time of day is particularly effective for reflection photography?
- What are some other types of water you could shoot reflections in?
- What depth of field should you use for shooting well-known landmarks in glass?


