
Panning is a specialized photographic technique. It’s a bit tricky to master, but once you do, your images will have both motion and focus.
In this article, I’ll show you the technique behind panning and what type of subjects work well with this technique.
Here’s what we’ll cover:
- What is panning?
- When to pan and why
- The technique of panning
- Tips to improve panning
Recommended Reading: Want a simple way to learn and master photography on the go? Grab our set of 44 printable Snap Cards for reference when you’re out shooting. They cover camera settings, camera techniques, and so much more. Check it out here.
What Is Panning?
Panning is a type of intentional motion blur (IMB). But it’s a particular type of motion blur.
The subject is in focus, and only the background is blurred.
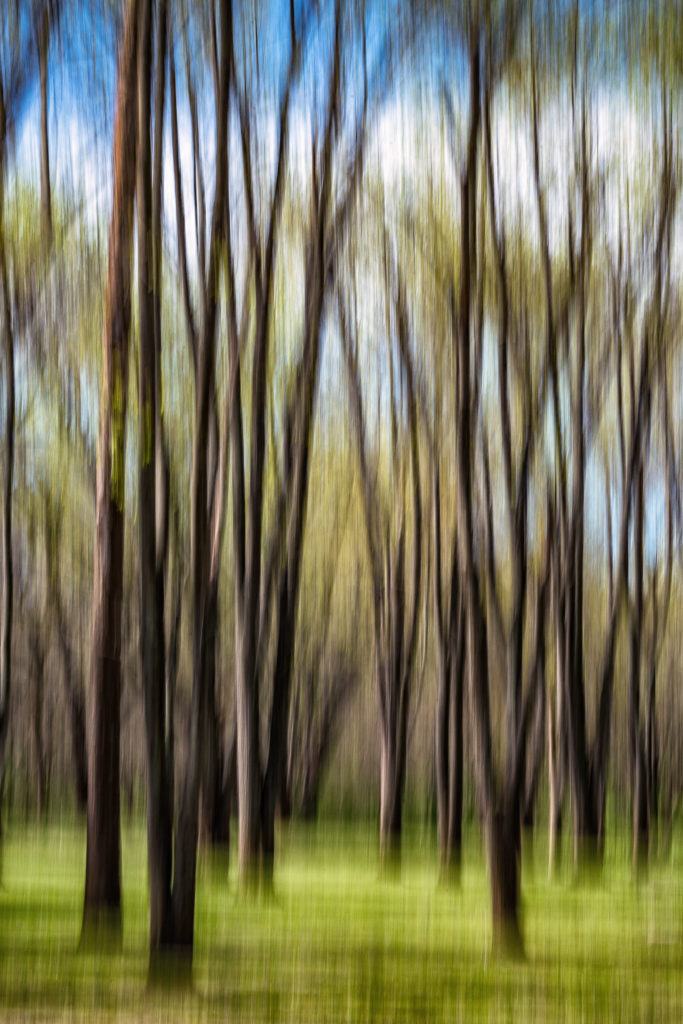
Intentional motion blur created by using a slow shutter speed and moving the camera
while the shutter is open. My settings were f29 @ 1/15th of a second, ISO 100. Photograph by Jenn Mishra
IMB is created when you move the camera while the shutter is open. Usually, this means that everything in the image blurs. The image above is an example of IMB. I set my shutter speed at 1/15th of a second and panned my camera vertically to blur these trees.
In this tree photo (above), the trees are static. They aren’t moving. A motion effect is created because I moved the camera.
It’s not the same as blurring out the background using a shallow depth of field. The background appears to have motion.
Motion blur created by subjects in motion. In this case, a flock of pelicans moves across the frame when my shutter is open. My settings were f8.0 @ 1/10th of a second, ISO 800. Photograph by Jenn Mishra
I’ll also get motion blur if something in motion moves across my frame at a slow
shutter speed, such as in the photo above. Long exposure images take advantage of this. Running water or clouds move across the frame, streaking and smoothing out.
Panning takes this technique a step further. In a way, panning combines motion blur created by my camera in motion and a subject moving across the frame.
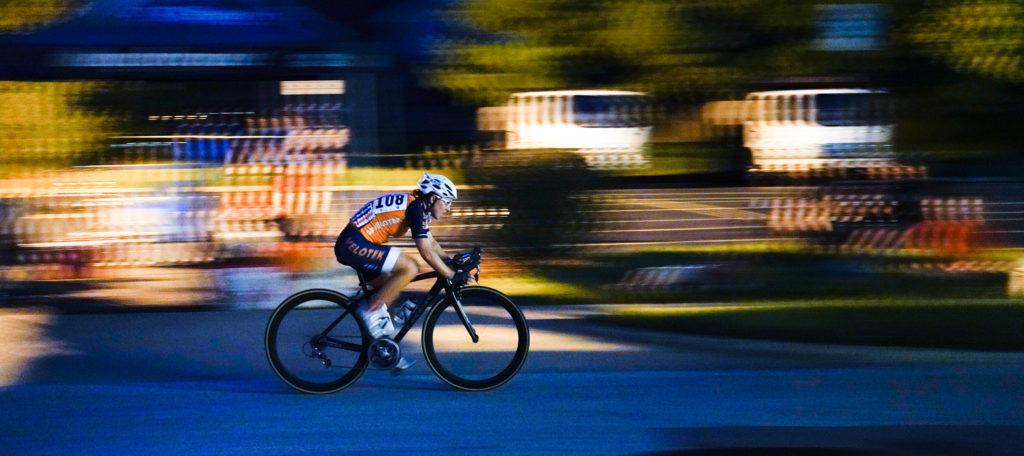
In panning, the moving subject is in focus while the static background appears to be in motion. This effect is created by moving your camera at the same speed as a moving subject. If you do this right, the subject will be in sharp focus.
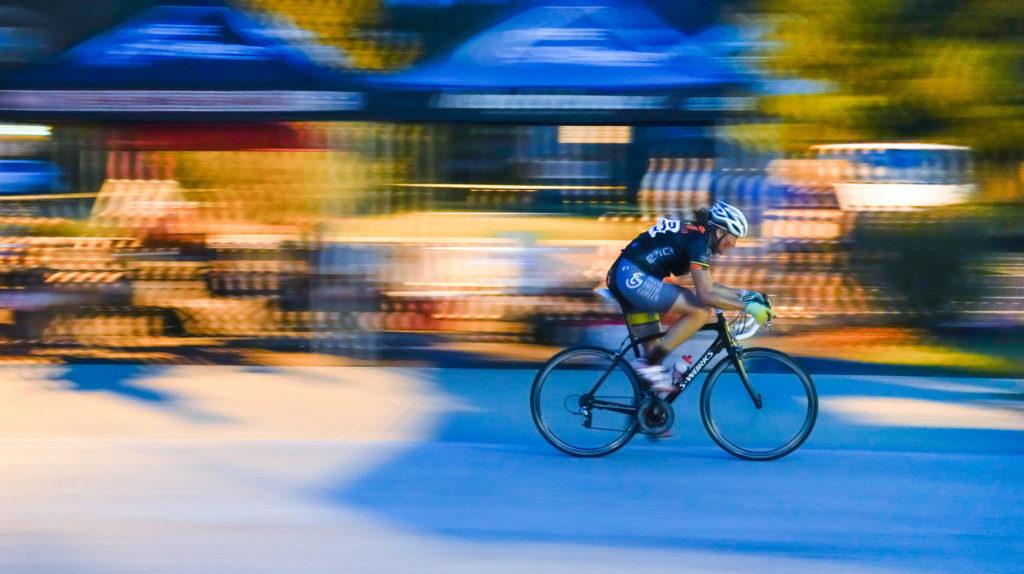
Panning a bicycle racer. The racer is in focus, and the background appears to be in motion. My settings were f4.5 @ 1/25th of a second, ISO 4000. Photograph by Jenn Mishra
When to Pan and Why?
Panning is a technique favored by sports and action photographers. It implies speed and motion, adding excitement to the story of action images.
The technique also helps the main subject stand out against a busy background. This is important in a sporting environment that might have crowds, stands, other players, and advertising in the background.
For similar reasons, panning is also used in street photography. The motion may not be as pronounced as it is in sports, but freezing a moving subject against a background in motion is one way to add separation.
Recommended Reading: Want a simple way to learn and master photography on the go? Grab our set of 44 printable Snap Cards for reference when you’re out shooting. They cover camera settings, camera techniques, and so much more. Check it out here.

Panning racecar in Le Mans, France. Photograph by Ameya Sawant
In panning, the moving subject is in focus while the static background appears to be in motion. This effect is created by moving your camera at the same speed as a moving subject.
How to Pan
The principles behind panning are simple, though the execution usually needs quite a bit of practice.
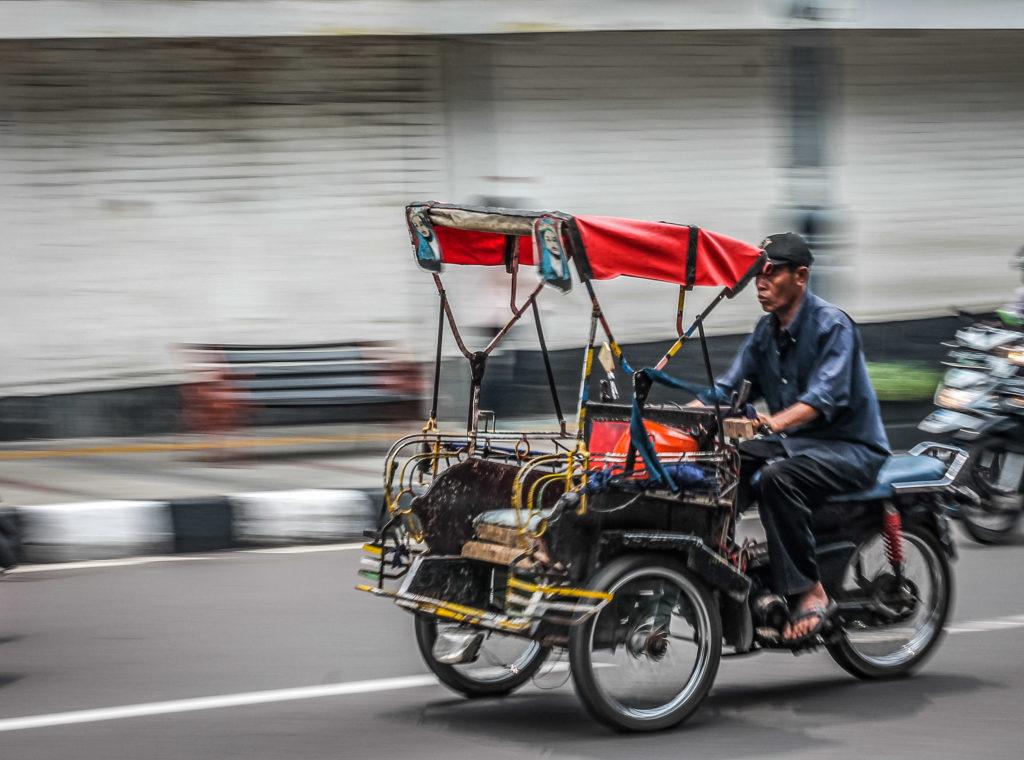
Panning catches this vehicle called a Becak in Indonesia. Photograph by Ivan Hermawan
Step 1: Find a Moving Object
If you’re at a sporting event, there will be patterns to the action. Watch how the athletes move and in what direction. The same principle applies if you’re photographing moving people on the street. Watch for patterns in motion. Where do people move? How fast do people move?
Place yourself so that your camera can move parallel to your subject. For panning to work, your subject needs to be moving across your frame. If your subject is moving towards or away from you, you won’t be able to pan.
Step 2: Set up Your Camera
To pan, you will need a slow shutter speed. How slow depends on how fast your subject is moving. As a general rule, the slower your subject, the slower your shutter speed needs to be.
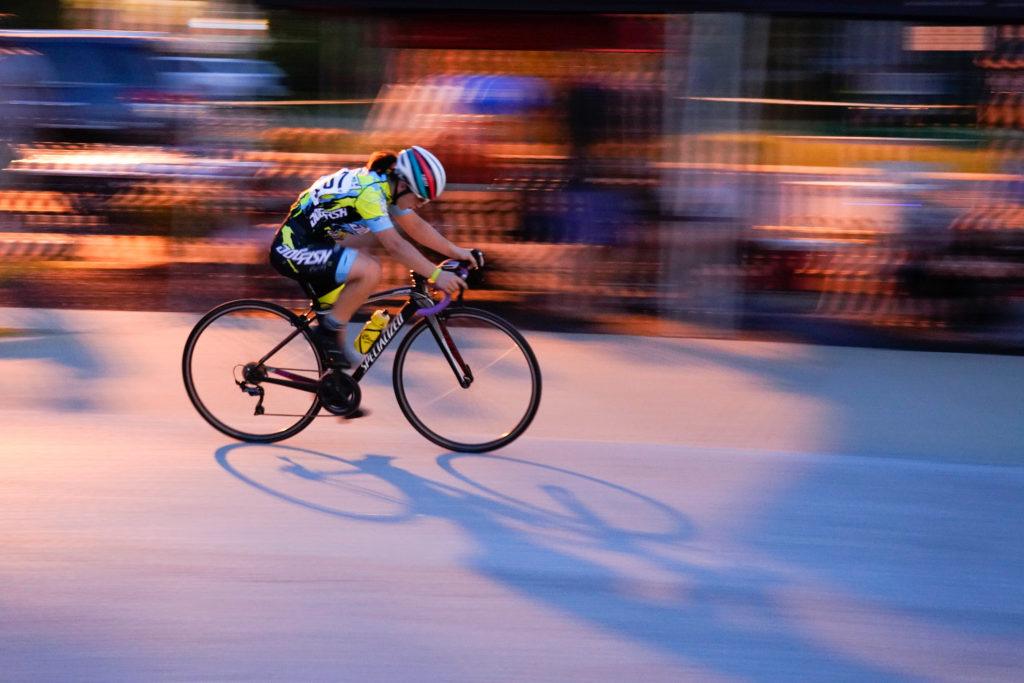
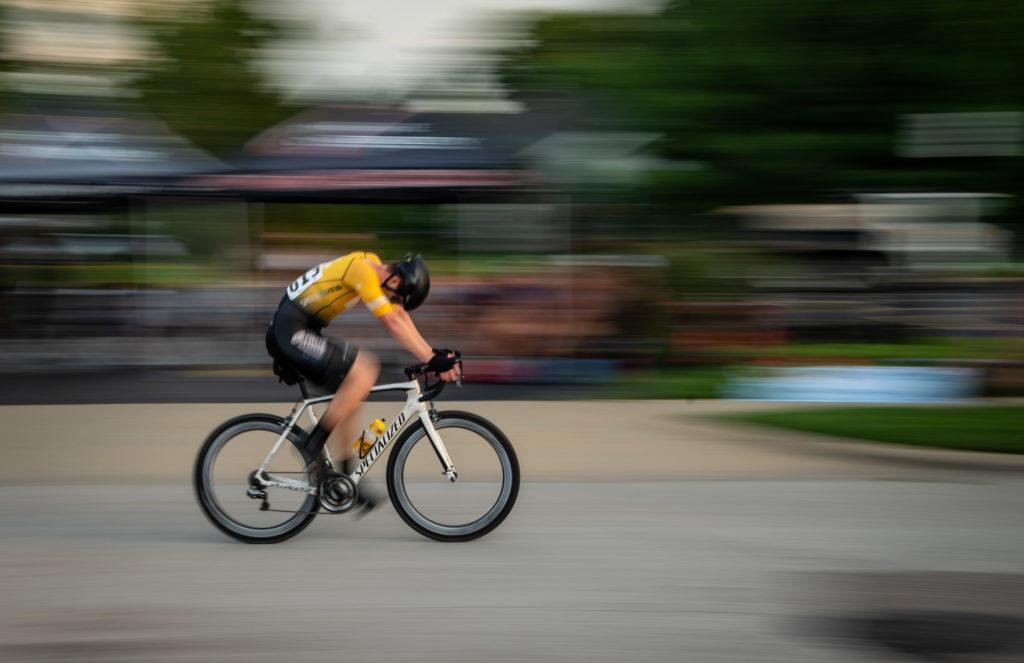
At this local bike race, cyclists went around the same track dozens of times. Each lap gave me opportunities to practice panning. My settings were f4.5 @ 1/25th of a second, ISO 5000. Photograph by Jenn Mishra
To photograph the bike race, I lowered my shutter speed to 1/25th of a second. I can handhold my camera at this shutter speed. You may need to make your aperture smaller (higher number) to allow less light into the camera.
In bright sunlight, you may need to use a neutral density (ND) filter to get the shutter speed slow enough.
You may want to have your camera on a monopod. This will hold the weight of the camera. It will help you stabilize the horizontal motion but allow you to have free movement.
Step 3: Pre-Focus
Auto-focus is great, but it’s not going to be quick enough to catch your moving subject.
At a sporting event, you may be able to prefocus on a point in the scene. Once you have a spot in focus, switch to manual focus mode.
If you use back-button focus, simply lift your finger off of the auto-focus button to lock focus.
The smaller aperture will help with focus. More of the scene will be in focus at a smaller aperture.

Pre-focus on the scene and wait for your subject to move through the frame. Photograph by Jenn Mishra
Step 4: Click and Move Your Camera
When your moving subject comes into frame, click your shutter button and move your camera. Your camera needs to be in motion while the shutter is open.
You’ll need to move your camera in a smooth horizontal motion to get the effect. If you jostle the camera up and down, the vertical movement will be seen in the background motion blur.
For panning to work, you’ll need to move your camera at the same speed as your subject. You also need to move in the same direction as your subject.
If you go faster or slower than your subject, you will see motion blur and your subject won’t be in sharp focus.
Matching your motion with your subject’s is the tricky part of panning.

Photograph by Jenn Mishra
Tips for Improving Panning
Don’t worry if your first attempts don’t work, or even if your first 1,000 attempts don’t work. Of all photographic techniques, panning might need the most practice.
Even when your panning shots don’t succeed, you might get some interesting motion blur shots.
Find yourself a scene that has a lot of predictable motion repetition. Ideally, the motion is consistent.
Even when your panning shots don’t succeed, you might get some interesting motion blur shots.
This can be a street with a lot of traffic, or a race that follows a repetitive course, like a bike or car race.
The repetitive motion will give you lots of opportunities to practice panning.
Photograph by Jenn Mishra
Here are some tips for improving your panning:
- Start Moving Early: The trick to panning is matching your speed with that of your subject. This is easier if your camera is already in motion. Start the motion, match it with your subject, and then click your shutter. This might take a little practice, but you’ll get the hang of it.
- Follow Through: Be loose and swing your body along with your camera. Keep moving through the shot and follow through. Just like in tennis, the time after you hit the ball is important. This will ensure that you have a smooth motion throughout the shot.
- Look for Background Features: Panning helps set your subject apart from a busy background. But if the background is too plain, you won’t be able to see the panning effect. It is the motion blur in the background features that make panning shots work.
- Use Burst Mode: Instead of one long exposure, try many shorter exposures. By “shorter,” I don’t mean shutter speeds that would freeze the action. If your camera remained stationary, then your subject would blur across the frame. Instead of a ½ second exposure, try five 1/10th of a second exposures.You may not be able to match the motion for the entire ½ second, but your motion may match up with your subject’s in one or two of the 1/10th of a second exposures.
- Move Away from Your Subject: If you’re having difficulty with panning, check your distance to your subject. It will be easier to pan if you are further from your subject. It is more difficult the closer you get. Think of a car whizzing by at speed. If you are close to the street, the fast car will go by in a blur. If you stand back a bit, the car doesn’t seem to go by as fast.
Recommended Reading: Want a simple way to learn and master photography on the go? Grab our set of 44 printable Snap Cards for reference when you’re out shooting. They cover camera settings, camera techniques, and so much more. Check it out here.

Photograph by Jenn Mishra
Conclusion
Panning is the effect created when your camera tracks a moving subject. If you didn’t follow your moving subject, you would get intentional motion blur. Since you’re tracking your subject, the background blurs instead.
Panning is easier to understand than to accomplish. It takes practice to physically match the speed of your subject.
Don’t give up if your keeper rate is low or even zero. Panning is one of the most difficult techniques to master. It takes a sharp sense of motion and the ability to match your movements to a moving subject.
Be relaxed and sharp at the same time.
Self-Check Quiz:
- Describe what a panned photo looks like.
- Why is panning a form of IMB?
- What type(s) of photography benefits from panning?
- What are two reasons you might use panning?
- Describe two tips for smoothing your motion when panning.
- Why will you need to use manual focus when panning?
- What is the benefit of using burst mode when panning?
- Why doesn’t panning work when your subject is against a plain background?
- What determines how slow your shutter needs to be for a successful panning shot?
- Find a street with a lot of foot or vehicular traffic.
- Place yourself parallel to the street and set your camera on a slow shutter speed. Try 1/25th of a second to start.
- Practice panning. Select your subject early, move your camera at the same speed as your subject, and press the shutter button.