


I am a proud Canadian, and like a lot of my fellow countrymates, I love hockey. My family grew up with hockey on TV all winter long, and though I didn’t watch religiously when I was quite young, my interest in and appreciation of the game grew as I got older. For two winters during high school, I had what I still consider to be one of my favorite jobs—I was hired as an usher at the local arena, and worked during the junior hockey team’s home games. I essentially got paid to watch hockey. And I loved it.
My love of sports, in general, continued to grow throughout my high school years. By the time I graduated, I had even started to consider a future in sports broadcasting after a presentation by the local TV sportscaster on career day. That was a dream I never did pursue as life took me in a different direction—I got married and started a family with a man who was not only a fellow sports fan but enjoyed playing rec hockey. This meant that when I eventually discovered my passion for sports photography, I could follow him to the rink and practice shooting hockey whenever I wanted.
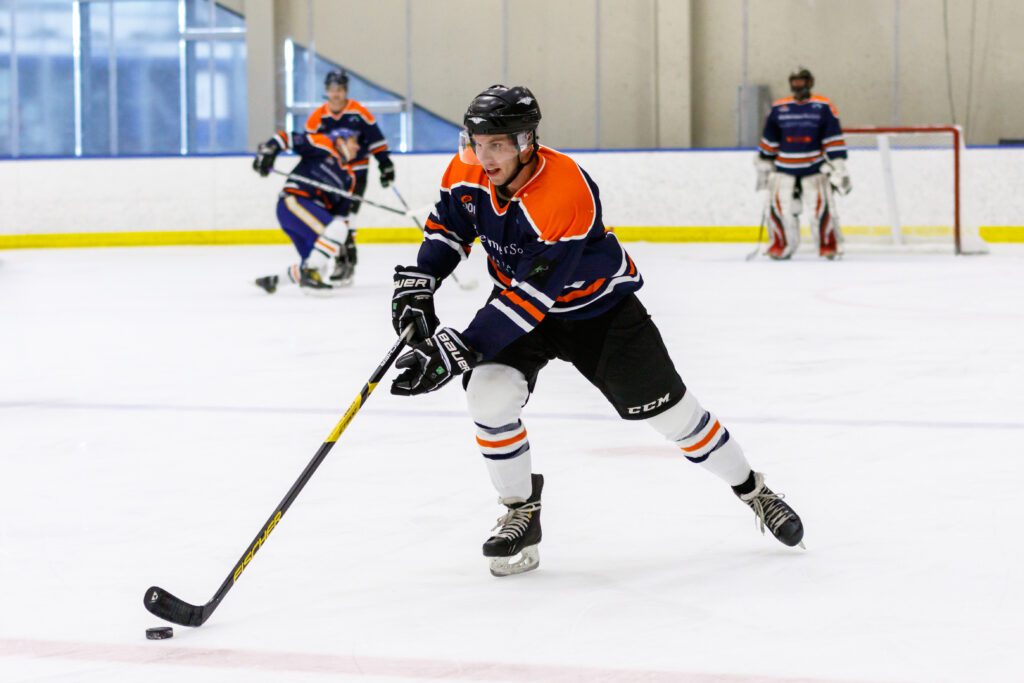
Photograph by Lisa Cannon
I have been able to take what I learned shooting in the hockey arena and transfer it to the gymnasium. Through a social media photography page, I connected with a group of local photographers shooting both volleyball and basketball for one of the universities in our city. As it turns out, the sports may be very different, but the photography skills used to capture them aren’t.
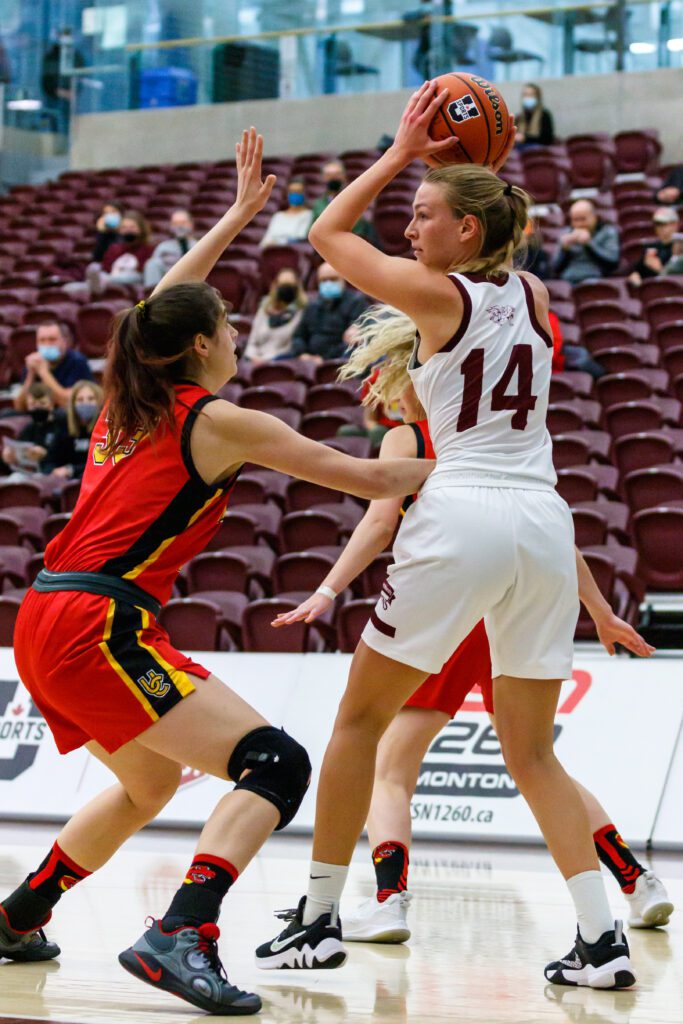
Photograph by Lisa Cannon
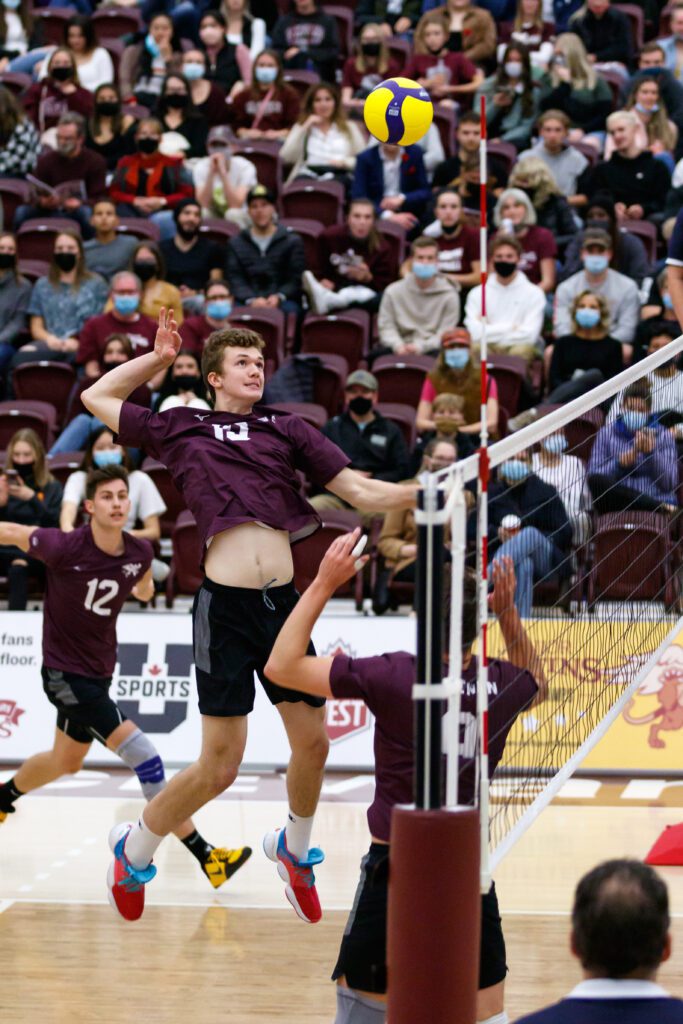
Photograph by Lisa Cannon
Have you ever wanted to know how to capture good quality shots of family members or friends while they play their favorite indoor sports? Or consider how the dynamic action photos that you see online are captured? Read on for my top tips to help you improve your indoor sports photography.
Here’s what we’ll cover:
- Best camera gear choices
- Best camera settings
- Dealing with low-level lighting
- Noise in your images
- Shooting with intent
- Knowing your sport
- A few final things
Recommended Reading: Want to expand your shooting skills and master photography? Grab our set of 65 beautifully designed and printable Action Cards that will give you over 200 photography assignments to help you take your photography to the next level. Check it out here.
Best Camera Gear Choices
Sports photography relies on high shutter speeds to freeze the action. This means you need camera gear that can support high shutter speeds in a variety of different circumstances. Unless you can be guaranteed perfect lighting conditions to shoot in—which is completely unrealistic—a camera body that can shoot at higher ISO settings with minimal noise is your ideal choice. A high frame per second rate is also an important feature to look for as it will help you to shoot at the pace of the game. Fortunately, there are many suitable camera body options on the market these days thanks in part to significant advances in technology over the past few years. There is plenty of information available online to help you choose the best camera for you, or work with the knowledgeable staff at your nearest camera store.
Fortunately, there are many suitable camera body options on the market these days thanks in part to significant advances in technology over the past few years.
Wide aperture lenses are also a must when shooting indoor sports action. Lenses with an f/2.8 or wider aperture will let as much light into your camera’s sensor as possible, and provide a shallow depth of field. This helps to draw attention to the subject of your image by keeping them sharp while adding blur—known as bokeh—to the background. The focal lengths you choose to invest in will depend on the sport you are shooting and the access you have to the playing surface. A 70-200mm f/2.8 lens is a versatile and almost standard lens choice for sports photographers as it is well suited for action that is farther away from you while allowing you to adjust as the play moves closer to you. If you can shoot from a position that is closer to the action, a wider angle zoom lens such as the 24-70mm is a great choice. I shoot mainly with my 70-200mm lens but may switch to a wider angle to help give me a variety of images. You will notice that image stabilization is an option on many lenses, but it isn’t necessary for sports photography—the high shutter speed you are shooting at will compensate for any lens shake that may occur, and the image stabilization system can slow down your lens.

Example of bokeh in an image. Photograph by Lisa Cannon
I would suggest buying the best gear your budget allows while keeping in mind your shooting situation. If you will be shooting many events at a semi-professional or even professional level, you will be expected to produce higher-quality images than parents of a youth hockey team, for instance, would be happy to have.
Key Lesson: Don’t forget you can also look for good used equipment, especially when it comes to lenses. Try to be sure to purchase from trusted and reliable sources whenever possible.
Best Camera Settings
When setting up your camera to shoot sports, start with the three exposure triangle basics. Because of the high-speed nature of most sports, your shutter speed also needs to be fast. I rarely have my camera set at a shutter speed below 1/1000 sec, regardless of the sport I am shooting, as this helps eliminate motion blur from my images. Next, choose a wide aperture setting to help bring in as much light as possible while keeping the background of the image soft. When shooting indoors, I use f/2.8 or f/3.2, as this gives me a depth of field that is shallow enough to provide good bokeh but still allows me to keep the player sharp. I then choose the lowest ISO setting I can to get the best exposure possible while maintaining the high shutter speed. Depending on the lighting conditions in the venue, that usually means shooting as high as ISO 2500 or 3200.

Left: Example with motion blur; Right: Example without motion blur. Photographs by Lisa Cannon
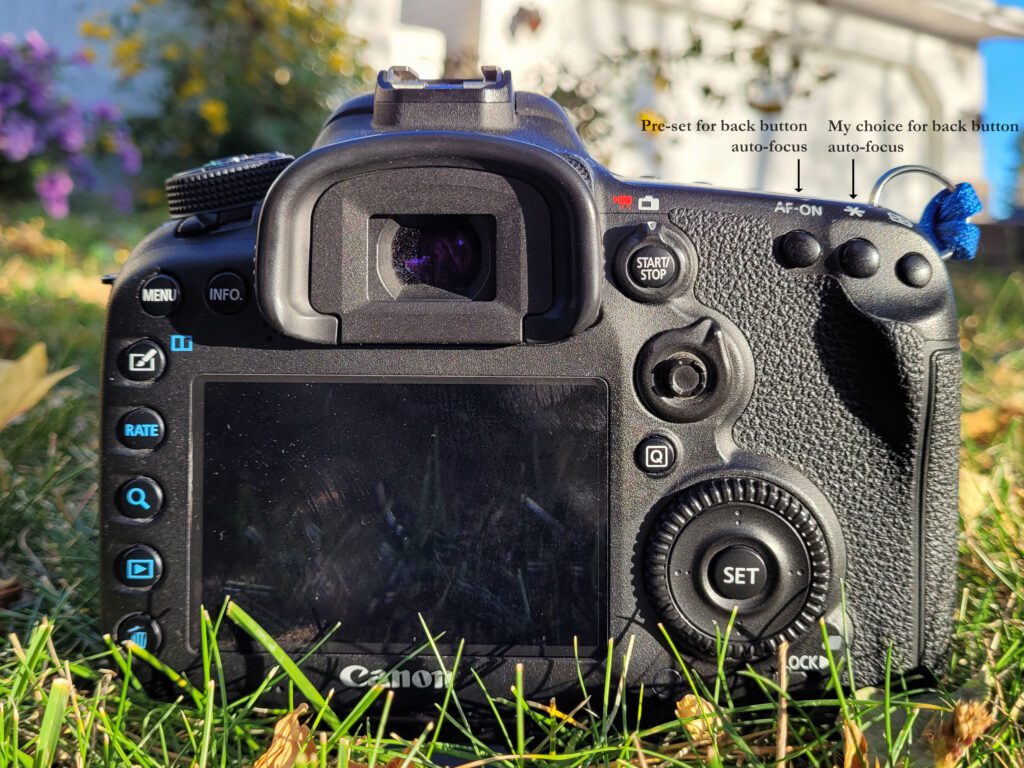
Once your exposure settings are locked in, it’s time to deal with your focus settings. The best results come from using a combination of the high-speed shutter with back-button auto-focus and continuous focus modes. Your camera’s shutter release button is set by default to control both the auto-focus and shutter release—you will want to re-assign the auto-focus to one of the buttons on the back of your camera to accommodate the continuous auto-focus mode. If you leave auto-focus on the shutter release, the camera will refocus each time you press the shutter button. Look for the button setup options in your camera’s menu system, usually under the custom control options, to choose which button to set as your auto-focus. Your camera may have an AF-ON button that is pre-programmed to auto-focus—you can keep it there or choose a different button. My hands are small, so I find it more comfortable to have mine set to the * button. No matter which button you set to auto-focus, don’t forget the separate step of removing the auto-focus function from the shutter release button, or your camera will continue to refocus each time you take a shot.
Because of the high-speed nature of most sports, your shutter speed also needs to be fast.
Photograph by Lisa Cannon
Continuous auto-focus mode tells your camera to hold focus on the chosen subject as long as the focus button stays pressed. To set your camera’s focus drive to continuous, look for the AI Servo mode on Canon cameras or AF-C mode on Nikon and Sony systems. Finally, set your shutter drive to high-speed continuous or burst mode. This means your shutter will continue to take exposures as long as you hold down the shutter release button.
Key Lesson: Once your camera is set up, choose your subject, press and hold your focus button, and when you’re ready, hold your shutter release to capture a burst of images. Remember to let go of the auto-focus button and repeat the process when you change subjects.
Dealing With Low-Level Lighting
As an amateur sports photographer, the venues I shoot in are usually plagued by poor quality and/or low-level lighting conditions. Professional photographers generally have the advantage of using top-of-the-line photography gear and may have access to the lighting systems built into the venues. This means the images you see from the pros will be cleaner and crisper than the ones you will be able to create in your hometown hockey rink or high school gym. You may be able to add your lighting to a game venue, but that will depend on the rules of the sport and venue, and your budget for the lighting equipment that would be required. I am not a professional, nor am I able to add lighting to the venues I shoot at, so I can only speak to my shooting experiences.

Shot in the dark end of the rink, 1/1000 sec, f/2.8, ISO 3200, edited. Photograph by Lisa Cannon
Key Lesson: Learning to deal with less-than-ideal lighting conditions is a must when shooting indoor events.
Recommended Reading: Want to expand your shooting skills and master photography? Grab our set of 65 beautifully designed and printable Action Cards that will give you over 200 photography assignments to help you take your photography to the next level. Check it out here.

Shot in the bright end of the rink, 1/1000 sec, f/3.2, ISO 2500, edited using identical settings as the dark image. Photograph by Lisa Cannon
In my opinion, lenses with wide aperture values and a camera body that supports higher ISO settings are a must in these conditions. The combination of the two will help you to create decently bright images while still producing images with as little noise as possible. Some post-processing will still probably be necessary to deal with noise and to further increase the brightness, but the better the image is captured in-camera, the fewer adjustments will be required. The wider aperture setting on your lens will also provide a shallow depth of field to help separate the subject of your photo from the background and any other players that may be in your scene.
In my opinion, lenses with wide aperture values and a camera body that supports higher ISO settings are a must in these (poor lighting) conditions.
Besides the choice of gear, there are a few things that can help when shooting under these conditions. Look for brighter areas of the venue that you may be able to shoot from. One arena I frequent has a very noticeable brightness difference between both ends of the rink, so I try to shoot from the bright side as much as the direction of gameplay allows. Other venues use lighting that can create an almost spotlight effect directly under the light itself. It may not be noticeable to the naked eye, so take a few test photos before the game and look for this type of effect. If you do see it, make an effort to try to time your shots while the players are in those brighter spots. And finally, turn on the Anti-Flicker setting if your camera warns it is needed—you will find it in your camera’s setup menus. Turning that feature on will help to combat the variations in brightness and even the color the lights themselves can create. I have linked an article at the end of this guide that will explain the phenomena in more detail.
Noise in Your Images
Because of the low lighting conditions inside arenas and gyms, noise in your images is an inevitable reality. I shoot with a Canon 7D Mark II which was promoted as a professional-level crop sensor body when it was released several years ago. I love shooting with it despite the drawbacks a crop sensor can bring. Indoor venues are where I struggle the most, but that doesn’t make my camera unusable. The crop sensor does not allow as much light into my camera as a full sensor would, simply due to the actual sensor size. This means I have to increase my ISO to compensate, which creates more noise in my images. I have linked a Wikipedia article at the end of this guide that you can reference for further information on sensor sizes.


Left: Edited with noise reduction applied; Right: Edited without noise reduction applied. Photographs by Lisa Cannon
There are two things to consider when deciding how high to set your ISO, regardless of the camera you are using. Setting the ISO high introduces sensor noise, and it will reach a point where the images are losing substantial detail as a result. However, setting the ISO lower and relying on post-processing software to brighten your images will also add noise, again affecting the quality of your final image. As with many parts of photography, I find the solution comes down to both the personal tolerance of the photographer and how the images are being used. I have found a middle ground between the amounts of ISO and post-processing noise that I can feel comfortable with, and that produces images that can still be printed to a decent size if the need arises. Since my images are mostly for online use, it means they are viewed in lower quality and compressed formats so any noise present in the image seems less concerning in my opinion.

The buzzer-beater winning basket—it’s not the best quality image, but it’s the only photograph of the moment. Photograph by Lisa Cannon
Key Lesson: Some of our most iconic sports images are from back in the film days, and are extremely noisy and grainy by today’s standards. This does not lessen the impact those images have. I believe a less-than-perfect photograph of a highlight moment is far better than no photograph at all.
Shooting With Intent

Photograph by Lisa Cannon
When I first started shooting sports, I made the common mistake of shooting with the “spray and pray” method. I would simply take advantage of the high-speed continuous shutter mode and shoot large bursts of images without really paying attention to what I was shooting. I would return home with far more images than necessary, most of which were average at best. Once I learned to shoot with purpose, my images started to improve. Shooting with purpose means that I try to follow the play through my viewfinder and only shoot when I see the action happening or think it’s about to. For example, because I enjoy watching figure skating competitions, I’ve learned what a skater’s body looks when they are getting ready to execute a jump. Even though I hadn’t shot figure skating before, I was able to catch this image during a practice session I was invited to shoot. As I was watching the skater warm-up, I recognized that her body motions indicated she was preparing to jump and I was able to get my camera up in time to catch her in the air. Later in the session, I was able to correctly time a spin jump to have the skater facing me.

Photograph by Lisa Cannon
Key Lesson: By slowing down a little and choosing your moments to shoot more carefully, you should end up with far more high-quality, dynamic images.
Knowing Your Sport
To me, knowing the sport you are shooting is a large part of the difference between being able to capture decent images and great ones. It is also an important part of being able to shoot with purpose, as I talked about in the previous section. Choosing when to shoot is much easier when you understand how the game is played, what each player’s job is during the game, and what a “big play” looks like. It can even be helpful to shoot the same team multiple times as you will start to recognize both individual player habits and team tendencies to watch for. All of that information can help you to predict the gameplay, which in turn will help you to choose your subject and time your images to capture the best moments.

Photograph by Lisa Cannon
Key Lesson: Learn about the sport you’re shooting if you’re not already familiar with it. Looking at images online can give you inspiration for the types of shots you might want to capture.
A Few Final Things
Since my goal in shooting sports images is to create images that can be enjoyed long after the event itself is over, I try to tell as much of the story of the moment as I can. To help achieve this, I always aim to capture the face and eyes of the athlete if I can. Not only does this make the image more engaging, but it also ensures the athlete is identifiable.

Image showing a clear face. Photograph by Lisa Cannon
If I can’t capture the face, my next best option is the jersey number as the teams know who is wearing what number. I also try to include the ball or puck if I can as it can help identify an offensive play from a defensive one or even show an important moment in the game.

Image using the jersey number to identify the player. Photograph by Lisa Cannon
If I am shooting outdoors, from the sidelines of an event, I always shoot from my knees to get a low, more dynamic angle on the players. The venue I shoot basketball and volleyball from allows me the same option, though I tend to shoot from various positions around the court to give my images a variety of looks. When it comes to shooting hockey, you are limited to shooting above the boards, meaning you are on the same level as the players. The good news is that doesn’t change from amateur to professional photographer—that is the look that is expected.
If I am shooting outdoors, from the sidelines of an event, I always shoot from my knees to get a low, more dynamic angle on the players.
One unique challenge to shooting in a hockey arena is having to shoot through the plexiglass. Professional arenas have cut-outs in the glass that allow you to put the end of a lens through, but I have yet to find one in a community rink. To get the best results, I look for the cleanest spots in the glass in the areas I plan to shoot from. Marks and smudges on the glass can show up in your images as discolorations and can be very difficult to correct in post-processing. When it comes time to shoot, keep your lens as close to the glass as possible to eliminate any reflection on the glass. You can use your lens hood to help keep you close without scratching your lens. There are also flexible rubber lens hoods available that will eliminate reflection by creating an almost seal around your lens while still allowing you to move the lens itself while you follow the play.
Recommended Reading: Want to expand your shooting skills and master photography? Grab our set of 65 beautifully designed and printable Action Cards that will give you over 200 photography assignments to help you take your photography to the next level. Check it out here.
My Final Thoughts
I love sports photography. I love the feeling of excitement I get when I see the images of the moments that I can capture. Being on the sidelines during a game leaves me feeling like part of the game, even though I am not part of the team. I hope I have left you with the knowledge you need to try it for yourself and experience the excitement, too.

Photograph by Lisa Cannon
Self-Check Quiz:
- What features are important to look for in a camera body that will be used for shooting sports?
- What three camera settings should you set first when preparing for sports photography?
- Are there lighting conditions that you should look for in an arena or gym?
- What are some differences between full and crop-sized sensors?
- Is it ok to have some noise in your images?
- Is there any benefit to learning about the sport you’re shooting?
Learning Assignment:
The best way to improve your images is to practice. You can use social media sites to help you find shooting opportunities if you don’t have a child or friend involved in the sports you are interested in capturing. Just be sure to speak to team organizers to get permission to shoot, and to set the terms for how the images will be used, especially if children are involved.


