

Introduction
Focus. Probably the most important trait of a high-quality image. You can have the most beautiful scene, object, or subject in an image, but if it’s not in focus, then you have nothing.
If an image is almost in perfect focus, then you can add a bit of sharpness using your post-processing package like Photoshop Lightroom, etc. If focus is way off, then your post-processing package cannot guess what you’ve attempted to capture so it’s beyond salvaging.
Take note that there will be tons of advice ‘out there’ on how to get sharp focus. Since this guide is about ‘My Tips…’ I will only share with you my core ingredients for achieving sharp focus.
What you will learn in this guide:
In this guide, I’d like to share a few of my tips about how to achieve sharp focus. We’ll cover both Manual focus and auto-focus because you are guaranteed to be needed both in your photography venture.
Recommended Reading: If you’d like to master camera settings to create gorgeous, creamy, blurry backgrounds, grab a copy of Photzy’s premium guide: Beautiful Background Blur.
What Are the Requirements for Sharp Focus?
Before we look at how I achieve sharp focus in my images, let’s look at the requirements for in-focus shots. Thereafter we can look at how to achieve that:
Appropriate Shutter Speed for Your Subject
When you take a still-life shot (any static object), then shutter speed is irrelevant – on the condition that your camera is on a tripod, of course. If it is not on a tripod, then at very slow shutter speeds the slightest camera movement (handshake) is going to spoil your image.
Appropriate Aperture for Your Subject
Before taking your image, you need to consider how much – and what part – of the scene, you want to be in focus on. For landscapes, you generally want everything to be in focus because you want to show off a beautiful foreground, middle section, and background.
For people photography, you may want everything in focus if you want your subject to be shown against a beautiful background. Other times you may want to blur everything but your subject, to emphasize the subject.
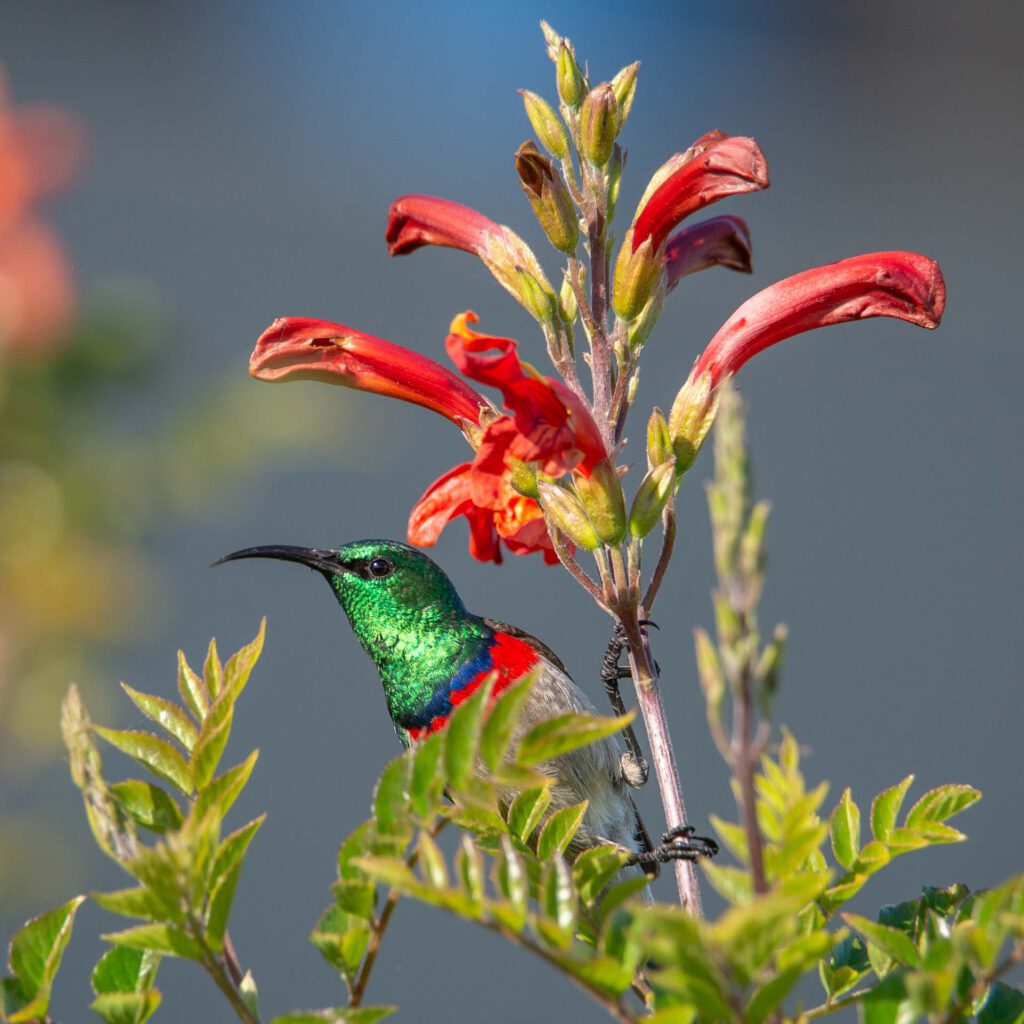
Photograph by Tobie Schalkwyk
In this image, the bird is well defined by portraying it against a blurred background. This was achieved by using my Tamron 150-600 G2’s widest aperture (f/6.3), its longest focal length (600mm), and a very short distance from the bird (+/- 2m or 6’). How did I get so close? I didn’t. I knew what its favorite source of nectar was so patiently waited for it at the right place to come closer to me.
Sufficient Light on Your Subject
Your camera needs sharp lines to achieve sharp focus. If it cannot find sharp lines, how will it know what is supposed to be in focus? It will be kind of ‘blind.’
Knowing What to Focus On
Your camera needs to know what exactly it is that you want to focus on. If you leave the camera to decide on your behalf, you are guaranteed to produce images with the ‘wrong’ sections of a scene in focus, and the subject/object that you wanted to emphasize out of focus.
Most cameras in full auto mode (like your cell phone’s camera) will simply put everything in focus. It’s probably a reasonable ‘second prize,’ but don’t expect to win photo competitions with the results. One of the main traits of a photo taken with a (cheap or expensive) camera in full auto mode is that everything is in focus all of the time.
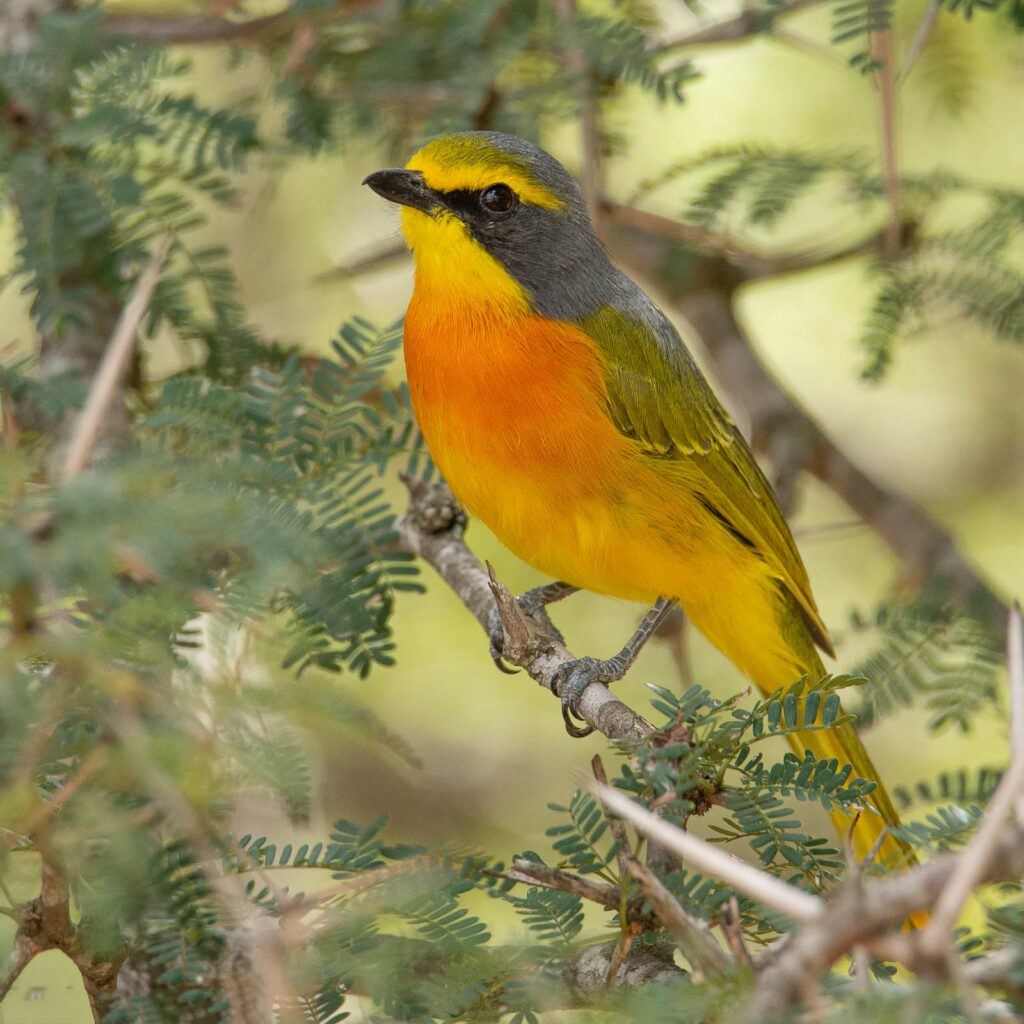
Photograph by Tobie Schalkwyk
Without telling the camera what to focus on, all of the leaves and branches in front of this beautiful bird would have been in focus too, wrapping the bird in a lot of clutter. How was the camera told what to focus on (and what to keep blurred)? More about that later.
Stability
This is super important in the event of long focal range images. If you are 400 steps away from your subject and zoom in at 600mm, then you can imagine that a 1mm movement of your camera relates to a few centimeters movement at your subject.
So, let’s address each of these requirements one by one and look at how to achieve each optimally.
Key Lesson: Sharp focus is not achieved by a single element but a combination of elements. The more of these elements you apply when taking your photograph, the higher the chances of reaching the optimum level of focus.
Appropriate Shutter Speeds and Aperture Settings
‘Well,’ – I can hear you thinking – ‘simply use super-fast shutter speeds, and then everything will be in focus, right?’
Not really. You can use your camera’s fastest shutter speed and if it does not know what to focus on, your main subject may still be out of focus. Another fact is that the faster your shutter speed, the less light enters your camera’s lens. You need to increase the width of your aperture (or your ISO setting) to compensate, but these two settings have their limitations.
What Are ‘Appropriate’ Shutter Speeds?
In general, shutter speeds of at least 1/250s-1/320s are fine for posed people shots because people are slow-moving compared to some other moving objects. When people are running or dancing – or when shooting animals – you may want to go a little faster on the shutter speed.

Photograph by Tobie Schalkwyk
I snapped this piece of the action at 1/800s. It was perhaps a little risky – 1/1200s would have been a little safer.
When people are running or dancing – or when shooting animals - you may want to go a little faster on the shutter speed.
My go-to shutter speed for birds is 1/800s. I sometimes go a bit slower for soaring birds and much slower for birds that do not move unless disturbed. I have taken sharp photos of owls at 1/60s. Why that slow? Well, owls are usually perched in dark places, so one needs a slow shutter speed to increase the light entering the lens.
Your goal should always be to use the slowest practical shutter speed so that you can keep your ISO setting as low as possible. High ISOs produce a snow-like ‘noise’ that can make your images look horrible.
What Are ‘Appropriate’ Aperture Settings?
Quite simply, it’s an aperture that would ONLY have the part of your image in focus that you want to emphasize. The in-focus section of your image is called the depth of field (DoF).
The DoF is determined by:
- Your distance from your main subject. The closer to your subject, the smaller the DoF and vice versa.
- Your aperture setting. The wider your aperture setting, the shallower your DoF.
If you thus want a real shallow DoF, then you need to get as close as possible to your subject and use a wide aperture setting (f/1.8, f/2.8, or otherwise the widest aperture setting allowed by your lens).
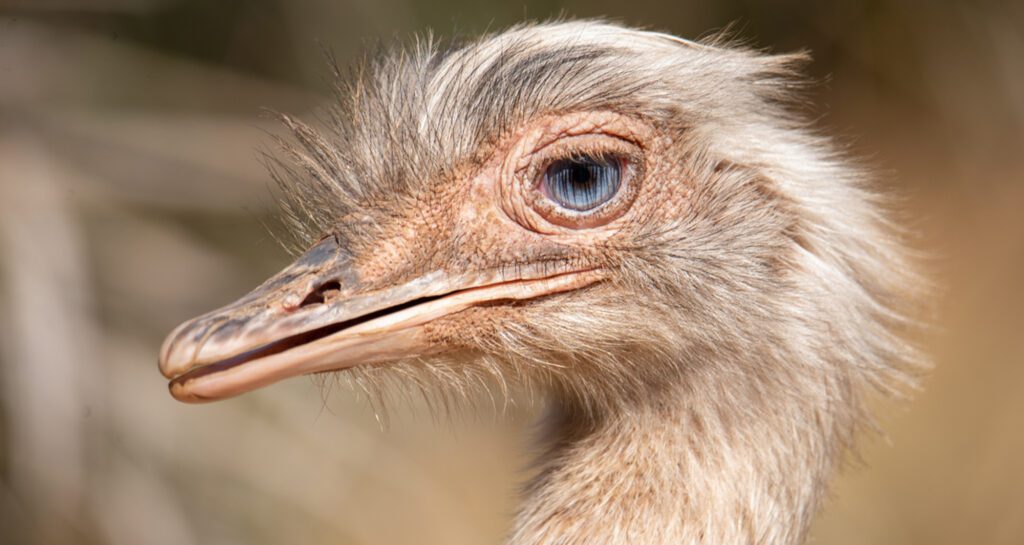
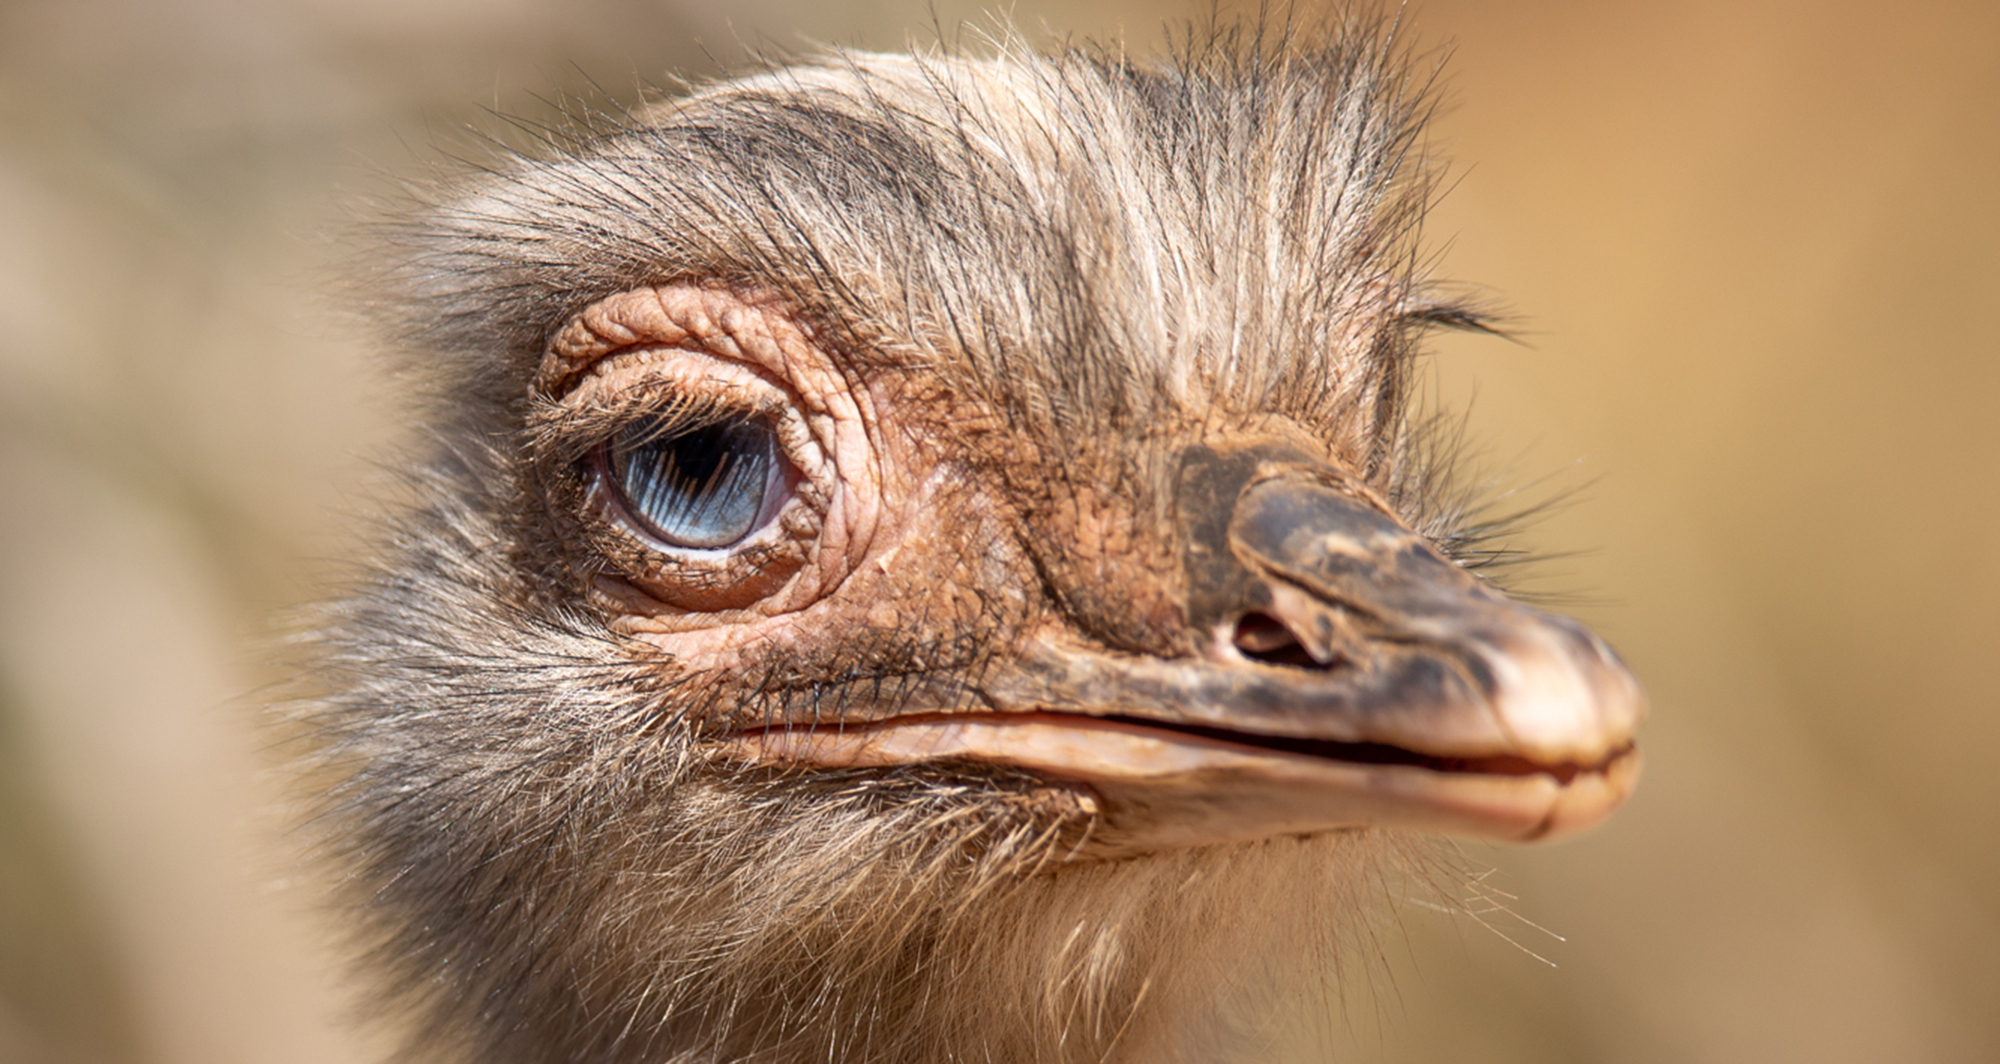
Photograph by Tobie Schalkwyk
My viewer’s eyes are pulled toward this bird’s eye by making it my main focal point. That was achieved by being about 3m (10’) away from it, a wide aperture (f/6.3), and a long focal length (600mm).
Note: The calculation of DoF is beyond the scope of this document. You can download and use apps on your cell phone/PC/laptop for easily calculating DoF. In general, use f/14 and narrower for landscapes and wider for other subjects.
Key Lesson: Every photograph deserves a little thinking about what exactly you want to achieve, what you want to emphasize, and how to achieve that. If you don’t do that, then the chances are that you will produce ‘average’ images more often than not. You have invested a lot of money and time in your photography, so why not make the most of it?
Recommended Reading: If you’d like to master camera settings to create gorgeous, creamy, blurry backgrounds, grab a copy of Photzy’s premium guide: Beautiful Background Blur.
Communication, Communication!
The fact that your camera has no idea what you want to emphasize in your image is a problem when allowing it to auto-select a suitable shutter speed and aperture setting. Suitable for what? How can you tell your camera what your intentions are?
I Always Use Manual Shooting Mode
I know that some photographers may recommend Shutter Speed Priority mode as an alternative to Manual mode, but I don’t like it. I will tell you why in a second.
Manual mode is indicated by an ‘M’ on Nikon mode selection dials. Shutter Speed Priority is indicated by an ‘S.’ This may be slightly different for other brands.

Photograph by Tobie Schalkwyk
Both these settings allow you to select a shutter speed of your choice. Shutter Speed Priority will let you select the shutter speed and then auto-adjust (what it deems to be) your Aperture and ISO settings until it reaches proper exposure. The problem is that you may want to have a sharp subject in the foreground and a blurred background – needing a wide aperture – and the camera does not know that thus selecting a ‘wrong’ aperture. That is why I always shoot in Manual mode.
Manual mode allows me to select a suitable shutter speed as well as aperture. I set my shutter speed to the lowest practical setting, adjust the aperture based on what I want in focus, and then adjust the ISO to get proper exposure.
Other Factors Having an Influence on Sharp Focus
What are the additional methods that I use to achieve sharp focus?
I use back button focus and AF-C.
As a bird photographer, I need to be able to keep the focus on fast-moving subjects, flying subjects, and subjects always moving around from one place to the next. How does back button focus come to the rescue?
Your DSLR camera focuses on your subject when pressing its shutter release button halfway down. It does not refocus until you release the shutter release button and press it halfway down again.
As a bird photographer, I need to be able to keep the focus on fast-moving subjects, flying subjects, and subjects always moving around from one place to the next.
If you want to keep the focus on your subject, you need to have AF-C (continuous focusing mode) selected and keep your shutter release button pressed halfway down. This may lead to a few issues:
- You can easily press too hard on the shutter release button and release the shutter by accident.
- The camera stops its continuous focusing action from the time your finger moves further down from the halfway mark to the ‘fully down’ mark. That implies that a fast-moving (flying or not) subject may be out of focus by the time you release the shutter.
With back button focus, the continuous focusing action is ‘disconnected’ from the shutter release button. The continuous focusing action keeps going regardless of how far your shutter release button is pushed down and your subject is always in focus.
I am not going into detail about how to set back button focus as it is different between camera brands and even different between different models within the same brand. Let me just say that in the event of my Nikon D600, I set the ‘Assign AE-L/AF-L button’ to AF-ON (f4 on the menu).

Photograph by Tobie Schalkwyk
That’s it. It’s that simple. So, it’s easy to jump between ‘normal’ focus and back button focus if you’d want to (I still prefer ‘normal’ focus for photographing humans, for some reason – or sometimes you want a stranger to take a photograph with you in it but you do not have a tripod with you and you don’t want to give him/her a lesson in back button focus!).
I Use Manual Focus When Needed
This is especially important when photographing a subject moving around between foliage or when photographing a subject through a fence. Your camera always assumes you are trying to focus on the closest object covered by your focus point (indicated by the square or relevant symbol in your camera’s viewfinder), so that is what it will focus on. Subjects behind a branch or other object will thus be out of focus more often than not when using auto-focus.

Photograph by Tobie Schalkwyk
This image would have been impossible without Manual Focus. Auto-focus would have focused on the grasses in the foreground every time.
When using manual focus, it is not always clear when exactly your subject is the sharpest in focus, so take numerous shots while moving the focus dial slightly back and forth. Whatever slight deviation there is from the perfect in-focus shot should be easy to correct in post-processing.
I Use the Reciprocal Rule of Photography
The reciprocal rule of photography eliminates camera shake when shooting without a tripod. It simply means that, for example, if you’re photographing an image at 500mm, your shutter speed should be 1/500s or faster. For 50mm, use a shutter speed of 1/50s or faster. Easy, hey?
Just keep the cropping factor in mind if you’re shooting with a crop sensor camera. In other words, 500mm and above is actually 500 x 1.5 = 750mm (Nikon) or 500 x 1.6 = 800mm (Canon). So, for a 500mm focal distance, your minimum shutter speed should be at least 1/750s (Nikon) or 1/800s (Canon).
I Always Try to Use the Central Focus Point
The central focus point always produces the sharpest focus. If I have to recompose, I focus via the central focus point by pressing my camera’s back button, then release the back button and move my camera to get the subject in the desired position. I then press the shutter release button.
The central focus point always produces the sharpest focus.
If you want to do the same with the default focus method, you’ll have to push your shutter release button halfway down and focus via the center focus point. Then hold your shutter release button halfway down whilst moving your camera to get your subject in the desired position. Then push the shutter release button fully down. Just make sure you’re not in Continuous Focus (AF-C) mode, otherwise, your camera will refocus as you move the camera around to reposition your subject.
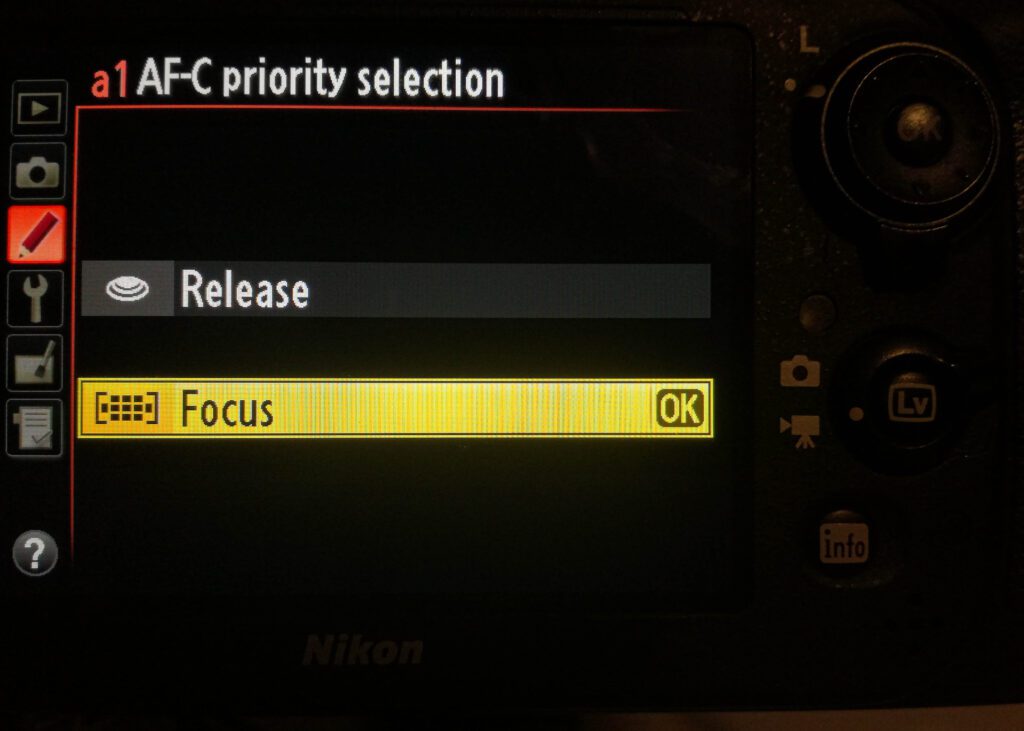
I Tell My Camera Not to Release the Shutter if Nothing Is in Focus
Most DSLRs allow you to set AF-C priority to:
- ‘Focus’ if you want the camera to release the shutter only if the area behind your focus point in the viewfinder is in focus.
- ‘Release’ if you want the camera to release the shutter even if the area behind the focus point is out of focus. I could never think of or find a need for this.
Photograph by Tobie Schalkwyk
In the event of recomposing your subject, ‘in focus’ of course means ‘was in focus’ before moving your subject into the desired position.
This feature has saved me a lot of times when snapping birds in flight or when using auto-focus on birds moving around in foliage. In such an event, I know that the shot was not taken and I immediately keep on trying.
I Get Close
It’s simple: the closer you are to your subject, the easier it is for your camera’s focusing system to find sharp lines. Today’s cameras are amazing at extracting details, even at great distances, but they can never beat an image of the same subject photographed at close range.
Key Lesson: There are many ways of improving your chances of achieving sharp focus. Some of them are significant, others not so much. The ones most valuable to you will depend on your genre of photography, or simply your purpose for each shot. Use them, try them out, and keep what works best for you.
About Sufficient Light
‘Sufficient light’ implies enough light for your camera to successfully establish focus. You will realize when light is insufficient; you’ll hear your lens’ inner focusing mechanism working hard – but unsuccessfully – as it tries to find something to focus on.
What do I do to ensure sufficient light?
- In the event of studio photography, I use my strobe or camera’s pilot (‘model’) light to establish focus.
- I almost always use my Speedlite when taking shots in dark/shady areas, even for nature photography.
- When in doubt, I sometimes use Auto-ISO to increase the light entering my lens. I set a maximum limit of 800 ISO, though, because I know that my images quickly build up too much noise at higher ISO levels.
About Stability
When photographing far-away shots (i.e., the moon) at long reach (up to 600mm in my case), then I do not save any effort to establish sharp focus. Each one of these steps adds to stability:
- Nothing more to say. Your hands simply are not stable!
- Mirror-up. This eliminates the camera shake caused by the mirror as it moves when you release the shutter.
- Remote shutter release. Cable or not. This eliminates movement of the camera such as when you finger-press the shutter release button.
- OS/IS/VR switched off. Sometimes this otherwise handy feature can cause slight ‘movement’ of the scene in the frame while releasing the shutter.

Photograph by Tobie Schalkwyk
A case for a tripod. I shot this sunrise from my study, way against the reciprocal rules of photography: 1/200s at 350mm. A handheld shot would most likely have been unsuccessful.
Recommended Reading: If you’d like to master camera settings to create gorgeous, creamy, blurry backgrounds, grab a copy of Photzy’s premium guide: Beautiful Background Blur.
Conclusion

Photograph by Tobie Schalkwyk
Well, these are my tips for getting sharp images, in a nutshell. I hope that you have learned something new from at least one of them, making the read worth it!
The bottom line is that focus is the most important property of a high-quality image. When you do it well, your work will be admired. Fail and you will have nothing to share with your friends and family.
Now get out and produce awesome in-focus images! Few things in life are more satisfying!

Photograph by Tobie Schalkwyk
Self-Check Quiz:
Use the following quiz to test your knowledge of what you have read above:
- Name a proven method for emphasizing your main subject in an image.
- Name at least three ways of getting sharp focus.
- When is Manual Focus the best option?
- When does auto-focus go wrong?
- What is the depth of field (DoF)? Why is it important to a photographer?
- What is the advantage of shooting in Manual mode?
Assignment:
- See if you can set your camera to back button focus. If you use anything but a Nikon, then this guide will only guide you in the right direction. You may have to consult your camera’s user guide or do a few Google searches to get all of the information needed.
- Switchback and forth between back button focus and standard auto-focus.
- Use the back button focus to compose your main subject in-camera.


