

Cityscapes are one of my favorite subjects to photograph. I love the idea of people concentrated into a relatively small space, each impacting the view in their minuscule way. Lights in the windows of high-rises, streetlights, and LED-lit company names all add to the drama. Cities change over time, so each capture is merely a moment of evolution toward an unknown destination.
Throughout my time photographing cities, I’ve developed a list of some things I look for to create an image with impact. In this guide, I’ll be covering the four best tips I have to create dramatic cityscapes:
- Look for interesting weather conditions, even adverse.
- Shoot during the best light of the day.
- Explore to find uncommon perspectives.
- Look for compositions that lead the viewer into the photograph.
Recommended Reading: If you’d like to learn more and improve your landscape photography, grab a copy of Photzy’s bestselling premium guide: Complete Landscape Photography.
Weather
My son and I have a rule: if there is rain in the afternoon, and the precipitation concludes by the evening, we will go and shoot the sunset near the city. Ninety percent of the time, the sunset will be fantastic and reflect brilliant colors off of the buildings. I don’t exactly know why, nor do I need to, but it’s a consistent phenomenon. When you pay attention to the weather, you’ll find patterns in it that you can use to your advantage.

Sunset after the rain. Photograph by Tomas Alvarez
The first tip for photographing cityscapes is making sure there are some clouds, or some sort of drama in the sky to fill that space of the image. Big, fluffy clouds will do, especially if you can get some reflections of them off buildings with glass exteriors. Adverse weather, such as rainy or snowy conditions, adds an element to a scene that makes it interesting.
Adverse weather, such as rainy or snowy conditions, adds an element to a scene that makes it interesting.
If clouds aren’t an option, or if it’s too dark to see details in the sky, creating images after a fresh rain will provide a different look by reflecting light in the reverse direction, from the ground to the sky. Shiny, wet streets reflect the city lights and headlights from vehicles up to the clouds. This light will give your sky a little detail and a wonderful glow.

Cold Blue Hour cityscape with steam as a compositional element. Photograph by Tomas Alvarez
Key Lesson: To make your images really pop, you should employ some interest in the sky or a different element in the top half of your image.
Additionally, if you live in a climate that gets really cold in the winter (and I mean below zero cold), you can take advantage of the clear air present when the temperature drops. Here in Minnesota, USA, we have a week in January where the temperature remains below zero Fahrenheit for at least a week. When that happens, there is very little particulate in the air, and it’s extremely clear. These conditions are perfect for photography – not necessarily for humans, though. We also have a few buildings in our downtown areas that exhaust steam, and the trails of steam can be used as elements in the image.
The Best Light
As you’ve already probably guessed, the best time to shoot cityscapes is when the city lights are on. This can be in the golden or blue hours, or the dark of night. Time is a factor when shooting during the golden and blue hours, but night shots add a little more complexity and offer a little more reward.
Creating images during the Golden Hour gives you a lot of options for using the sunlight reflecting off of buildings and less reliance on ambient streetlights. A nice sky cascading from blue to orange on the horizon will take an average scene and push it to another level. The creative possibilities are endless when there is enough light.
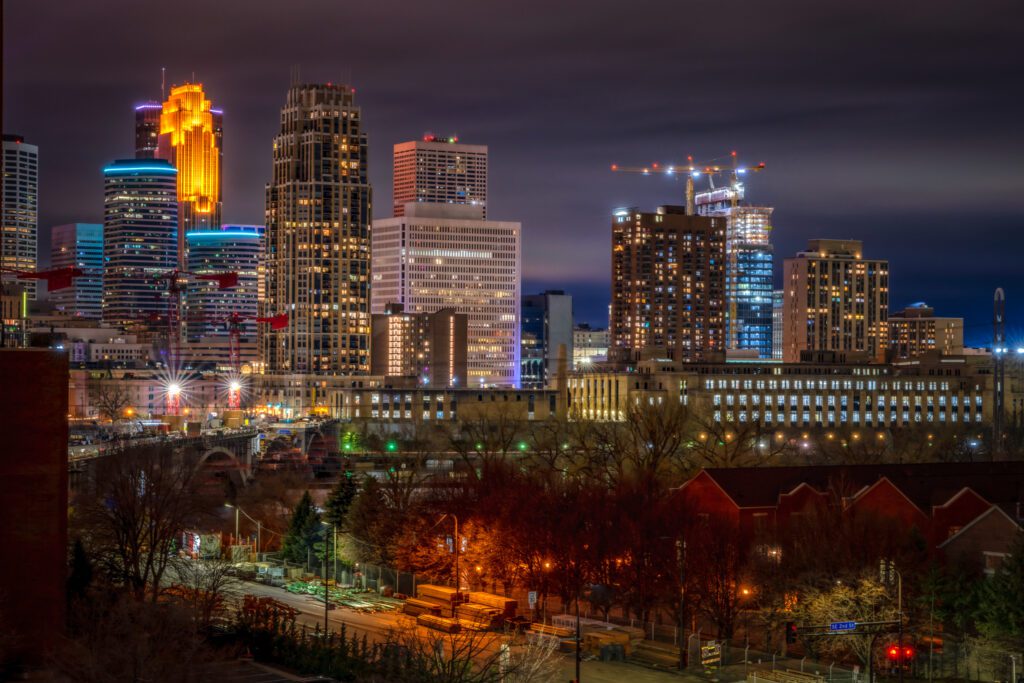
Minneapolis at night and under construction. Shot from a parking ramp. Photograph by Tomas Alvarez
Your options are a little more limited when shooting during the Blue Hour, though. The Blue Hour is my favorite. I love how the sky glows in a vibrant blue, juxtaposed to the orange-ish glow of city streets. If you are into that faded teal and orange look, then this is a great time to shoot anything in the city, especially neon lights.
Shooting after dark opens the door to a lot of creative possibilities, though technically, it is a little trickier to focus, and moving, lit objects will present a challenge with light streaks. The latter, though, can be desirable in an image to provide a level of the dimension of motion to the image. Depending on the lighting – typically mixed lighting, old orange sodium lights, and newer daylight-colored LEDs – you may need to adjust your white balance in post-processing to get the right look.
Key Lesson: The best light is typically when the lights of the city are on or reflect the color from the sky.
Find Uncommon Perspectives

A unique city perspective is only visible from the top of a parking ramp. Photograph by Tomas Alvarez
I love urban exploration. For a while, I would get together with friends and we would drive around and check out the views from multi-level car parks. We would go from one ramp to another to find the ones with the best views. It’s an easy way to find an uncommon perspective that shows the city in a way that hasn’t been seen.
Here in the twin cities, we have a few parks that have wonderful views but only when the trees don’t have leaves on the branches. Finding these locations is a great way to stay creative and energized when the weather turns foul and the trees are bare.

Building compression. Photograph by Tomas Alvarez
Other places to look for uncommonly photographed views are bridges, streets that lead to brightly lit areas, brightly lit restaurant districts, city parks, and historical areas. There’s a good chance that you’ve seen your local city photographed in the best locations. Visit those places and look to see if you can find a similar vantage point.
As an aside, you could use a super-zoom lens to get an ultra-closeup of a building or group of buildings. Long lenses tend to compress the buildings into a 2D plane, and they look different in that way.
Key Lesson: Finding a unique perspective of what has already been photographed will help you in creating a stand-out image.
Compositional Depth
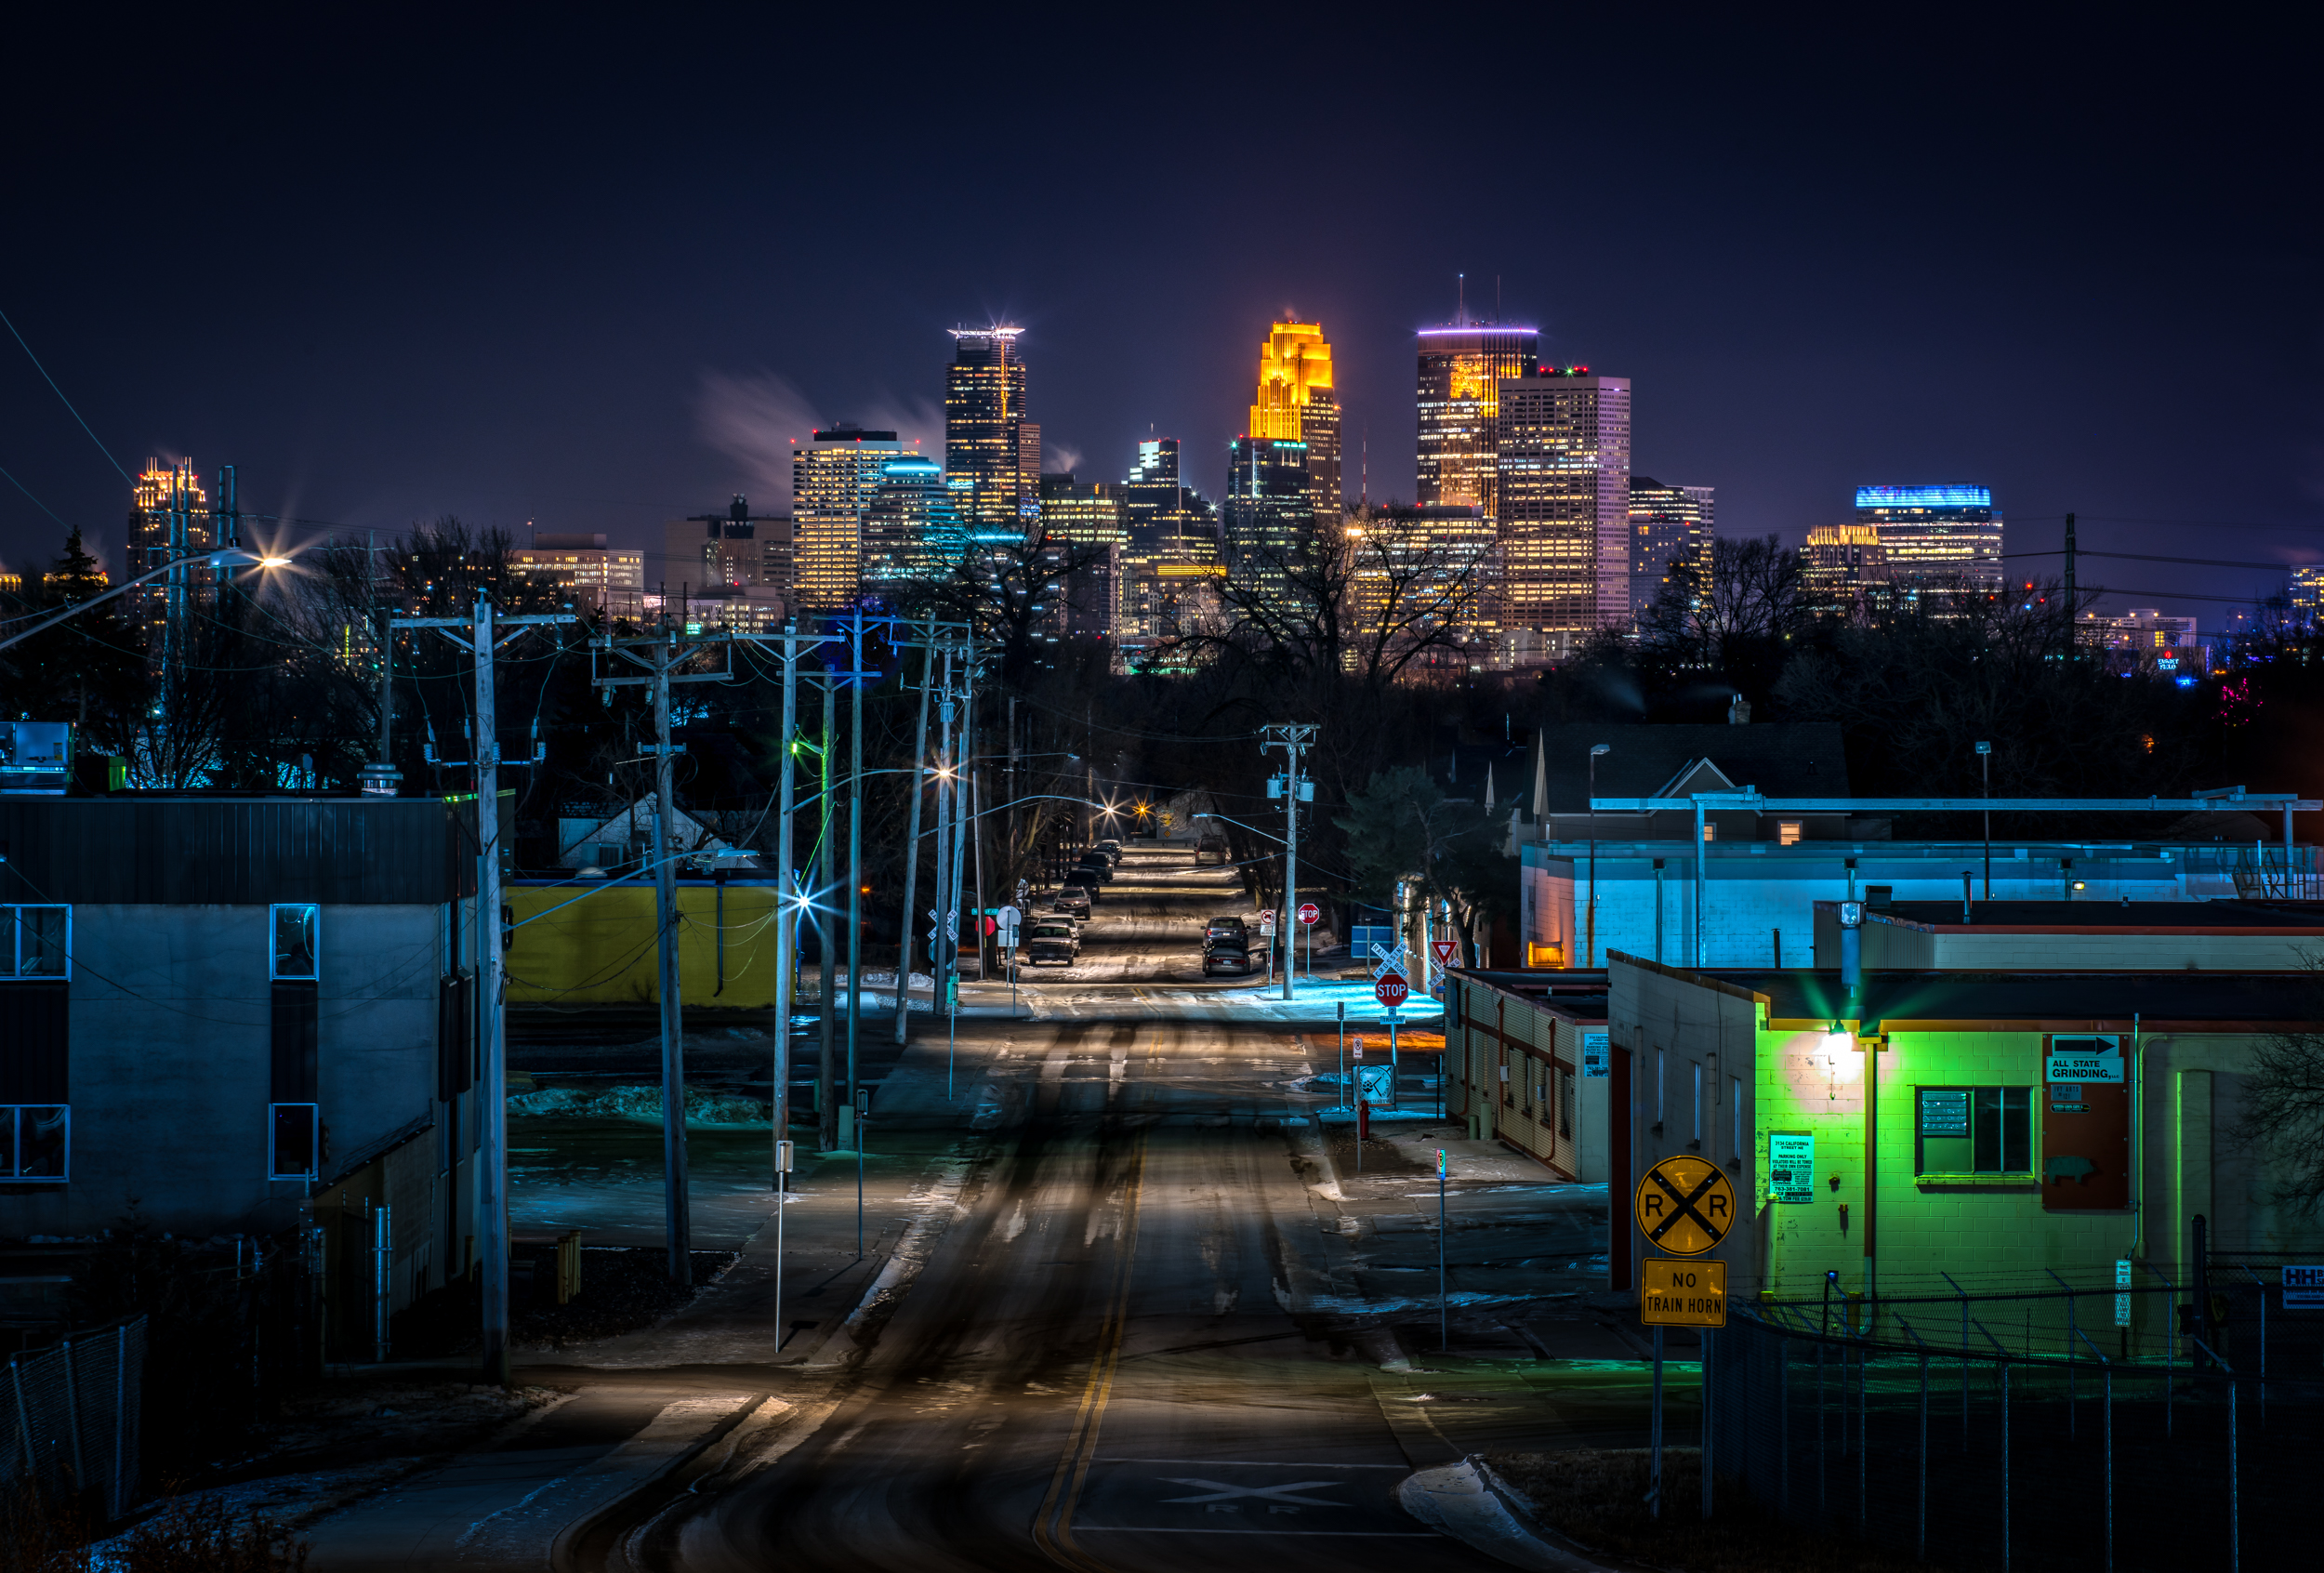
A simple cityscape composition. Photograph by Tomas Alvarez
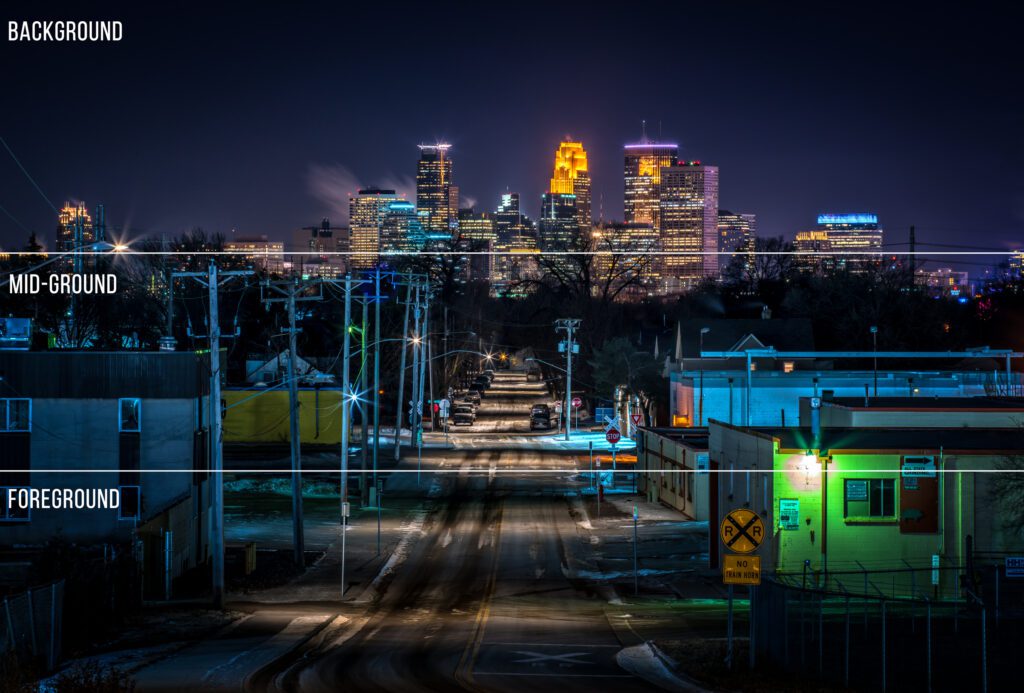
Composition is the element that ties everything together. The orientation of buildings, streets, and light is a critical component of a good cityscape. Your composition doesn’t have to be complex, but simply breaking down the elements of the image into foreground, mid-ground, and background using the rule of thirds is an easy way to add depth to a photograph.
The image above employs a few compositional elements to aid in drawing the viewer in. First, the image, when split into thirds, shows the foreground, mid-ground, and background. The green building in the foreground commands the viewer’s attention first, partly because it’s bright, and also because the bright spot is near the endpoint of the Golden Spiral.
Composition is the element that ties everything together.
The mid-ground doesn’t have too much in it, but the road works to pull the viewer deeper into the image with its leading lines.
Finally, in the background, we get to the city and its relative position to the fore and mid-ground. I have titled this image “The Road to Oz” since it reminds me of the Wizard of Oz and the Yellow-Brick Road.
Keeping your composition simple will ensure the context of your image is understood effectively, but it’ll be important to experiment to find the best composition for each scene.
Leading Lines

A long set of leading lines. The car adds interest where there would be none without it. Photograph by Tomas Alvarez
Leading lines is the compositional technique I employ the most in my cityscape photography. As most cities are laid out in a grid fashion, using streets to lead the viewer to a different part of an image is almost easy. When you see it, you know it.
The image above is a good illustration of the technique. When I framed up my shot, I thought the road below the bridge on which I stood was perfect for a foreground, drawing the viewer up to the city. There were very few vehicles on the road at the time, but when I saw a car go by, I thought it would add an element of interest that the image would need. In this case, it adds the potential of story arcs into the image. Is that car fleeing the city? Is it the beginning of a new adventure for the occupant? We don’t know why the driver is there at that moment, but it’s fun to think about and create a story in our heads.
Key Lesson: Your photograph can employ a simple composition, but try to use other elements to draw viewers into your image.
Recommended Reading: If you’d like to learn more and improve your landscape photography, grab a copy of Photzy’s bestselling premium guide: Complete Landscape Photography.
So, there you have it. These are the best four tips for shooting cityscapes that I have. You may not be able to get all the tips to work together for a single shot, but when you do, it’ll be magic. Exploring your area is probably the most critical tip because once you’ve found some unique perspectives, you just need the rest of the items to fall into place for a good image. I also really like to find views that other people missed. They’re out there for every region – you just have to put in the time to find them. When you see other photographers post shots with the same composition and location, you’ll know you found something good.
Self-Check Quiz:
- What are some commonly shot cityscapes near you?
- Are there other perspectives?
- Where are some rarely seen perspectives?
- Are there any parking ramps, city parks, or bridges that may provide a unique perspective?
- Do you have any cityscapes with obvious leading lines that you can use in your image?
- What weather patterns are you aware of in your area that may help you create better images?


