


If I mention the words ‘color gels,’ I’m guessing that a lot of you will immediately think of the overly bright and stylized images that were produced with them in the 1980s. But actually, if used with a little sensitivity, they can produce a wide range of looks and styles that can elevate and add interest to your images.
In this article, we’ll look at how to incorporate color gels into your photography along with the equipment and knowledge you’ll need to capture exciting and vibrant images.
Here is what we will cover:
- What are color gels?
- Complementary colors
- What equipment do you need?
- Using color gels for color correction
- Using color gels for creative effects
Recommended Reading: If you’re interested in learning more about light and how you can use it to improve your photography, grab a copy of Photzy’s bestselling premium guide: Understanding Light Book Two.
What are Color Gels?
Color gels (sometimes known as lighting gels) are transparent or semi-transparent sheets available in a variety of colors, which are placed over your lighting source. The difference between specialist gels and ordinary color cellophane is that the gels are made from heat-resistant plastics. Because color gels are often used for cinematic lighting, you’ll generally find them sold in rolls or sheets that are then cut to the correct size. This can be expensive if you want to experiment with lots of different colors, but you can find small kits of different color gels sold by photographic manufacturers such as Lee Filters and Lastolite. Of course, you can use colored cellophane, but it will melt quickly, meaning you need to keep an eye on it!
Complimentary Colors
Before you start working with color gels, you need to have an idea of how colors work together and which ones are complementary. A lot of this is instinctive; we tend to know which colors work together! For example, you can work with colors that come from the same family (e.g. shades of red and orange). Complementary colors are those that are opposite each other on the color wheel (e.g. red and green). So, using these two colors together will produce vibrant images that look pleasing to the human eye.
Key Lesson: Don’t forget to take into account the effect that different color gels will have on skin tones. Obviously, if you’re shooting directly onto a model’s face with a gel, the face will pick up the tones of that gel. But if you use color gels to light the background, your model’s face will develop tones from its complementary color. For example, if you light the background with blue gels, then the skin will take on more yellow tones.

Here’s a simple RYB color wheel to give you an idea of how colors work together.
What Equipment Do You Need?
Obviously, you’ll need your camera and chosen lens! Ideally, you’ll be working with studio lighting and strobes, as you will then have far more creative possibilities. However, you can also use color gels with a flashgun.
Color gels come in various forms. Filters or rolls are the most common. As I mentioned previously, you can also use cellophane, but you’ll need to watch the heat generated from your lights. Remember that color gels may have different densities, and cellophane in particular is very thin, so the resulting colors may not be as vivid. Therefore, you can use double layers of gels to create more vivid colors.
Remember that color gels may have different densities, and cellophane in particular is very thin, so the resulting colors may not be as vivid.
You will also need to attach your color gels to your lights. This doesn’t need to be an expensive endeavor! There are specialist gel frame assembly units available, but you can use some more DIY hacks. If you’re using a flashgun, then your best bet is simply to use good old duct tape! With studio lights there are more options. Barn doors are a great choice, as they’ll keep the gels a small distance from the actual light. Attach the gels to the barn doors using either wooden clothes pegs (don’t use plastic, as they’ll melt) or a double clip.
Key Lesson: Do not use continuous lighting with color gels as they will just melt and create an expensive mess! If you are using strobe lighting, you need to remember to turn off the modeling light. This is because the modeling light is on constantly (unlike the flash) and will melt color gels.
Using Color Gels for Color Correction
Before we look at the creative possibilities of color gels, I just want to mention how they can be used to aid color correction. Now, modern cameras have pretty accurate built-in white balance settings. Problems can occasionally arise if you’re using multiple light sources, such as fill-in flash in a tungsten-lit room.
In many cases, simply using the tungsten white balance setting will be enough to correct the orange lighting that tungsten produces. However, if you add in flash, you may find that you’re left with an overly cold and blue image as the flash fights with the tungsten lighting. A simple way to deal with this is to add an orange color correction gel over your flash. This will ensure that all your lighting is producing a tungsten cast and, using the tungsten white balance setting, you’ll be able to produce a neutrally balanced image.

An indoor shot such as this can benefit from color gels to help correct tungsten lighting. Photograph by Natalia Hofmann
Using Color Gels for Creative Effects
When it comes to using color gels, the only limit should be your imagination. Don’t be afraid to experiment and try out different things.
For me, color gels come into their own when used in a studio or home studio environment. It’s here that you can let your creativity loose and get lots of different looks. I would recommend using a gray background, as this will provide a neutral background for the color gels to work on.
Now, ideally you’ll be working with studio lights. If you’re working with flashguns, though, you’ll need to use them off-camera so that you can angle them and direct the gels to where you want them to hit.
Think about what you want to achieve with your color gels. Do you want to go for a subtle look? If so, then think about using a single sheet of a lighter color gel as a rim light and use it to illuminate one side of your model’s face. This will add a subtle hint of color on the skin.
Alternatively, you could use color gels to light your background to add interesting colors and shades. You can light your model’s face separately with normal lighting to allow the background color gels to just be picked up slightly on the skin.

Try using color gels as rim lighting to pick out details in your subject. Photograph by Alex Holyoake
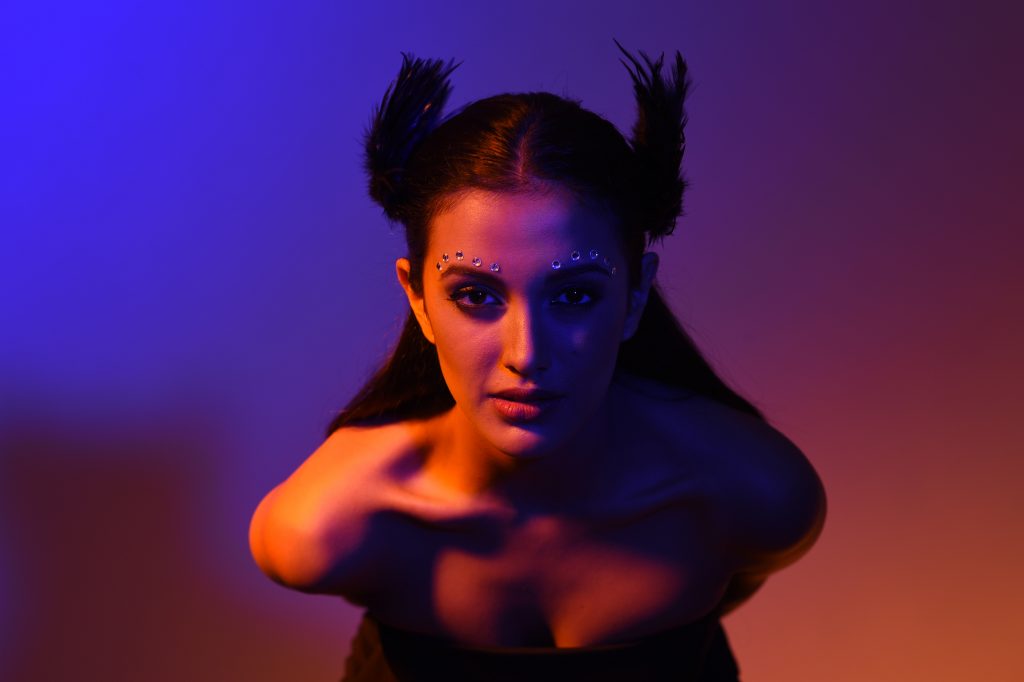
Or why not go for the full effect and use two complementary color gels on either side of the face? To avoid a garish look, go for darker and muted colors, such as purples, teals, and blues. You can create an atmospheric and intriguing look with very little effort. Another trick is to use color gels to light your subject’s hair, giving it a subtle glow.
To avoid a garish look, go for darker and muted colors, such as purples, teals, and blues. You can create an atmospheric and intriguing look with very little effort.
If you have a full studio setup, then work with three studio lights. This will give you the most options for lighting both your background and subject in the way that you wish to. You will find that using a softbox or beauty dish on your subject (if you’re not lighting the subject’s face with gels) will give you the softest and most flattering lighting to combine with your color gels. I would also recommend keeping a silver reflector handy, as this will allow you to direct the light further and angle it back into any shadows.
Obviously, these are just some suggestions to get you started and to help your mind start thinking creatively when it comes to using color gels. But there really are no limits to how you decide to use color gels.
Key Lesson: If in doubt, start subtly! Color gels can become quite garish if you use a lot of layers or very bright colors. Start with a gentle palette and build up the gels to create your desired effect
Recommended Reading: If you’re interested in learning more about light and how you can use it to improve your photography, grab a copy of Photzy’s bestselling premium guide: Understanding Light Book Two.
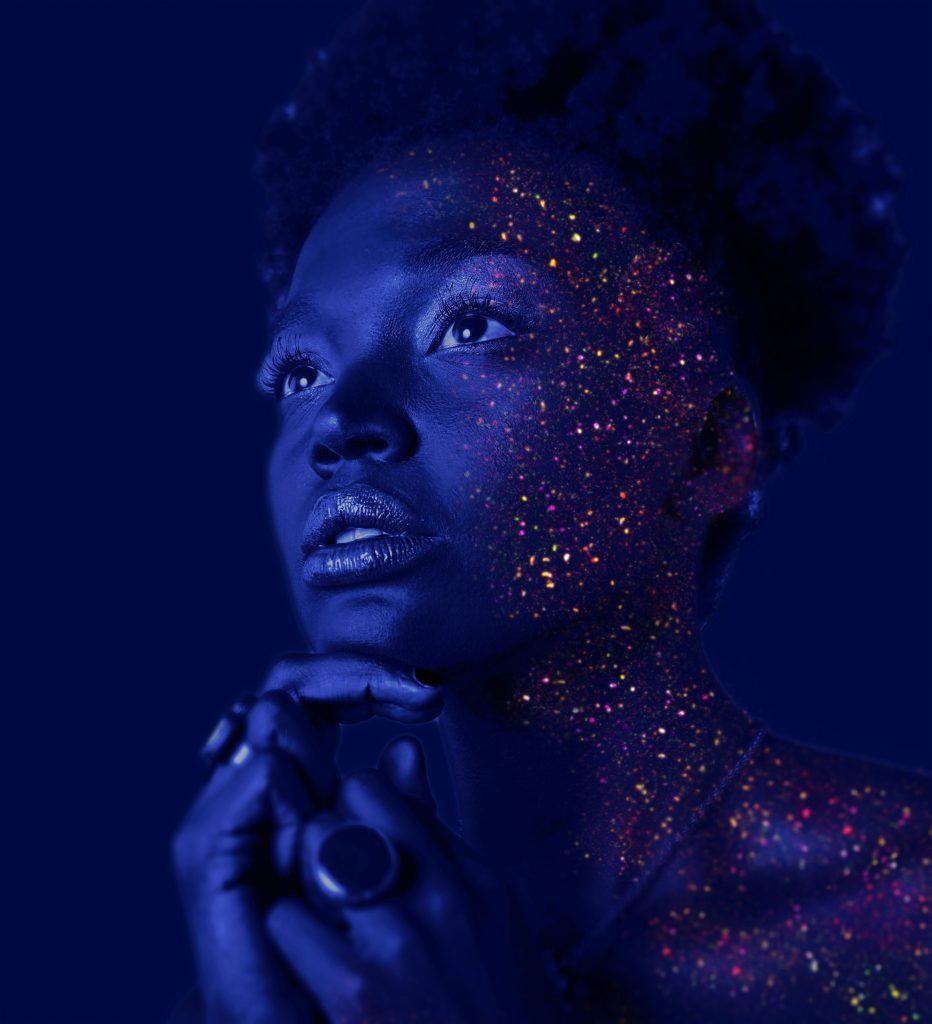
Once you’ve gained confidence with color gels, try using them to light your whole subject for a stylish and creative look. Photograph by 3Motional Studio
Conclusion
They might have fallen out of fashion for a time, but used correctly, color gels can add a new and exciting twist to your imagery. To get the best out of gels you need to:
- have the right camera and lighting equipment,
- buy colored gels or cellophane that suits your needs,
- think about the creative effect that you want to end up with, and
- know how to use your lighting to good effect.
Self-Check Quiz:
- What are color gels?
- How do complementary colors work?
- Do you have the lighting you need to work with colored gels?
- How can you use colored gels for color correction?
- What are some creative ways you can use colored gels?


