Déjà vu all over again: my last Photzy article began thusly.
“I confess! I love camera automation. I love autofocus. I love aperture priority. I love auto white balance. I love auto ISO.”
And I SHOULD have added, I LOVE LIVE VIEW!
Live View is a function within a camera that bypasses the image view in the electronic or non-electronic viewfinder and instead sends the information to the LCD panel on the rear of the camera.
I was entranced with live (pre)view before I fully understood what it was. My first direct-to-digital camera was a no-bigger-than-a-pack-of-cards Nikon L12 point and shoot (2007). I quickly intuited that what I was seeing on the LCD on the back was a live preview of the scene through the lens, projected from sensor to screen in real time. If it looked too dark, I could bias the exposure up; if it was too light, I could bias it down. I was seeing in real time what the picture would look like when I tripped the shutter. A quick review verified that I had gotten it. Only a glance was needed to ensure that the exposure was nailed. To this day I remain awed.
I also intuited that my little pocket camera was a mirrorless camera. Any camera that has no mirror, including a phone, is by definition mirrorless. If it has a mirror, it’s a reflex; everything else is mirrorless. Mirrorless digital cameras are in live, real-time preview by default.
Coming from a career in analog, digital was near miraculous to me. Mirrorless, with its What You See Is What You Get (WYSIWYG) component, was even more miraculous. I am a totally committed mirrorless guy. Although no stranger to film SLRs, I’ve never even looked through a digital SLR, vastly preferring mirrorless for the precise reason that they are in Live View full time. Moreover, the Sony A6300s that are now my working cameras have state-of-the-art high-resolution eye-level EVFs (Electronic Viewfinders). With the shielded eyepiece I see a magnified, brilliant full-time live view, even in full sun.
I was entranced with live (pre)view before I fully understood what it was.
Mirrorless ILCs only appeared about a decade ago, and early efforts to compete with DSLRs were not spectacular, but like all technology today they have been madly leapfrogging themselves, especially in the areas of fast, accurate focus and really amazing EVFs. I think mirrorless cameras have more than arrived and can fully compete head-to-head with DSLRs in any field of photography.
I am not denigrating DSLRs. Most now have a Live View option, but not in the eye-level finder. To use a DSLR in Live View you must first disable its most important feature, its optical finder, by locking the mirror up. You have the advantages of Live View, but you lose the advantages of optical viewing. Live View in a DSLR is more suited to static, tripod-mounted work; it is unsuited to following action.
If you are in bright sun, it can be difficult to near impossible to see the LCD screen as it washes out in bright light. One of the main reasons I so highly value mirrorless with eye-level EVF is that I can clearly see the real-time live preview in any light, plus magnified, but if you are working with a DSLR you may need workarounds, such as physically shading the LCD, and even then it may be wiped out, plus not magnified.
Key Lesson: While DSLRs have a Live View option, it is a more limiting feature than mirrorless cameras that are in Live View full time.
Early EVFs were not bright, not sharp, and “laggy”; there could be noticeable “image chatter” as the camera moved while the finder struggled to keep up. But technology has caught up. Looking “through” my Sony EVFs there is no lag. There is no blackout effect in continuous bursts. They let me instantly see changes to exposure, white balance, and color settings – things no optical viewfinder can show.
Not all EVFs are that good yet, but today preferring optical over electronic is a matter of choice.
I can only discuss using Live View in relation to mirrorless ILCs, but most of what we’ll cover also applies to DSLRs in Live View.
- Live View shows the scene exactly as it will photograph.
- Live View allows for precision manual focus by zooming.
- Framing in Live View is 100% edge to edge.
- Live View is always bright regardless of the light, or lack of light.
- If your LCD is articulated, you can hold the camera high overhead or on the ground and still see to compose.
- Live View DOF preview is bright, as opposed to optical DOF preview that relies on stopping the lens down to a working aperture.
- Grid view can be turned on and is useful for composition.
- The live histogram can be turned on.
- The spirit level can be turned on, if the camera has it.
Every camera is different. Newer cameras have higher resolution LCDs. A poor screen with a grainy image may make Live View less useful.
Live View Shows the Scene Exactly as It Will Photograph!
I think the single most valuable feature of Live View is for gauging correct exposure. I make use of every feature, keeping the histogram visible, using the grid to aid in composition, but mainly for exposure. I hardly ever even glance at the light meter. I watch the screen and the histogram, which I usually keep crowded to the right (ETTR) because I shoot only RAW.
The single most valuable feature of Live View is for gauging correct exposure.
If you are a JPEG shooter, then taking advantage of Live View can be a game changer, especially for avoiding overexposure. JPEGs should never be “exposed to the right,” rather just the opposite.

18% Gray card
Cameras have had built-in light meters for at least 40 years, but their Achilles heel is that they “read” only reflected light, and all light meters are calibrated to average an exposure to 18% reflectance, middle gray, and Zone V, which looks like the example above.
This averaging of brightness across a scene works well enough when the scene itself is average, and since most are average, a matrix meter will give a good exposure. But what about scenes that are not average, predominately light, or predominately dark? An averaging meter will make an overall bright scene too dark, and an overall dark scene too light.
Key Lesson: Without exception, all light meters are calibrated to middle gray. The photographer needs to be able to gauge if the exposure needs to be biased up or down. That takes skill.
But if your camera is in exposure simulation live view (which is the default in my Sonys), then you will see right on the LCD if the scene looks too dark or too bright. If your camera has an EVF, then you can see and evaluate it even in bright sun.
Key Lesson: Live View gives you a visual reference of the actual exposure, helping you nail it every time.
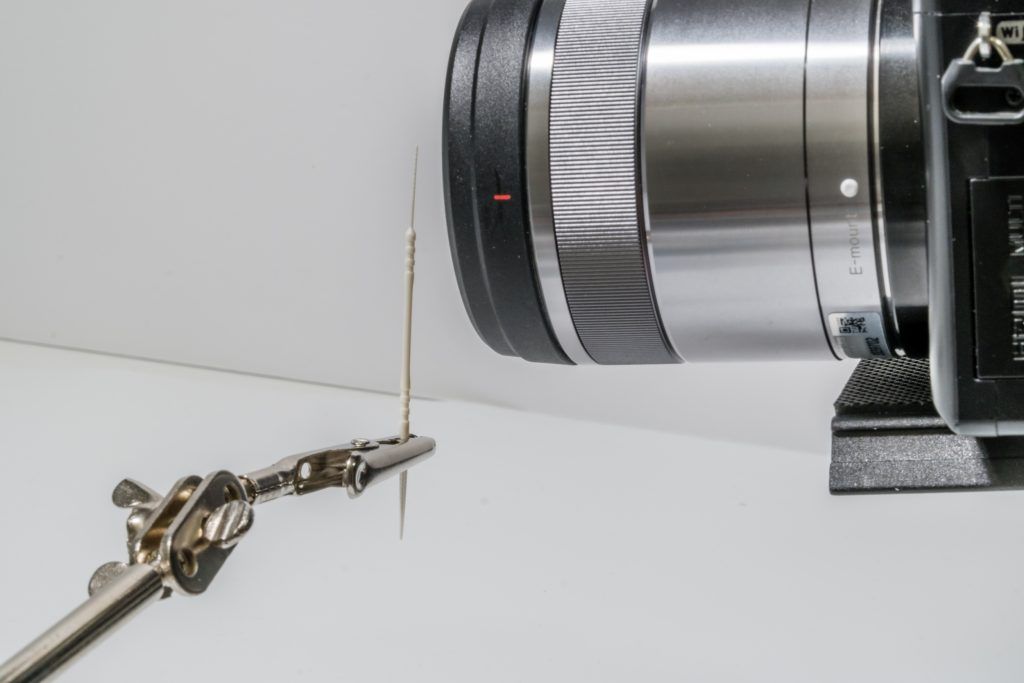
Setting up a tricky macro shot. Photograph by Charles Haacker
I set up this shot as a demonstration. It’s about as ‘not average’ as it gets. I am using Live View not only to focus and compose, but most importantly to determine proper exposure. My subject is a tiny plastic dental brush-pick, the kind you can find in any drugstore. I am shooting it greatly magnified with a dedicated macro lens.
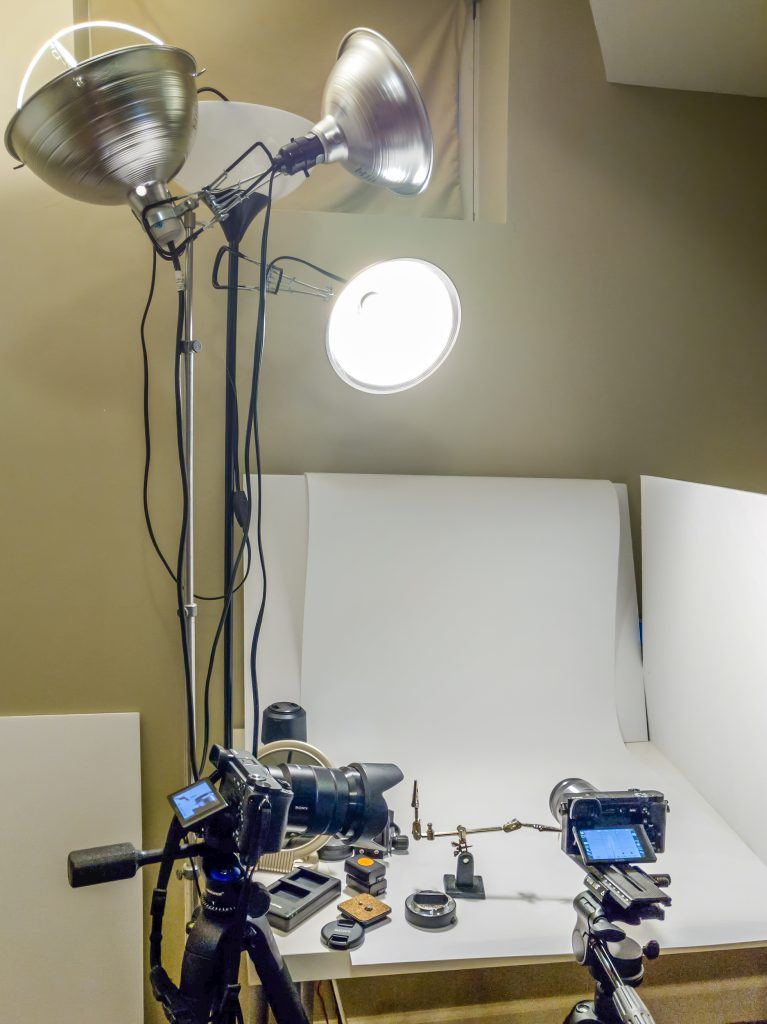
My little tabletop set. Photograph by Charles Haacker
The tiny brush pick subject is translucent plastic in a white set, essentially a white-on-white situation. There are several ways I could meter a correct exposure; using a gray card would be one, but if I don’t have a gray card or an incident light meter, I do have Live View!
Key Lesson: When in Live View with any camera, you can see everything you need to know right in the frame – not just composition, but color, exposure, depth of field, even flaws such as lens flare or faulty focus.
I always have my cameras in exposure simulation live view, sometimes called exposure priority display. Whatever your camera calls it, it is the What You See Is What You Get (WYSIWYG) preview. You see the effects of any and all settings, even in Manual mode. Exposure adjustments are visible right in the finder or onscreen. Depth of field is visible, full time. If the white balance is off, you see it so you can fix it. I have the option of turning off all of the exposure display, but I can’t imagine why I would; the see-at-a-glance data is too useful.

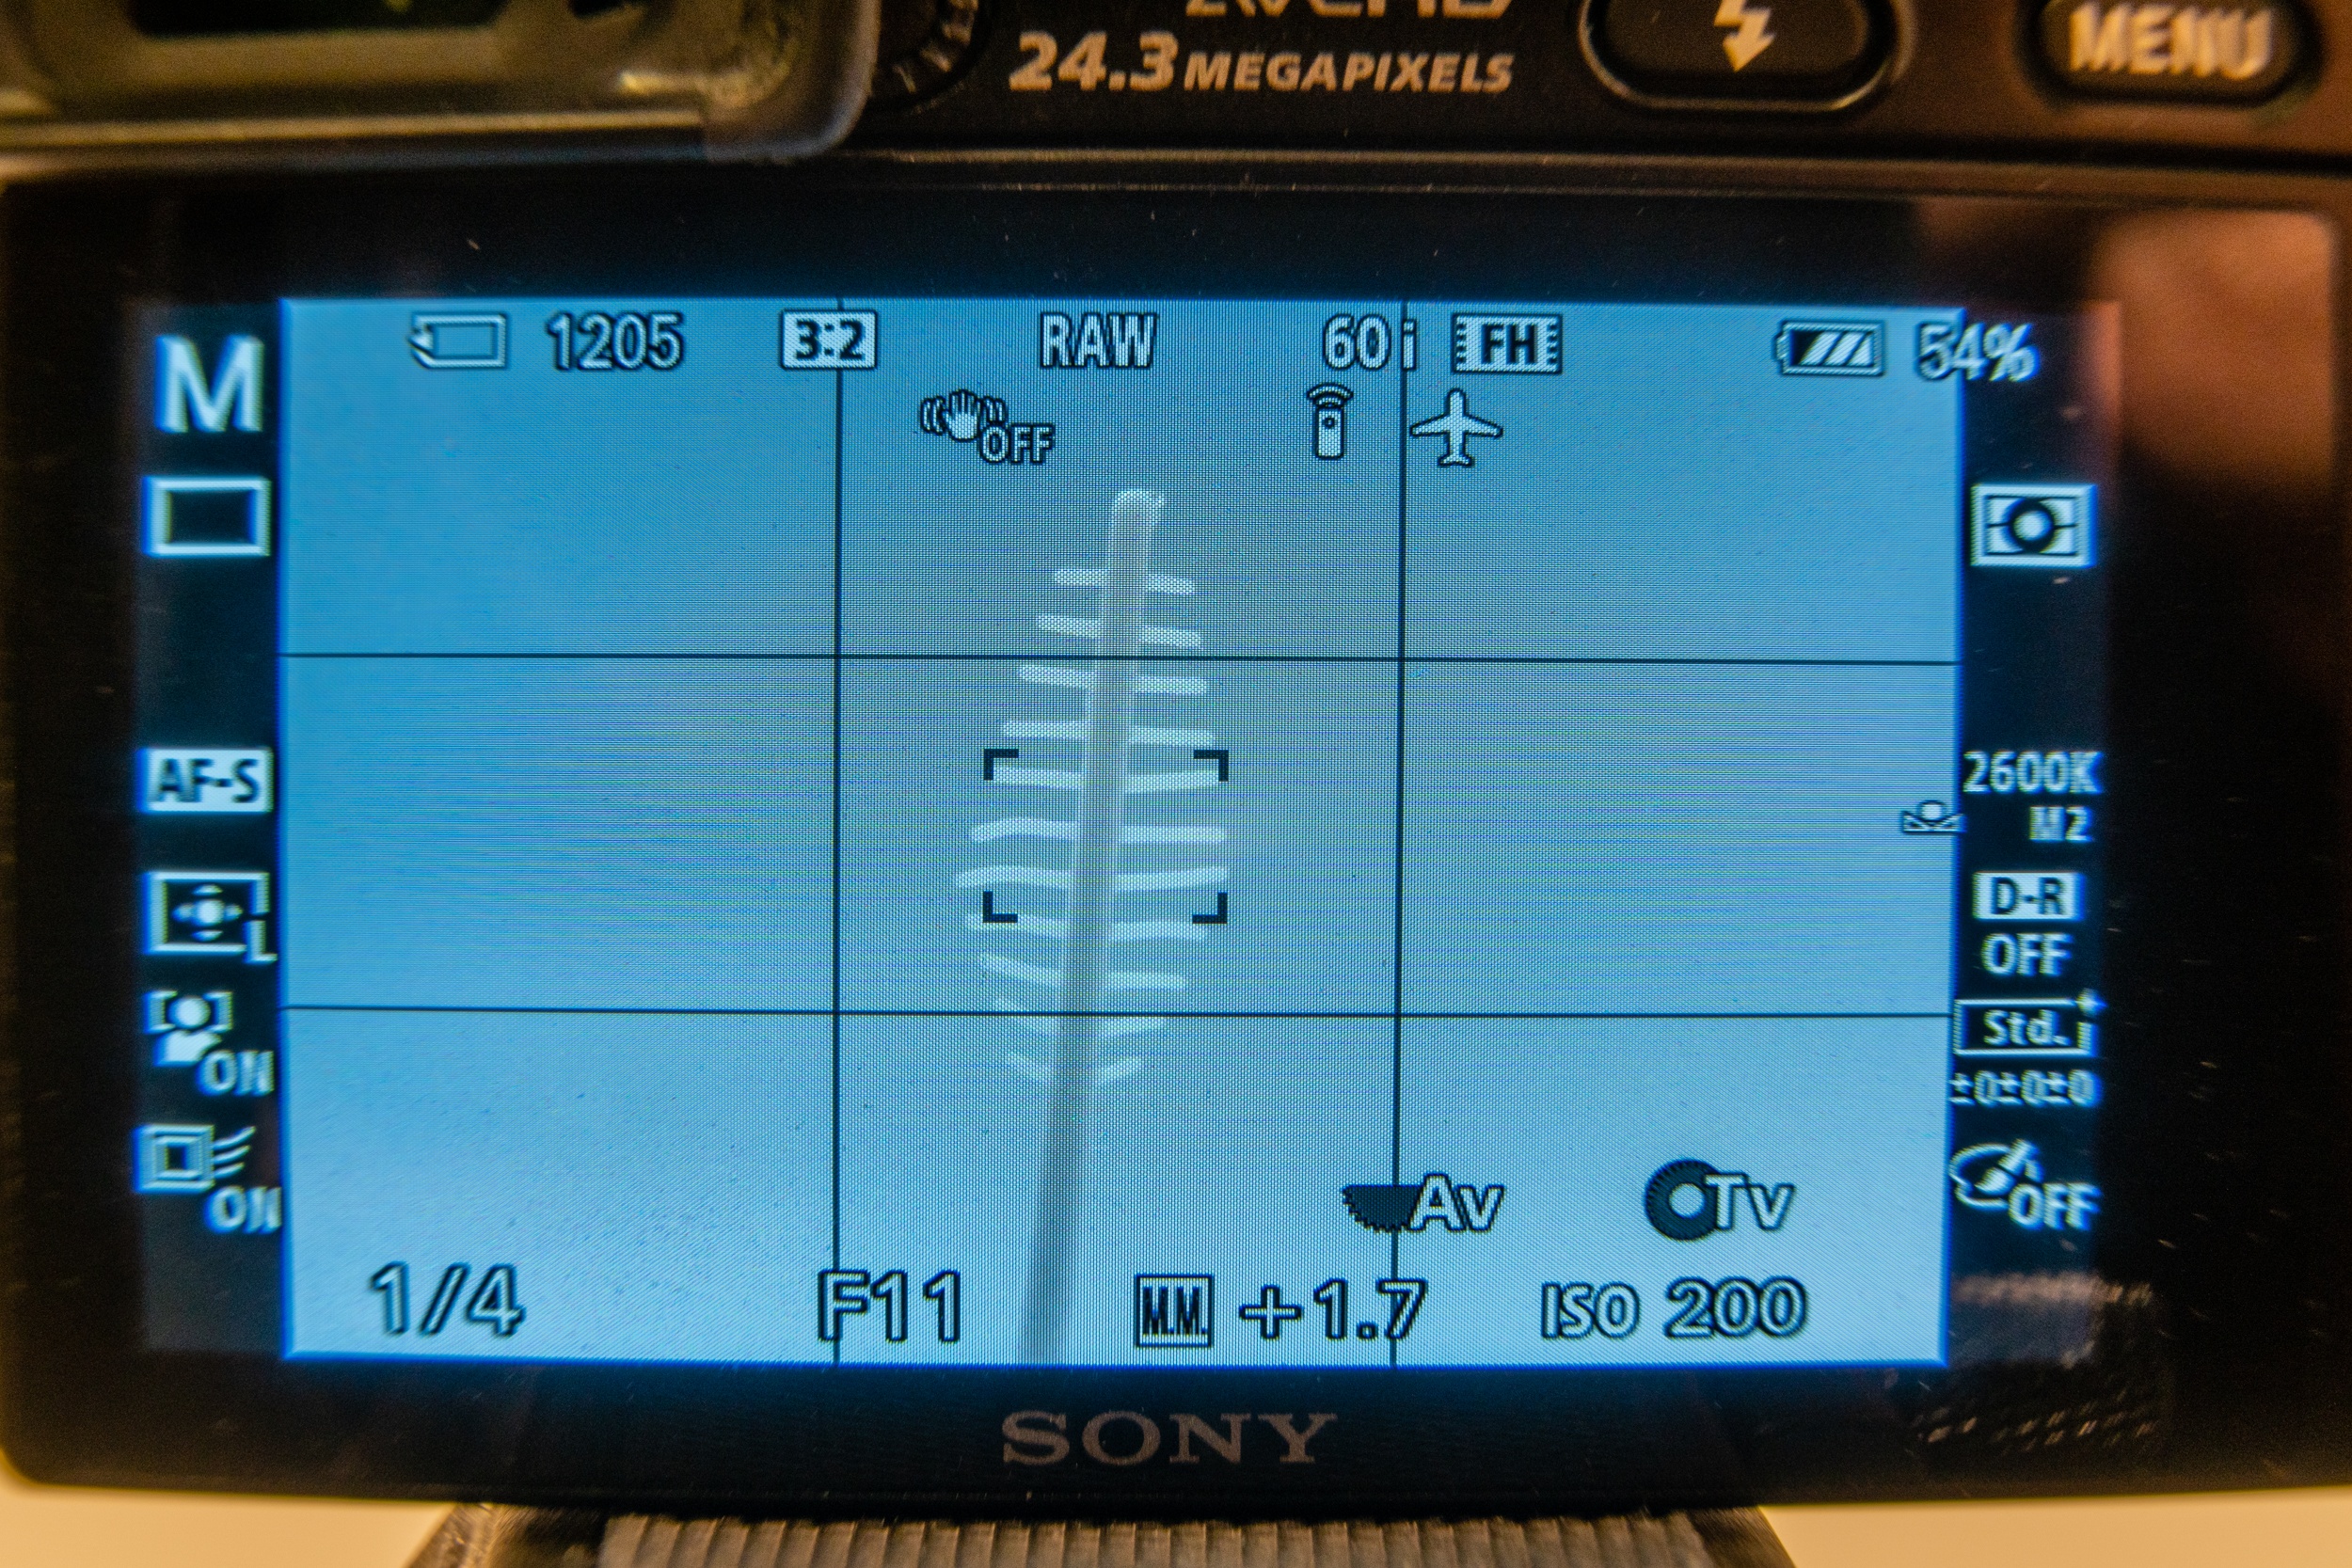
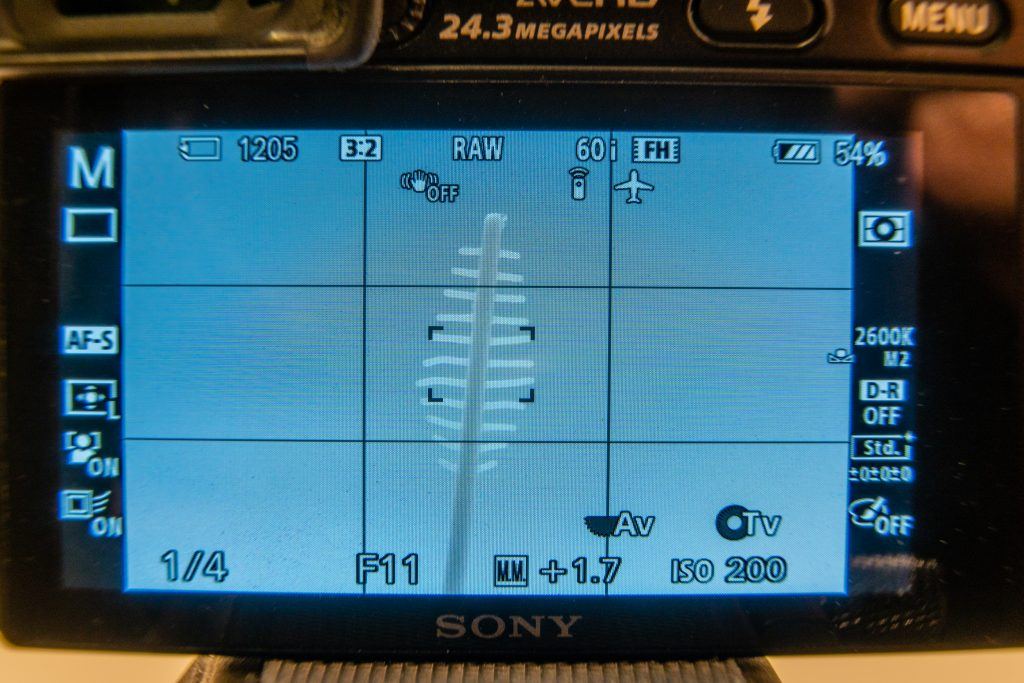
Screenshot of the live view, a little light. Photograph by Charles Haacker
Above is the live view of my tiny toothpick subject. My camera is in Manual mode, the ISO set to 200, 0.5-sec (½-sec) @ f/11. The +2.0 (bottom center right) shows that the camera’s meter “thinks” the exposure is two stops over, but bear in mind that it’s matrix metering in a white set, so it’s not correct. The reflected meter has no clue of the brightness it’s aimed at, so it is averaging the white background to photograph middle gray. But I want a gradual darker-to-lighter gray. I ignore the meter, looking instead at the screen brightness.
Recommended Reading: Want a step-by-step guide on photography skills with your DSLR? Grab a copy of our best-selling guide: the DSLR Crash Course.
Live View Allows for Precision Manual Focus by Zooming
I also made good use of manual focus, zooming to the tiny comb of the toothpick to focus critically. That also assured me that shooting at f/11 was sufficient depth of field for the little flat subject. Autofocus does not do well in situations such as this. It “hunts.” Manual focus, once zeroed, does not drift.
Lacking exposure simulation live view, I would be more likely to underexpose in this situation. I know the meter is fooled by the overall whiteness, but by how much? I have the experience to make an educated guess, but photographers are visual people; being able to see what you are actually doing is priceless.

The one-stop-over picture after Lightroom processing. Photograph by Charles Haacker.
This image on the screen does look thin, though, maybe a stop over, and the resulting unedited picture shows that, while the exposure is pretty close, it’s a little washed out.

The best shot after Lightroom processing. Photograph by Charles Haacker
The big deal, though, is that the picture matches the live preview on the screen. The screen looks a little too light, and so is the actual picture by the same amount. Live View shows me reality. Experience assures me that I can trust it.
This is the picture (above) I pre-visualized. I’ve cut the exposure time. The slightly washed-out look is gone. There is excellent detail. The tiny brush tips are nicely glowing in the back light. Note especially how the live preview looks on the screen: it’s a match. WYSIWYG. I love that I can accurately gauge an exposure just from what I see in the finder.
The value is time-saving accuracy and confidence. When I upload pictures to Lightroom the exposures are absolutely correct, easily verified with a glance at the histogram before processing.

The best exposure, before processing in Lightroom. Photograph by Charles Haacker.
In this Lightroom screenshot the histogram is in the upper-right corner. It’s all bunched up but it’s in the center, verifying that the exposure is correct. All the sliders below it are neutral, zeroed. That’s why the histogram is bunched; there is no black or white in the unprocessed RAW picture.

This closeup better shows the centrally bunched histogram. Photograph by Charles Haacker
When post-processing the histogram, look at the exposure and contrast sliders; they are still neutral, zeroed, so the original exposure was on the money. The other sliders have been adjusted so the histogram is spread out to the ends of the box. The black and white sliders especially have been adjusted so the picture has a solid black point and white point.
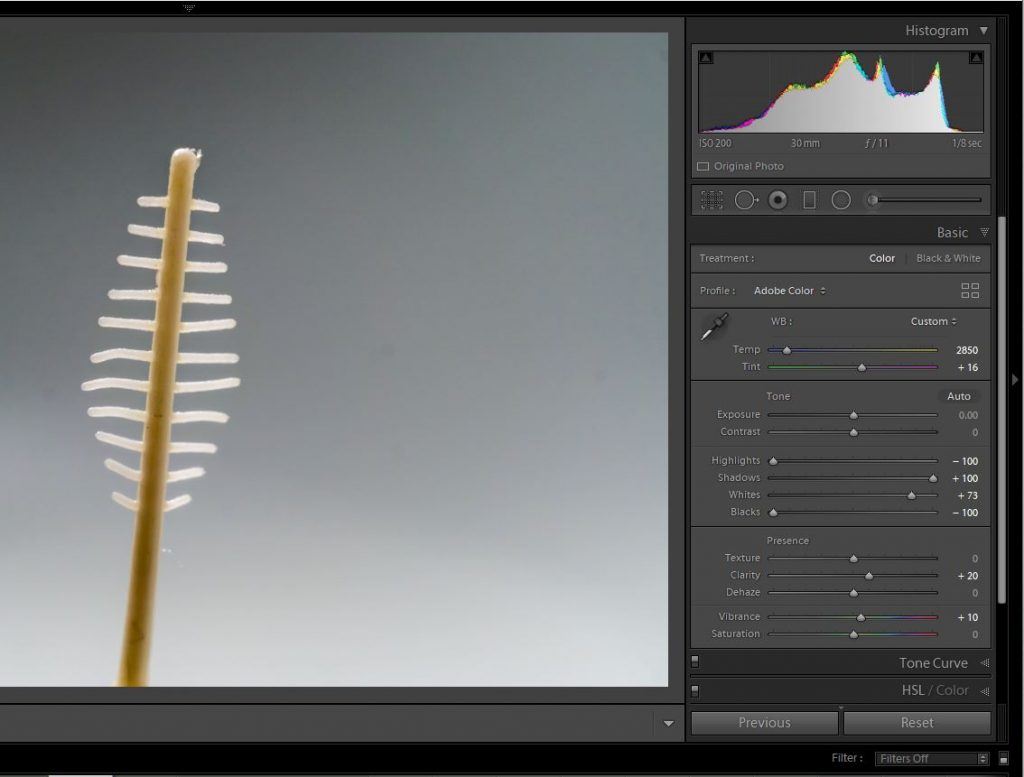
After processing, the histogram spreads to both “walls” but the original exposure needs no adjustment. Photograph by Charles Haacker

This ring around shows how perfectly matched the live view on the screen is to the resulting well-processed picture. Photograph by Charles Haacker

A several-times-life-size macro shot of a mushroom made with the camera on the ground under the cap looking up. Photograph by Charles Haacker
Live View can let you hold your camera high overhead or on the ground and still see to compose, especially if you have an articulated screen.
This macro shot of a mushroom was made with the camera on the ground underneath the cap looking up. I was able to precisely focus and compose it by having my articulated screen flipped out so that I could see what I was doing. You could do something like this blind, but it would be very challenging.
Live View is Always Bright Regardless of the Light, or Lack of Light
I am an event photographer from way back. I’ve shot plenty of film of all sorts of events, including weddings, but there was always a nagging concern that I might have been off, overexposed the gown, or made another irretrievable error. Live View lets me relax; if it looks good on the screen or in the EVF, it’s good. If it looks too dark or light, I know instantly I need to change the exposure. The existing light, bright or not, is immaterial to Live View.

Live performance shot at ISO 12,800 under dim, color-gelled stage lights. Photograph by Charles Haacker
The frame on the left (image above) is what this “available dark” shot looked like in my viewfinder. The frame on the right is after processing in Lightroom. The lack of clean, un-gelled light in this situation would have been challenging with an optical finder; for Live View, it’s another day at the office.
If you are shooting a DSLR in Live View, you can’t really shoot stills of an event like a wedding. It defeats all the best features of your optical system for following action. If you video, going to Live View is the first step, but it’s awkward to shoot stills that way except from a tripod where you have greater control but must forego the convenience of hand-holding.
Live View can let you hold your camera high overhead or on the ground and still see to compose, especially if you have an articulated screen.
To shoot in Live View with a DSLR, Nikons have an LV (Live View) button. By pressing it, you will hear the mirror flip up and see that the finder goes dark. The scene is now projected to the LCD directly from the sensor. There will be different choices of data displayed depending on the camera. By default, most will be in exposure simulation/exposure priority display, the WYSIWYG preview.
You may need to cover the viewfinder to prevent light from seeping into the camera and affecting exposure. Nikons come with a cover for this purpose.
Information I found regarding at least some Nikon DSLRs warns that using Live View for too long can harm your pictures and your camera. The camera heats up more than normal. That creates noise, but more importantly, too high an internal temperature can permanently damage your camera.
At least some Nikon DSLRs have a fail-safe that automatically disables Live View if the camera senses a critical heat level. In warm weather you may not be able to use a DSLR in Live View for long. The camera may shut down for a cool-down period.
Key Lesson: Live View is less convenient in DSLRs, harder to use, and can cause overheating and camera shutdown. Live View’s utility is limited in DSLRs, but you can’t shoot video without it.
Recommended Reading: Want a step-by-step guide on photography skills with your DSLR? Grab a copy of our best-selling guide: the DSLR Crash Course.
For what it’s worth, I regularly shoot outdoor events in summer in 80°F to 90°F+ heat with two mirrorless Sony A6300 bodies with overlapping zooms. I will usually come back with hundreds of exposures on each body. Being mirrorless, they are in Live View 100% of the time, and because I am working fast I never turn them off, and even disable their sleep cycles so that both cameras are “cooking” even when not in actual use. They have never overheated and quit for a cooldown.
Conclusion
- Live View is invaluable for gauging correct exposure.
- It is essential when shooting video.
- Live View allows for critical manual focus.
- Live View is always bright regardless of the light.
- The Live View depth of field preview is always bright.
- Mirrorless cameras are always in Live View full time – they are battery hogs, but batteries are light; it’s no trouble to carry extra.
Assignment:
If you use a SLR, reread your camera manual on how to use it in Live View, then try it out. Keep it in exposure simulation mode but go to manual control so you can observe the screen growing lighter/darker as the exposure is changed. Try manual focus so you can see the zooming feature. Shoot what you see. Don’t delete in the camera; bring it all back, upload, and study it. Learn things!
Self-Check Quiz:
- True or False: DSLRs are just as convenient to use in Live View as shooting through the optical finder.
- True or False: Live View is useless for focusing.
- True or False: All mirrorless cameras are in Live View full time.
- True or False: Live View uses lots of battery energy.
- True or False: Mirrorless cameras are best used only on tripods.

