


Though the current generation of vloggers, bloggers, influencers, and enthusiast photographers probably couldn’t imagine a life without Live View, it wasn’t long ago when it was little more than a pipedream.
Before Live View became mainstream, our only framing option was to peer through an eyepiece to see what our consumer cameras were capturing, whether digital SLRs or film SLRs (although some medium format cameras also had a version of live view – a ground glass focusing screen which was the same size as the film).
Currently, the market is demanding ever smaller and lighter cameras, so the traditional optical viewfinder is possibly heading in the same direction as the Dodo bird. This would not be a good outcome, as we’ll see in this guide.
When I think of Live View and all of its benefits, I think it’s also important to understand what came before all this amazing technology to get a perspective of the developments of today.

In very bright conditions, shooting in Live View mode can be something of a lottery as it is so hard to see everything on the LCD (Silverton, NSW, location for several Mad Max films). Photograph by Robin Nichols
Single-lens reflex cameras (SLRs), introduced to consumers in the ’50s, provided a breakthrough design in that you could actually see through the lens (via a clunky mirror and prism system array) and then compose the shot before pressing the shutter button. Before this, photographers had to rely on framing a subject through a second lens, using a twin-lens reflex camera (TLR). Such devices were really good cameras, but they were effective twice the size and weight of an SLR. Plus, what you saw in the viewfinder was never the same as that recorded on the film, which could be, compositionally, very frustrating.
Before Live View became mainstream, our only framing option was to peer through an eyepiece to see what our consumer cameras were capturing,...
Before SLRs, there were rangefinder cameras. Like TLRs, these too employed a separate optical viewing system producing a split image that had to be manually lined up in the eyepiece to confirm perfect focus. This was a combination of a mechanical focusing mechanism and optical previewing, a system that’s still hard to beat in terms of accuracy today. That said, of course, rangefinders had their own technical issues, but it was still a great technology.

What was considered ‘live view’ back in the day consisted of a 5×4-inch sheet of ground glass onto which the image was projected, albeit upside down (left). Then came medium format SLR cameras, such as this 6x7cm glass focus screen (center left), then the tiny 35mm SLR and DSLR eyepiece viewfinders. Now we have the three-inch (plus) LCD screen which enables true Live View information taken directly off the camera sensor. Some cameras combine the viewfinder with an LCD, whereas others only have an LCD. Photograph by Robin Nichols
What you’ll learn in this guide:
- A short history of the viewfinder, ‘live’ and otherwise
- Advantages of the optical viewfinder
- Live View on a DSLR
- Live View on a mirrorless camera
- Advantages and disadvantages of Live View
- Tips for getting the best from Live View
- Workarounds for Live View problems
- Discover hidden features of Live View
Recommended Reading: Want a step-by-step guide on photography skills with your DSLR? Grab a copy of our bestselling guide: the DSLR Crash Course.
Very Old School
When I was learning the craft of photography at university in the UK [some] years ago, I used a 5×4-inch monorail camera quite extensively (my student grant was paying for the film). This is a camera whose sensor (or film as it was in those days) was huge – bigger than a postcard.

Although I’m somewhat nostalgic about these awesome monorail-type cameras, they were very heavy, extremely bulky, required expensive lenses and, as mentioned, took a lot of work to set up before you were ready to shoot! Photograph by Eusebius@Commons
On a couple of occasions, I even used a 10×8-inch monorail camera, a massive beast with unbelievable image clarity. Monorail cameras are simple systems based around an adjustable aluminum tube, called a rail, that has a lens panel fitted at the front, and a glass focusing screen a little larger than the film size at the back. To make everything light-tight, both panels are encased with expandable bellows. The ‘live view’ screen, as it was then, was either 5×4 inches or 10×8 inches. It was seriously big, but the image could only be properly viewed when examined in a dark room from under a black cloth or with the type of custom shade pictured here. Even then, because there’s no prism involved in its optical system, the image appears on the focusing screen upside down.
Although most might consider this kind of camera primitive in these digitized days, the image quality produced was nothing short of stunning, something that only high-end digital camera backs costing upwards of US$30,000 can equal.
So, though Live View on DSLRs – with all its bells and whistles – is something we take for granted today, it’s still not universally better than the quality produced by some of those old-school technologies. That’s a subject for another time.
Battery Woes
When I first began teaching adult education, I remember one particular student who turned up with a brand-new Nikon point-and-shoot compact (Coolpix 950). During the course of the day, we spent a lot of time making test shots, replaying, and checking them on the LCD screen.
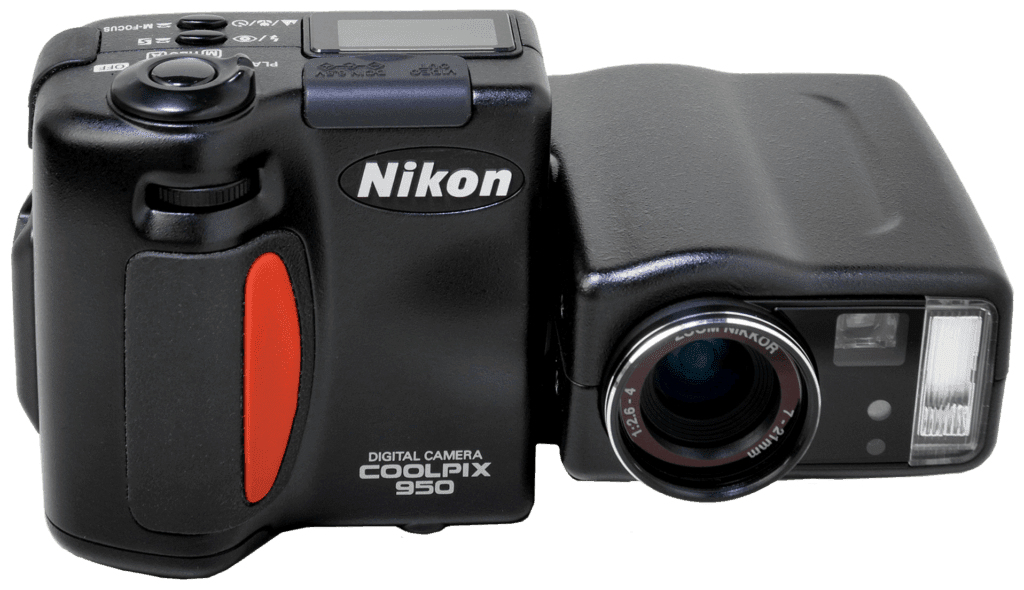
Many early digital cameras were infamous for their short battery life even though the LCDs were still small. This model was particularly power-hungry. Photograph courtesy of Nikon USA
As with many compacts of that time, the Nikon was powered by AA batteries. It turned out that this model was a bit of a power guzzler. The student had to walk to the shop several times during the course of the day and ended up buying four packets of batteries (16x AAs) to keep the camera working. Although today’s technology and lithium battery design are far superior to what it was back in 2000, LCDs continue to get larger and therefore more power-hungry. Even now, I always advise anyone shooting for any length of time to pack spare batteries. Always!
Logical Advance
The principle of Live View is simple. Instead of bouncing the light passing into a lens off a mirror and up into an eyepiece via a prism arrangement, designers came up with a neat answer: why not take the image directly off the camera sensor? That way, you not only get rid of the mirror and prism, which will make the cameras smaller and lighter, but it also produces an image that’s as near a perfect representation as possible of what’s to be recorded. Most compact cameras already had this system as they didn’t use viewfinders, but it was a new challenge for the DSLR.
Live View on a DSLR
All digital cameras have an LCD screen. As you know, these are amazingly effective for reviewing images and even adding minor edits to files, if needed. But one factor preventing the development of DSLR Live View was a simple fact that when not shooting, the mirror covers the sensor, so there’s no signal. In 2006, Olympus circumvented this architectural design issue by incorporating a separate sensor to generate just Live View data for the LCD screen. And so, with the Olympus E330, a live viewing revolution began.
However, one problem that became apparent with DSLR Live View was that this preview wasn’t the same as the signal produced by the image capture sensor itself, but it was destined for bigger things. These days, Live View technology has advanced to the point where it’s not only very accurate, but it can also mirror a range of camera settings quickly and accurately onscreen, including exposure, depth of field, and White Balance, just for starters. On a Canon, this feature is called Exposure Simulation, and as with many other camera brands, it can be turned on and off.

My Canon has this feature for brightening/darkening the LCD. I have never used it as it gives a false sense of exposure. Photograph by Robin Nichols
Turned on, this mode produces a live simulation of the exposure and is perfect for tricky high contrast lighting, or extremely low lighting. It’s a WYSIWYG system that works effectively. Dial-in a different ISO number, f-stop, shutter speed, White Balance, or Exposure Compensation value, and the simulation reflects those variations. (If you want to do a quick test, do it in Manual metering mode.)
These days, Live View technology has advanced to the point where it’s not only very accurate, but it can also mirror a range of camera settings quickly and accurately onscreen...
Turned off, and the DSLR reverts to its fully open aperture mode to produce the brightest image (for that lens) on the LCD, irrespective of the exposure settings. This is the perfect mode if you are shooting in dark, dingy places where you really need to see what you are doing to get the correct framing but because there’s no exposure simulation, you have to rely on the camera’s exposure capabilities for getting it right.
Warning: All DSLRs and mirrorless cameras have a menu feature for adjusting the LCD brightness. On the surface, this seems sensible, but be careful when using this. Lightening the LCD will certainly help you frame an image when shooting in very dark locations, but it might also provide false exposure information. I recommend using the histogram to judge exposure as it operates independently of the LCD brightness.
No Mirror? No Worries.
If you have a mirrorless camera, there’s obviously no mirror to get in the way of the live signal. Live View, therefore, is the default setting as it reads the signal directly off the sensor. But like the DSLR, sometimes it’s beneficial to be able to turn that feature off so you can see what you are framing more clearly. Panasonic, for example, has a mode called Live View Boost (on its flagship Lumix S5 model). This lowers the very high LCD frame rate while boosting the gain, thus making it brighter and perfect for tricky subjects such as astrophotography, architectural interiors, and all night-time shooting scenarios.

This is the Live View for a Canon 5D MkIII. Exp.SIM indicates that the camera is set to Exposure Simulation, so the brightness displayed is very close to the real exposure. The histogram graph (top right) indicates that most of the tones in the image lie in the middle of the brightness range, meaning no over or underexposure. (Note: layout and features will differ slightly from model to model.) Photograph by Robin Nichols
Recommended Reading: Want a step-by-step guide on photography skills with your DSLR? Grab a copy of our bestselling guide: the DSLR Crash Course.
The Elephant in the Room
As I write this, Live View sounds like the perfect technology, and anyone not using this 100% of the time surely needs to see a medical specialist. Well, I’d almost agree with myself here, but then what should we do about the large pachyderm lying on the sofa? LCDs, irrespective of their amazing size, resolution, and rotational capabilities are often unreadable in bright light, especially as many products also have a highly reflective surface.

LCDs tend to have shiny surfaces, so although a 3-inch LCD is a luxury, it doesn’t work very well in bright light – unless you fit a hood. In this example, the right-hand view suffers heavily from a backlight falling onto the screen, making it tricky to assess exactly what’s in the shot and what’s just a reflection. Using an LCD hood will help reduce the reflections. Some photographers go so far as to apply an adhesive, non-reflective skin directly onto the LCD to reduce reflections. Photograph by Robin Nichols
If you reside in the northern hemisphere this might not be an issue, but I live in Australia, essentially a desert continent once away from the coastal fringe. I like to use Live View a lot, but it’s semi-useless in some of the harsh lighting conditions we experience ‘down under.’ This is especially so when traveling away from the coast, and particularly during the extremely hot summer months.
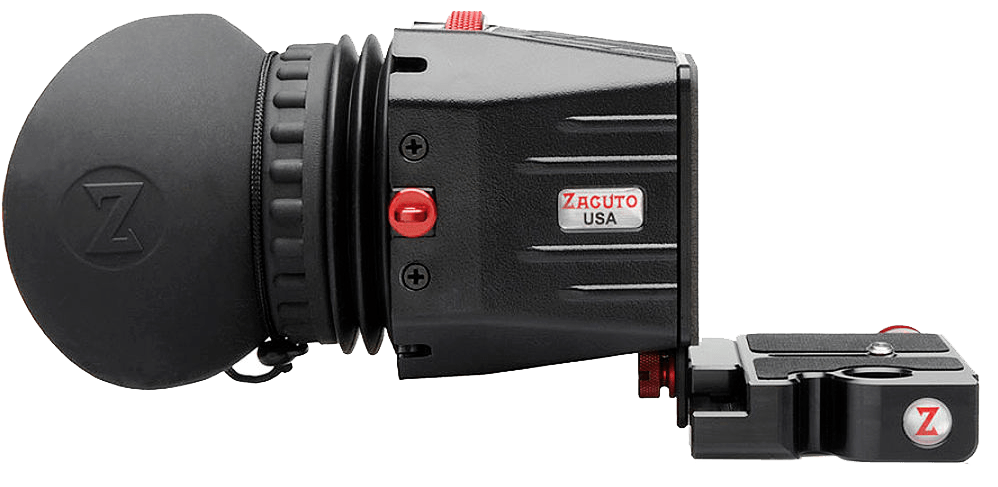
To help see the LCD screen in bright light, you can buy flip-up, stick-on LCD hoods or, as in this monster, professional models with adjustable eyepieces that attach via the tripod socket. This is a top-of-the-range Zacuto Z-finder, perfect for getting the best from the LCD in any light. Photograph by Robin Nichols
Advantages of Live View
- Displays a close simulation of the real exposure and composition.
- Displays additional shooting information such as exposure, live histogram, battery level, memory space, White Balance, focus peaking, and more.
- More accurate AF response as mirrorless cameras boasts a far greater range of AF points.
- Live View in mirrorless cameras is excellent for fast-action photography with almost no lag because there’s no mirror flip-up required.
- In its Off mode, use Live View to lighten dark scenes on the LCD, making it easy to see details and to check critical focus.
- Some cameras use a Focus Assist mode which enlarges the LCD image significantly for critical focus. It’s an excellent feature to use with manual focus (MF).
- The perfect tool for light painting and extremely long exposures.
- Perfect for use in combination with a swiveling LCD – no more backache!
- Perfect for video and can also be expanded to incorporate the use of field monitors with HDMI connectivity.
Disadvantages of Live View
- Can’t see the screen in bright light.
- Hand-holding at arm’s length is considerably less stable than when using an eyepiece.
- Only viewing mode on some mirrorless cameras.
- Only viewing mode on some point and shoot cameras.
- Can be power-hungry.
Top Tip: Use the histogram on the LCD to assess exposure, especially if it’s too light to see the live image on the LCD screen properly.
Handle With Care
If we are praising the obvious benefits of Live View, we ought to consider its negative aspects too.
For me, the obvious one is an inability to clearly see the LCD image, because the screen is reflective and the lighting we shoot in is often harsh. It doesn’t seem to put the younger generation of smartphone users off, but then, with a mirrorless, digital compact, or a smartphone, you have no alternative BUT to use Live View.
I bought a Panasonic GF5 back in 2012 – a brilliant little micro FourThirds camera, small and mirrorless producing outstanding results for the time. But it had no optical viewfinder so, somewhat ironically, I then bought a Panasonic accessory EVF (electronic viewfinder) to go with it, at a substantial extra cost. This slots into the camera’s hot shoe, providing the option of two viewing modes.
Viewing aside, the unstated advantage of having a viewfinder is one of camera stability.
Viewing aside, the unstated advantage of having a viewfinder is one of camera stability.
Holding a camera to your eye (brow) produces, in most situations, the same sort of clarity boost that leaning against a wall or even using a monopod might. Holding the camera at arm’s length, however stable you might think you are, is simply begging for a camera shake.
Case closed as far as I’m concerned, but marketing departments would perhaps argue that, with the development of more sophisticated image stabilization, especially in sensor stabilization, camera shake is a thing of the past.
Maybe…
Is That a Peak I See?
Another feature of Live View, which many might not have discovered, is focus peaking. It’s not available in all cameras, but if you discover it in yours, use it, because, in many shooting situations, it’s an invaluable focusing aid.
(Don’t get this confused with exposure alerts that place color highlights on over and underexposed parts of the frame.)

Focus peaking is a feature that I find insanely handy because I don’t need to use reading glasses to see exactly where in the frame the focus falls. In this example, f/8 produces a reasonably good depth of field. The concentration of red on the lower front side of the central flower indicates that this is the point of focus, and therefore the sharpest part of the image. Photograph by Robin Nichols
Focus peaking highlights those parts of the image that are in focus using a color overlay, making it an invaluable tool for reading the correct depth of field (DOF) and for accurate focus feedback when shooting at wide-open apertures. I particularly like to use this Live View feature when shooting video, because it’s not possible to look through the eyepiece. So focus peaking suffices as a focus confirmation nicely (it’s also beneficial for those of us who have to use reading glasses to see the menu).
If you use a field monitor (a much larger LCD screen plugged into the camera via the HDMI port), you’ll have access to similar focus peaking tools, only on a much grander scale, much like the monorail camera described earlier.
Live View AF Performance
These things creep up on you, but undeniably autofocus systems have benefitted massively by going mirrorless for the simple reason that AF information can be gleaned from almost the entire sensor area, giving you up to 90% AF coverage – something that you won’t experience with a DSLR, however much you pay for it.
My first DSLR, a Nikon D100, boasted a five-area AF setup, which was quite impressive for 2002. Its current entry-level consumer DSLR (the Nikon D3500) has a mere 11 focus points, but its top-of-the-range Nikon D6 boasts 105 focus points. Autofocus technology has gone beyond science fiction for most regular DSLR photographers, but it’s worth noting that non-Live View AF is going to be considerably faster than Live View AF because of the two different types of AF sensors used: phase or contrast detection. It’s a complex science which I won’t get into here (you’d need a book). You just need to know that Live View AF is not a real performer in DSLRs.
Compare this to Nikon’s mirrorless sibling, the Z7 which was released in 2018. This has a 493-point AF system, covering all but 10% of the sensor. If you want more, the Sony Alpha 9 claims 693 AF points.
Autofocus technology has gone beyond science fiction for most regular DSLR photographers, but it’s worth noting that non-Live View AF is going to be considerably faster than Live View AF ...
Currently, many mirrorless cameras (and DSLRs) come with touch screen responses. Tap the screen to focus on a specific object and you’ll find the super-quick AF response puts many a DSLR to shame.
Where’s all this leading? My trusty Canon 5D MkIII has a mere 61 AF points which I find works superbly in all but about 5% of the situations I shoot in (and when it does not work, it’s probably me, not the camera), so having ‘the fastest AF on the planet’ – as many companies like to claim from time to time – is little more than marketing hype. Are you taking better pictures because you have 44 more AF points than me? I doubt it.
Live View has indeed made my photographic experience somewhat better, less from a technical stance than from the standpoint of convenience.
Recommended Reading: Want a step-by-step guide on photography skills with your DSLR? Grab a copy of our bestselling guide: the DSLR Crash Course.
One Final Thought
Back in the day when I was shooting with those [archaic] monorail cameras, exposures had to be calculated using a hand-held meter, and if this wasn’t used correctly, the resulting exposure was less than impressive. It was annoying if you were shooting color negatives, but a disaster if using color transparencies (because of their narrow exposure latitude).

For the sake of clarity, this is a screenshot of the histogram in the camera’s replay mode (it’s a bit obscure in shooting mode). As that tone mountain is not touching either the left or right-hand vertical axis, it’s considered a ‘good’ exposure. In Live View, this histogram will move left or right depending on whether you under or overexposed. In my opinion, it’s one of the best ways of assessing the correct meter reading in contrasting and bright light conditions. Photograph by Robin Nichols
Live View features a live display histogram (keep pressing the ‘Info’ or ‘Disp’ button until it appears. If not, turn this display on through the menu).
This is the most accurate metering method because it provides instant feedback on the subject brightness and is inclusive of the lens characteristics, subject contrast, color, and brightness levels. It’s all compressed into this one feature. I use it all the time, particularly when shooting video because it’s so easy to see onscreen – plus it works beautifully.
The hand-held light meter, which I still have, now sits in the cupboard next to all the other bits of technology that are destined to slowly mold away.
Don’t forget that Live View or not, it’s often the human input that makes or breaks the success of a shot, not the technology.
Self-Check Quiz:
- What is a single-lens reflex camera?
- How does a rangefinder camera focus?
- What created a power problem with early digital cameras?
- Which camera manufacturer was the first to create ‘Live View’ on a DSLR?
- Why can adjusting the LCD brightness on a camera back panel screen create unexpected exposure problems?
- Why is shooting in bright light an issue with using the Live View feature?
- Name four advantages of Live View.
- Name three disadvantages of Live View.
- Why can using Live View create stability and camera shake problems?


