Lightroom is a powerful and versatile program that gives you the ability to control how your photos look. This control can happen on both macro and micro levels. Many users make macro alterations to manipulate the appearance of their images, but fewer venture into using the Detail tab. The Detail tab is an excellent tool for making more subtle adjustments that can make your photos pop.
In Lightroom, the Detail tab lets you find the tools to adjust the sharpness of your photos and the digital noise levels. Using both of these can add life to your images. Still, changes must be made with care as over-modification leads to rapid deterioration.
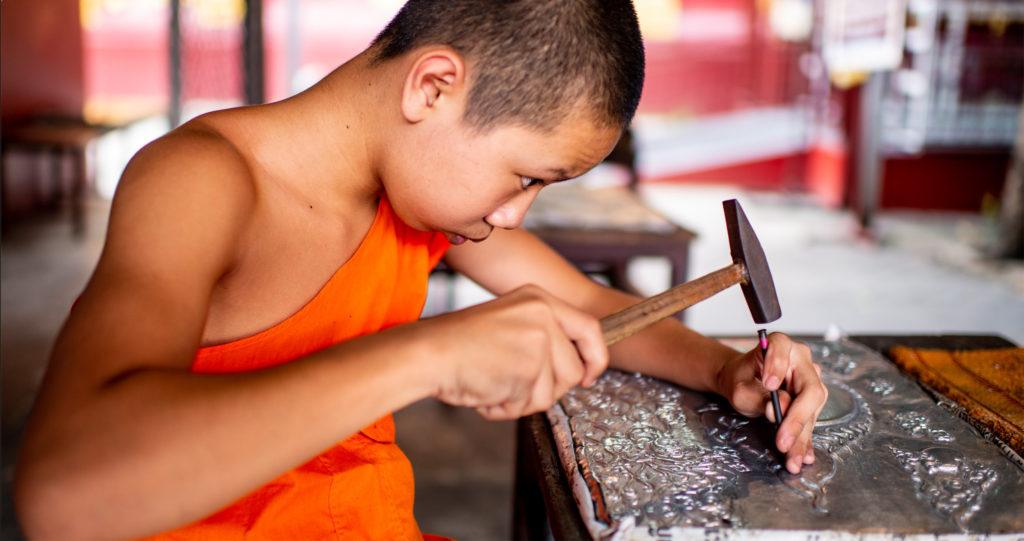
Editorial photography is a genre in which photographers do not have the level of control or luxury of time afforded to other styles. This immediacy can mean images are not always as clear as they could be and often contain digital noise due to high ISO settings. The Detail tab contains excellent tools to help improve editorial-style photos.
In Lightroom, the Detail tab lets you find the tools to adjust the sharpness of your photos and the digital noise levels.
This article aims to show you what effect the Sharpening and Noise Reduction sliders in the Detail tab have on your images. You’ll also learn what happens to your photos when you overuse these tools.
Here is what you will learn:
- What is the purpose of the Details tab in Lightroom?
- How to access the Details tab
- How to increase productivity while accessing tabs and working in Lightroom
- An in-depth explanation of the Sharpening Tools
- How the Sharpening Masking function works and why you should use it
- An in-depth explanation of the Noise Reduction Tools
- The difference between lu2minance noise and color noise (chromatic noise)
Recommended Reading: If you want to learn how to enhance your photos and create better images, grab a copy of Photzy’s premium guide: Ultimate Guide to Fundamental Editing.
Using the Detail Tab in the Develop Module
When you’re in the Develop Module, you will find a selection of tabs to the right of your image.
If you can’t see them, press the F8 key on your keyboard or click on the small triangle in the middle of Lightroom’s right sidebar.
The top tab under the histogram and some tool icons is the Basic tab. This is where you find the commonly used tools for making major universal adjustments, mostly to the exposure and color values. This is the best starting point for working on a RAW image file before moving down to the Detail tab.
Key Lesson: Navigating the tabs when they are all open can waste time, especially when you’re still getting used to the layout and location of the various tools. The Detail tab is four down from the Basic tab. When you have many tabs open, you may not be able to see it unless you scroll down.
Here’s a handy tip: Right-click on the header of any tab and select Solo mode from the menu that appears. Now only the tab you are working in stays open. When you click on another tab, the previous one you were using will close. This makes the navigation of the tools and sliders more streamlined.

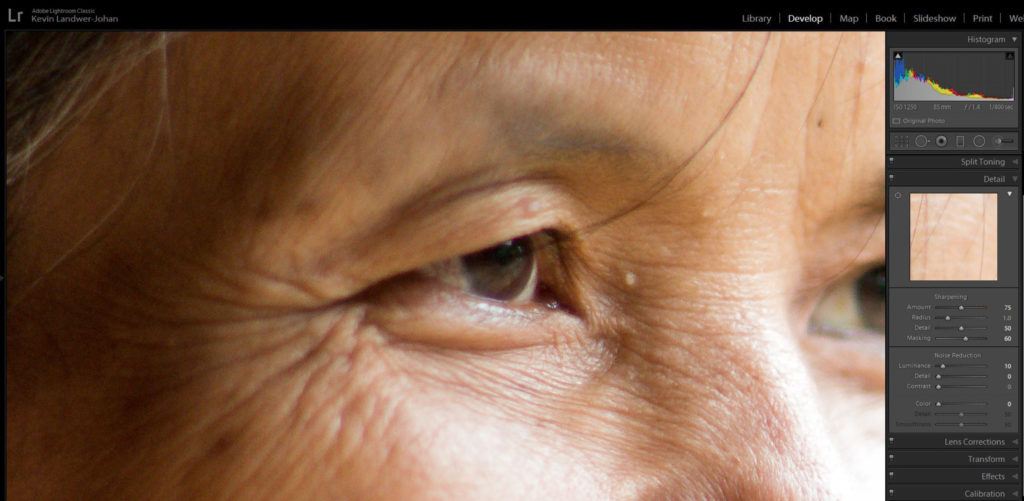
Photograph by Kevin Landwer-Johan
Managing Image Sharpening in Lightroom
In the Sharpening part of the Detail tab you’ll find four sliders:
- Amount
- Radius
- Detail
- Masking
These work together and each has a different function for adding the appearance of sharpness to a soft image.
Key Lesson: An out-of-focus photo will always remain so. No amount of sharpening will rescue an image that’s truly out of focus to begin with.
The sliders for sharpening are used to adjust the contrast of edges in your photos. They will make some changes to an out-of-focus photo, but the image will never look as good as if it were properly focused on the camera.
Pictures that are a little soft will benefit from sharpening. Photographs that are well out of focus and have excessive sharpening applied generally look pretty awful. The best thing to do with an out-of-focus photo is to leave it alone and find a better image to work on.
At times, editorial photographs that are out of focus are accepted for publication. They’re usually one-off photos of newsworthy events captured in the spur of the moment. These photos are best left without much or any sharpening. The blurriness often helps convey the immediacy of the story.

Photograph by Kevin Landwer-Johan
Alterations That the Sharpening Sliders Make
Each slider performs a different task. When you combine their use, you have more control over the outcome.
Amount
This is the main sharpening control. When this slider is set to 0, the other sliders are grayed out. You must use the amount slider first and then the others will activate.
This slider works on the contrast variance between pixels. The further to the right you drag it, the more intense the effect appears. This manages contrast on a pixel level in areas of the image where there are defined edges.
Radius
The Radius slider controls how wide the influence of the Amount slider is from each pixel. You can set it from 0.5 to 3 pixels. So, along an edge containing contrast, the Radius influences how far from the edge sharpening is applied.
The wider the radius you choose, the thicker the lines of contrast appear. Applying too much-sharpening effect on too wide a radius can result in edges that look like shadows.
Detail
This slider influences how much detail is affected by sharpening. A low number means smaller details are not altered. The more you drag the slider to the right, the finer the details are sharpened.
If you’re sharpening a photo of a person, the lower detail setting will affect the edges of the hair against the background. As you drag the Detail slider to the right, individual strands of hair become visibly changed.
Masking
This tool allows you to control how much of the overall image is affected by the changes you’re making. Set to 0, the whole image is adjusted as you use the other sharpening sliders. As you drag the slider to the right, larger areas of similar pixels are ignored.
In photos with a lot of detail, this slider is not of so much use. In compositions with a clear subject separated from a soft background, the masking slider is more useful.

Photograph by Kevin Landwer-Johan
Key Lesson: Seeing how your image is changing can be challenging when you’re using the sharpening tool. There’s a preview window in the tab above the sliders, but this is not always so clear.
Hold down the Alt key on a PC or the Option key on a Mac while you drag the sliders. You’ll see an enhanced visual that helps you view the alterations you’re making. While zoomed in, it is very apparent what’s happening when you drag the sliders.
Recommended Reading: If you want to learn how to enhance your photos and create better images, grab a copy of Photzy’s premium guide: Ultimate Guide to Fundamental Editing.
There's No Magic Formula for Image Sharpening
Every photo you work on response differently to the sharpening changes you make to it. Aim for what looks natural. Avoid dragging any of the sliders to their extremes as this leads to a breakdown of image quality.
Working with a larger file size will help preserve the integrity of the photo as you work on it. With photos from your phone or a compact camera, the image will start to deteriorate even with minor amounts of sharpening applied.

Photograph by Kevin Landwer-Johan
Managing Noise Reduction in Lightroom
You may have noticed when you apply to sharpen that more digital noise appears in your photos. This is because sharpening enhances the contrast at edges on a pixel level, even when it appears there’s little or no detail. This can be controlled somewhat using the masking slider.
Editorial photographers love using high ISO rather than flash. Flash can be intrusive and, in many situations, alter the atmosphere. Using a flash can also draw unwanted attention to a photographer. With high ISO comes digital noise, so it’s necessary to deal with it during postproduction.
You can end up with noise in your photos after using the sharpening tools or because of high ISO. The noise reduction sliders are here to help you rescue your photos.
No noise reduction used. Photograph by Kevin Landwer-Johan

Noise reduction used resulted in softening. Photograph by Kevin Landwer-Johan
There are two types of digital noise that Lightroom works on. They are Luminance Noise and Color Noise.
Luminance Noise is pixels that are too light or too dark compared with similar surrounding pixels. Color Noise is seen as discolored pixels.
There are two types of digital noise that Lightroom works on. They are Luminance Noise and Color Noise.
These two sets of sliders work in similar ways. One affects luminance difference, while the other affects color differences between pixels.
Adjusting the Luminance and Color Sliders for Noise Reduction
These sliders affect the level of contrast between pixels of varying luminosity and color. They darken or lighten contrasts and average out color contrast. The effect is to smooth away the contrast. If overused, you’ll potentially lose the sharpening you made with the other sliders in the Detail tab.
Working similarly to how the sharpening sliders do, noise is reduced by altering contrast levels between pixels.
The Details slider can help you confine where the noise reduction happens. With the slider at 0, noise is reduced to the whole image. Moving the slider to the right means reduction happens, except on edges.
The Contrast slider makes very subtle alterations to areas of contrast but does not often appear to do much at all.

Photograph by Kevin Landwer-Johan
Conclusion
These are subtle, yet powerful tools when used carefully. Adjusting the sharpness of your photos can make them that much more appealing. Overdoing it will ruin a good picture.
Heavy-handed used of sharpening tools is one of the most common post-processing mistakes I see. Typically, it appears on photos that are badly out of focus and are not worth spending time processing.

Photograph by Kevin Landwer-Johan
Key Lesson: “Make sure it’s sharp.” I heard this phrase so many times when I started work in the photography department of a daily newspaper. If a photo was handed in for publication and it wasn’t in focus, it would be rejected. Newsprint is not at all forgiving, so photos must be pin-sharp to have the most impact. Only on rare occasions would a soft image be printed. This was only when no sharp photo of a news event was available.
Photography has changed a lot since then. Digital imaging technology has changed so much, but it has not (yet) provided tools to fix an out-of-focus photo.
Use the sharpening tools in Lightroom with care. Trying to repair a photo that’s clearly out of focus usually only makes it look worse.
Apply the tools well and you can enhance images that are a little soft and bring some life back into them.
Recommended Reading: If you want to learn how to enhance your photos and create better images, grab a copy of Photzy’s premium guide: Ultimate Guide to Fundamental Editing.
Self-Check Quiz:
- What is located in the Detail tab of Lightroom?
- Why is it important not to overuse the Sharpening and Noise Reduction Tools?
- How can you quickly locate the Detail tab?
- What is ‘Solo Mode’?
- True or False: You can effectively sharpen an out-of-focus picture using the Detail tab tools.
- What does sharpening do to the edges of your photos?
- Is a slightly blurry picture ever acceptable?
- In sharpening, what does the Radius slider do?
- How do you access the Masking function within the sharpening toolset?
- What ill-effect can occur with noise reduction?
- What is the difference between Luminance Noise and Color Noise (chromatic noise)?