


Many photographers prefer to use Lightroom only. Adobe Lightroom is a fabulous program that you can do a diverse amount of image editing with. But Lightroom has some limitations.
So, in this guide, I’ll outline some aspects of image editing you will need Photoshop for.
The Adobe photography CC software comes as a package deal. Lightroom provides sufficient editing tools for many photographers. It also has less of a learning curve than Photoshop. This makes it attractive.
But when you want to do things like combine multiple images, use layer masks, work with Smart Objects, refine object removal and cloning, post-process images to add text, or any other image editing techniques, you’ll need to step bravely into the world of Photoshop.
Let’s take a look at each of these editing techniques you’ll need to use Photoshop for. Beware, you may become inspired to take your image editing to a new level.
Key Lesson: Photoshop provides editing functionality on levels that Lightroom does not.
Recommended Reading: If you want to learn how to enhance your photos and create better images, grab a copy of Photzy’s premium guide: Ultimate Guide to Fundamental Editing.
Combining Multiple Layers in Photoshop
The ability to work with multiple layers in Photoshop is one of its most notable differences from Lightroom. When editing in Lightroom, you are restricted to working on one layer only. In Photoshop you can introduce as many new layers as you need.
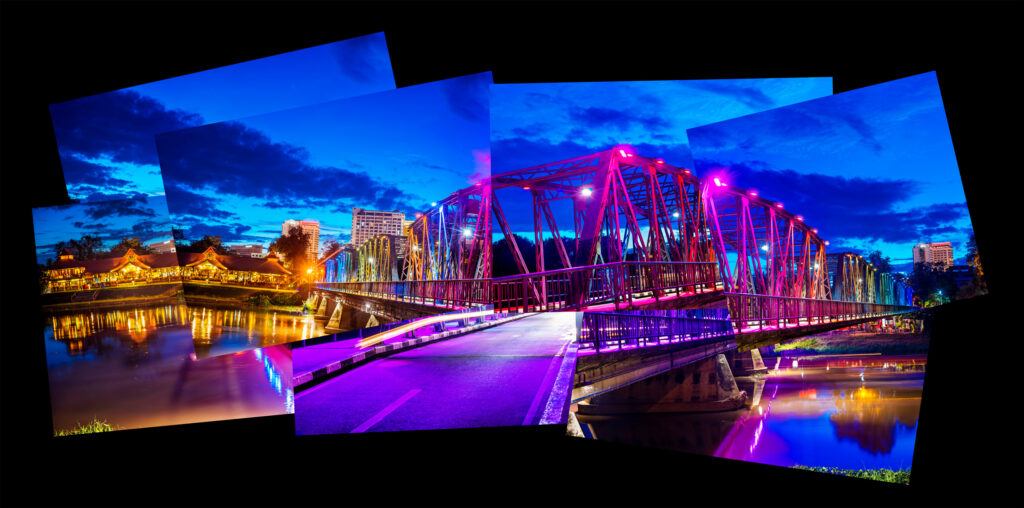
When working on my photomontages, I have created files with around 150 images on separate layers. This allows me to position each photo independently and move them around as I need to.

Photomontage example made with very few layers. Photograph by Kevin Landwer-Johan
There is an endless number of techniques you can use layers for. By reproducing the same photo on different layers and using a variety of blend modes, you can boost contrast. This can add more life to an otherwise flat image.
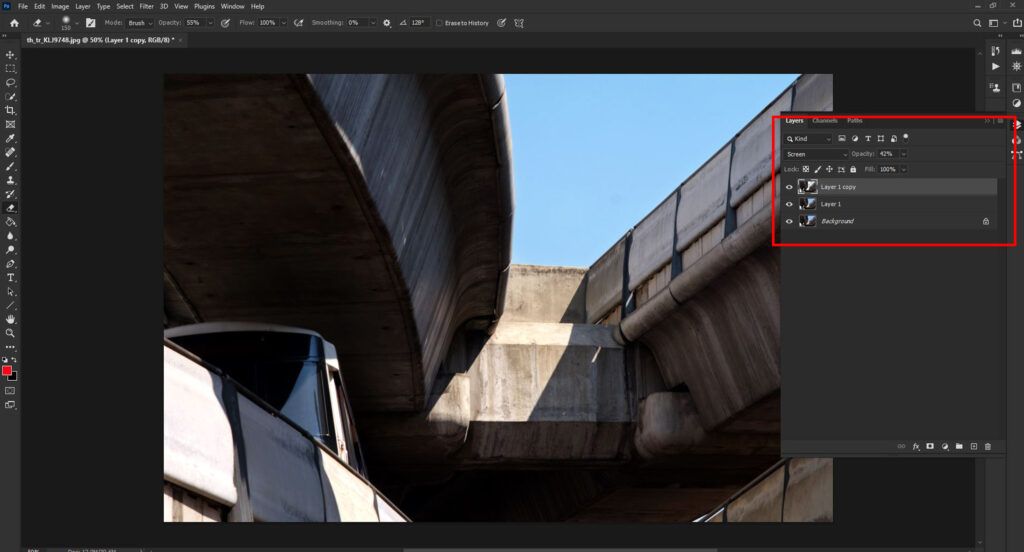
The technique using three layers with various blend modes to boost contrast. Photograph by Kevin Landwer-Johan
Adjustment Layers are another Photoshop feature that Lightroom does not have. You can use adjustment layers to help fine-tune an image or images on multiple layers. Edit essentials such as curves, levels, and exposure. Or you can experiment with Patterns, Gradients, or Posterization.
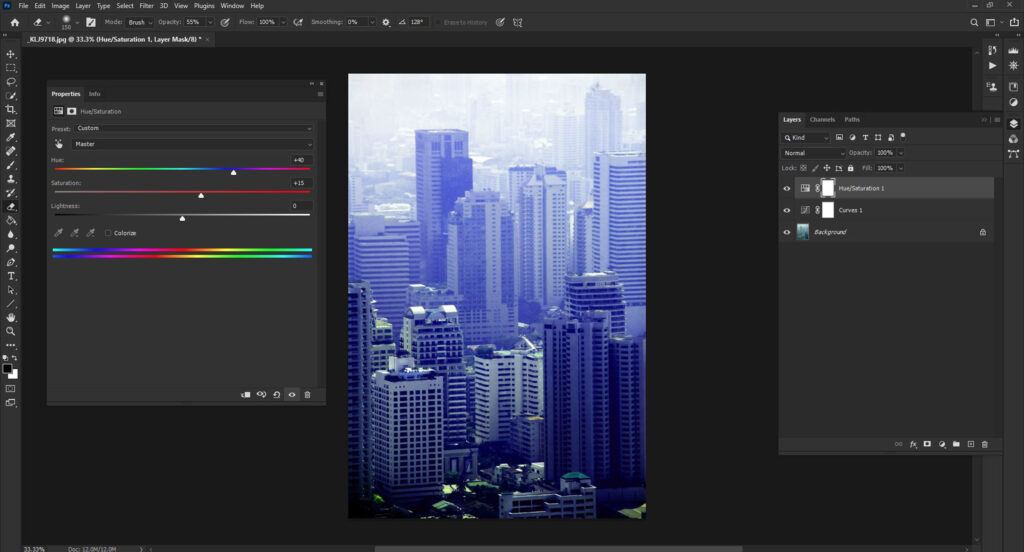
Screengrab showing the use of Adjustment Layers. Photograph by Kevin Landwer-Johan
Layers also allow you to duplicate an image and make adjustments to your copy while preserving your original. This is helpful when performing difficult edits or experimenting with techniques that are new to you.
Merging two or more photos to make a composite is something you can do in Photoshop, but not in Lightroom. You can add whole photos or erase certain areas before merging them. By placing images on separate layers, you can control the transparency and blend mode of each layer to control how it appears.
Key Lesson: The ability to work on layers is one of the major differences between Lightroom and Photoshop.
Incorporating Layer Masks
Layer masks are a powerful tool in Photoshop. Applying a layer mask allows you to make adjustments to a layer, or too many layers, without directly affecting an image. You can use them with layers you create and with Adjustment Layers.
You can paint on a white layer mask to hide or reveal more or less of the layer beneath. Painting with a black brush will erase the mask. If you make a mistake, you can switch the brush, so it paints with white. Now you can paint over-erased areas of the mask and they will be restored. Changing the brush to a shade of gray will erase only part of the image when you apply it.
Layer masks are a powerful tool in Photoshop. Applying a layer mask allows you to make adjustments to a layer, or too many layers, without directly affecting an image.
Changing a layer mask so it’s filled with black hides the mask. You can then paint on the mask to reveal certain areas. Click on the layer mask icon in the Layers Panel. Then go to Edit > Fill, in the main menu. From the drop-down menu, select Black.
This provides you incredible flexibility to manipulate images. You can be as experimental or perfectionist as you like. This is like working with the Adjustment Brush in Lightroom but provides for much more editing diversity.
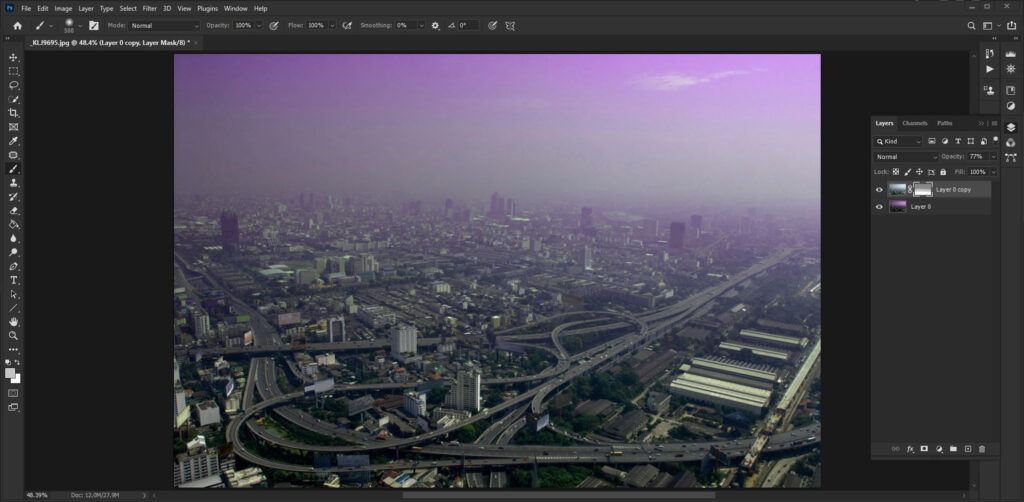
Image with a Layer Mask. Photograph by Kevin Landwer-Johan
In this example, I’ve duplicated the same image and placed them on separate layers. I edited the sky in the lower layer to change the color. On the top layer, I added a layer mask and then used a brush to erase the upper portion of the image to reveal the colored sky of the lower layer.

Here is the original, unaltered photo. Photograph by Kevin Landwer-Johan
Key Lesson: Layer masks in Photoshop provide a great deal of flexibility. This is because there’s no limit to how often you can over-paint any mistakes you make.
Working With Photoshop Smart Objects
Smart Objects in Photoshop have some similarities to working in Lightroom. When you edit a Smart Object, you are performing non-destructive alterations. This is very much how Lightroom works when you edit. But with Smart Objects, you can combine as many as you like on the same layer or different layers. This gives you much more scope when you are designing or creating photo art.
Another key aspect of working with Smart Objects is that when you resize them you will not lose image quality. If you upsize a regular image or layer, you will lose quality.
Using Smart Objects as placeholders speed up workflow on complex images. Photograph by Kevin Landwer-Johan
You can introduce vector images when using Smart Objects and they will keep their original integrity. If you bring a vector into Photoshop as a regular layer, it will be rasterized. This feature is particularly useful when you need to combine graphic elements with photographs.
Smart Objects allows you to work with low-resolution placeholder images as you edit. Once you’ve completed editing, you can then replace them with full-resolution files. I find this workflow is perfect when I am editing montages with many layers.
Key Lesson: Smart Objects provides added editing flexibility and a smoother workflow, particularly when you are working with many layers.
Refine Object Removal and Cloning
Lightroom users can use various tools to remove spots and edit out red-eye. Photoshop provides many options for removing objects and cloning. Once you’ve learned to use these tools in Photoshop, it’s unlikely you’ll use the spot removal in Lightroom other than for very basic edits.

An exaggerated example of cloning in Photoshop. Photograph by Kevin Landwer-Johan
In Photoshop there are various tools to use when you want to remove unwanted elements from photos. The most commonly used of these is the Clone Stamp tool. With this, you can select what you want to remove and sample another section of the same image and paint those pixels in place.
The Healing Brush works similarly but is more automated. When you paint with this tool, Photoshop will match the lighting, texture, transparency, and shading of the pixels you are replacing.
Lightroom users can use various tools to remove spots and edit out red-eye.
When you click and hold on the Healing Brush icon in the menu bar, you’ll discover four other options for tools that work similarly. One of my favorites here is the Patch Tool. With this, you can draw around an element you want to remove, then sample another part of the image. Photoshop will replace the pixels, matching and merging the replacement pixels quite seamlessly.
Key Lesson: Whereas you can remove spots in Lightroom, the cloning and healing functionality in Photoshop is far superior.
Adding Text in Photoshop

Photograph by Kevin Landwer-Johan
Adding text in Photoshop is as easy as creating a new layer, selecting the text tool, and typing. There are also many levels of complexity beyond this for how you can manipulate the way your text will look. In Lightroom, it’s not possible to add text to an image like this. Lightroom offers very limited ability to add text in the Print Module.
In Photoshop you have all the power of layers and layer masks to use when adding text. Sure, you can simply type in a text, overlaying it on a background image. Or you can experiment endlessly to merge text and make it an integral part of the image.
One of the most common purposes photographers adds text to photos is to watermark them. It is possible to add watermarks in Lightroom, but with Photoshop you have a lot more flexibility to manipulate the text to get it looking how you want it to.
Learning To Use Photoshop
Are you beginning to use Photoshop after getting used to editing in Lightroom? Here are a few things that Photoshop does differently than Lightroom.
Key Lesson: In Photoshop, you must remember to save your work. Lightroom automatically saves your progress, so if the software crashes or the power goes out, you will not lose your edits. In Photoshop, you must turn on the auto-save function and set it to the time increment you want to save your work at.
Recommended Reading: If you want to learn how to enhance your photos and create better images, grab a copy of Photzy’s premium guide: Ultimate Guide to Fundamental Editing.
To set the auto-save function, go to File > Preferences > File handling. In the File Saving Options, make sure ‘Automatically Save Recovery Information Every’ is enabled. Then choose how often you want Photoshop to save your work.
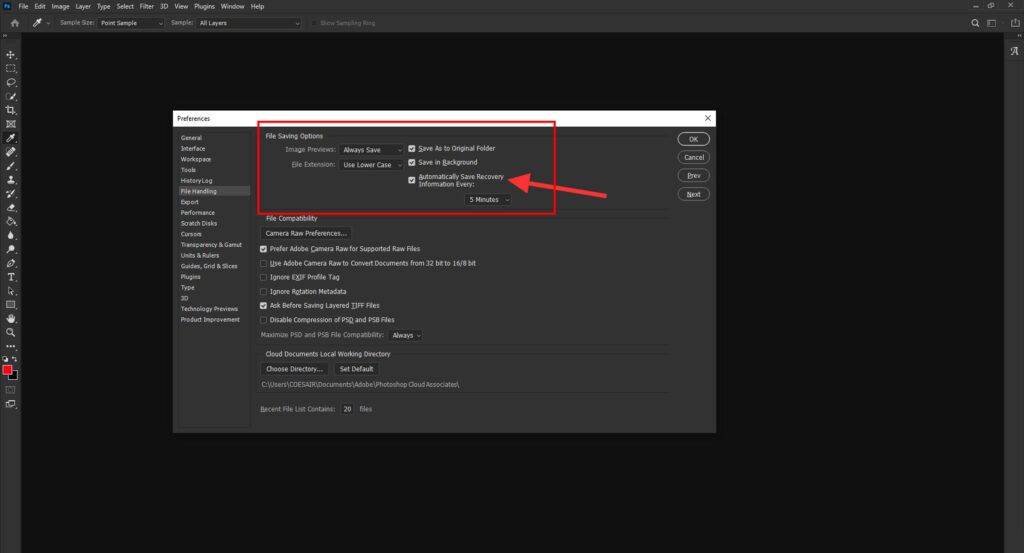
Photograph by Kevin Landwer-Johan
Unless you are using Smart Objects, any editing you do in Photoshop is ‘destructive.’ In Lightroom, all edits you make are ‘non-destructive.’ Destructive editing alters the original image. So, any changes you make are saved on the original. Non-destructive editing does not alter the original photo, so you can always go back and start over.
Lightroom has great cataloging functionality for your photographs. Photoshop does not have this, so you’ll need to keep using Lightroom to manage all your photos. Adobe also makes another program that helps you keep track of your photo collections. It’s called Adobe Bridge. There are numerous other programs that photographers use to manage their pictures.
Lightroom works directly with your RAW files. When you try opening a RAW file in Photoshop, Camera RAW software will open first. You can make some adjustments here and then open the file with Photoshop.
Conclusion

Photograph by Kevin Landwer-Johan
Both Lightroom and Photoshop are high-quality editing programs. They have some similar functionality and some differences. It is possible to use one and not the other. I find I do most of my serious edits across both platforms.
My workflow starts in Lightroom. Here I do my essential exposure and color balancing. Then I’ll export a TIFF file or open the image directly using Photoshop. Then I proceed to remove any unwanted elements in the image and further tweak it until I’m happy with the results.
It takes time to learn both these programs. Photoshop is more complex but can still be made good use of to perform simple edits in ways you cannot when only using Lightroom.
Self-Check Quiz:
- Name two things you can do in Photoshop but not in Lightroom.
- How many new layers can you introduce to an image in Photoshop?
- What happens when you paint on a layer mask?
- When you edit a Smart Object, are you making destructive or non-destructive changes?
- What is the most common tool to use in Photoshop for removing unwanted elements?
- Is it possible to add watermarks to your photos in Lightroom?
- Do you have to remember to save your work in Photoshop?


