


The setting tone in Lightroom can be done in many different ways using various panels and sliders. You can manipulate the tone in your photographs to portray the feeling you want. With people photography, I try to match the tone of the image to the expression of my subject. In this article, I will explore a few ways you can do this.
Here is what we’ll cover:
- Why contrast can help set the mood
- The importance of shadow
- Lighting and tone
- Creating two moods from the same lighting
- Enhancing controlled lighting
- The tools for adjusting tone in Lightroom
By setting the tone in Lightroom you can enhance the mood of your portraits. Doing this well means that viewers will connect more with your photos.
Photograph by Kevin Landwer-Johan
The style of lighting used when you photograph people is the foundation for setting the tone. Matching this with the mood of your portraits helps to build a stronger image. When the light is even and there’s a little shadow, you can do a lot in Lightroom to shape the feeling of the image. By manipulating the tone, you can alter the way your pictures look. I have included some examples of how to do this later in the article.
“Photography for me is not looking, it’s feeling. If you can’t feel what you’re looking at, then you’re never going to get others to feel anything when they look at your pictures.”
Don McCullin
Key Lesson: The style of lighting used when you photograph people is the foundation for setting the tone.
Recommended Reading: If you want to learn how to enhance your photos and create better images, grab a copy of Photzy’s premium guide, Ultimate Guide to Fundamental Editing.
Lighting and Tone
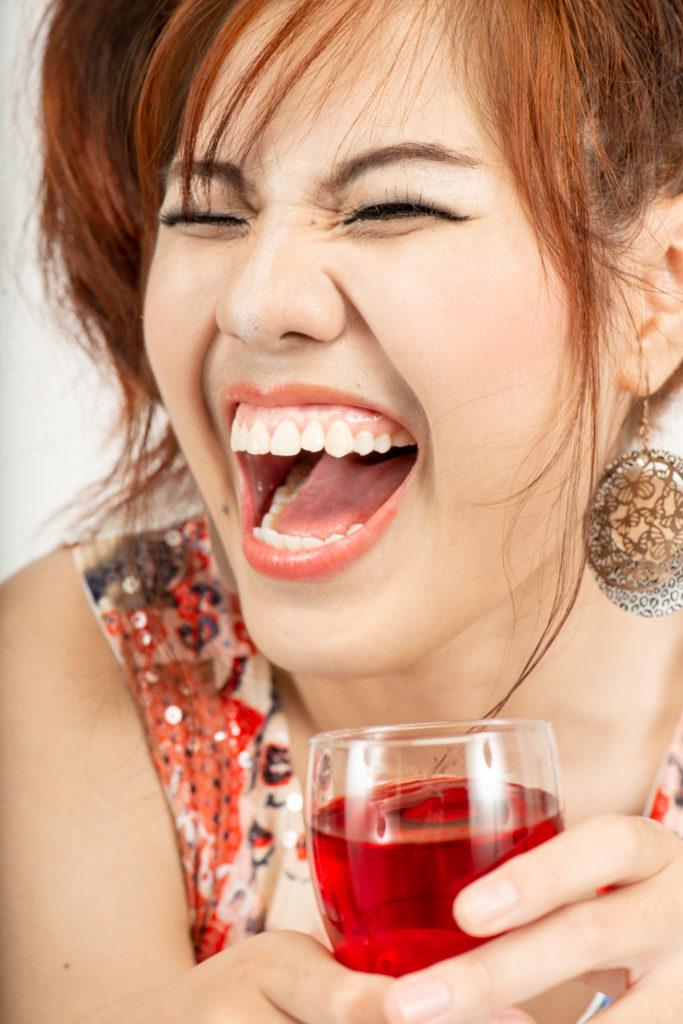
How you light a portrait influences the mood it will convey. Matching the lighting to the expression of the person you’re photographing helps to build a stronger picture. Keeping that feeling with the tone you set in Lightroom will further enhance the portrait.
Bright, even lighting helps convey a positive, happy feeling. Somber lighting with dark shadows tends to communicate the opposite. When you don’t have any control over lighting, you must rely more on your post-processing skills to shape the tone of your people’s photos.

Photograph by Kevin Landwer-Johan
For photographers who prefer to take portraits with only natural light, you can still create a mood. Choosing the location based on the type of light will help you convey the mood you want to achieve in your portraits. How you post-process your photos in Lightroom can further amplify the feeling you create with the lighting. Or you can change it dramatically. The extremely broad dynamic range sensors in modern cameras allow you to manipulate the RAW files extensively.
Key Lesson: For photographers who prefer to take portraits with only natural light, you can still create a mood.
Creating Two Moods From the Same Lighting Conditions
Photographs by Kevin Landwer-Johan
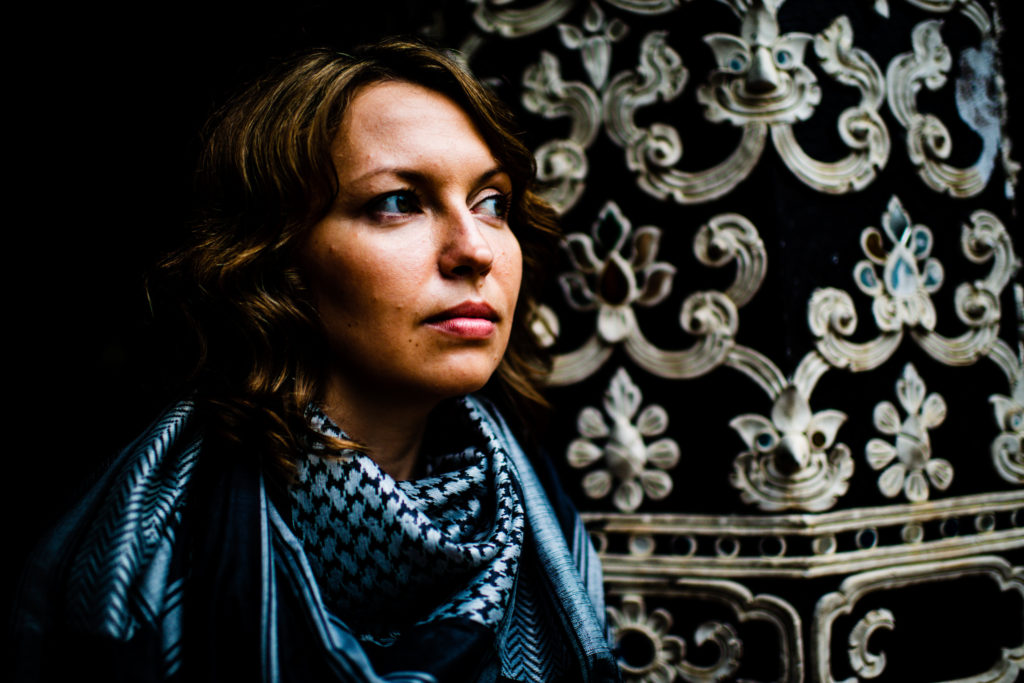
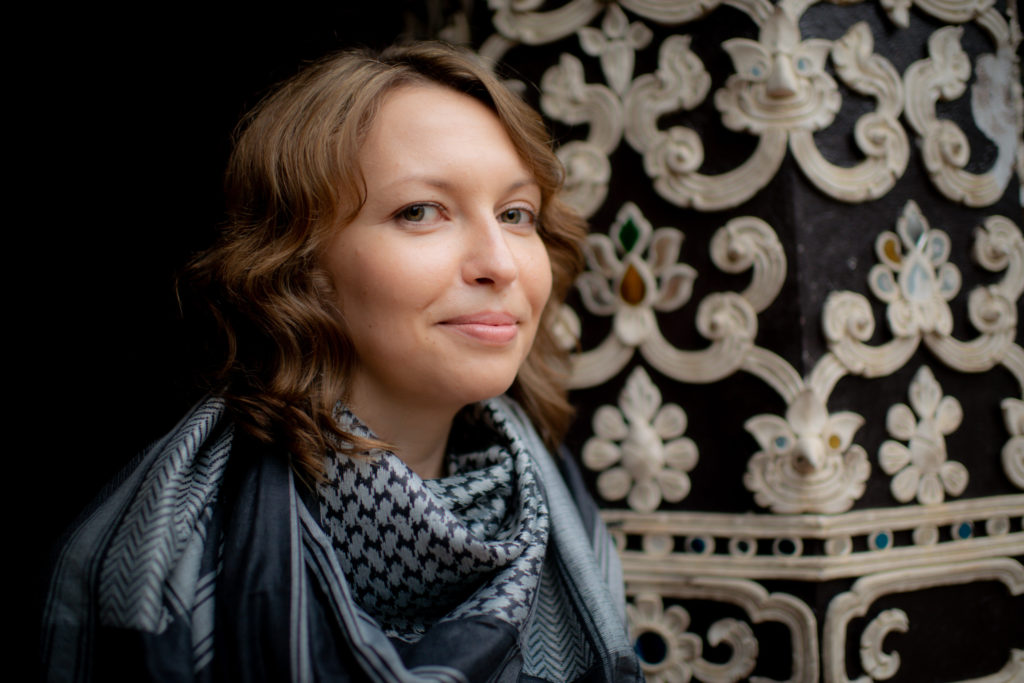
Above are two photos of a friend. The lighting for both portraits is identical, as were my exposure settings. Her expression is quite different in each picture, so I have processed them to suit. In the first photo her expression is contemplative and a bit sad. I have darkened the shadows to enhance this. In the second photo, where she’s smiling slightly at me, the mood is happier. I held back on the shadows and decreased the contrast to better suit her expression.
The sky was overcast, and the light was flat the day I made these photos. Using the sliders in the Basic Panel in Lightroom I was able to manipulate the tone of both photos to best suit the mood I wanted them to express. For the darker photo, I increased the contrast and decreased the highlights. I also dragged the Blacks slider to the left to darken the blacks. Then I used the Dehaze slider to increase the contrast a little more.
For the lighter photo, I kept most sliders at zero. I did slide the Blacks slider towards the left to darken the black areas; otherwise, they looked too washed out. I then used the Clarity and Dehaze sliders. I pulled both of these to the left to soften the contrast and lighten the feeling of the photo.
Key Lesson: The adjustment sliders that you choose to use when adjusting tone in Lightroom will have a vast effect on the final outcome.
Recommended Reading: If you want to learn how to enhance your photos and create better images, grab a copy of Photzy’s premium guide, Ultimate Guide to Fundamental Editing.
Enhancing Controlled Lighting
When you do have control over the style of lighting you use to make a portrait, you have more flexibility in Lightroom.
In high-contrast lighting, your eyes can see more detail in the tone range. In the darkest and lightest areas, your camera will most likely not record the same amount of detail in a single frame. You have to expose for the highlights to pick up the details there or expose for the shadows to capture detail in the darker areas. Your eyes will most likely see detail in both the highlights and shadows.
In high-contrast lighting, your eyes can see more detail in the tone range.
In Lightroom, you can control the tone of your photographs to get pictures that look like the way you saw them or how you imagined them. When you control the light and have it balanced the way you want it, you can be more effective in your tone control once you start post-processing.
Photograph by Kevin Landwer-Johan
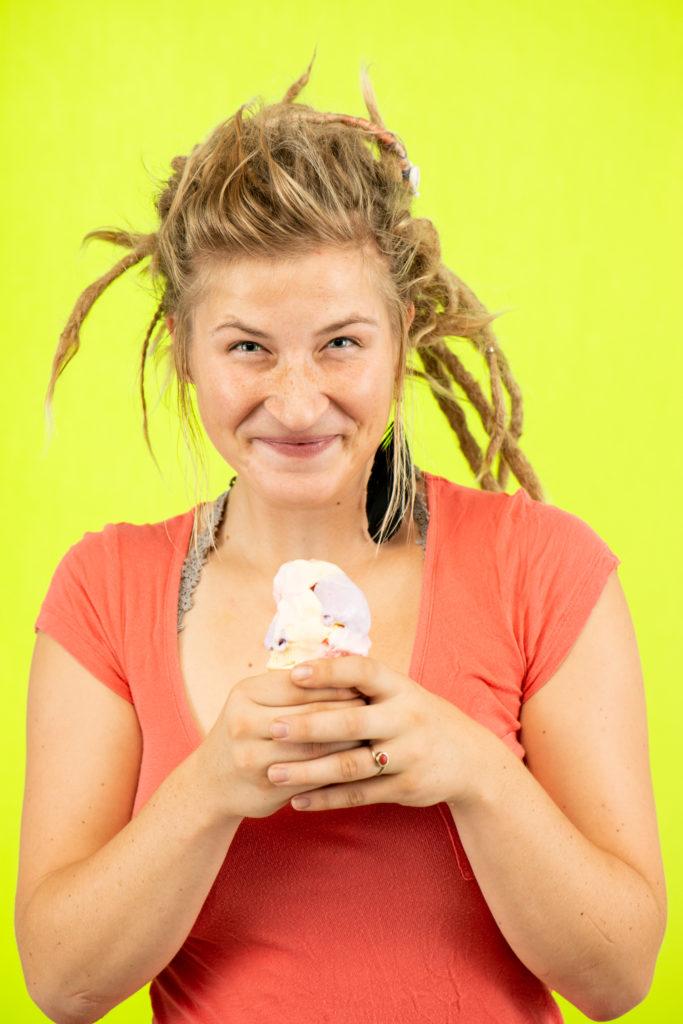
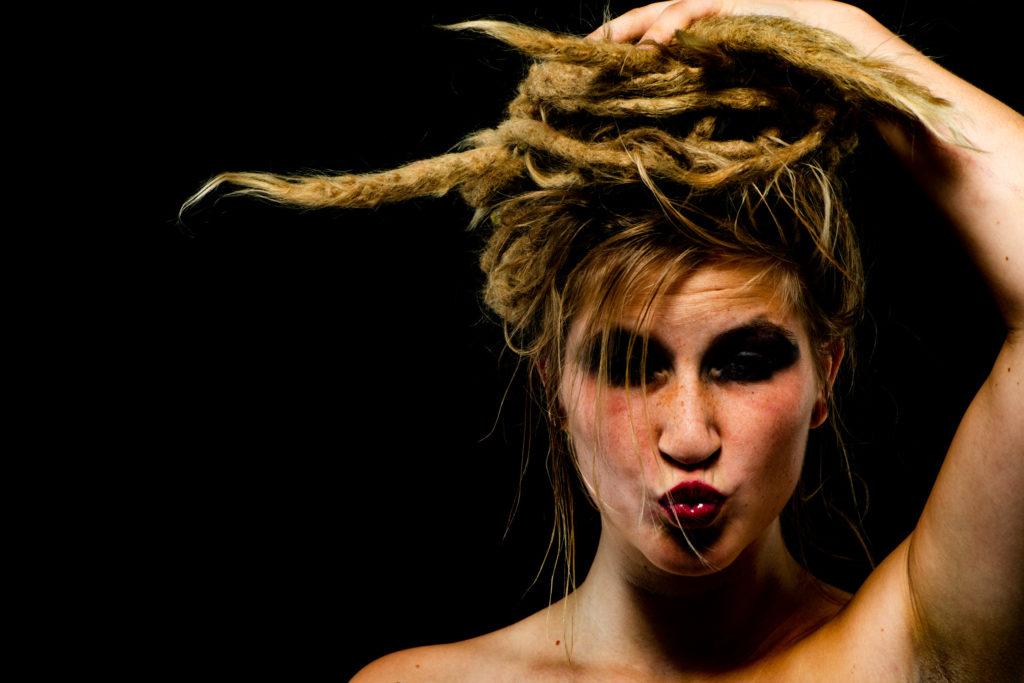
A friend wanted me to photograph her with ice cream. She loves ice cream. So, I suggested we create two different styles of image: one with a typical, happy, summery feeling, and the other darker and somewhat sinister. The main aspects of creating the two styles came down to her expression and the tone of the images.
For the first set, I used even, bright lighting. My backgrounds were bright and summery. Her expression was happy. No matter how hard we worked on the air conditioner, the ice cream melted too quickly!
Key Lesson: If you get the lighting right in respect to the mood that you wish to convey, adjustments in Lightroom should be minimal.
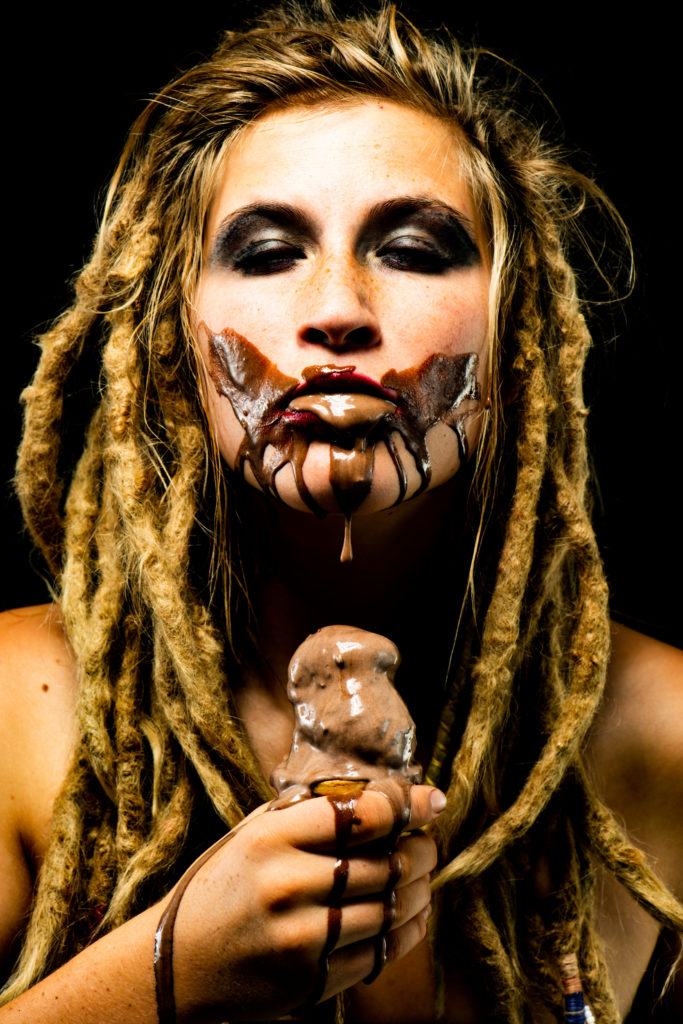
Photograph by Kevin Landwer-Johan
For the second set of photos, I used a dark background and a single light above her. This created some nice dark shadows. We also switched to chocolate ice cream. The overall tone of these portraits was much darker.
Post-processing both sets of photos in Lightroom did not require too much work because I had set the mood with the lighting. For the first set, I reduced the shadows further, and for the second set, I darkened them. This tweaking of the tone in the photos helped support the themes of each.
How to Adjust Tone Using Lightroom
You could probably write a book on the various methods of adjusting tone in Lightroom. There is no right way or wrong way to do it. There are so many options available that it really is a matter of finding out which controls you prefer to use.
In the right-hand-side panel of the Develop Module in Lightroom, you have several sets of controls that allow you to manipulate image tone. The Basic panel is the one I use the most. Here, I’ll often start with the Blacks slider by pulling it to the left. This enriches the black areas in my pictures.
The other main sliders I use to create the tone I want are Contrast, Highlights, Shadows, and Dehaze. Depending on the look I want, I will adjust each of these sliders to the left or right.

Photograph by Kevin Landwer-Johan
Photograph by Kevin Landwer-Johan
I am always careful not to take the sliders to their extremes as I find this can cause a loss of image quality. If I want the black areas very dark, I’ll use a mixture of Blacks, Contrast, Shadows, and Dehaze. If I want to have a happier feeling, I’ll use Shadows and Dehaze moved in the opposite direction to lighten the mood of the image.
Key Lesson: Rarely will moving the Lightroom adjustment sliders to their extremes produce pleasing results!
Recommended Reading: If you’d like to improve your composition skills for better images, grab a copy of Photzy’s best-selling premium guide: Ultimate Guide to Fundamental Editing.
In the panel below Basics, you will find the Tone Curve. This is also a powerful tool for influencing the tone of your photographs. By clicking and dragging on the diagonal line that runs from the bottom left to the top right, you can adjust the image tone. Clicking on the line towards the left you’ll adjust the dark areas. To the right, you’ll be adjusting the lighter areas. In the middle, you’ll be adjusting the mid-tones. Many people prefer to use this method rather than the slider in the Basic Panel. It’s up to you to discover which tools you are more comfortable using.
You can also click and drag within the Histogram. This works similarly to the Tone Curve. To adjust the tone in specific parts of your image, the Adjustment Brush can be used. This gives you much more flexibility as you can make localized adjustments with it. Once you have painted over parts of your image with this brush, you can use the sliders to achieve the look you want.
Conclusion
Lightroom is a powerful application and there are many ways you can use it for setting the tone of your photos. When you start with an image that has lighting that already matches the tone you want, you’ll have less post-processing to do.

Photograph by Kevin Landwer-Johan
- What can the manipulation of tone in Lightroom help you portray in your photos?
- What can you do to match the expression of the person you are photographing to help make a stronger portrait?
- What type of lighting helps convey a positive, happy feeling?
- What type of lighting communicates the opposite?
- Is it possible to manipulate tone in Lightroom to create more than one mood for the same photo?
- Does your camera always record an image the same way you see a scene with your eyes?
- What happens to ice cream in hot weather?
- If the lighting for a portrait is well adjusted, would you expect to need more or less post-processing to create the look you want?
- Name one of the main panels in Lightroom that has tools for manipulating tone.


