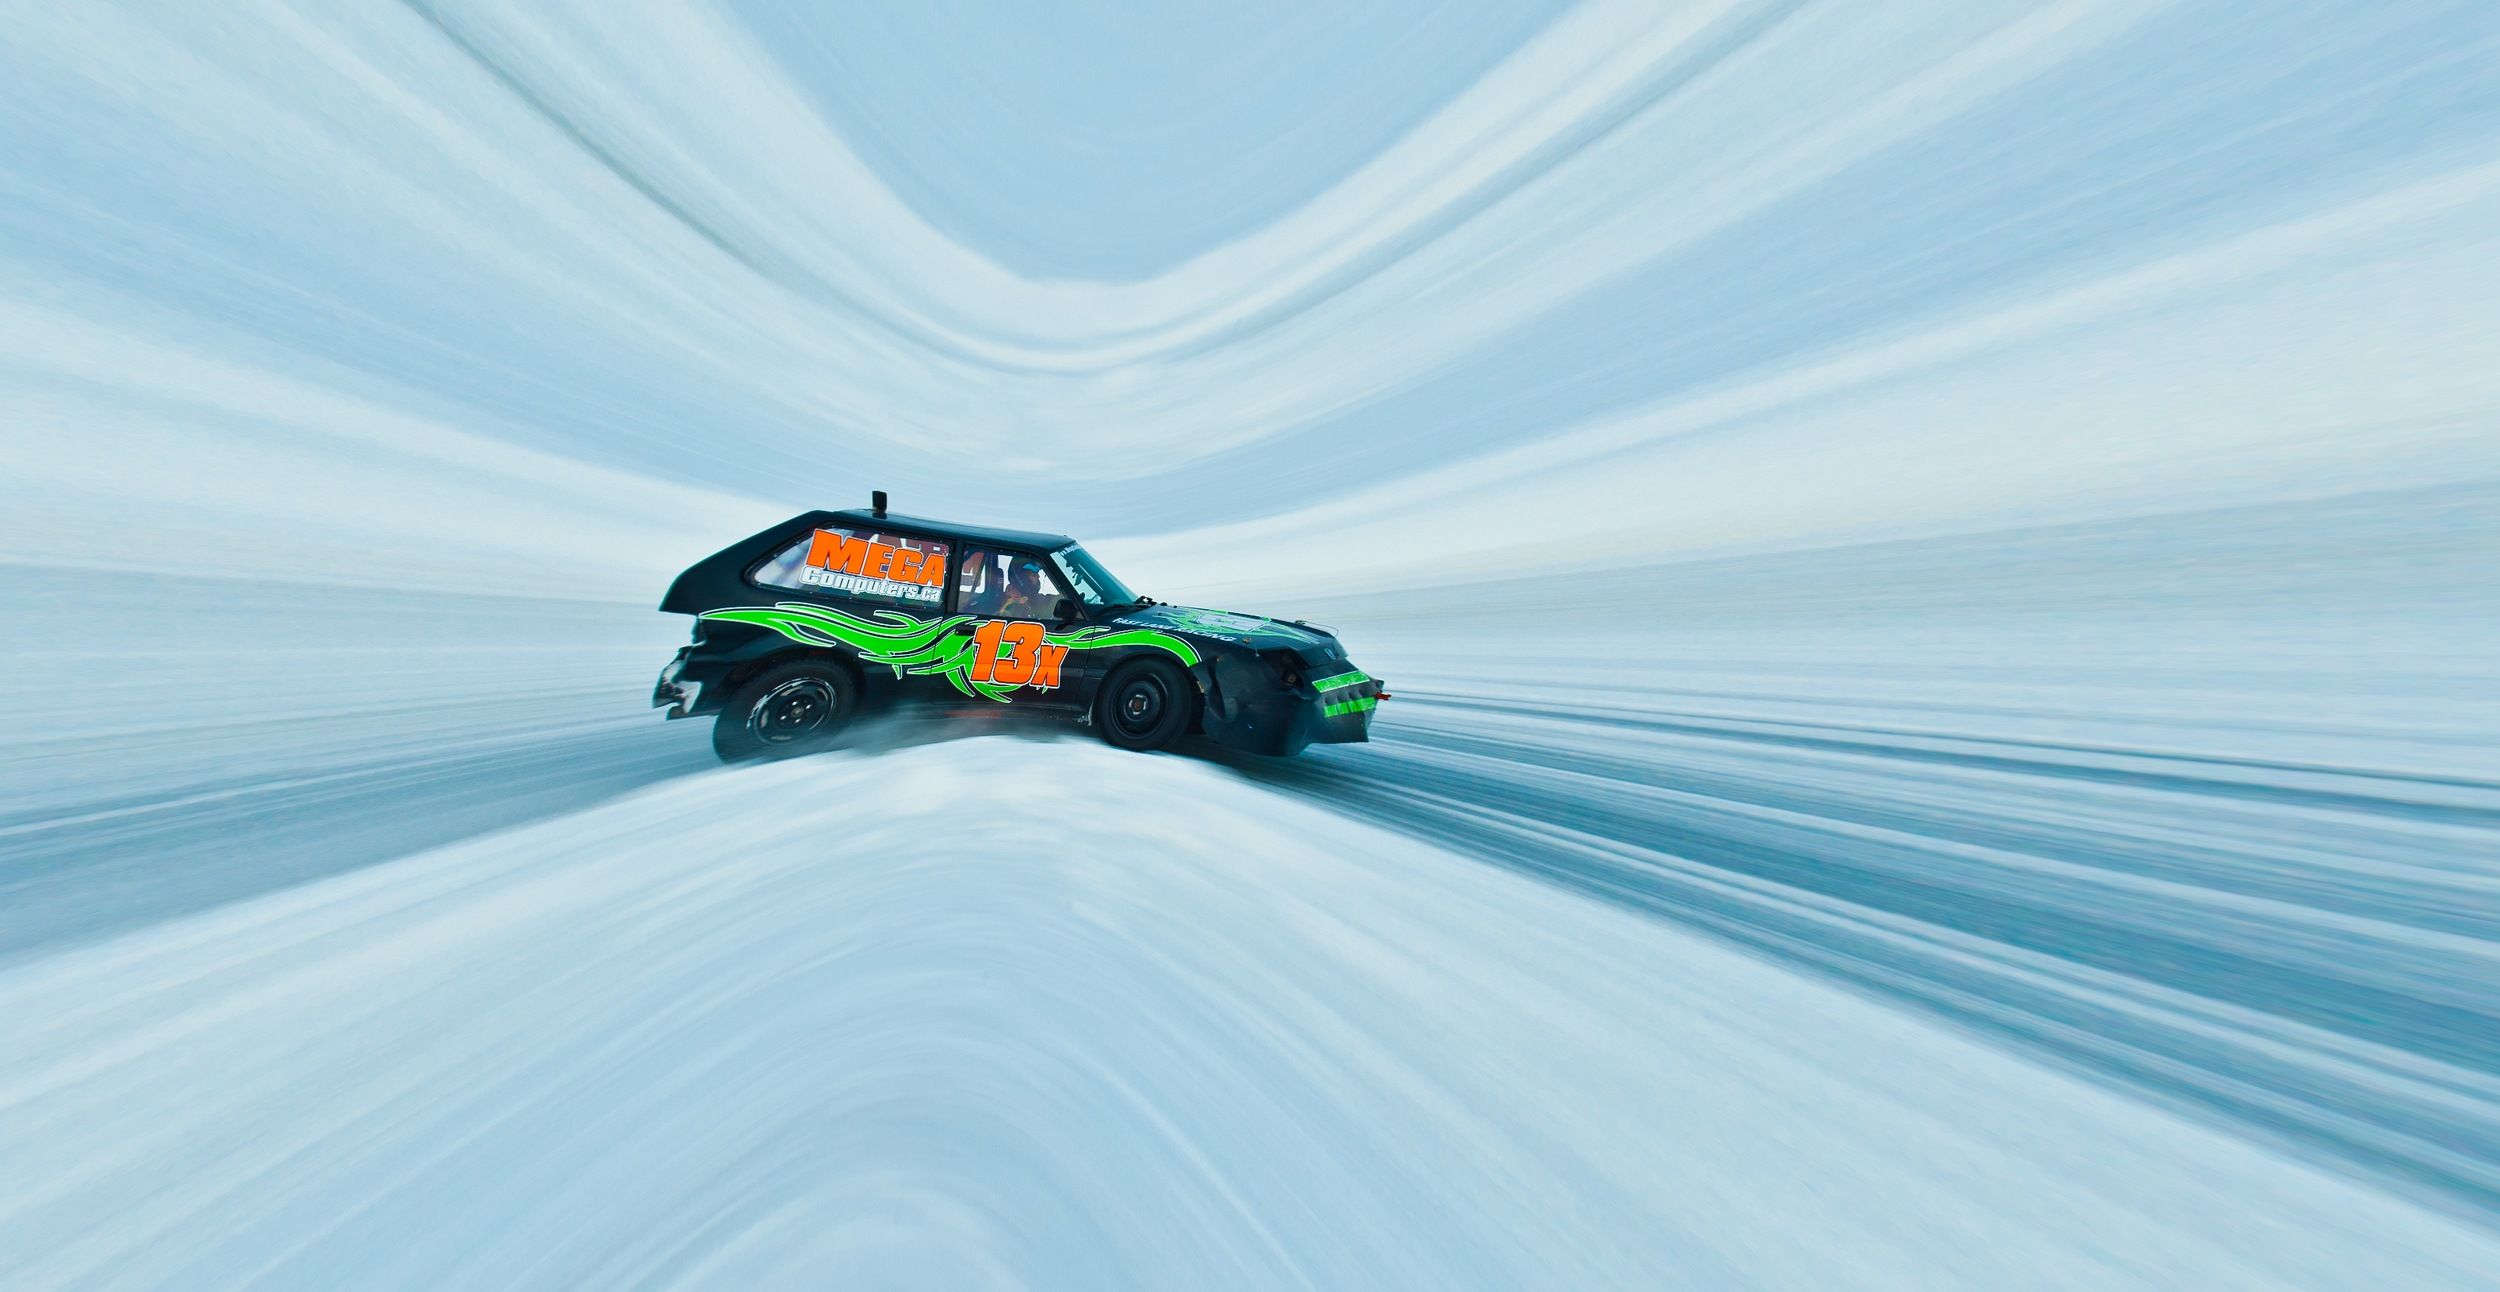
Do you use Lens Corrections in your creative process?
How about for cropping images?
In Lightroom (LR), Lens Corrections have been around for a long time and have been used by most photographers since the day LR was released. Most, if not all of us, have used this function to straighten or align images with either the horizontal or vertical lines within an image. We have also most likely used the Lens Profiles to correct individual lens distortions, such as lens vignette, where the corners of the images are darker than the image, or to correct lens faults such as barrel or pincushion geometric.
In this article, I am going to introduce you to how to use LR’s Lens Profile to assist you in your creative process. You know, those images where things can be somewhat stagnant and you want to add a little something extra, or you want to present a different ‘view’ of the same image – something that will challenge your viewer.
In this article, you will learn:
- how to use the LR 5.7 and LR CC Classic Lens Corrections panel to expand your creative process,
- how to ‘creatively’ use LR’s CC Classic’s Transformation panels, and
- how to crop an image using the Lens Profile Manual and/or the Transformation panels.
Recommended Resource: Want a simple way to learn and master photography on the go? Grab our set of 44 printable Snap Cards for reference when you’re out shooting. They cover camera settings, camera techniques, and so much more. Check it out here.
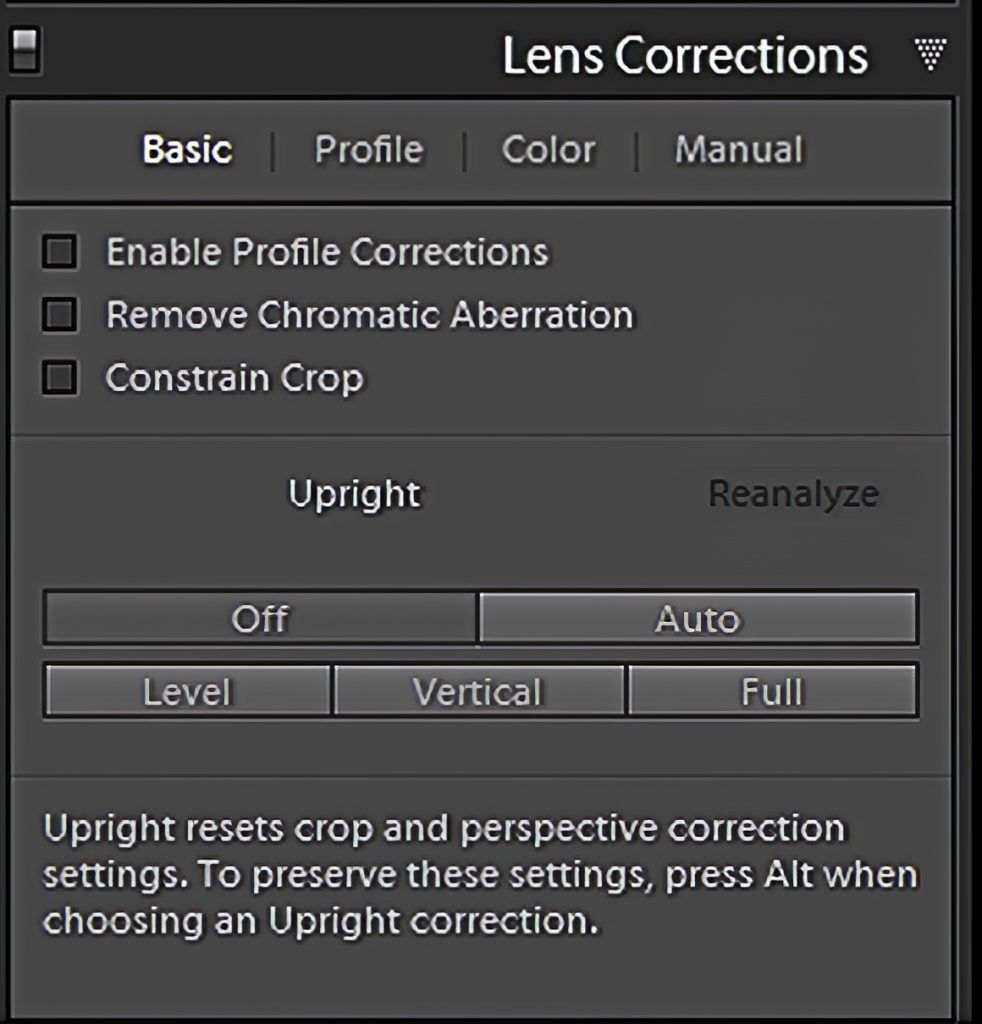
As there are a lot of tutorials and how-to videos available for research, I am not going to explain what each of the Lens Corrections panels do, nor what the options in each panel are for. However, I will point out how the features of LR 5.7 are now displayed and used in LR’s CC Classic. Additionally, I will point out what I feel are the important features to assist you in elevating your creative process to a unique level.
Photographers who have been using LR for years will recognize the Lens Corrections panel from LR 5.7.
When using this tool for creative purposes, the important options are as follows:
- Enable Profile Corrections (click to check)
- Constrain Crop (which is optional to check)
- The Upright ‘buttons’ at the bottom (Off, Auto, Level, Vertical, and Full) (we’ll discuss these later as we see the effects that can be gained from
using these buttons)
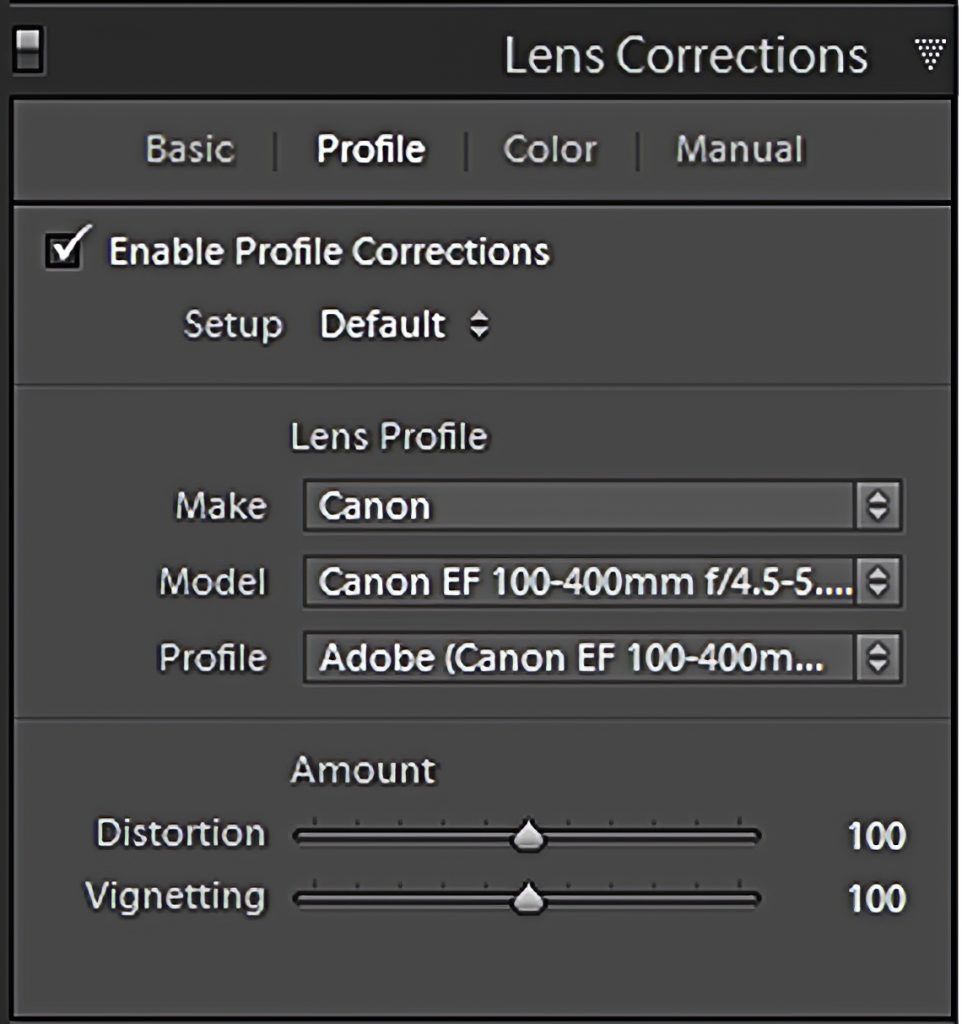
The next important panel to use is the Profile panel.
As you can see, the ‘Enable Profile Corrections’ checkbox has already been checked/clicked. Next, select the Lens Profile that you wish to use to make adjustments with. Click on ‘Make’ to select your camera brand/ type. The ‘Model’ of the lens will usually be completed automatically; however, sometimes LR will not be able to find the lens that you were using to take the image. In this case, manually select the ‘Model.’
You may find that your lens choice is still not available. You have two options now: search the Internet for the LR lens profile you need and then load it into your version of LR, or select a different camera ‘Make’ and then select the ‘Model’ you wish to use. Remember, we are using the Lens Profile for creative purposes, so having the correct lens is somewhat irrelevant.
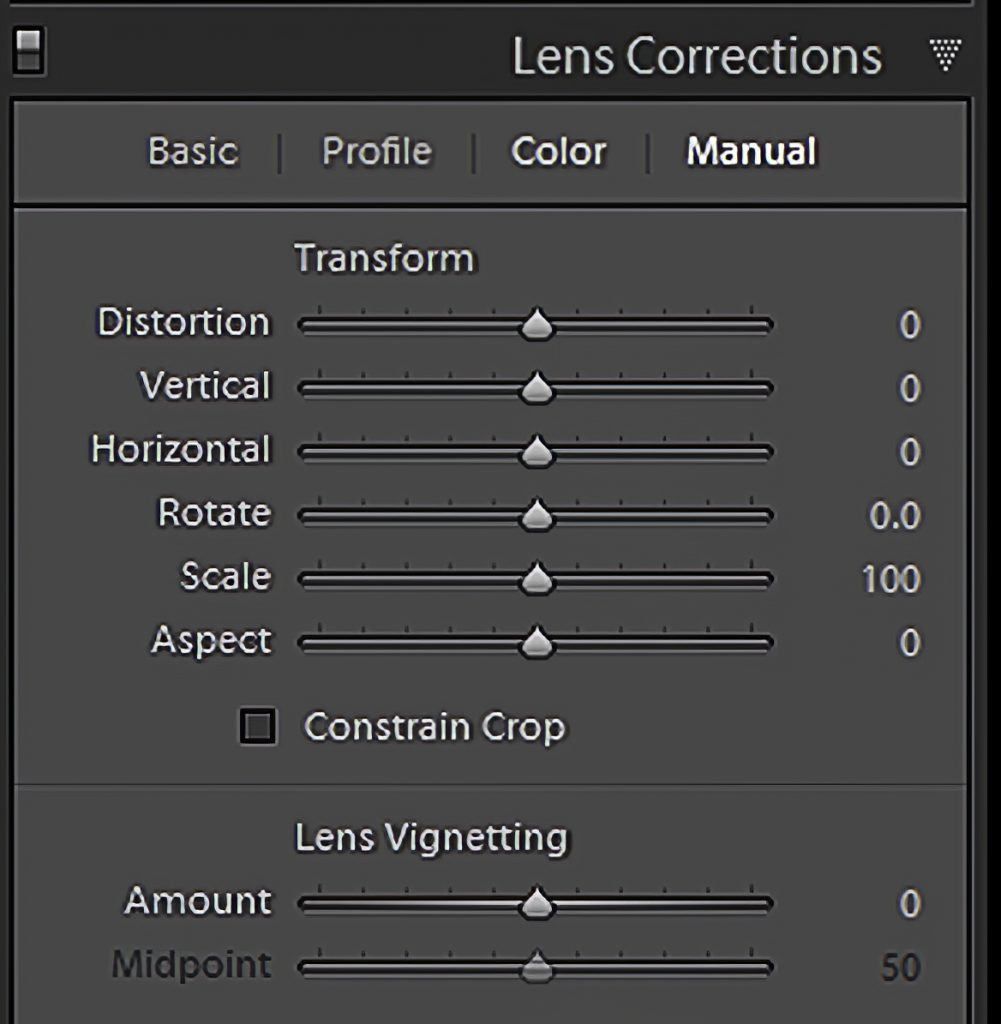
The final panel that is of importance to us is the ‘Manual’ panel.
As the name suggests, this panel enables us to make manual adjustments to the image by moving the sliders as we desire. It is this panel, when combined with the Profile panel, which enables us to use the Lens Corrections panel to greatly stretch our creativity with regards to thoughts on where/how we may want to creatively process an image.
As Adobe has developed and advanced LR, both its technical ability and its user interface have changed. It is partly due to the increased use of LR in mobile devices that these changes have been necessary. However, if one is to stop and think about the functionality of both versions, one will notice that they both have the same ability. Adobe has just changed the user-interface, or layout, of how the LR functions are grouped.
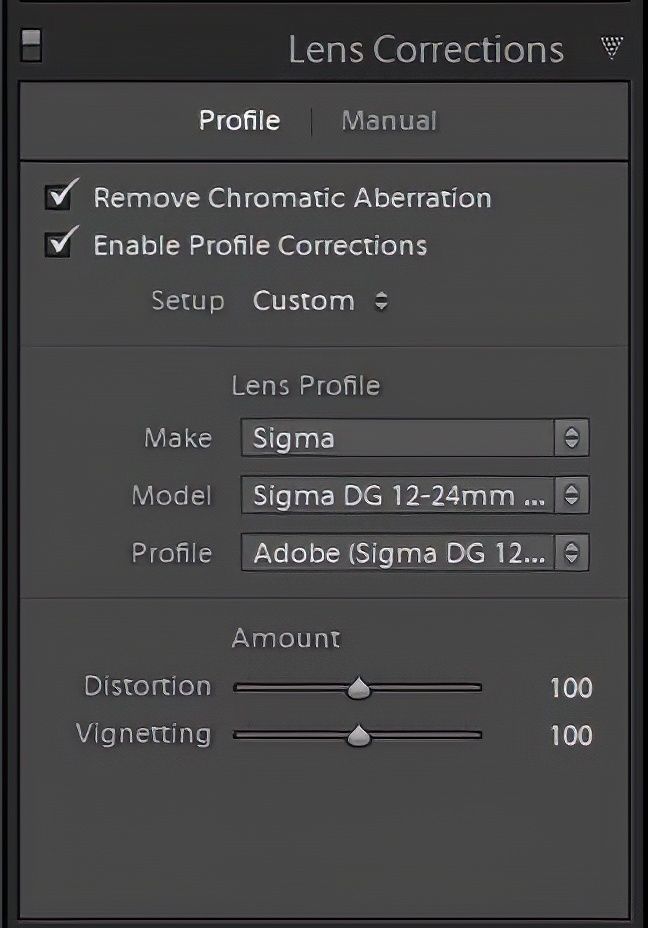
As you can see, the LR CC Classic interface is slightly different in that the Lens Corrections panel now only has two sub-panels. The Lens Corrections panel in earlier versions of Lightroom had four tabs (see previous illustration). The Profile subpanel is virtually identical to its predecessor.
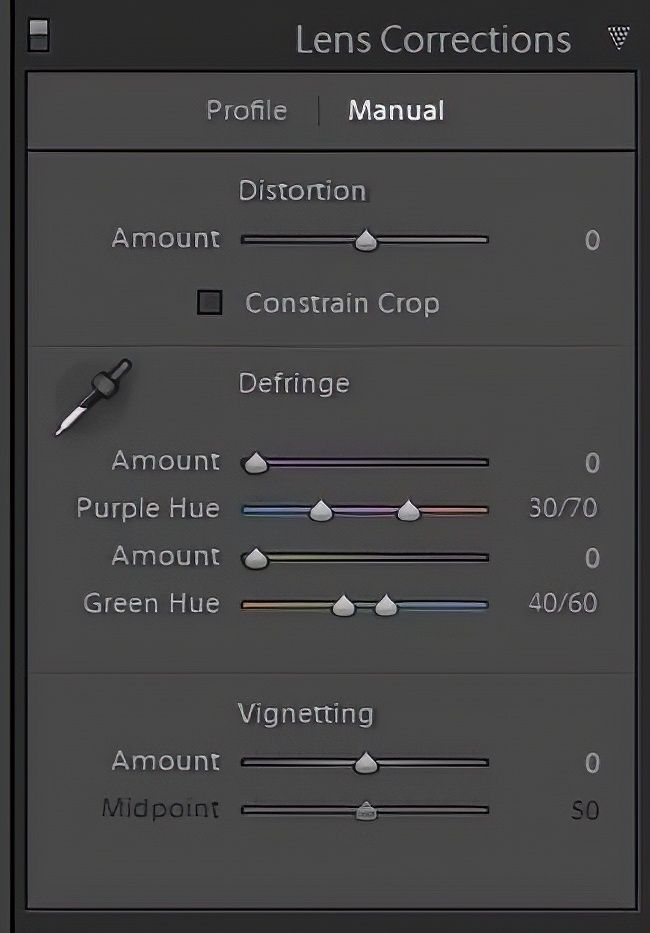
Although the Manual sub-panel is quite different, with the exception of the ‘Distortion’ adjustment, it is basically the same Color (Defringe) sub-panel as seen in the illustration above. For our intent, and for creativity, the Distortion slider is what we are interested in using in this panel.
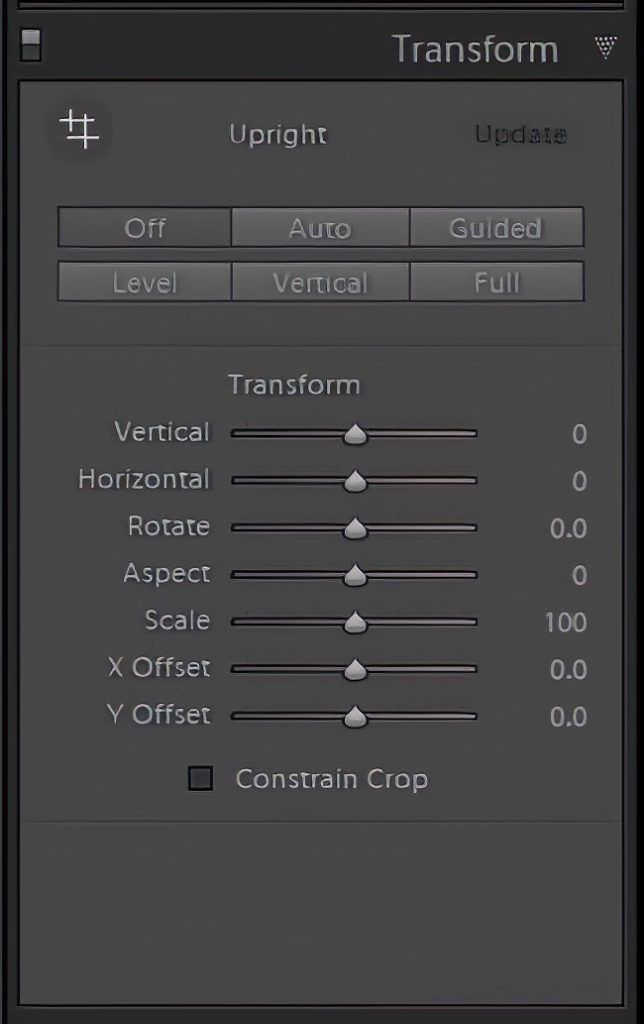
The last panel we are interested in using is the LR CC Classic ‘Transform’ panel. As you will notice, it is now a combination of the automatic adjustments of the LR 5.7 version of both the Basic and Manual panels.
Note: Adobe has added two new sliders to this panel, which are very important when cropping an image. We’ll discuss the ‘X Offset’ and ‘Y Offset’ sliders later
Cropping
Did you know that you can use the Manual panel (LR 5.7) or the Transform panel (LR CC Classic) to crop your images?
How? Use the “Scale” slider.
Simply slide the Scale slider to the right to enlarge the image. The best part is that the image ‘size/image dimension’ does not change.
Compare these next two images.
Note: The image size/dimension is 5184 x 3456.
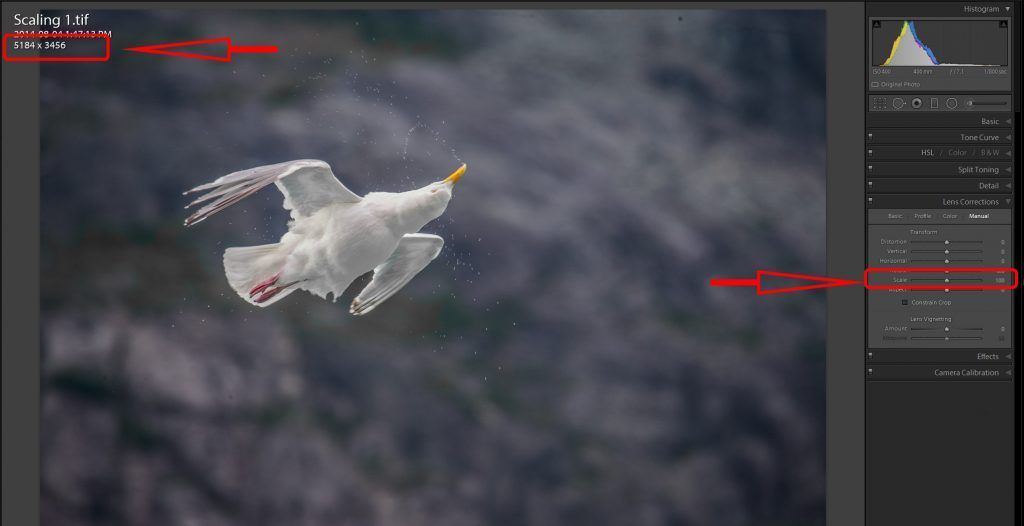
Scale set to 100 (Normal). Photo by Paul McKeen
The first (above) is the original image with the Scale set to its default of 100.
Now compare this to the next image. You will see that this second image is enlarged, or ‘appears’ to be cropped.
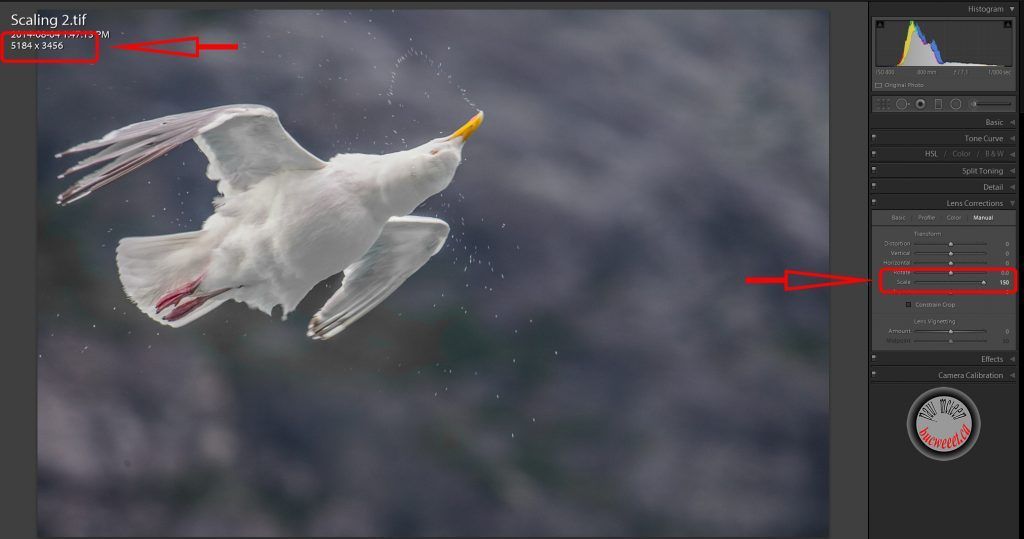
Scale set to 150. Photo by Paul McKeen
However, if you look again at the image size/dimension of the second image you will note that it has not changed. It is still 5184 x 3456 (even though it has been enlarged/cropped).
As you can see, there is a definite advantage to using the “Scale” slider to initially crop images. The reason I say ‘initially’ is because the Scale slider will only enlarge the image to a certain degree. After that, one must use the actual Crop tool to make a ‘tighter crop.’
The only negative aspect I have found when using this method is that if you’re using LR 5.7, the Scale slider makes adjustments from the center of the image. If you look at the second image, you will see that the bird has moved into the upper left-hand corner. There isn’t an easy way to re-center the image on the bird.
Key Lesson: In LR 5.7, to achieve the ‘largest’ possible cropped image, I would suggest you set your desired ‘crop ratio’ (4×5, 1×1, 16×9, etc.) before using the Scale slider. With this done, you have the ability to move the new size to better position the subject that suits the desired crop.
Resizing the cropped image will enable you to place your subject where you would like it.
Lastly, use the Scale slider to enlarge the subject/ image to your desired final crop size.
Resizing the cropped image will enable you to place your subject where you would like it.
For LR CC Classic, LR has two additional sliders in the Transform panel, specifically the ‘X Offset’ and the ‘Y Offset.’ Using these two sliders enables you to move the center point of the cropped area. Using the second bird image above as an example, one is able to move the bird to a more central position in the image.
Moving the ‘X Offset’ slider moves the center point horizontally in relation to the slider movement (slider to the left, image moves to the left; slider to the right, image moves to the right).
Moving the ‘Y Offset’ slider moves the center point vertically in relation to the slider movement.
Recommended Resource: Want a simple way to learn and master photography on the go? Grab our set of 44 printable Snap Cards for reference when you’re out shooting. They cover camera settings, camera techniques, and so much more. Check it out here.
The Creative Process
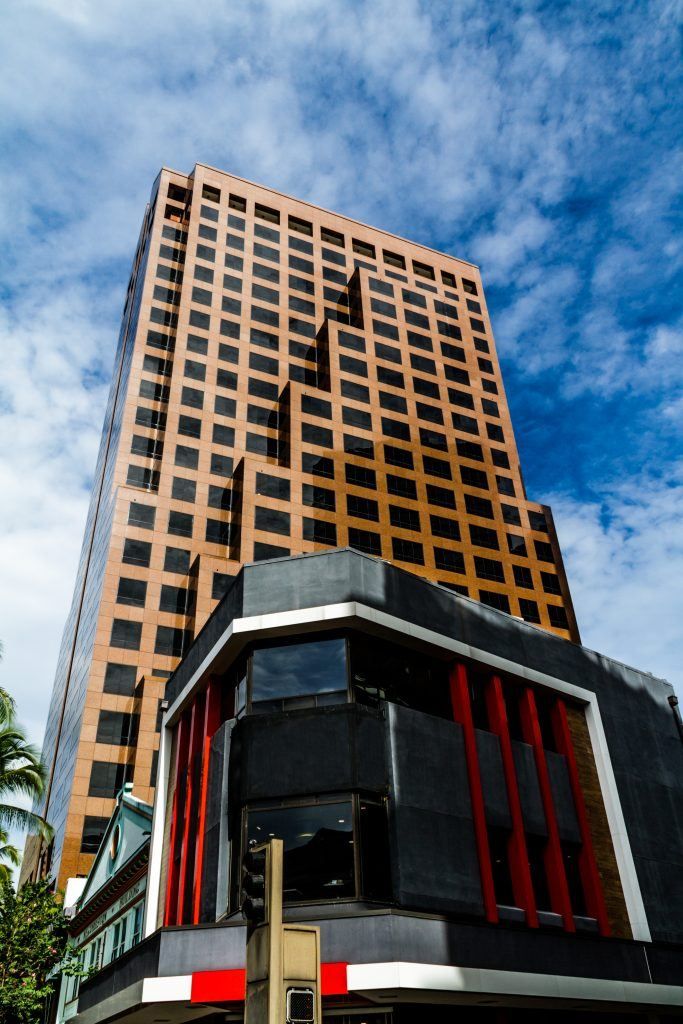
The original image. Photo by Paul McKeen
While processing an image, and after applying the Lens Corrections, my eyes will see other potential images within the one I’m processing. Quite often, all it takes is a new crop; however, I try not to limit my imagination to just cropping.
This is when I’ll use the Lens Corrections on the Basic/Manual panel (LR 5.7) or the Transform panel (LR CC Classic).
I will initially show what I consider the ‘standard’ results of Lens Corrections. Then I will take them one step further to show you the possibilities if one doesn’t limit their imagination.
The following images have the ‘full’ Lens Corrections applied, with the third image being further cropped and then converted to black and white.
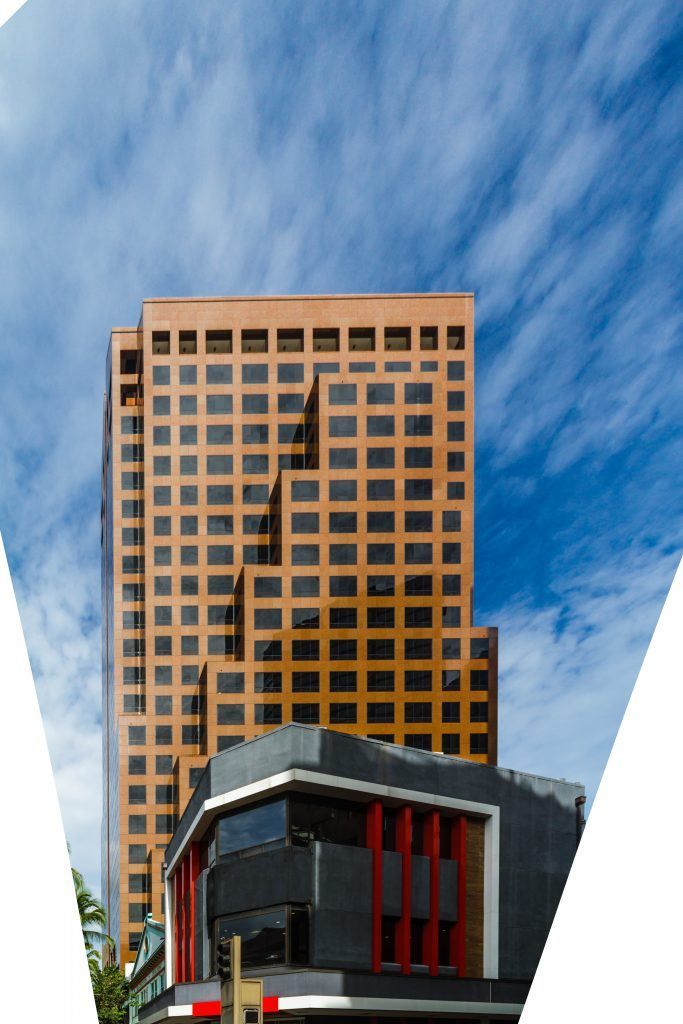
Full Lens Correction applied. Photo by Paul McKeen
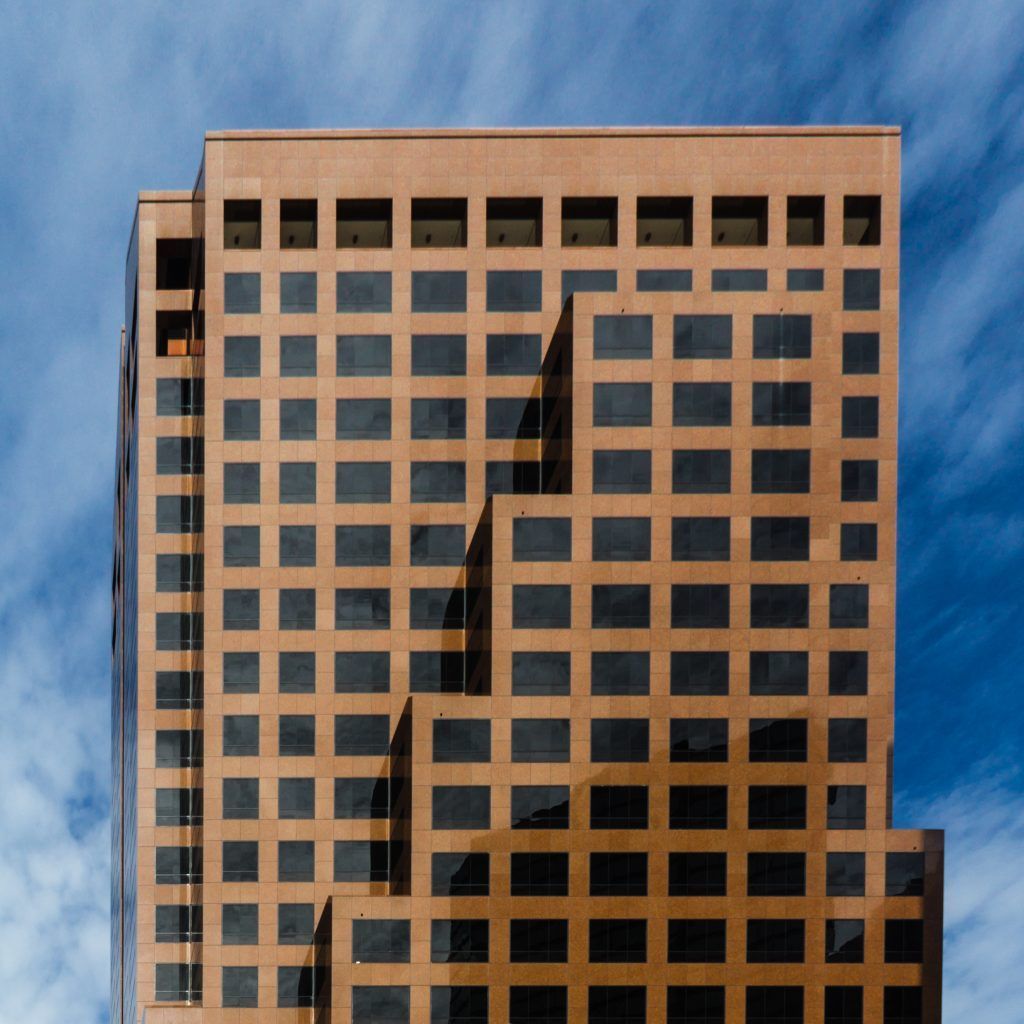
The next step was to crop the image. Photo by Paul McKeen
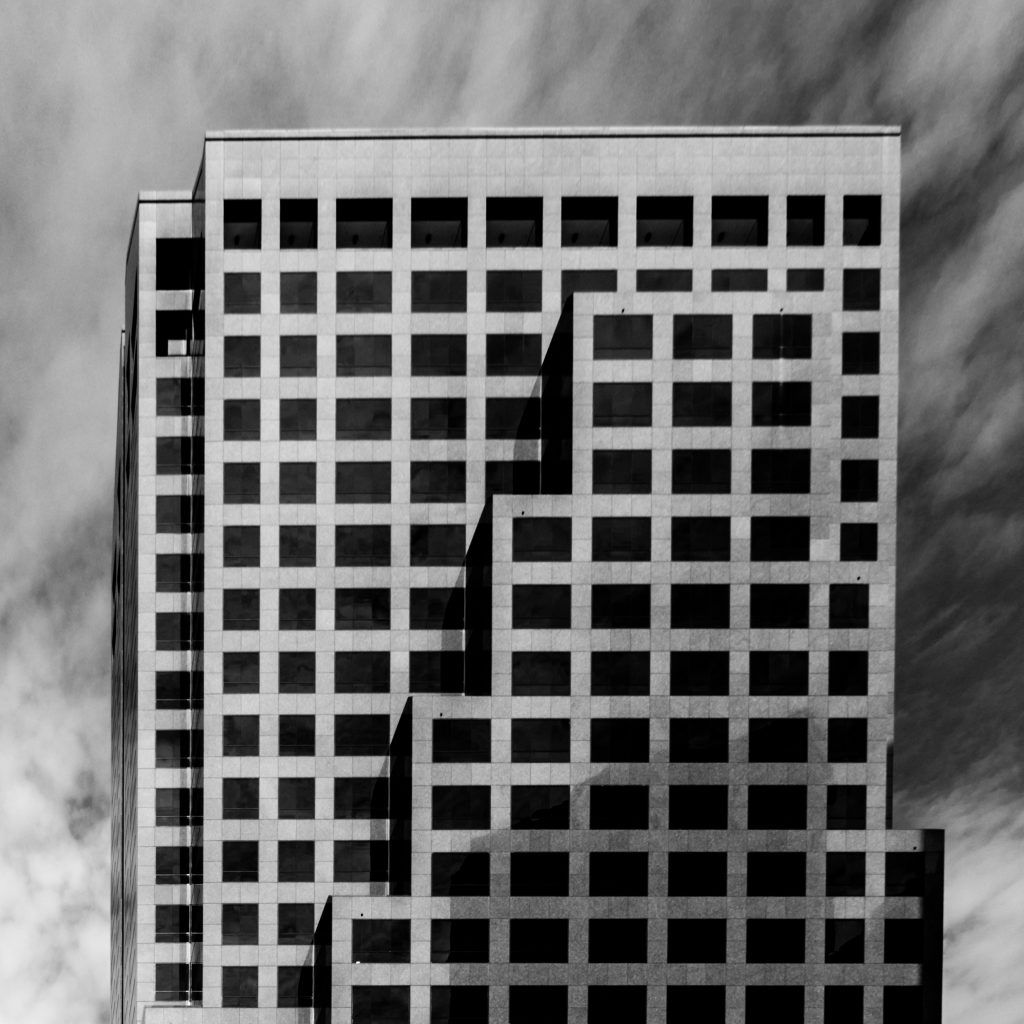
The final step was to convert it to black and white. Photo by Paul McKeen
The following images have only the ‘Vertical’ Lens Corrections applied, with the final image (second image below) being further cropped and converted to black and white.
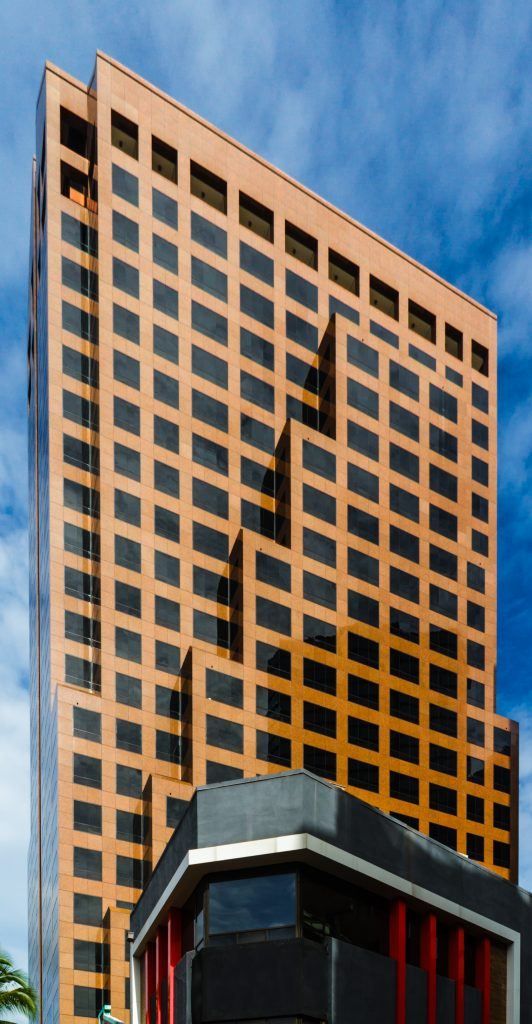
Vertical corrections have been applied. Photo by Paul McKeen
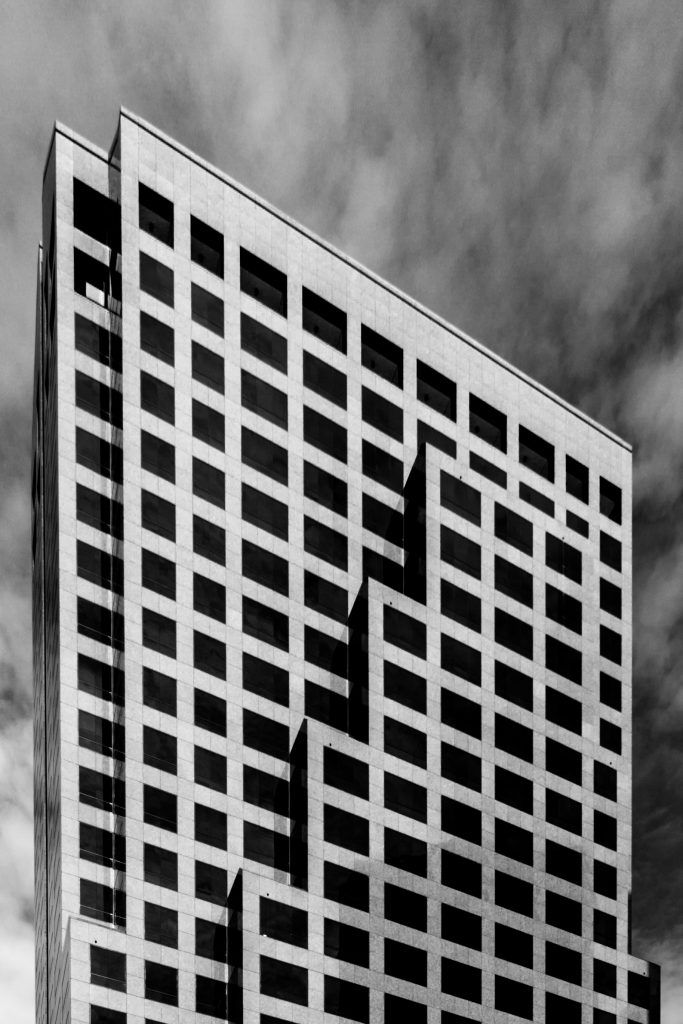
This final version has the vertical corrections. It has been cropped. Finally, it has been converted to black and white. Photo by Paul McKeen
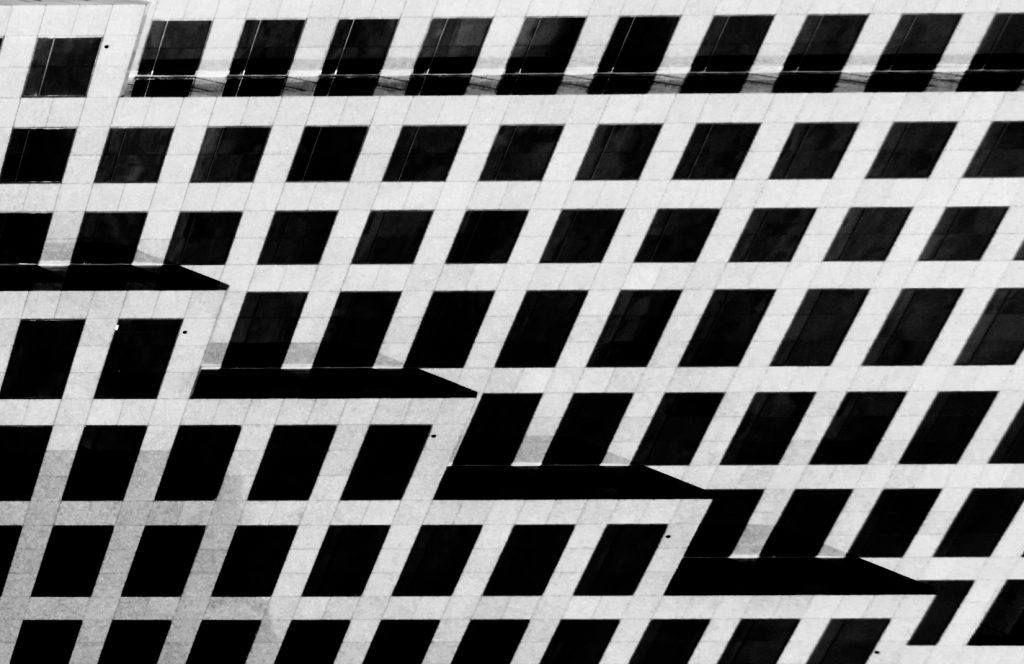
In this version, I have further cropped the image and rotated it. Photo by Paul McKeen
Finally, the image can be rotated and further cropped, if desired. As you can see from the image above and the one below, the final image may not look anything similar to the original image.
Using the Lens Corrections/ Transformation panels can produce some interesting results. However, if you go one step further and change the Lens Profile to a non-standard one, as well as utilize the ‘Manual’ panel in the process, the images can become entirely different and potentially more interesting.
If you experiment with different Lens Profiles you will find that, quite often, not much changes in the image. But if you change to a drastically different lens profile, you may find the results will surprise you.
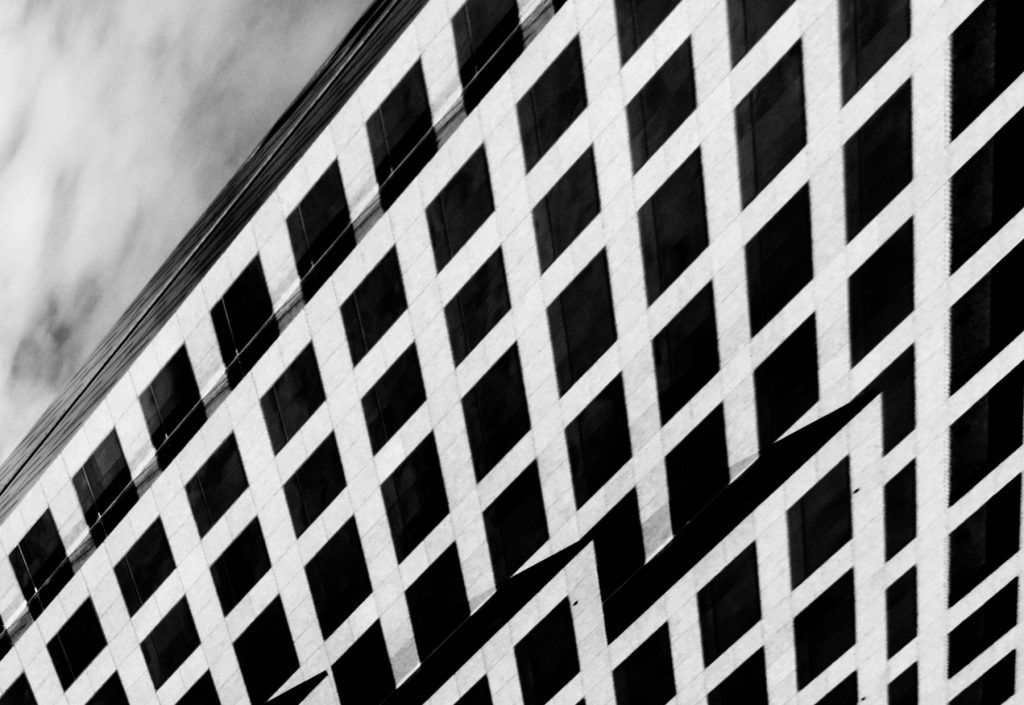
In this version, I rotated the photograph one more time for a completely different effect! Photo by Paul McKeen
Through both experimentation and experience, I have found that by changing to a fish eye lens profile, I achieve the most image distortion, which sometimes proves quite fascinating. Although I rarely use a Sigma lens, I will generally choose to apply one of Sigma’s fish eye lens profiles to my image and then further refine the result using the Manual/ Transform panel.
In the next two images, I have included the Lens Profile selected as well as the ‘Manual/Transform’ panel settings I used to acquire the view or interpretation that I achieved.
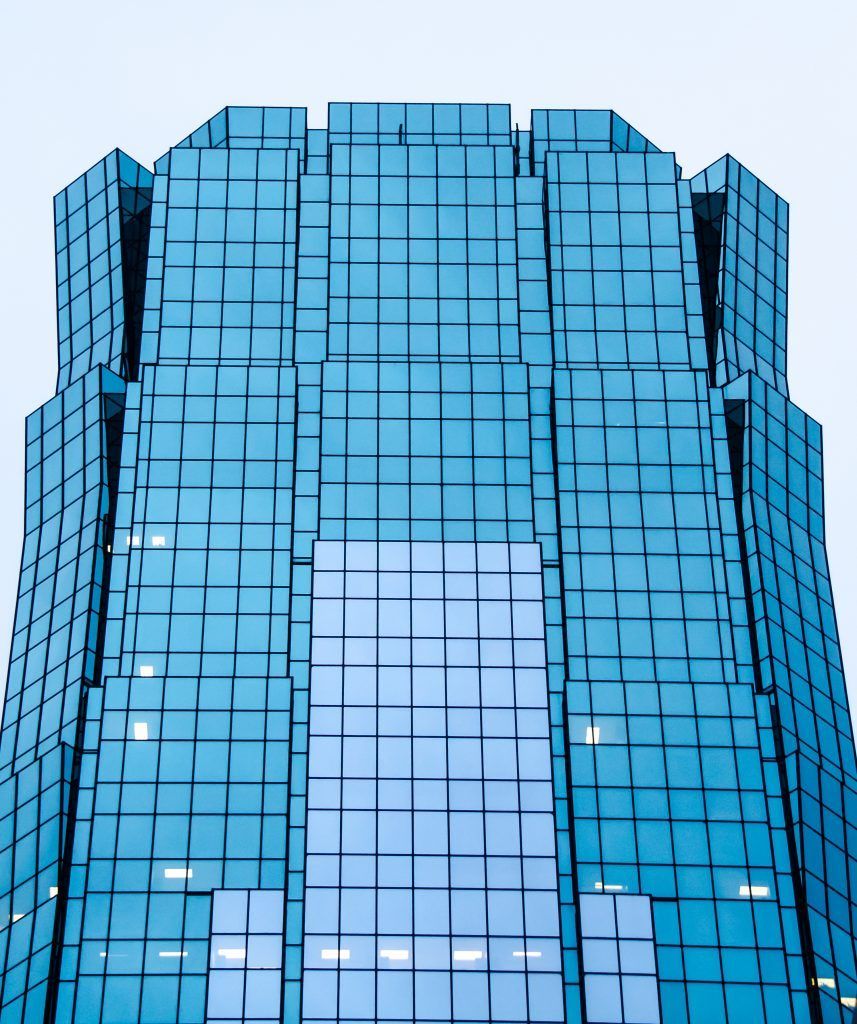
Photo by Paul McKeen
This is the original image file (above).
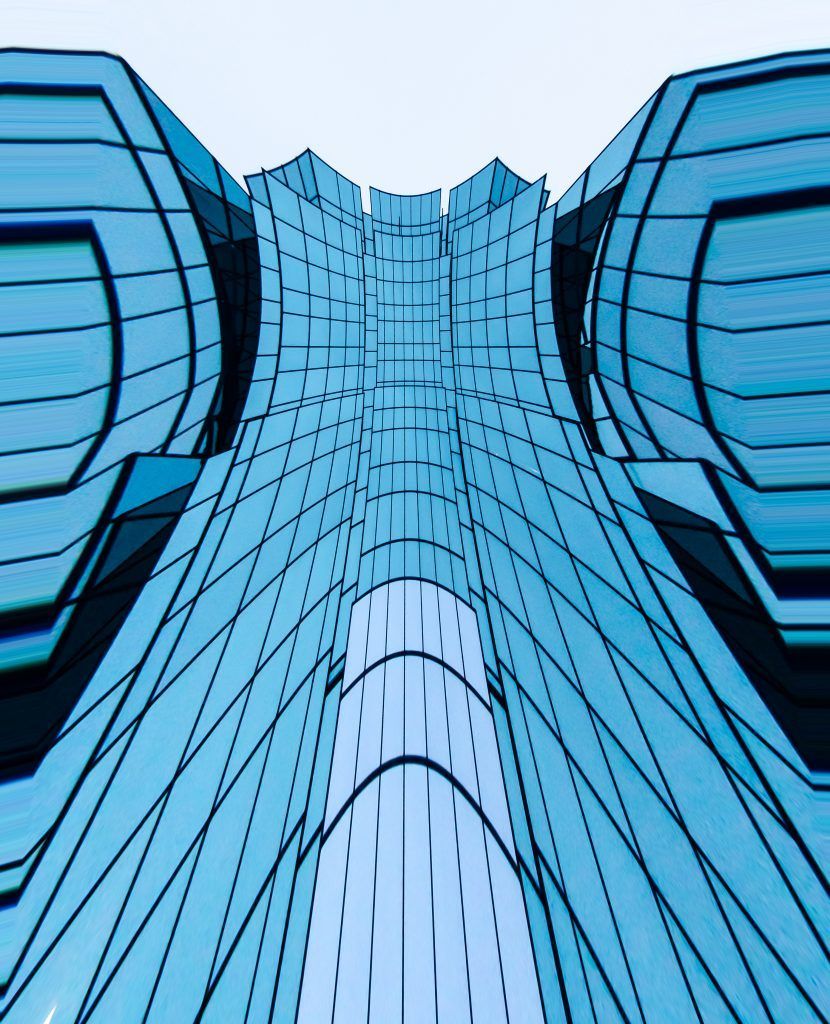
Photo by Paul McKeen
This is my ‘created’ version using the following settings:
Lens Profile: Sigma 4.5mm f/2.8 circular fish eye
Distortion: +100
Vertical: -17
Rotate: 10.0
Aspect: +88
Rotation: 90 degrees clockwise
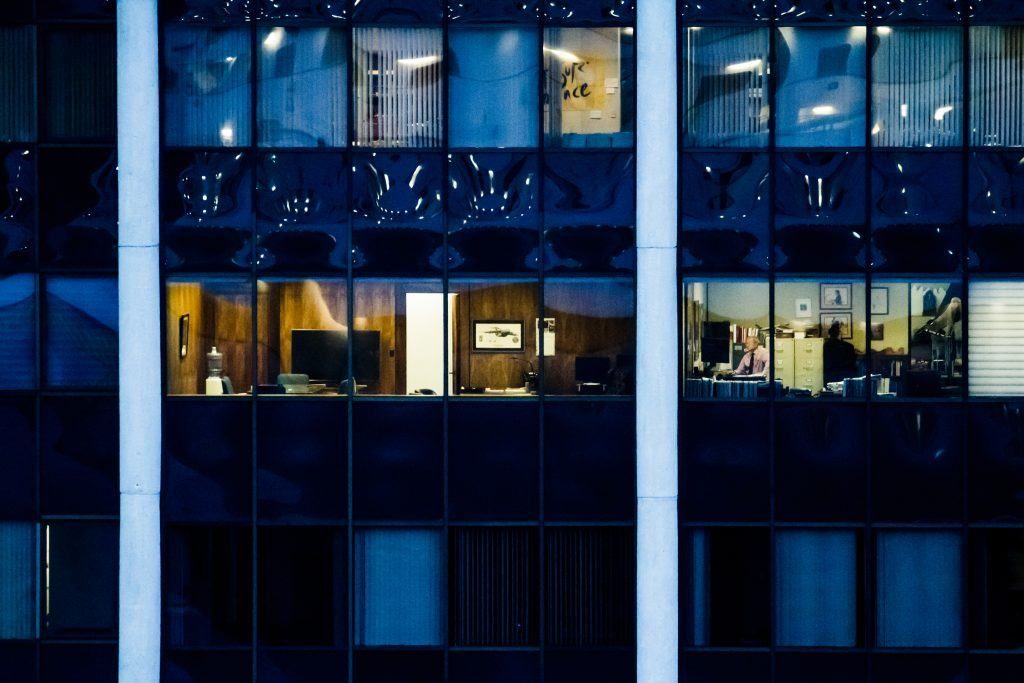
Original photograph. Photo by Paul McKeen

Photo by Paul McKeen
The image was cropped and distorted with the following settings:
Lens Profile: Sigma 8mm f/3.5 circular fish eye
Distortion: +100
Vertical: +78
Scale: 50
Aspect: -100
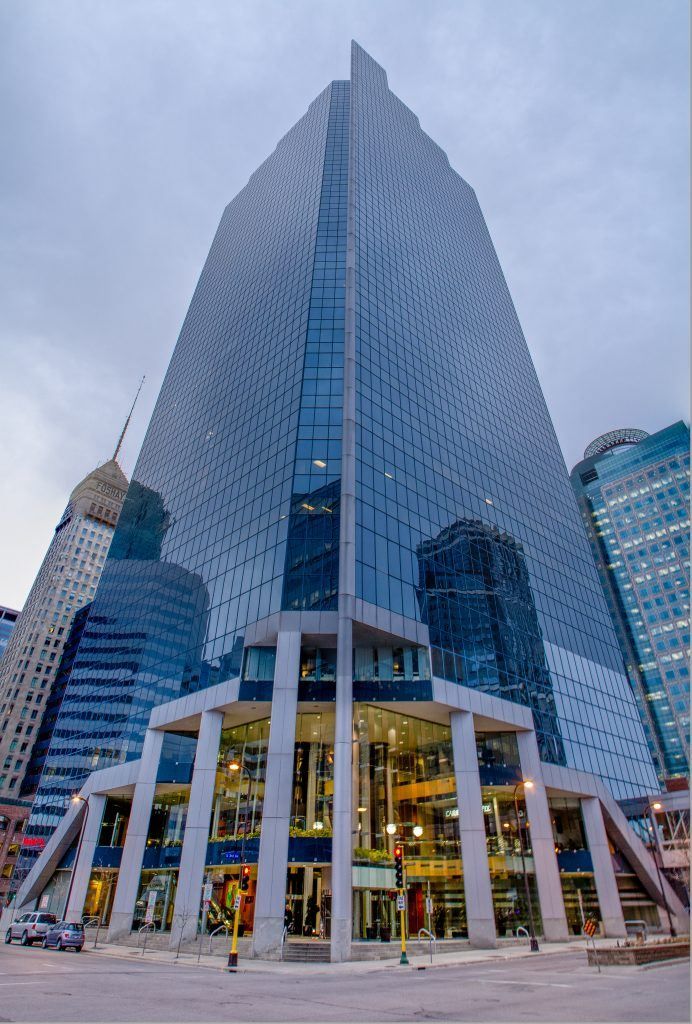
Original photograph. Photo by Paul McKeen
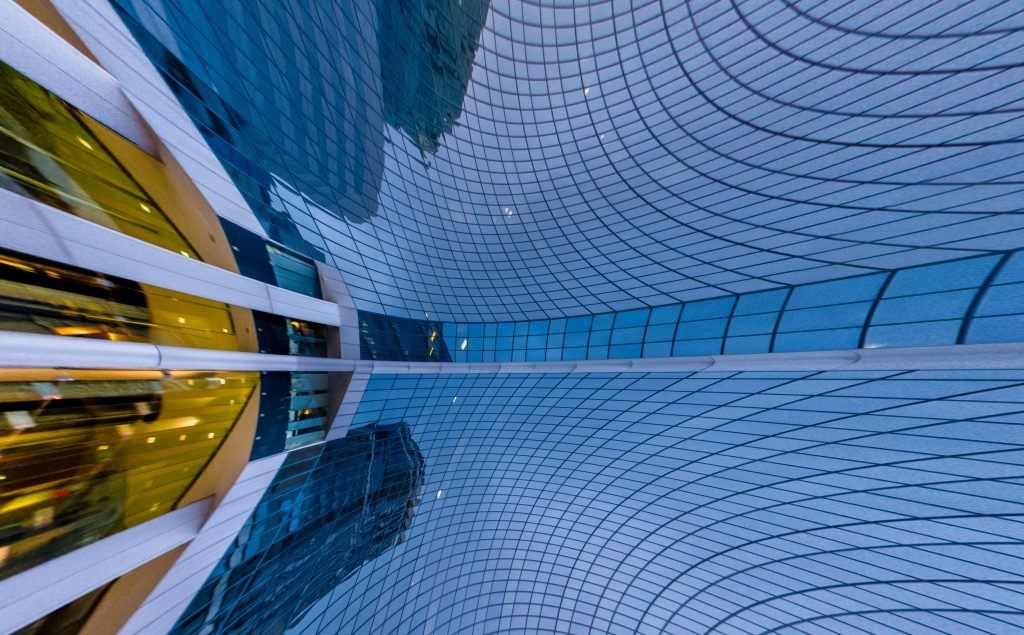
Photo by Paul McKeen
The following settings have now been applied:
Lens Profile: Sigma 4.5mm f/2.8 circular fish eye
Distortion: +100
Vertical: -17
Rotate: 10.0
Aspect: +88
Additional Rotate: Rotated the entire image 90 degrees clockwise
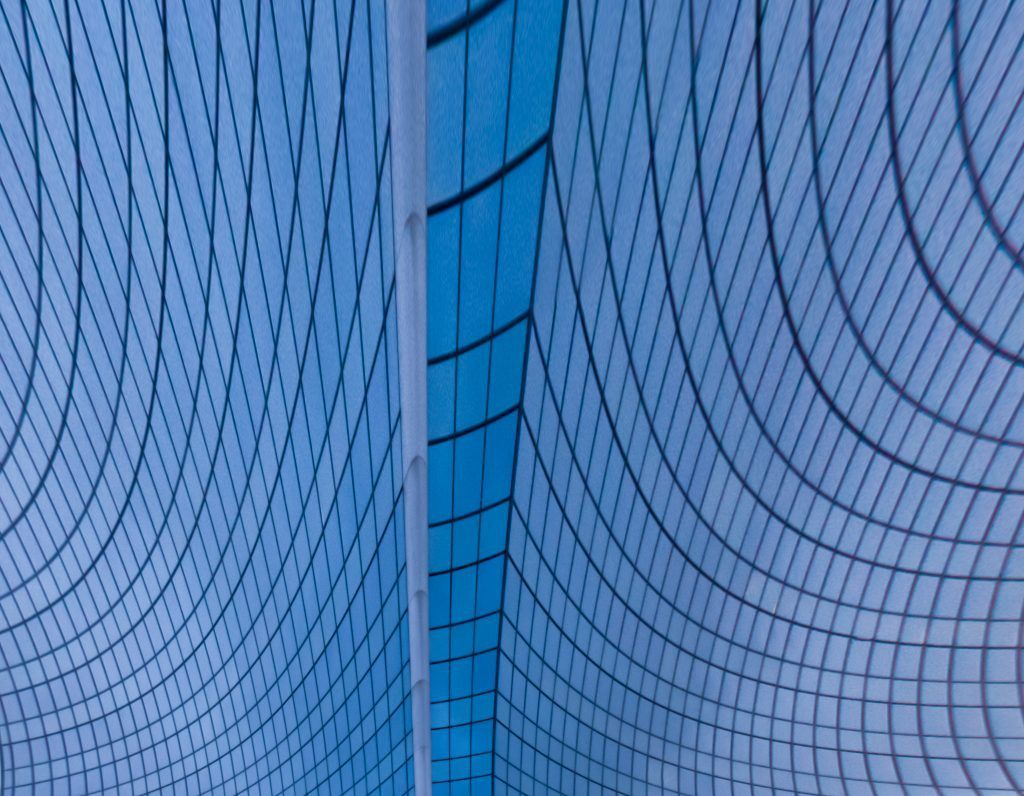
Photo by Paul McKeen
I then looked for a second creative option. Here is my result:
This version was created using the following settings applied to the first version:
Lens Profile: Sigma 4.5mm f/2.8 circular fish eye
Distortion: +100
Vertical: -10
Horizontal: +55
Rotate: +10.0
Aspect: -88
Additional Rotate: Rotated the entire image 90 degrees counter-clockwise

This is my original image of a goose. Photo by Paul McKeen
I think you already know that most applications of Lens Corrections apply to architecture, or to images that have vertical/horizontal lines to which one can align the image. But I have also found that applying Lens Corrections to any image can provide interesting results.

Here is a ‘creative’ version with Lens Corrections applied. Photo by Paul McKeen
And finally, if you recall the cover image…

Here is my original image of this racecar speeding across an icy track. Photo by Paul McKeen

Here is my created version! Photo by Paul McKeen
Conclusion
At the beginning of this guide, I mentioned how using the Lens Corrections can expand your vision to other possibilities in an image. As you can see, using the Lens Corrections/Transformation can open up possibilities in not only altering the outcome of your image, but also change the way viewers ‘see’ your image.
Recommended Resource: Want a simple way to learn and master photography on the go? Grab our set of 44 printable Snap Cards for reference when you’re out shooting. They cover camera settings, camera techniques, and so much more. Check it out here.
Self-Check Quiz:
- Can you crop an image using the Lens Corrections tools?
- What is the difference between the Lens Corrections panels in LR 5.7 versus Lightroom CC?
- When using the Lens Corrections tool for creative purposes, should you check or un-check the “Enable Profile Corrections” option?
- When using the Lens Corrections tool for creative purposes, is it important to match the settings to the lens that was used to shoot the picture?
- True or False: When using the Lens Corrections tool, the settings are destructive to the original file.
- Once you’ve completed a creative Lens Corrections adjustment, can you do a second round for even more dramatic results?
- Is it possible to rotate an image using the Lens Corrections tools?


