


Isolating your subject in photography is a key compositional tool. It simplifies and increases the impact of your image. It also clearly communicates to your viewer what the photograph is about.
Isolating your subject seems like it should be easy. We’re looking at something when we take a photograph. Click. How hard can it be?
But many beginner photographers struggle with having a clear center of interest. There are a couple of reasons for this:
1. Unclear About the Subject
To isolate your subject, you must be clear in your own mind what the subject is. Beginner photographers often struggle with this. Some don’t want to commit to a single subject while others “spray and pray” – taking a lot of images, hoping one is good.
Sometimes the subject is identifiable but doesn’t have the impact it could have had. It doesn’t stand out against the background or there are competing elements.

The world can be a busy place. It’s not always easy to isolate your subject against a busy background. Photograph by Jenn Mishra
2. Seeing With Our Brains
It also takes a while to understand that what you, as the photographer, see is not what the camera sees. Our brains fill in gaps and piece together scenes.
A scene may appear closer to us than it does in a photograph. For instance, mountains in a landscape may appear much closer in reality than they show in an image.
It also takes a while to understand that what you, as the photographer, see is not what the camera sees. Our brains fill in gaps and piece together scenes.
When we see something interesting, our brains filter out everything else. When you get your images home, you see power lines, annoying street signs, or bits of trash that you didn’t see when you took the photo.
This happens so easily and subconsciously that we don’t even know that our brains are adjusting what we see. Photographers understand that perception differs from reality. They compensate for this using compositional techniques.
Key Lesson: Isolating your subject is both about technique and thoughtful composition.
In this guide, we’ll cover the following techniques that will help you isolate your subject:
- Simplifying backgrounds
- Using a shallow depth of field
- Cropping and filling the frame
- Cloning or de-emphasizing distractions
- Contrasting elements
Recommended Reading: If you’d like to improve your composition skills for better images, grab a copy of Photzy’s best-selling premium guide: Understanding Composition.
One major way to isolate your subject is by removing distractions. Photographers do this in the way they compose their images and in post-processing.
Minimalist photographers take this idea to heart. They compose with a small number of elements in their images. Their subject is isolated because there is nothing else in the photograph. The subject takes center stage.

This image of swans in fog uses negative space to isolate the subjects. Photograph by Jenn Mishra
One technique that minimalist photographers use is negative space. In this compositional technique, the space around the subject becomes an important element in the frame.
To create a minimal photograph, place only your subject – or part of your subject – in the frame. A minimal photograph is simple in composition, but not necessarily simple in meaning.
Key Lesson: Minimalism is a style of art that uses very few compositional elements.
Isolating your subject doesn’t necessarily mean making a minimalist image. But it does mean removing elements that distract from the subject. Here are some techniques that will help you isolate your subject.
Simplify Background
Your subject will stand out better against a clean background than a cluttered one. If possible, move your subject away from a cluttered background.
Sometimes changing your perspective or angle on the subject will do the trick. Step to the left or the right. Move up or down. Changing your position may move your subject into a cleaner space.
If the background is too busy, try a low perspective using the sky as a background. This can simplify the composition.

I isolated a couple of sunflowers against the sky by getting low. Shooting at eye level or above will put the field of sunflowers in the background. This isn’t necessarily a problem. But I’d have to use different techniques to make these sunflowers stand out. Photograph by Jenn Mishra
Most importantly, try to avoid any background elements intersecting your subject. Remember that you see in 3D, but your camera photographs in 2D. Your eyes register depth between the background and the subject and separate them. But your camera doesn’t. A common compositional mistake is to have a pole or stick seeming to come out of a person’s head.
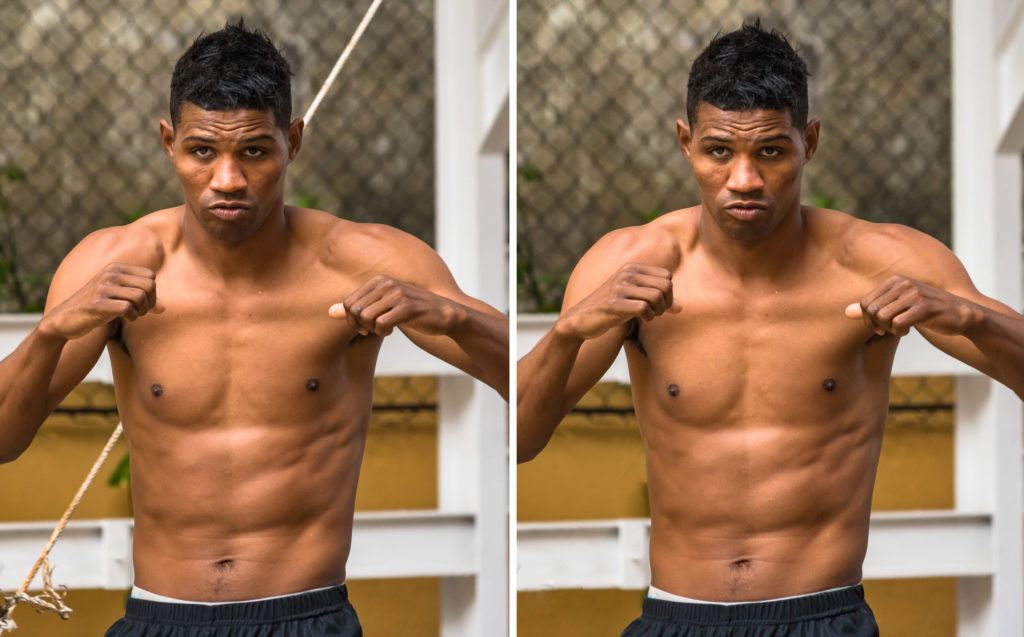
Before and after comparison. The rope behind this Cuban boxer is an odd distraction. I was able to remove it in post-processing, but it would have been better to move the boxer to a cleaner background. Photograph by Jenn Mishra
Use Shallow Depth of Field
When you don’t have a clean background to work with, use your camera’s selective focus ability. Creating a shallow depth of field blurs the background and removes distractions.
Shallow depth of field is a particular photographic technique. It can be a bit complex if you’ve never explored it before. In a nutshell, you open your aperture wide (by selecting a lower f-stop number like f/2.8). At a wide aperture, the focus will drop off the main subject and blur the background. For instance, focusing on someone’s nose may make their ears out-of-focus.
Creating a shallow depth of field also has a lot to do with how close you are to your subject and also how close the subject is to the background. If you’re not getting a shallow depth of field at a wide aperture, try moving closer to your subject. Then try moving the subject further from the background.
Key Lesson: A shallow (or narrow) depth of field creates a separation between an in-focus subject and out-of-focus background.
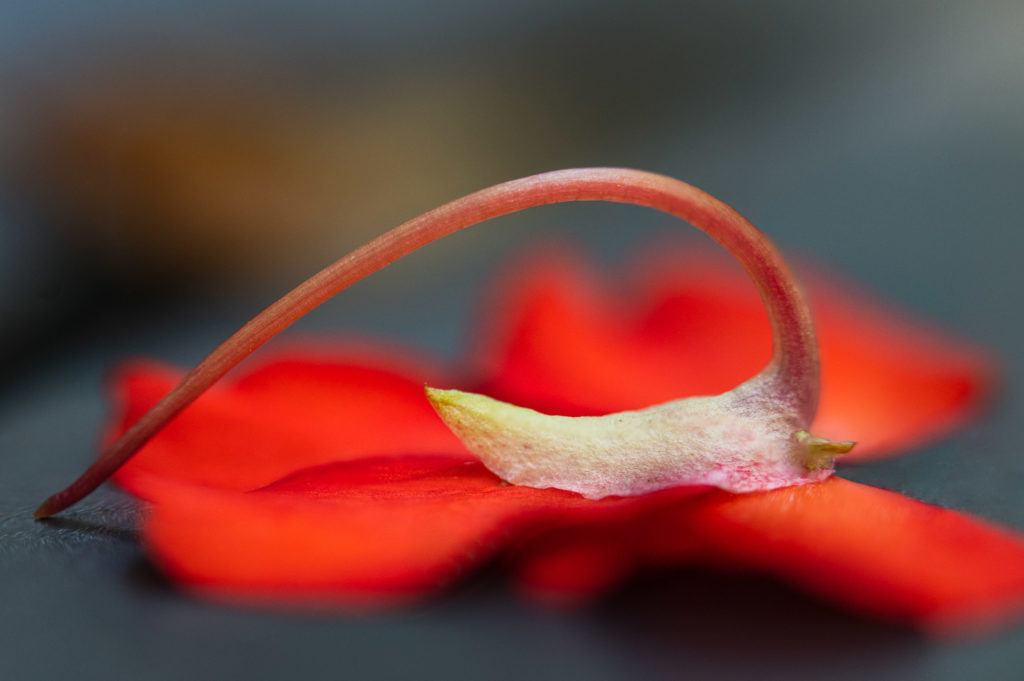
A shallow depth of field allowed me to isolate the fallen blossom against the background of my busy patio. I’m left with hints of color that make the background interesting without being distracting. Photograph by Jenn Mishra
You can control how blurred the background is. Taken to an extreme, all background elements smooth out, leaving only color and blur.
Perfecting shallow depth of field may take a bit of practice. But it is a commonly used tool for isolating your subject against a busy background.
Cropping
An essential part of isolating your subject is in how you frame your subject. You can include a lot of background or zoom in tight on your subject. A good crop makes the image all about your subject and removes anything distracting.
Cropping is a decision that’s made both in-camera and in post-processing. Cropping in-camera is about selecting an appropriate focal length on a zoom lens. It’s good practice to try and frame your subject as much as possible in-camera. But you will likely do some cropping during post-processing.
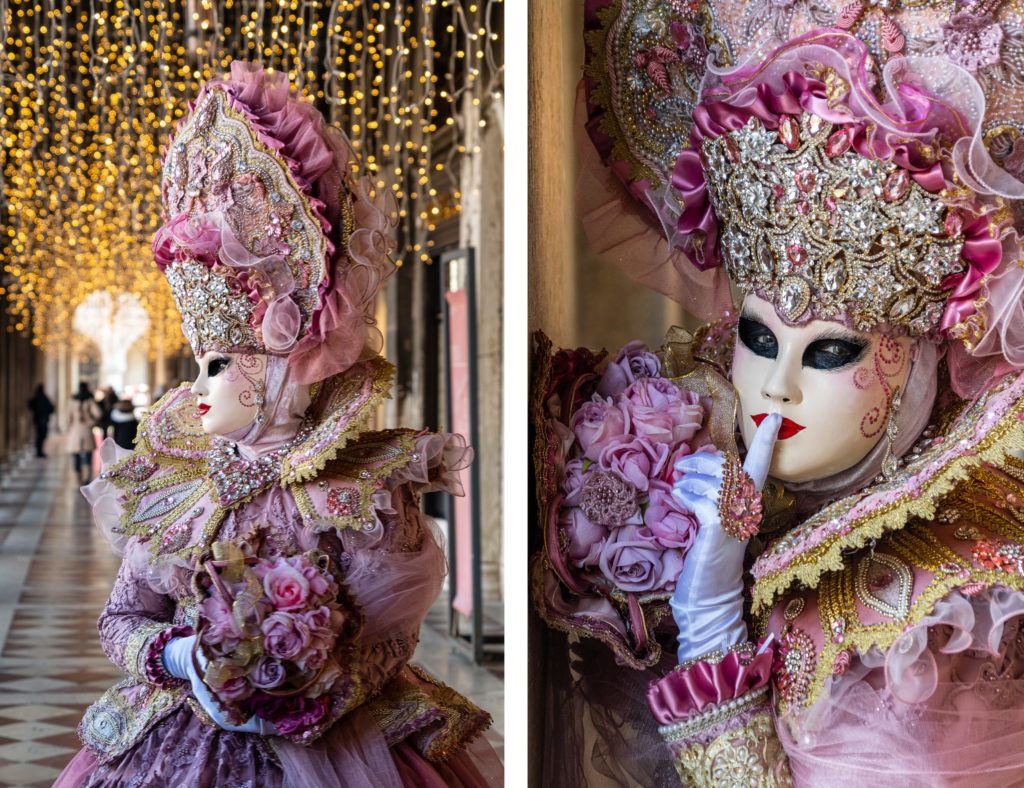
I tried many different focal lengths when photographing this model. The close-up crop eliminates the crowded streets of the Venice Carnival (right). Photograph by Jenn Mishra
Cropping requires you to consider what needs to be in the image and what is non-essential. Beginner photographers often leave too much space around the subject. They are shy about getting close or uncertain about how much cropping is allowed. There are no hard-and-fast rules about how to crop an image. Some photographers seem to have a better eye for cropping than others.
It’s worth spending some time experimenting with different cropping possibilities. A good crop can make your image pop.
When deciding how to crop your image, first identify what makes the image interesting. Find the key elements of your image that must remain. Then decide if you should include any other elements. You may be surprised at how many times other elements aren’t needed.
Filling the frame with your subject is a way of isolating it. Don’t be afraid to chop off part of a head or half of a flower. You’ve isolated your subject simply by not allowing anything else into the image.
Key Lesson: Deciding what to include and what to exclude in an image is one of the most important decisions that photographers make. How you decide to crop an image affects the impact and interest of the image.
Recommended Reading: If you’d like to improve your composition skills for better images, grab a copy of Photzy’s best-selling premium guide: Understanding Composition.
You may not be able to imagine a closer crop until you try it. Here’s an exercise that may change the way you look at your images:
- Choose an image. You can open it in a post-processing program or use a printed version.
- Crop or draw a random rectangle on your image. You can even close your eyes as you draw the rectangle.
- Take a look at this new crop. Do you need anything that was cropped out of the image? Do you miss anything that you’ve cropped out?
- If too much of your subject is cropped, widen your rectangle just a little.
- Try shaving a little bit off the top and bottom of the frame.
- Try shaving a little bit off the left and right sides of the frame.
It’s worth spending some time experimenting with different cropping possibilities. A good crop can make your image pop.

Crop comparisons. To see different crops of the original image (left), I clicked the “X” key twice in Lightroom (middle two images). The final crop is on the far right. I expanded the crop a little and moved it to the far left of the frame. Photograph by Jenn Mishra
Keep adjusting until you’re happy with the crop. This exercise isn’t about the initial random crop; it’s about the decisions you make from there. If you end up where you started, then your image doesn’t need cropping.
If you use Lightroom, try this process to find a new way of looking at your image:
- Open your image in Lightroom.
- Open the Develop Module.
- Select the Crop tool.
- Click the “X” key.
- Click the “X” key again.
The “X” key in Lightroom’s Crop tool switches the orientation from portrait to landscape or landscape to portrait. One of the by-products is that Lightroom automatically crops in on your image. This may be annoying in other circumstances, but in this instance, it may help you see a tighter crop.
You may or may not like Lightroom’s crop. In deciding what you like and don’t like about it, you make key decisions about what to include in the final image.
Cloning Out or De-Emphasizing Distractions
Isolating your subject means removing or de-emphasizing any distractions. Distractions are anything that might take your viewer’s eye away from the subject. Photographers commonly clean up images in post-processing by removing distracting elements. This includes cloning out or darkening bright spots in the background.
A lot of photographers add a slight vignette to their images to darken the edges of the frame. This draws the eye into the center of the frame.
Brightness draws the eye, but so does color and sharpness. If you can’t clone out a distracting element, try darkening it. You can also desaturate or lower the sharpness and contrast.
The element is still in the image, but it won’t draw the eye away from the subject.
Distractions may seem small, but they are cumulative. By removing distractions, your viewer will only notice your subject.
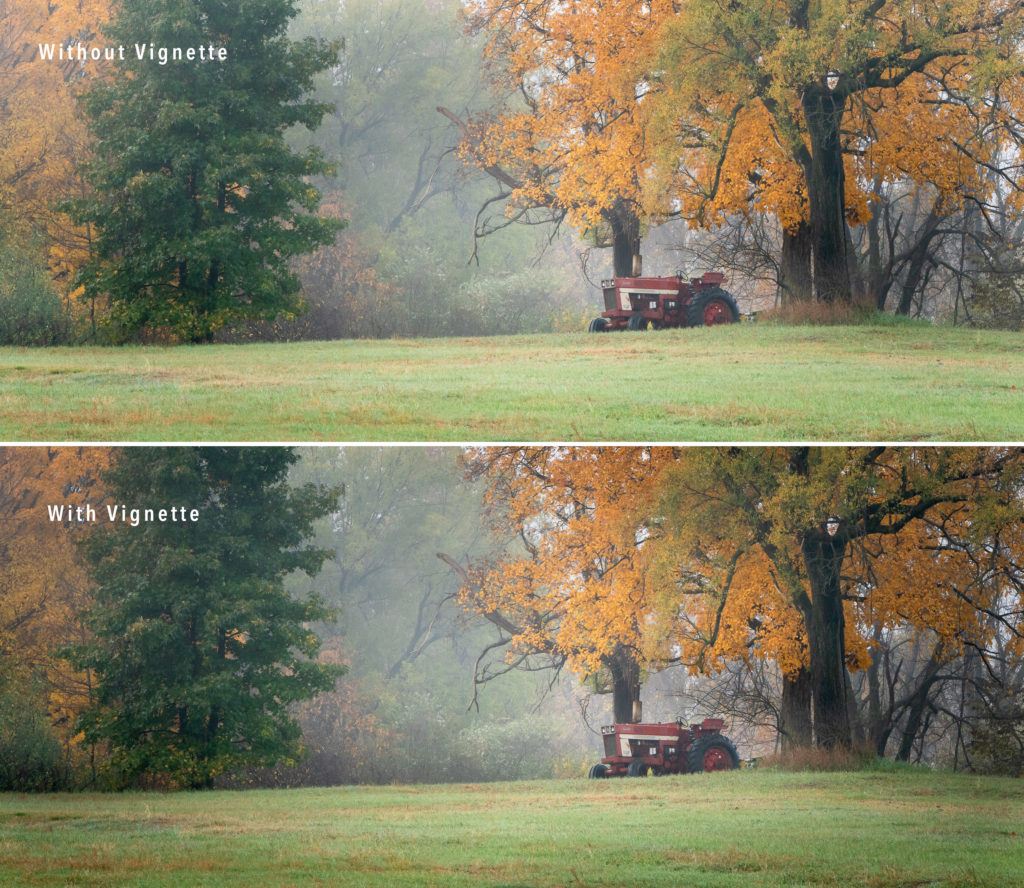
Vignette comparisons. Adding a slight vignette draws the eye to the subject. You may not even notice the difference unless the images are side by side. Photograph by Jenn Mishra
Contrasting Elements
Another way to isolate your subject is to look for contrasting elements. Differences between your subject and the background help your subject stand out.
Silhouettes are a good example of this. A silhouette isolates a dark subject against a light background. You can also isolate a light subject against a dark background.
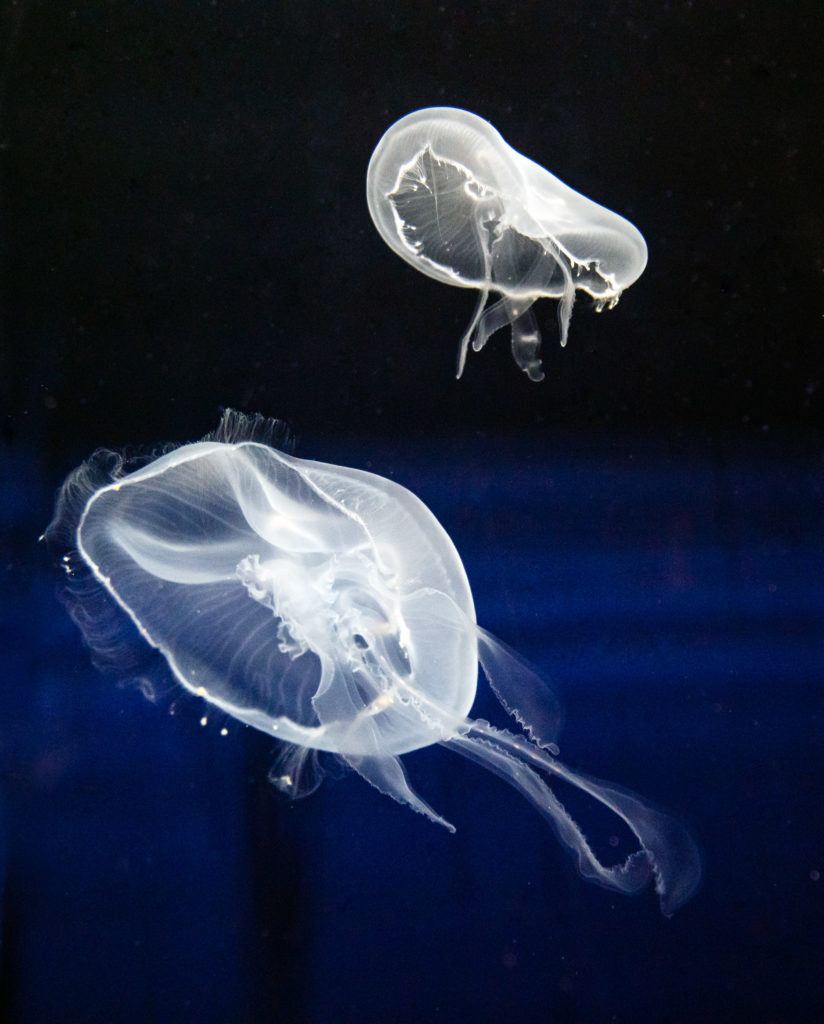
Light-colored jellyfish stand out against a dark aquarium. Photograph by Jenn Mishra
This is the principle behind a lot of studio photography. Studio lights highlight a product or model, isolating the subject from the background.
Contrasting lights and darks is one way to isolate your subject. Other contrasting elements will also help isolate your subject (for instance, a colored subject against a desaturated background). Selective color is the term used when one color appears on an otherwise black and white image. This is a way of isolating a subject or one subject among many, like on the cover of this guide.
When composing an image, look for color differences and also shape. Contrasting patterns or lines flowing in opposite directions can also help isolate your subject.
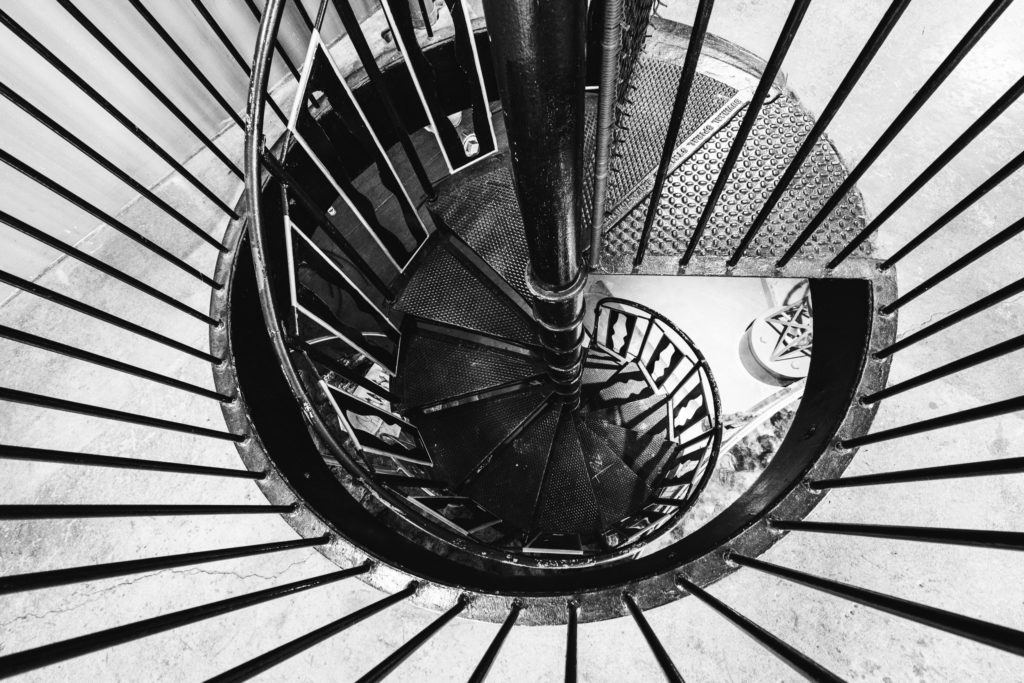
Lines lead your eye into the subject: a circular spiral staircase. The difference in shapes and the direction of the lines emphasize the subject. I’ve removed distracting color by making the image black and white. Photograph by Jenn Mishra
Key Lesson: You can use contrasting elements to isolate your subject, especially in a busy scene.
Recommended Reading: If you’d like to improve your composition skills for better images, grab a copy of Photzy’s best-selling premium guide: Understanding Composition.

Photograph by Jenn Mishra
Conclusion
Isolating your subject is one of the most important compositional tools. If you want to make more impactful images, isolate your subject.
Identify your subject clearly. Compose in a way that emphasizes your subject and de-emphasizes everything else. Look for simple backgrounds and use negative space to set off your subject. If the background is busy, change your perspective or use a shallow depth of field.
Isolating your subject continues into post-processing. You can make decisions about cropping and cloning out distracting elements.
Photographic techniques in the field and during post-processing help you isolate your subject, giving your photographs greater impact.
Self-Check Quiz:
- Why do beginner photographers sometimes struggle with isolating their subject?
- Describe one way that your perception of a scene varies from the way your camera records the scene.
- What is a minimalist photograph?
- What is negative space?
- Describe two ways you can isolate your subject against a busy background.
- What is shallow depth of field and how can it help you isolate your subject?
- What does “filling the frame” mean?
- What does the “X” key in Lightroom do when the Cropping tool is selected?
- How can selective color be used to isolate your subject?
- What does focal length have to do with cropping?
Assignment:
Select an image and follow the exercise described in the cropping section of this guide.


