At the end of the noughties, one of the biggest drawbacks to the [then] new fad of digital photography was the poor image quality most produced, especially when used with high ISO settings.
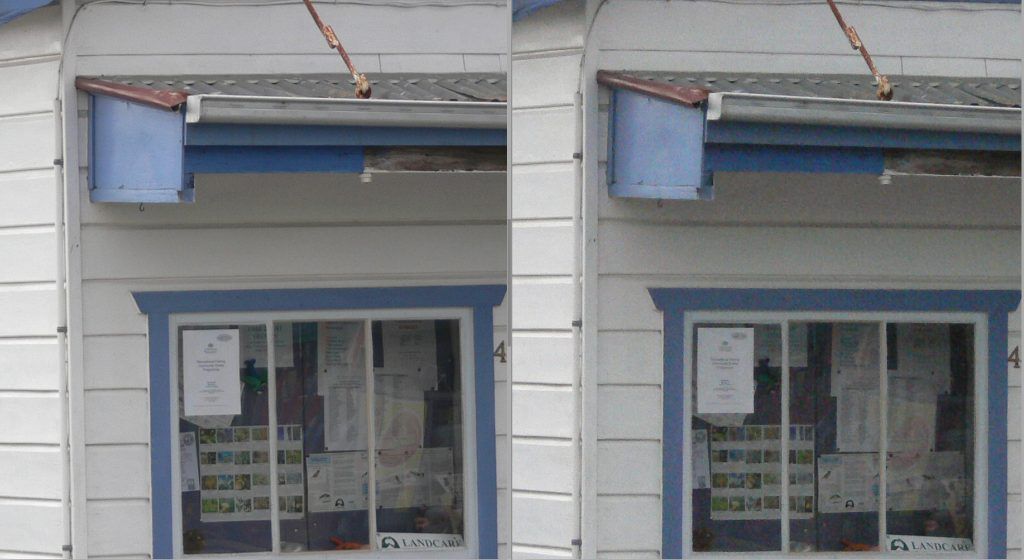
Here’s a comparison between ISO 100 and 400, enlarged to 200%. You can see that the lighter areas clearly suffer less from noise than the shady, darker areas, but even so, at ISO 400 (righthand example) the image displays a lot of ugly color noise (Panasonic FZ30). Photograph by Robin Nichols
Looking back, this is all understandable because the technology was so new and raw. Ironically, at the time, the film was at its peak and companies were producing films with extremely high ISO ratings. ISO 800, 1000, and even 3200 were pretty much the norm.
But once consumer digital cameras burst onto the market, the high-quality fast film was replaced by digital devices that featured very restricted ISO capabilities, and these produced significantly reduced quality. At the time, most consumer cameras had an ISO range of 50–400, and if used at the higher numbers produced very gritty noisy results. Even now, some twenty years later, I still hesitate when advising students as to what ISO settings to adopt, especially when shooting in poor lighting, for fear they’d be unhappy with the results.
Recommended Resource: Want a step-by-step guide on photography skills with your DSLR? Grab a copy of our best-selling guide, the DSLR Crash Course.
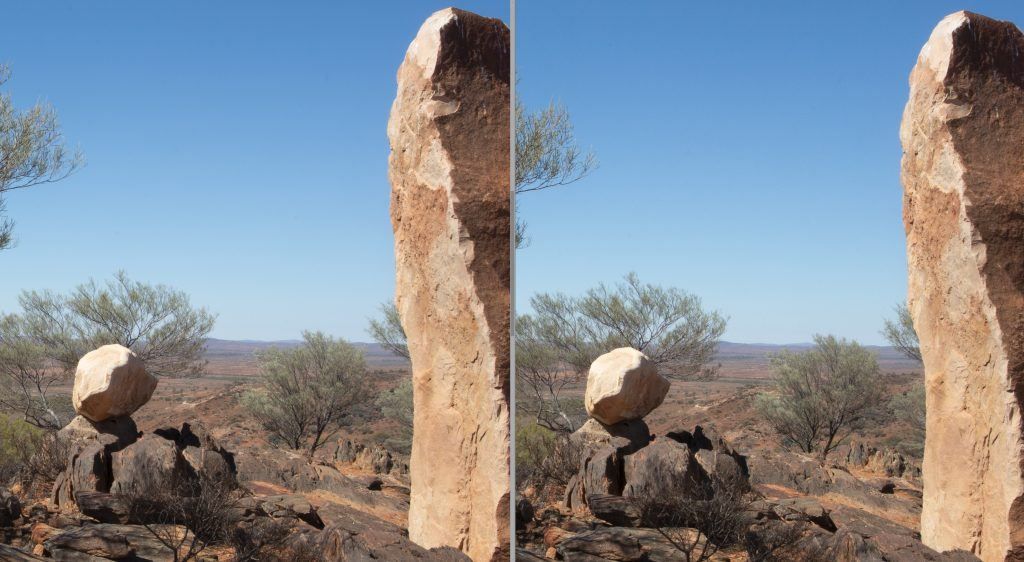
Here’s a comparison between ISO 100 and 400 using a full-frame camera that’s a decade newer than the Pana-sonic FZ30. No visible grain at all. Photograph by Robin Nichols
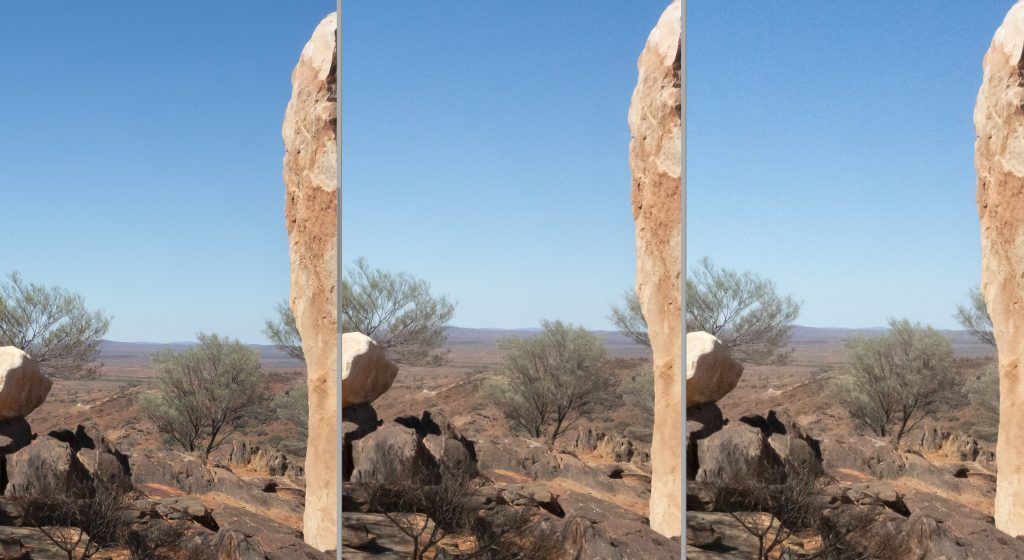
Using the same full-frame camera, here is what ISO 800, 6400, and 12800 looks like. Noise-free at ISO 800, some small grain at ISO 6400 which is quite acceptable, but predictably visible noise at the over-the-top 12800 settings. Photograph by Robin Nichols
A decade ago I’d have been justified in being that cautious, but now that’s not the case. Some of the biggest advances in recent digital camera technology have been significant improvements in the sensitivity of sensors. The in-camera software (called Firmware) that processes the data to make it look brighter, more colorful, and cleaner (i.e. with less noise) has also improved markedly.
So should we still be afraid of shooting with ISO settings that have been pushed to the max? And what can we do to minimize the effects of both luminance and color noise when it does occur?
Why Do We Get Noise?
Noise, I guess, is the visual equivalent of that annoying background hiss we sometimes get from radios that were tuned to a weak broadcast signal. Even today, this occasionally happens on my car radio if I’m traveling far from the signal, or I am driving through a poor reception area. Turn the volume up and the music becomes a bit louder, but so does the horrible hissy background noise. This is interference picked up from other radio signals and local atmospherics – stuff that’s out of my control.
When a digital image is created, light is converted into electricity in the analog-to-digital converter (A/D) and this is then magically turned into a color picture. If there is insufficient light in the scene to render detail, the conversion process amplifies the brightness values until it decides there’s enough detail for ‘correct’ exposure. This is all good and well, but if you are shooting in a dark location with a high ISO setting, this amplification keeps on going until it not only amplifies the tiny amount of light illuminating the scene but all sorts of other stuff that we, as photographers, really don’t want to see. This includes JPEG artifacts (if shooting JPEGs), gritty luminance noise, and, with some cameras, speckled chroma or color noise.
As if this is not enough, another source of digital noise is heat, generated during very long exposures. After a few seconds the sensor begins to warm up and the longer the exposure, the warmer it gets, eventually creating a type of imperfection called thermal noise. If you are an astrophotographer, you’ll know all about this annoying side effect.
... Another source of digital noise is heat, generated during very long exposures.
Now, if you never look at images other than on social media, and especially if that’s displayed on small screens, you might not even be aware of the noise. But as soon as the image is enlarged over a certain size, the technical faults in the image will become apparent (and I’m talking about sharpness, resolution, and digital noise). The greater the enlargement, the more obvious its shortcomings.
That said, even if you only ever enlarge images a small amount, digital noise will always degrade the quality of the image to make it appear less sharp, often with poorer contrast and color.
Recommended Resource: Want a step-by-step guide on photography skills with your DSLR? Grab a copy of our best-selling guide, the DSLR Crash Course.

I use high ISO a lot for shooting wildlife. The combination of a long telephoto lens and often poor lighting forces me to shoot at ISO 3200+ in daylight to maintain a sufficient shutter speed to avoid camera shake (ISO 3200, f3.2 @ 1/400s shooting from a motorboat). Photograph by Robin Nichols
Is My Camera Noisy?
Current digital cameras have amazingly good-quality sensors, which means that the noise problems we had even five or six years ago are now significantly fewer.
The best way to discover how good your camera performs is to test it yourself.
- Put the camera on a tripod and shoot a scene in the bright light, shade, and at night time.
- In each lighting scenario set the camera to Program Mode and snap off a series of exposures, changing only the ISO settings from lowest to highest.
- Copy the files to the desktop computer and examine them closely (at 100-200%) to see in what lighting, and at what ISO setting, the noise becomes too much for your taste, if at all.
Tip: While shooting these tests, try some exposures with the camera’s Noise Reduction filter set to Low, Medium, High, and Off, to see how effective this might be in-camera. Also try the camera’s Long Exposure Noise Reduction filter to assess if this improves the look of the file, or not. You might be pleasantly surprised at how good these features are.
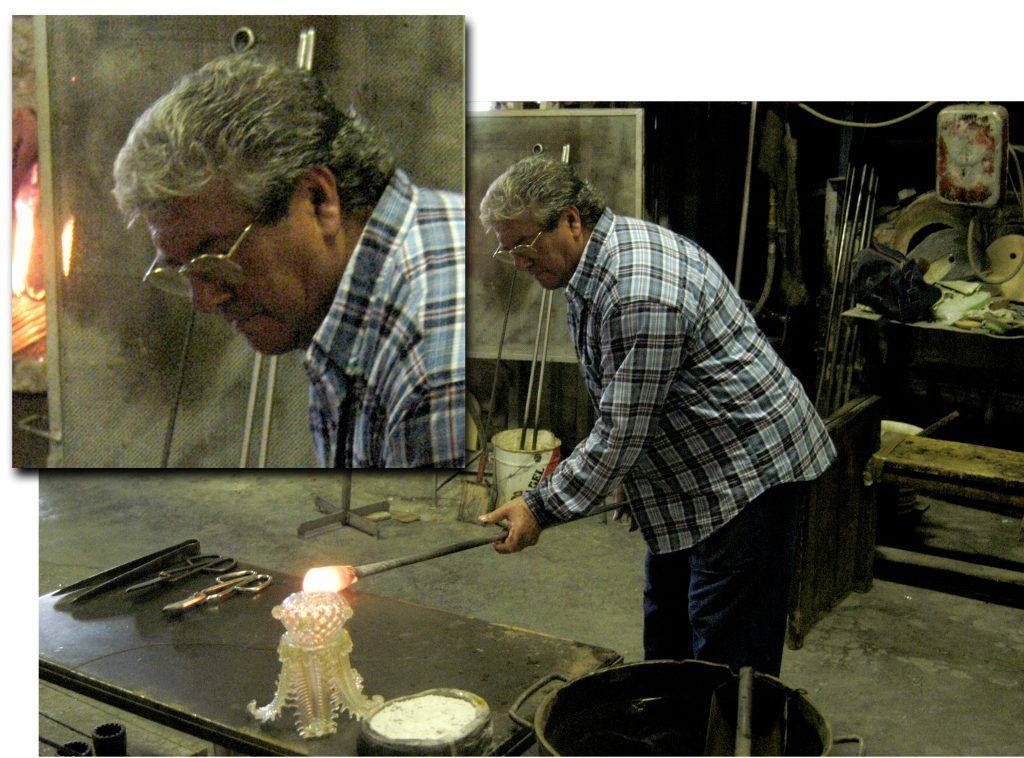
I know this is an unfair comparison, but the fact that I have to find an old image taken using a Nikon D100, my first DSLR, to demonstrate how noisy cameras can illustrate how much better new technology has become of late. Shot in a dim glass factory, ISO 1000, f4 at 1/60s. There’s a lot of noise in the image, and in particular color noise, which you can clearly see in the enlarged portion of the image. Photograph by Robin Nichols
Top Tips for Shooting at High ISO
- A full-frame sensor will produce far less noise than a smaller APS-C or Four-Thirds sensor-based purely on the size of the image sensor and the number of pixels it has.
- Shooting at high ISO in good lighting produces significantly less digital noise than you might think.
- High ISO in poor lighting will exaggerate the presence of digital noise.
- Slight over-exposure creates a file with less noise in it than a straight exposure (i.e. camera set to ‘+1’ Exposure Compensation where possible).
- To maintain the cleanest image quality, avoid using the expanded ISO capability (see breakout section on this). Shoot at ISO 6400 rather than the expanded 12,800 or 25,600 settings because these will be very noisy.
- Experiment with the camera’s High ISO NR filter.
- Consider using flash in dark scenes to help illuminate the (noisy) shadows.
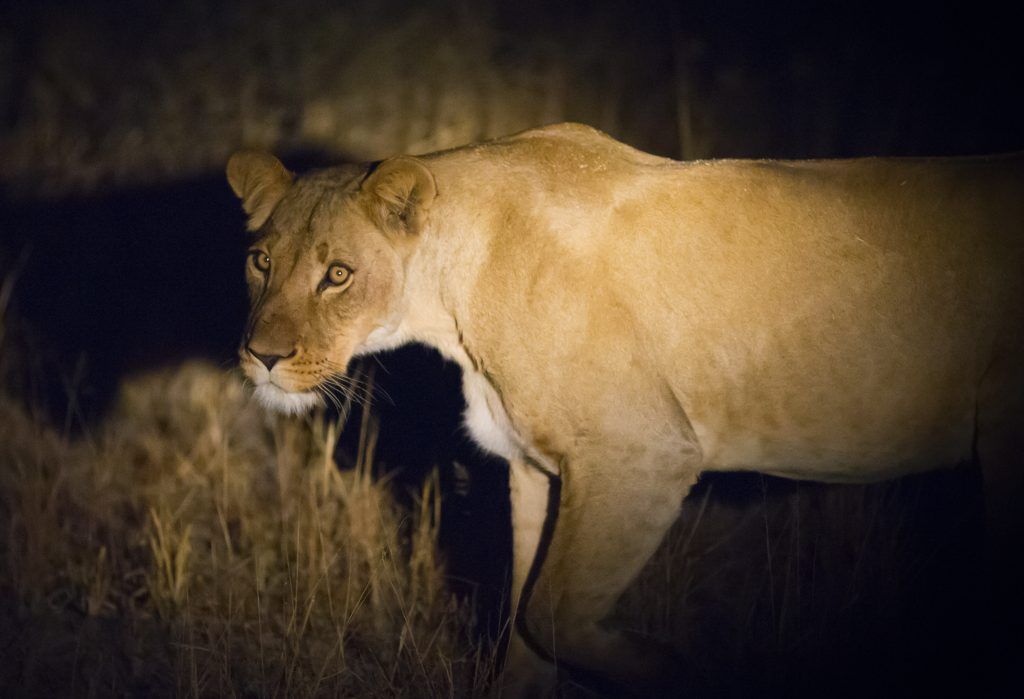
No flash, just a powerful spotlight. Because the lioness was surrounded by absolute black, I set the Exposure Compensation on my camera to minus 1.5 stops; otherwise, she’d have been grossly over-exposed (clipped). Exposure was ISO 8000, f2.8, 1/640s with some noise removal in Lightroom. Photograph by Robin Nichols
Expandable ISO: Read Between The Lines
I have a theory that when new camera operating systems are being designed, the manufacturer’s marketing department gets involved. Why? Even today, I see ISO settings – not to mention heaps of other camera features – that clearly looks good on paper, but don’t necessarily produce the best results.
Take Olympus mirrorless cameras, for example. I’m a die-hard Olympus fan from way back, but it’s a mirrorless camera ship with an ISO range that stretches from a low 100 to a staggering 25,600. At its highest setting, you get poor image quality because its small Four-Thirds sensor generates a lot of digital noise.
So why bother promoting these figures if the results aren’t that good? To Olympus’ credit, if you take a closer look at its official specifications (this is for the OMD EM-10 MkIII, but the EM-5 and EM-1 are similar), you’ll see that its claimed ISO range is in fact only 100–6400, but there’s the facility to extend it another two exposure steps to ISO 12,800 and ISO 25,600, respectively, when needed.
At 6400 its image quality is actually good, but it drops off noticeably when extended to the maximum setting. If you just have to get the shot, no matter what, then the quality hit at these very high settings is not so important, but I’d seriously avoid these high numbers where possible.
I have a theory that when new camera operating systems are being designed, the manufacturer’s marketing department gets involved.
But this is not just an Olympus thing. Every manufacturer does it. For example, the state-of-the-art Sony A9 full-frame mirrorless camera claims an ISO range of between 50 and 204,800. That’s an eye-boggling specification. Again, if you look at the real specifications, its actual range is ISO 100–51,200, one full exposure step faster than the maximum on the Olympus. Images shot between 51,200 and 204,800, I think, are more wishful thinking than quality image capture, but then we can reduce the noise slightly through clever use of exposure, by adding in-camera noise reduction or minimizing it in post-production which will remedy some, if not all, of the deleterious effects of extending the ISO beyond a comfortable rating.
Other camera models present this extended ISO capability by naming it Hi-1, Hi–2, Hi–3, Lo-1, etc., so perhaps photographers understand that this is not in the normal ISO setting range.
JPEG Versus Raw
When it comes to minimizing luminance and color noise, RAW files will always produce better results, but (and this might be a big ‘but’) the photographer has to do the work to remove noise from a RAW file to get it looking good. If shooting JPEGs, you might discover that the noise, and in particular color noise, might well be removed in-camera, making files appear, superficially at least, cleaner-looking than an unedited RAW file.
For example, the difference between color-noisy Canon files and Nikon files, which appear to have no color noise, is impressive.
But with a little work in Photoshop/Lightroom/ Elements/Skylum Luminar, a RAW file, especially one shot at high ISO settings, will ultimately result in a far better-looking image than anything shot as a JPEG file.
In Brief: Noise Reduction Techniques
- Avoid underexposure (but keep an eye on the histogram to avoid overexposure).
- Shoot in the Raw file format where possible.
- Avoid JPEGs as they suffer from noise and compression artifacts (from too much compression).
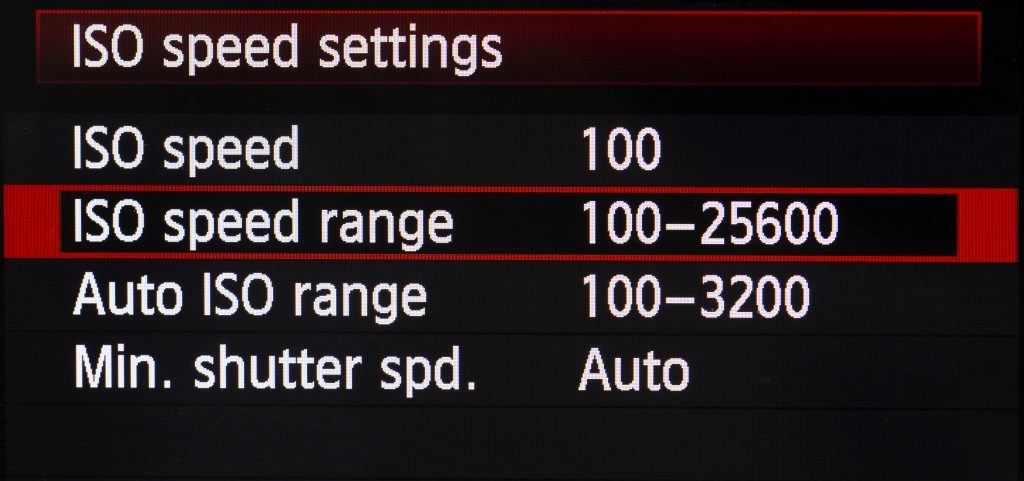
- Test the ‘noisiness’ of your camera, and then use the camera’s ISO limiter feature to stop the ISO from being elevated above a number that you are comfortable with.
- Try the camera’s High ISO Noise Reduction filter.
- Use camera RAW’s excellent Luminance and Color Noise reduction sliders in Photoshop/ Elements/Lightroom/Skylum Luminar, etc.
- Consider buying a specialist noise reduction plug-in such as Topaz Denoise, Neat Image, or Photo Ninja (used to be called Noise Ninja but is now a full-blown RAW converter with exceptional noise-reduction features).
Filter It Out
If your image files do suffer from excess noise, you can engage the camera’s High ISO Noise Reduction filter or its Long Exposure Noise Reduction filter. Some cameras have both; some just have one of these. Check the manual if you are not sure. High ISO filters generally have three or four strength settings, depending on the noise characteristics of the camera and how aggressively you want to tackle the problem.
Using one of these filters is a bit like having a Photoshop noise reduction app built into the camera’s firmware. In the models I have tested, this feature works reasonably well. One frustrating thing about the long exposure NR filter is that it more than doubles the processing time simply because, to remove thermal noise, the camera shoots a second, blank frame in the background, compares the two, and removes the noise difference, producing a cleaner-looking file. This all takes time.
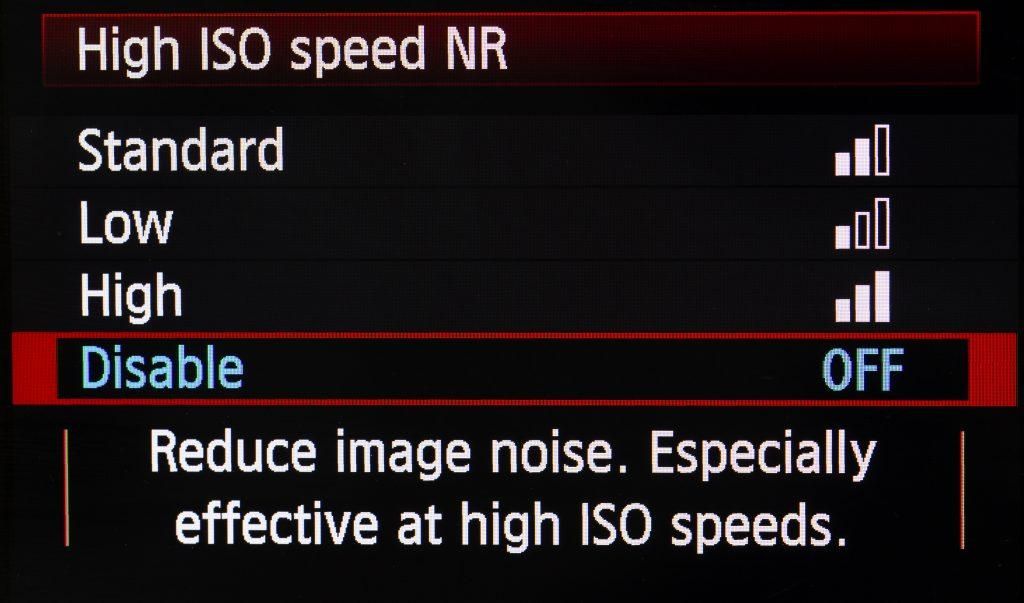
Most cameras have effective High ISO Speed NR filters. Test your camera’s settings to see how effective each level might be. Photograph by Robin Nichols
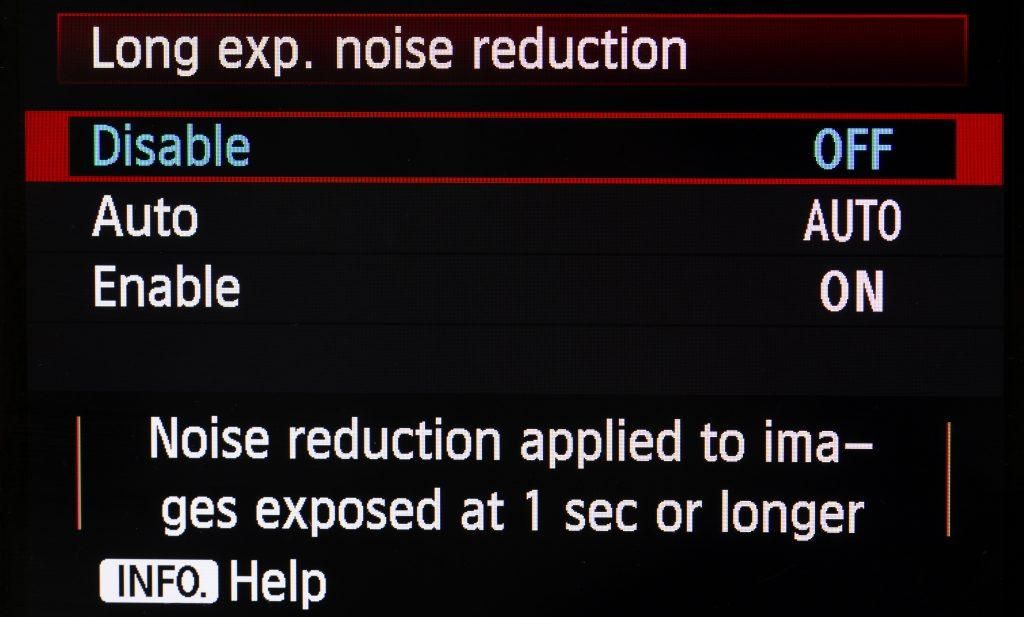
Another useful feature to try is the Long Exposure NR filter, effective at reducing thermal noise. I’d suggest either having it on or off, but not in Auto, because in Auto it’s going to get annoying when it sometimes works and sometimes doesn’t. On or off is more predictable. Photograph by Robin Nichols
It’s important to test these features carefully. Processing an in-camera might prove to be less hassle than doing it once downloaded, or you may prefer to use a third-party noise reduction Photoshop plug-in to get the ultimate high-quality results.
Most photo-editing programs have very good noise reduction features. And if you don’t agree, you can also buy specialist noise reduction plug-ins for Photoshop-compliant applications that arguably do the job even better than Photoshop.
So, is high ISO really the enemy? In my opinion, it’s definitely not the enemy. In fact, if handled correctly, it can be one of a photographer’s greatest assets.
It’s a feature to be embraced, not fought with.
Photograph by Robin Nichols
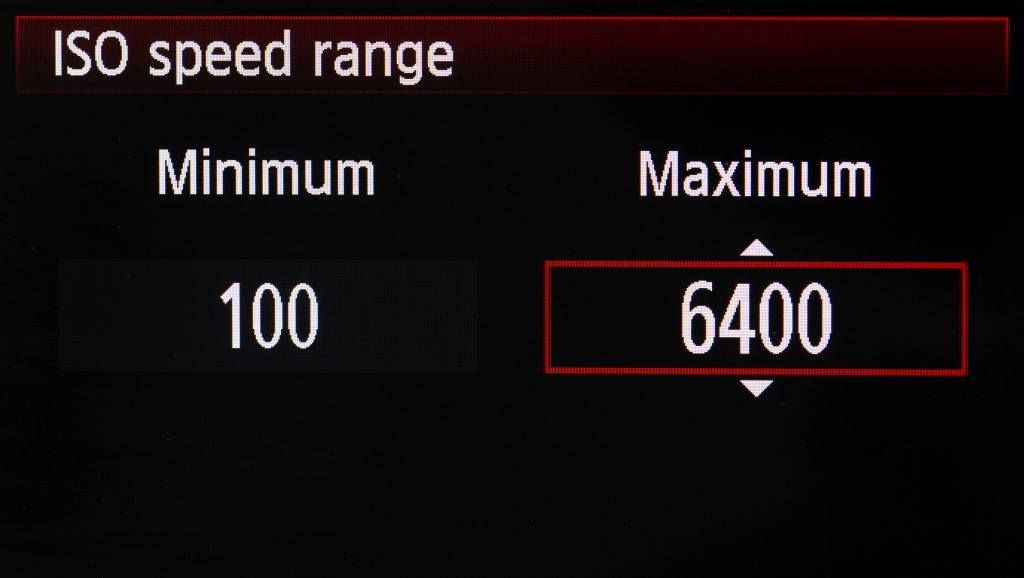
If you are worried about excess noise generated while shooting at very high ISO settings, try setting the camera’s ISO limiter, designed so it blocks the Auto ISO feature from raising the sensitivity to the maximum. Photograph by Robin Nichols
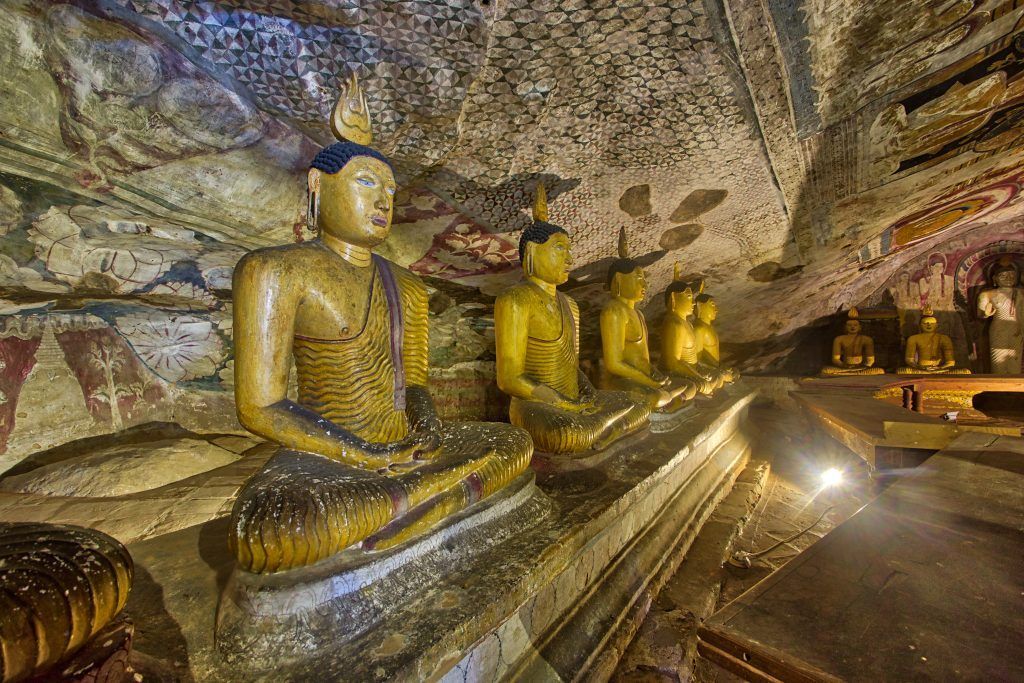
Rock caves in Dambulla, Sri Lanka. Three bracketed images were shot at ISO 3200 and then put together using Skylum Aurora HDR software. Very little noise despite the gloominess of the location, the underexposure, and overall lack of light. ISO 3200, f10 @ 1/2s, 1sec and 2 secs. Photograph by Robin Nichols


