

Lines exist everywhere. But in photos, they carry a distinct purpose. Learn about leading lines in photography and how to use them professionally, from scratch.
For the less wary, leading lines can lead them astray! (Pun intended.)
Jokes aside, leading lines are one of the first things that professional photographers learn before going pro. The chances are that your photographs already contain leading lines, but you haven’t used them consciously.
Not to worry, as this guide will give you an in-depth tutorial on how to use leading lines in photography, with bonus information!
What you will learn in this guide:
You will learn what leading lines are and how to use them in your photographs. Additionally, you will be learning the following:
- Types of leading lines
- Lines vs. paths
- How to use leadings lines
- Tips for using leading lines more effectively
We will discuss every point in detail. Without further ado, let’s begin!
Recommended Reading: If you’d like to improve your composition skills for better images, grab a copy of Photzy’s best-selling premium guide: Understanding Composition.
What Are Leading Lines in Photography?
A photograph can be captured in a particular way to draw the viewer’s attention towards a specific point. This is created with the help of leading lines. These lines are intentionally framed in a way that the viewer is bound to focus on the designated portion.
A photograph can be captured in a particular way to draw the viewer’s attention towards a specific point.
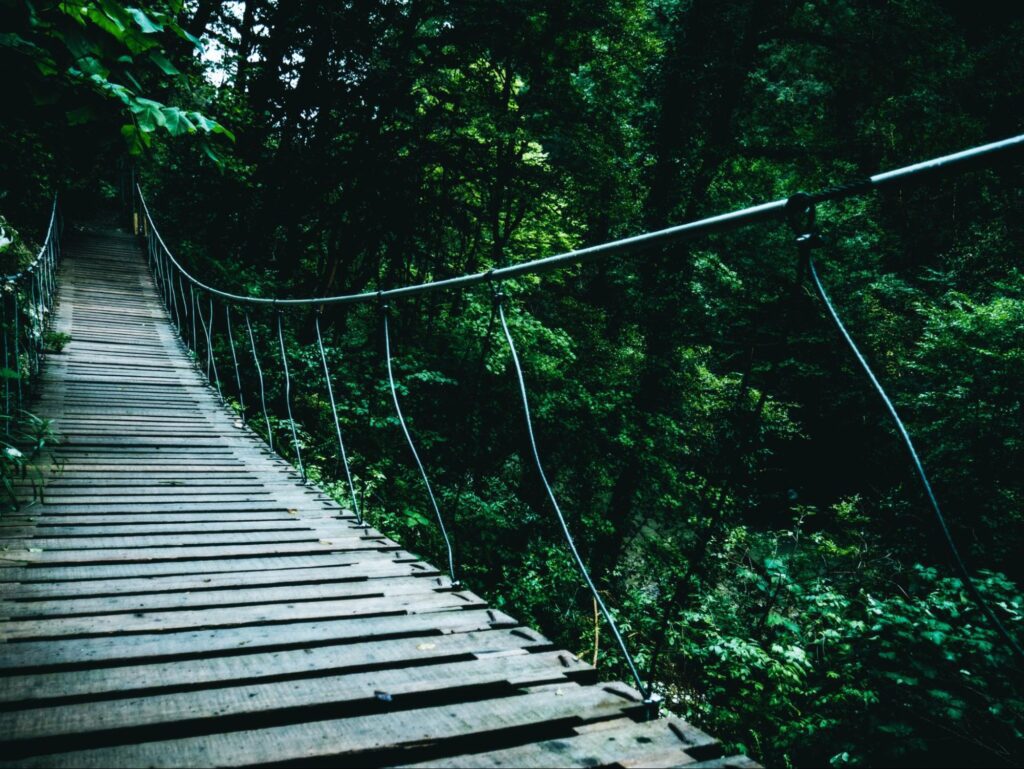
Leading lines refer to lines that lead the view. If it has a linear shape and can guide the viewer’s eye, then it can work as a leading line. These lines can be anything starting from bridges, rivers, roads, walls, and more.
However, these lines must be framed accordingly by adjusting the camera’s point of view. Whether these lines work as suitable leading lines in a photo is greatly dependent on this vantage point.
What Are the Different Types of Leading Lines in Photography?
Understanding the different kinds of leading lines can help us use them more effectively. There are four types of leading lines used in photography today. They are as follows:
Horizontal Lines
Horizontal lines are lines across the width of the image. These lines are common in landscape and nature photography. They can also be found in interior photography if the interior is arranged following the horizontal lines.

Horizontal lines tend to provide a sense of peace and calm. However, the photographer should be careful that these lines don’t result in a dull image. It’s best to have an idea of what you want to portray in the image through these lines before capturing it.
Vertical Lines
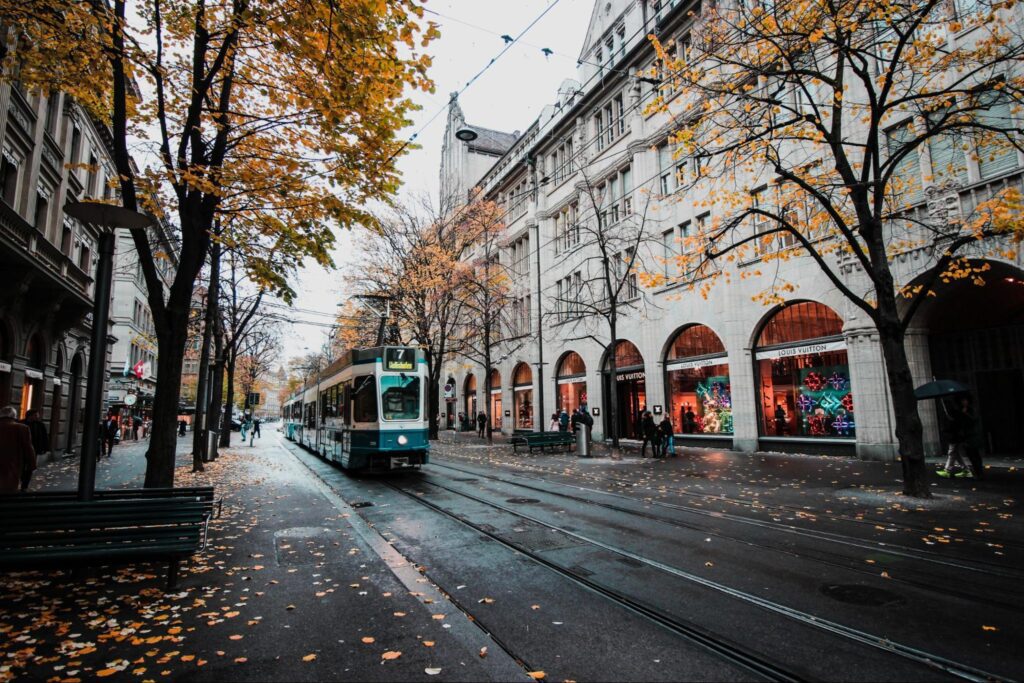
Vertical lines are lines across the height of the image, and these lines can be found in nature and cityscape photography. Roads and buildings are commonly used as vertical lines.
Vertical lines provide a sense of power and hierarchy. Naturally, these lines direct the vision up and down.
Diagonal Lines
Diagonal lines commonly trace from foreground to background. This conveys a sense of distance. Even in a still photo, movement and change can be felt. These lines can be anything. A vertical or horizontal line can be diagonal if captured accordingly.
Experiment with diagonal lines to increase the depth in your image if you’re dealing with a large depth of field.
Converging Lines
Converging lines can be a strong compositional feature to include in your images since they are quite good at attracting attention to the point of convergence.

If your frame has converging lines, it’s ideal to place the image’s subject at the intersection of these leading lines. These lines aid in the creation of a three-dimensional reality in a two-dimensional shot.
Why Are Leading Lines Important in Photography?
Leading lines have been used to generate visual flow for decades. A leading line in a crowded photograph draws the viewer’s eye to the photo’s main point. These lines also add depth to the scene, helping to distinguish the foreground from the backdrop. Symmetrical lines create a balanced composition, which improves the overall appeal of the photograph.
To achieve these results, a careful composition is required. Your skill to construct a shot will determine whether or not leading lines produce the intended results. It’s great if you try to make use of the lines that emerge in the scene.
Recommended Reading: If you’d like to improve your composition skills for better images, grab a copy of Photzy’s best-selling premium guide: Understanding Composition.
Leading Lines vs. Paths - The Difference

The distinction between a leading line and a path is clear-cut. Lines are used in both strategies to guide your attention, but they serve different purposes. A leading line leads you to the focal center of the image. A path tends to lead to an endless point.
The image above, for example, uses vertical leading lines of the seesaw to direct your attention to the boy.
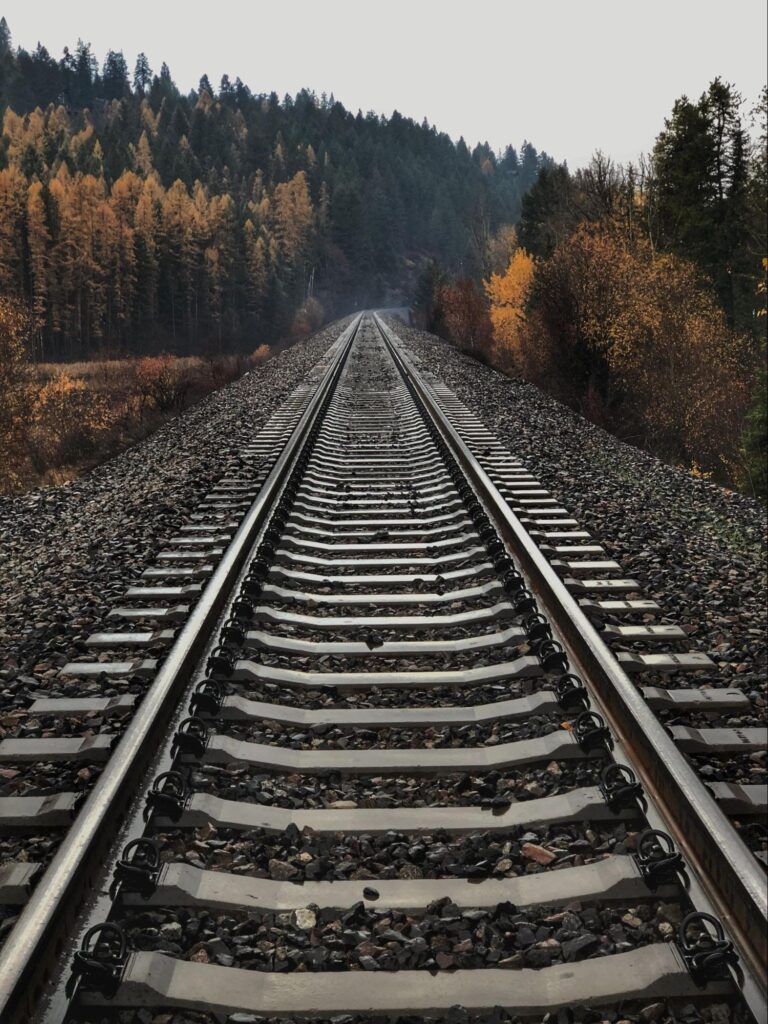
This railroad, on the other hand, acts as a path, winding across the image and generating a vanishing point on the horizon.
How to Use Leading Lines in Photography
It’s important to understand the procedure of applying leading lines. Working with them may be broken down into two easy steps:
Step 1. Look For a Leading Line
Regardless of where you reside or where you like to snap images, leading lines can be found anywhere. The key is to track them down and incorporate them creatively into your compositions.
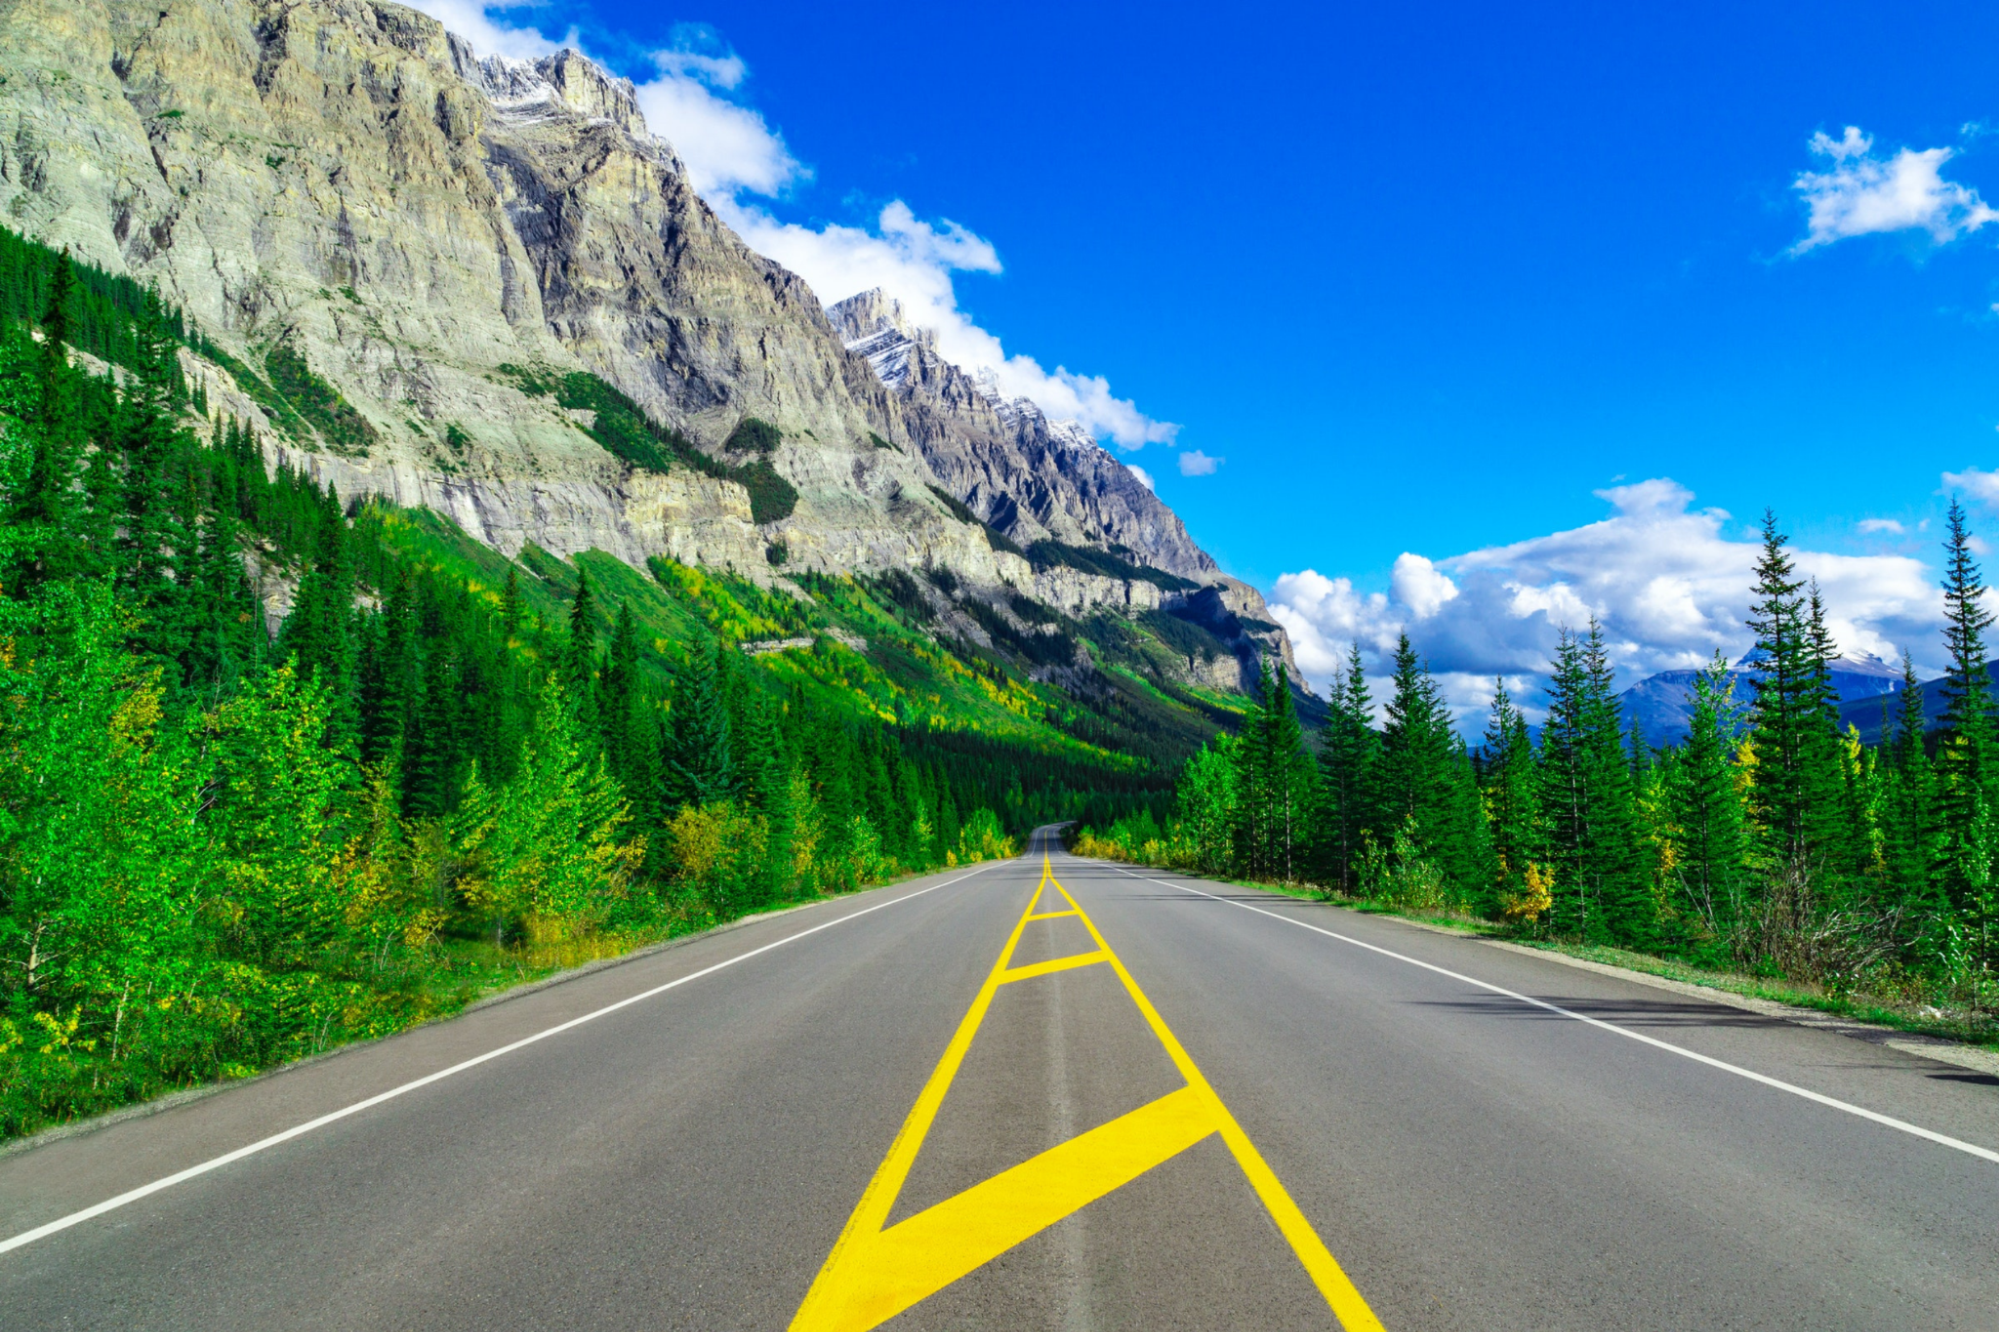
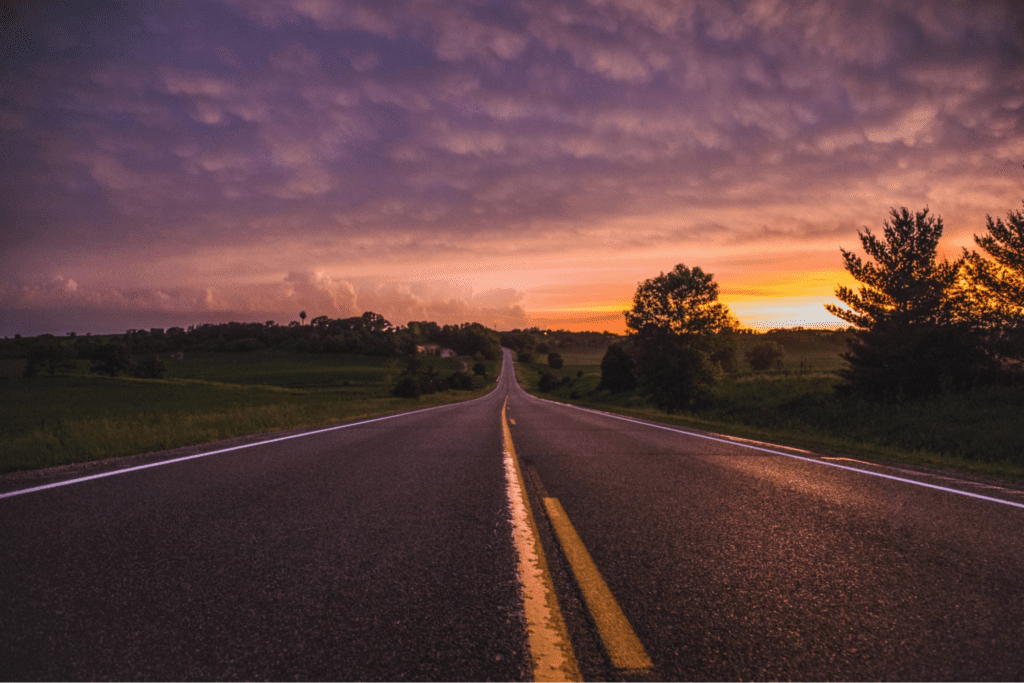
The ideal place to begin is with roads and paths. They are inherently leading since they direct somewhere, and their edges frequently create a vanishing point on the horizon.
There are a variety of other prominent lines to choose from. Photographers utilize a range of objects in their compositions, including sand patterns, fallen logs, bouquets of flowers, rocks, bridges, fences, and more.
Take a look at the environment for noticeable lines the next time you’re putting up a photo. Even if it takes some searching, spotting leading lines in photography is worth it. You’ll eventually uncover some great ones.
Step 2. Make That Leading Line a Part of Your Composition
It’s now time to incorporate the leading lines into your composition, which should be a careful and thoughtful procedure.
To begin, consider where you want this leading line to lead the spectator. You’ll need to modify your camera position so that the leading line points roughly in the appropriate direction, especially if it leads to an appealing sight in the backdrop, such as a sunset.
Next, consider whether the leading line is attractive enough to serve as a foreground subject. Is it possible to get close enough to make it appear gigantic in the frame? Do it if your leading line is intriguing and you believe you can get near.
Some leading lines aren’t able to grab the audience’s attention or aren’t accessible, and that’s fine. Leading lines are always significant, even if they aren’t attention-grabbers. Be sure to include an eye-catching foreground subject or tighten up your composition by focusing on the main subject.
Leading lines are always significant, even if they aren't attention-grabbers.
After you’ve placed your subject and any leading lines, take another look at the setting. Consider how you might be able to improve the effects of the leading lines by shifting your camera position, changing heights, or choosing a wider or longer focal length.
Tips for Using Leading Lines in Photo Composition
Now that we understand what leading lines are and how to use them, let’s discover a few tips to use effectively in our photography sessions. Professionals leverage these tips while shooting, so do think about them deeply!
Evaluate the Location and Time of Day
Are you in a natural setting or a city surrounded by skyscrapers? Natural effects like the sun’s rays may cast long shadows that can be employed as leading lines. Environments like forests can present difficulties in creating leading lines conventionally, for which you may have to think creatively.
All of these factors can help you figure out how leading lines can be used in your photos.
Notice Any Natural Lines
Scan the region where you’ll be shooting for natural and manufactured structures that could be used to generate strong leading lines in the frame. This could be fields, shadows, trees, rivers, buildings, or pavements. Leading lines exist everywhere in real life – it’s just about compositionally framing them.
Look For Leading Lines in Arrows
Instead of basic lines, we can go a step further and create triangular or arrow patterns going towards the subject.
We can achieve this by applying the laws of perspective. In a photo of a long, straight street, as the photo gets closer to the horizon, the street starts to get narrow and the buildings get closer together. From the lower corner to the central line, a diagonal line will cross this image.
Placing your subject on this central line and then altering your viewpoint to observe the inverted ‘V’ of the sky can assist you in creating an arrow pointing towards your subject or focal point. You can also use additional lines that naturally form a similar ‘V’ shape around the subject.
Focal Point
After deciding which leading lines to use, position your camera so that the lines bring your attention to the image’s main point. Take your time, but keep in mind that if you’re utilizing natural shadows as leading lines, you’ll need to adjust for how they shift over time.
Look For Positioning Leading Lines
Leading lines can also be used to generate flow, often known as dynamism, throughout a composition. Leading lines naturally guide the viewer around the image, keeping them interested.
By properly positioning leading lines in your composition, you can bring attention to important parts of a photograph, such as a gorgeous mountain or an ocean sunset. You can use these lines to direct the viewer’s attention to the parts you want them to see, and to steer them away from the sections you don’t want them to see.
Lighting Conditions
After you’ve framed your shot, assess the lighting conditions and tweak your shutter speed and aperture accordingly. Strong leading lines can’t balance for an underexposed or overexposed photo, so make sure your camera is set to the right exposure.
Use Your Lines to Create Depth
In landscape photography, the near-far method is very popular. It’s a quick and easy technique to add lots of depth to your images, and it’s how you can get photos like this:
Leading lines are an excellent technique to provide image depth. You may create a 3D appearance in scenic landscape photography by highlighting the start of a line before letting it fade away into the background.
Take Multiple Shots
When it comes to editing your photos and selecting your favorites, it’s always a good idea to give yourself options. Keep changing your viewpoints for various shots to ensure you’ve explored all of the available angles. After exploring all the vantage points that your time and/or space provide, you’ll be able to make an informed decision on which shot to finalize.
Recommended Reading: If you’d like to improve your composition skills for better images, grab a copy of Photzy’s best-selling premium guide: Understanding Composition.
Final Verdict

Leading lines in photography are the significant compositional features that guide our sight through the image. They can be used to tell stories, emphasize a point, or establish a link between two objects.
Wherever you go, start thinking about leading lines; amid everyday chaos, practice finding leading lines. It will help to improve your compositions dramatically in a short period!
Self-Check Quiz:
- Why are leading lines important?
- How are paths different from leading lines?
- If I can’t find a great leading line, what could I do?
- How can a photograph’s subject benefit from leading lines?
- Can poorly illuminated photos be compensated by using leading lines?


