


When you create stunning photographs, people will go “wowza.” But without focal points, they may end up confused – making this method crucial.
Starting in photography is hard enough, but taking it to a professional level can be even harder. Using focal points in photography is one vital technique of the pros, but it’s never achieved easily.
However, with the right resources, this complicated journey can be eased. We have created a detailed guide of ALL the techniques one can utilize to create strong focal points.
What you will learn in this guide:
- What a focal point is
- The importance of focal points
- Over 10 techniques for applying focal points in your photographs
- How to avoid similar focal points
- How to use multiple focal points
Got your coffee and camera ready? Let’s begin!
Recommended Reading: If you’d like to improve your composition skills for better images, grab a copy of Photzy’s best-selling premium guide: Understanding Composition.
What Is a Focal Point in Photography?
The term “focus” refers to the volume of the image which is sharper than the rest. The amount of focus and the point of focus both have an impact on the final image. In other words, changing each one alters the final image’s appearance.
When photographers say “focal point,” they usually mean the space in the shot that they want to bring the most attention to. Every shot has a certain spot where the photographer wants a viewer’s sight to settle.
This can be single or numerous points, and photographers with high-end digital cameras can pick between the number of these spots and their position. These focal points can also be placed in post-production.
Importance of the Focal Point in Photography
The focal point may only take up a little portion of the frame, but it has the power to define the composition. If there is no point of focus, the viewer’s eye gets frustrated since it isn’t drawn to any single portion of the image.
There needs to be a part of the picture that pulls the viewer’s eye to the most crucial component or an area that you wish to highlight. It’s a detail in the image that people will recall long after they’ve forgotten everything else.
The focal point may only take up a little portion of the frame, but it has the power to define the composition.
The way you approach this will determine if the final image is impactful or not. You’ll only be a professional when you learn the various ways of creating this point.
Here is a list of all the ways a photographer can use focal points in photo composition. You can use all these techniques, regardless of being either an amateur, semi-professional, or expert.
Using Depth of Field
To blur out elements in front of or behind your focal point, utilize Depth of Field.
Let’s say your subject is standing behind a plant and has a cityscape in the background. Ideally, you would want the focal point to be your subject.
By adjusting your aperture accordingly, you can set a shallow depth of field to focus only on your subject. Everything else, including the plant in the foreground and the cityscape in the background, would be blurred.
This creates a focal point either on your entire subject or parts of it (e.g., the face).
However, it’s not feasible to set multiple focal points using depth of field. You can do so in post-production, but it would just look odd. In that case, it’s best to have a wider depth of field and create focal points using other techniques mentioned below.
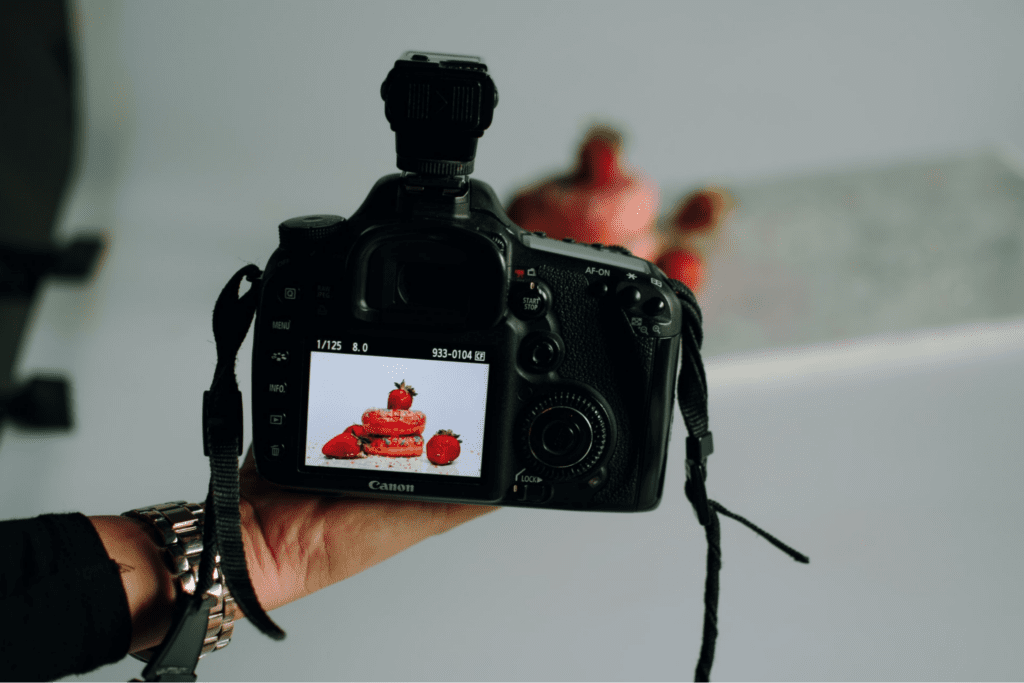
Create Color Contrast
Colors have a significant impact on how focal points are conceived.
A stop sign that is freshly painted in a thick layer of bright red will stand out more than the one painted in a drab, somewhat-muted red. A pink cushion on a white couch will pop more than an off-white pillow on the same couch.
Viewers will naturally focus more on these contrasts and less on the subdued colors.

This way, you can use color contrasts to create points of focus in a photograph. The contrasts don’t have to be extreme, but they should be contrasting enough to spark attention to those spots.
If you can’t find naturally occurring color contrasts, you can always create them artificially through post-production.
Use Light Contrast
The human eye is easily drawn to bright objects. In images with strong light contrasts, focal points are usually found.
Look around you for regions with significant light contrast and position your subject there when taking the photo. This type of contrast is easier to find when the light is hardened – usually when the sun is high in the sky, when light is coming through an opening such as a window, or when artificial light is directed such as a light post in the light.
The lightest light and darkest dark in a frame can be placed next to each other for establishing a focal point.

Apart from drawing attention to your focal point, a high light contrast also helps to conceal distracting objects by hiding them in the dark parts of the composition.
Placing the point of focus in brighter sections ensures that viewers see it as the most significant aspect of the image. You can shoot in black and white to boost the intensity of this effect.
Focus on the Eyes for Portraits
The eyes are excellent focal points. We automatically stare at the eyes of everyone we meet because they are so revealing. In a portrait, the same thing happens.
Make sure the eyes are as crisp as possible. When looking at a portrait that has blurry eyes, the viewer may feel dissatisfied.

Although, the eyes aren’t as important when you’re capturing a group portrait. They are typically a minor component of the frame.
If someone appears blurry, the viewer interprets this person to be ‘less important’ in the composition. You don’t want anyone to be insulted, do you? Thus, it’s best to keep everyone in focus for group portraits, even if that means sacrificing a strong focal point.
Recommended Reading: If you’d like to improve your composition skills for better images, grab a copy of Photzy’s best-selling premium guide: Understanding Composition.
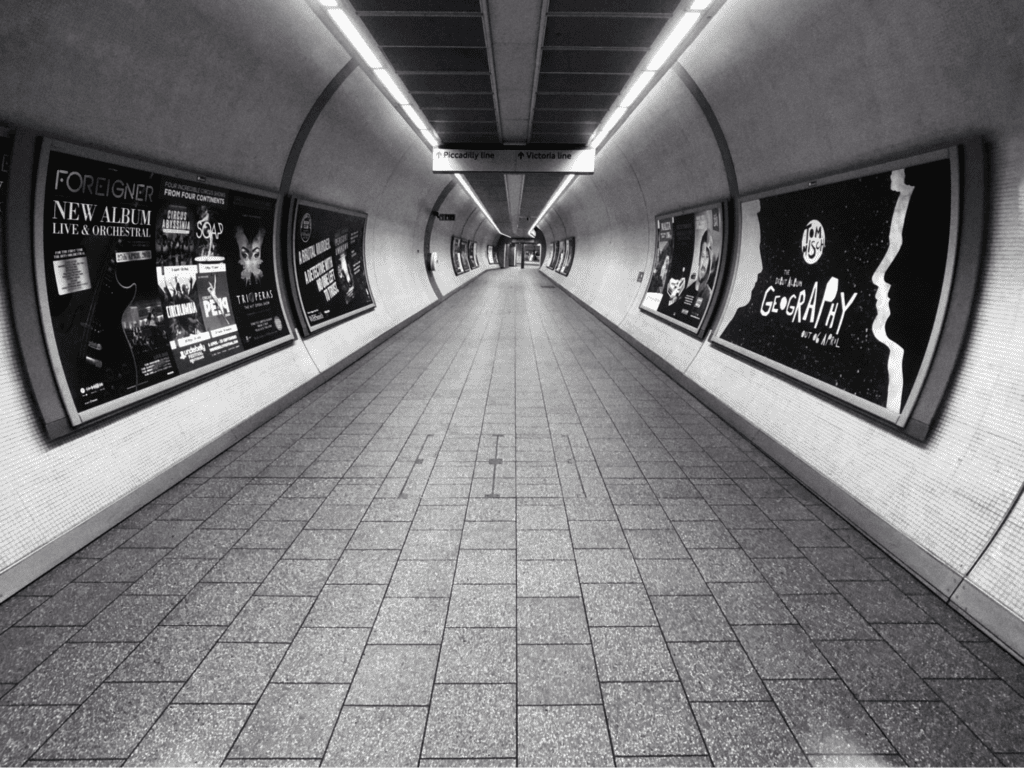
Incorporate Motion Blur
In photography, motion blur refers to the deliberate blurring of a moving object in an image.
This can be used to achieve an interesting focal point by placing the subject still against a moving background. As a result, the subject in the frame will be in focus while the rest of the scene moves.

This could be a person in the subway with trains zooming by, or a stationary street cart amidst bustling crowds.
Choose Elements With High Visual Weight
Remember that the visual weight of certain things is greater than that of others in composition. They tend to attract the viewer’s attention right away and make excellent focal points.
Objects with larger dimensions, for example, have greater weight than those with smaller dimensions. Large objects catch our attention first, and we gaze at them for longer periods.
It’s best to either use these objects as focal points or avoid them entirely. If a model wears apparel with lettering or extravagant design, it might become an unwelcome point of focus in front of the actual focal point – the model.
Use the Rule of Thirds
The rule of thirds’ main purpose is to aid in the creation of asymmetrical compositions. It gets uninteresting when the elements of an image are centered and too balanced. Asymmetry and imbalance of pieces generate a far more dynamic picture, especially when it is offset utilizing the rule of thirds.
Asymmetry and imbalance of pieces generate a far more dynamic picture, especially when it is offset utilizing the rule of thirds.
Such imbalances can be leveraged to generate a focal point as well. But don’t be frightened if you’re unsure of how to go about doing it.
The goal is to simply position your main subject in the lower, upper, left, or right third portion of the frame. As a result, your subject will become a more prominent focal point.
Use Leading Lines
Understanding leading lines is a straightforward component of photo composition. The concept is to employ a line or multiple lines within the image to draw your attention to a specific point.
The crucial thing is that the leading lines guide a viewer to the image’s focal point, multiple focal points, or any one of the image’s focal points.
Lines that lead away from the focal points are often less useful and may detract from the composition. Effective use of lines can help your composition stand out and ensure that the viewers see what you want them to see.
Leading lines can come in a variety of shapes and sizes. Paths, rivers, highways, power lines, furrows in fields, hedgerows, and tree lines can all be used as leading lines. Lines generated by buildings in cityscapes or street photographs could also be used.
You can use a curved or wavy set of leading lines instead of straight ones. As long as they help guide the eye to the focal point(s), they’re serving their purpose.
Use the Rule of Odds
When photographing a group of subjects, the rule of odds suggests that using an odd number rather than an even number will result in a more engaging and aesthetically appealing composition (with an added focal point).
If there are an even number of elements in composition (such as four cupcakes), then the human brain will typically try to group these elements into pairs. This can make the resulting frame appear ordinary and dull.

Placing one main subject in the frame with two/four other supporting elements will guide a viewer’s eyes to naturally focus on the middle/odd subject, giving your composition a focal point.
Our gaze is naturally drawn to the center of a grouped composition, which isn’t ideal when our focal point exists elsewhere. By strategically using this rule, you can bring the viewer’s attention to a desired focal point, regardless of where it’s positioned in the frame.
Three subjects inside a frame is a popular way of applying the rule of odds. They always create a line or a triangle in this manner, and both these forms are compositionally pleasant, with an emphasized focal point, of course.
Use Negative Space
Leaving a lot of negative space in a shot is a great technique for generating a strong focal point. This blank space will result in a minimalist composition with a significant focus on a single subject that pops out from the background.
It could be a boat in the middle of a river/sea, with only the sky above and the water below it. Even though there will be minor patterns in the sky and water, it still serves as negative space, especially if you place the boat in the center. As a result, the boat becomes the focal point.
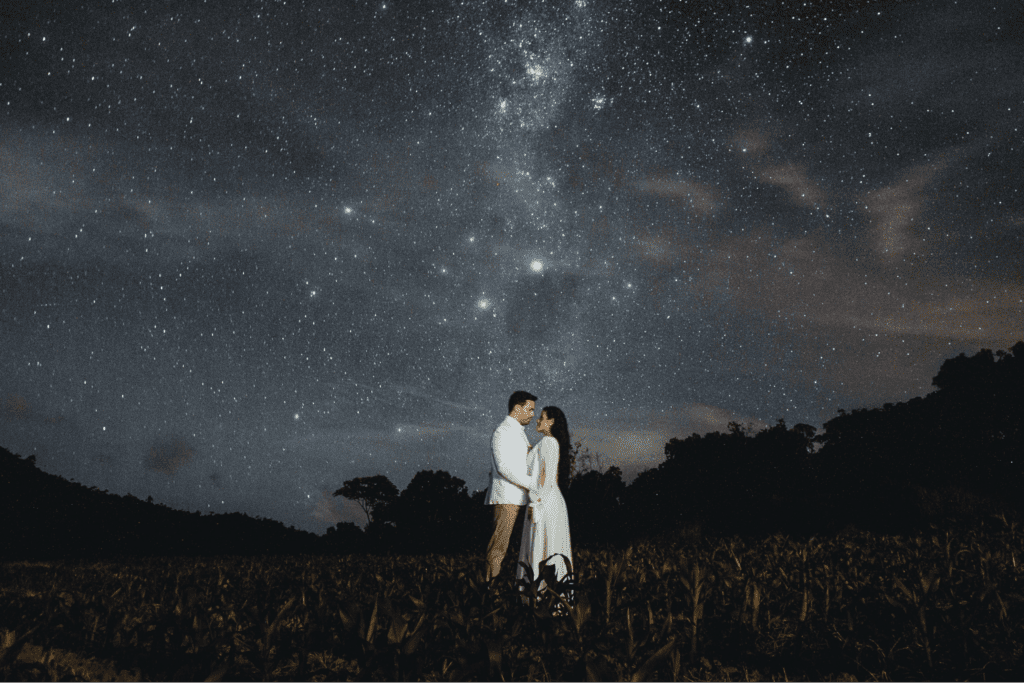
Negative space allows you to shoot small subjects without losing them to other elements in the background. When photographing focal points from a distance, this is an excellent technique to utilize.
Avoid Incorporating Similar Focal Points
If you want to emphasize symmetry or balance in your composition, you can employ two similar focal points. If not, it’s best not to use them, especially for more than two.
Similar focal elements will compete for the viewers’ attention, leaving them puzzled. In photography, an additional point of interest can help lead the eye. However, a large number of strong points will be overpowering.
To tackle this situation, enlarge one of the emphasis points clearly, which will immediately draw the viewer’s attention. The eye will then naturally follow the smaller focal points.
More information on using multiple focal points is explained in the section below.
Multiple Focal Points
There might be several focal points in photography. Your environment, as well as the items in it, can dramatically modify and increase your focus points in a single frame.
Our attention may be initially pulled to a bigger subject, but with closer examination, we may find a little secondary focus point that also offers vital information to the frame.
In this technique, you must determine which one is your primary focal point and create a hierarchy of appealing focal elements.

A diagonal leading line is used to create multiple focal points (i.e., the faces on the wall). Photograph by Spacejoy
Use the strategies discussed in this guide like contrast, color, rule of thirds, etc. to give the primary subject greater focal emphasis in comparison to other ones.
This will be the first point that the viewers’ eyes will be drawn to. Other focal points in the image will strategically yet naturally guide them through it, creating multiple focal points.
Recommended Reading: If you’d like to improve your composition skills for better images, grab a copy of Photzy’s best-selling premium guide: Understanding Composition.
Final Verdict
This may be a lot of information to digest, but don’t rush it. Try each technique step by step and come back here to try out the next one! If this guide has helped you, don’t forget to share.

Self-Check Quiz:
- What is a focal point?
- Why is the focal point important in photography?
- Why should I avoid similar focal points?
- What should I do when I’m trying to capture grouped elements and need a focal point?
- How do I create multiple focal points?


