

A beautiful sunset (or sunrise) is an intriguing subject for photographers. After all, we are all about capturing the beauty of our environment and nothing is more beautiful than the golden glow of a setting sun.
But, getting a great photograph of a sunset is very tricky because of two concerns – proper exposure and exposure range. Part of the dilemma lies in the fact that often the exposure range is too large for our cameras to capture it. This means something has to give. Either the highlights are blown out or the shadows are too dense.
However, before we all start crying over future images lost, we can take hope in the fact that there are techniques available to help us capture that beautiful golden globe.
The other problem is figuring out the correct exposure. The sun is very bright so a pinpoint light source and the area surrounding it will be dark by comparison. There are exceptions such as if water is reflecting the sun. Clouds will also add luminance. But even with those elements helping you, the exposure range will often be out of reach.
Your first lesson in taking a better sunset photograph is- Ask yourself some questions.
What do you want to say with your photograph?
Are you willing to sacrifice the foreground details to enhance the sun?
Are you willing to let the sun blow out a bit so that you have detail in the foreground?
Can you choose an angle that squeezes the exposure range?
Are there tools available to you that can help you squeeze the exposure range?

Photo by Swami Stream
The pinpoint brightness of a setting sun will often fool your camera meter into underexposure (just like this photo above).

Photo by Moyan_Brenn
If you’ve been savvy enough to override your camera meter and increase the exposure for your foreground, the sun and surrounding areas will blow out and lose detail (image above). This may, or may not, be satisfactory depending on what your goals are.
Important Tip: If you’re unsure about the exposure, do what is called an exposure bracket:
- Put your camera in manual mode.
- Take a meter reading by pointing your camera to an area of the sky that is adjacent to the sun; don’t include the sun in the frame.
- Recompose your image and take the photograph.
- Take the same photograph increasing and decreasing the exposure in 1/2 stop increments. Do this for at least 2 stops over and 3 stops under your initial exposure.
- When you have a chance – evaluate all 11 exposures to determine which one came closest to your vision of the photograph.
At this point we’ve established a simple technique that can help you get the best exposure. The problem here is that the contrast range may still be too much.
What can we do about that?
One thing is timing.
Exactly what time of day are you going to attempt your photograph? As the sun approaches the horizon, the intensity of light is diminished by atmospheric haze.
"As the sun approaches the horizon, the intensity of light is diminished by atmospheric haze."

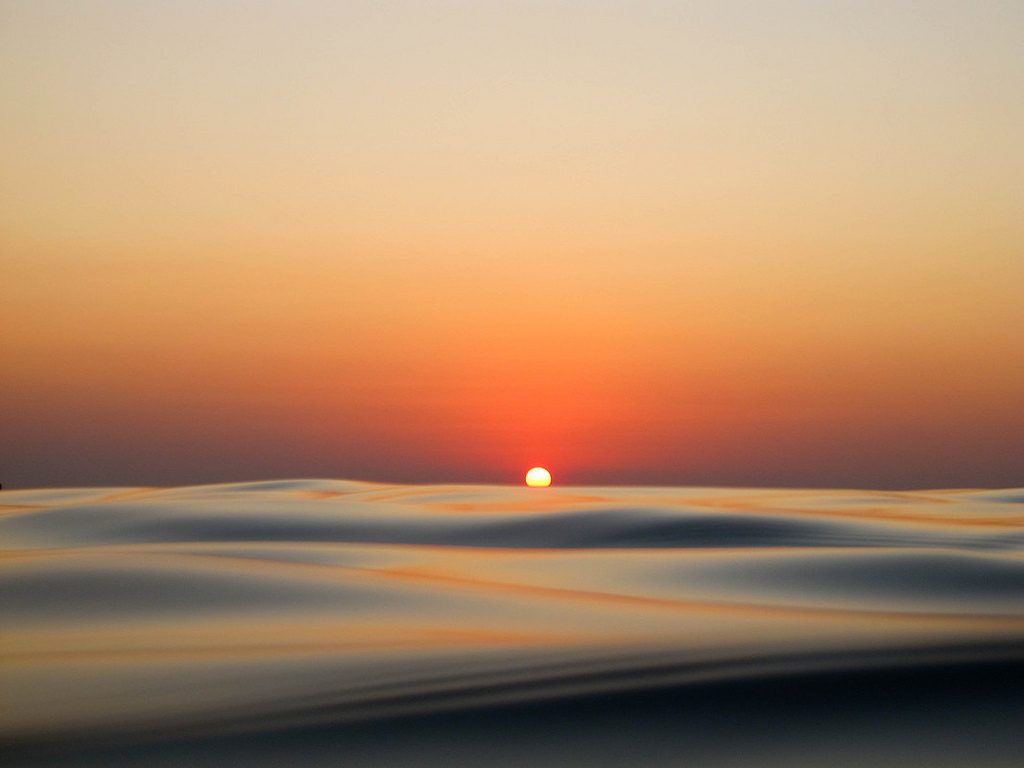
Photo by Kent DuFault
This photograph was taken within minutes of the sun breaking the horizon line. Even at that time, the exposure level would have been too much for the camera. In order to “even out the exposure level” the photographer employed a flash unit for fill light.
This time of day is often referred to as “The Golden Hour”. The Golden Hour occurs one hour before sunset and one hour after sunrise.
There are caveats to this principle, though.

Photo by familymwr
If you’re shooting directly into the sun, it’s not really a Golden Hour – it’s more like a Golden Ten Minutes.
What exactly do we mean by that?
The Golden Ten Minutes is that brief couple of minutes where atmospheric haze has reduced the sun’s intensity to an exposure level that matches the foreground. During the Golden Ten Minutes you’ll be able to shoot directly into the sun, take a single exposure, and accurately record everything in the shot. It occurs ten minutes before the sun drops below the horizon line.
In the ten minute window before the sun slips below the horizon, atmospheric haze will reduce its intensity of light and allow you to capture a full range of tone in a single exposure.
There are many factors that could affect the exposure range and thus allow you a longer window of opportunity.
Let’s discuss them now.
Cloud Cover
Clouds are God’s gift to the sunset photographer. Not only do they add color and drama to a sunset, they also reduce the intensity of the sun.
Cloud cover can extend your ten minute window back to the Golden Hour.
When clouds are present, your window of opportunity is opened up. But, keep this in mind- watch the sun as it moves through the clouds. Your exposure could change radically as it breaks into an open spot or becomes completely covered in another. Try to time your shot where the sun is partially revealed. This will give you the most dramatic image.

Photo by paul bica
If you have important details in the foreground, a fill flash will often “brighten” them up just enough to become more pleasing.
This is also a good opportunity to use HDR. But beware of movement throughout your scene. If the clouds are moving, or any other object is blowing in the wind, you’ll have issues with ghosting.

Photo by dave.meleca
You might also wish to try a gradient filter.
This photographer attempted to pull his exposure within range by using a gradient filter (photo above). However, the scene was still beyond the recording capabilities of his camera.
Gradient filters can be helpful. The downside is that they sometimes give a manipulated look. Here are some tips on the use of these filters:
- Avoid the use of unnatural colors.
- They work best on a medium focal length lens to telephoto
lens. They become much more visible when employed on a wide angle lens. - Use them in combination with The Golden Hour. They can add some color when color isn’t present, but they’re not very effective at squeezing exposure.

Photo by Zach Dischner
Another way to offset the significant exposure range is to place an object in silhouette directly in front of the sunset. This allows you to dial down the exposure, showcase the sunset, and still provide foreground interest.
A silhouette in front of your sunset will help you keep your exposure balanced and add foreground interest.

Photo by girish_suryawanshi
This photographer took that previous tip one step further. He completely blocked the setting sun with a foreground object (image above). This worked because it reduced the overall exposure which kept his foreground from going to a complete silhouette, and it added a warm tone to accentuate the setting sun effect.
So far, we’ve talked about exposure, exposure range, and some simple techniques on how to capture an image while looking directly into the sun.
Consider this- sometimes the beauty of a sunset isn’t the sun itself. It’s what the sunlight is doing to everything else around you.
This is an important point for two reasons:
- What’s attracting you to the idea of taking a photograph may not be the sun itself. It may be the “effect” the light is having on other objects.
- If indeed it’s the lighting provided by the sunset and not the glowing orb itself that’s of interest, your job has just gotten a lot easier.
Sunsets And Gorgeous Clouds
Sunsets are often related to the cloud cover they illuminate. If this is your subject, you simply need to know a couple of tips.
- Take your meter reading from a mid-tone section of the sky. Do not take your reading where the sun is located.
- If the situation lends itself to it- include something in the foreground to add scale.
- Exposure bracketing is a good technique for this situation as well.
Dramatic cloud cover will generally be within the contrast tolerance of your camera.

Photo by scott1346
Cloud Cover And A Structure
This combination can provide a pretty sweet opportunity. Keep your eyes open for objects that will add interest to your sunset while at the same time smoothing out that exposure range. An added benefit to this technique is the cross-starthat sometimes forms when when the pinpoint of the sun is placed near an opaque solid line.
The last possibility for sunset photography isn’t about the sun or the clouds; it’s about the light produced. Depending on your situation, you can choose to include, or not include, any of these elements.
If you’re having trouble capturing a proper image,go to the contrast range- turn your eyes to other ideas around you. You may find an equally interesting photograph that still has “sunset” qualities.
"The last possibility for sunset photography isn’t about the sun or the clouds; it’s about the light produced."

Photo by TumblingRun
This photograph doesn’t show the sun, but it screams sunset. When faced with a beautiful sunset situation look to your left, right, and behind you. The golden rays may guide you to an even better photograph.
Post-sunset also offers excellent opportunities for images. Colors often become vibrant and change in color temperature. This can lead to some pretty outstanding work. Keep in mind that exposure levels will drop off precipitously. You will most likely need to brace your camera to avoid camera shake. The best way to do this is to use a tripod. Alternatively, you could place the camera against a steady object such as a fence-post.
Post-sunset is a great opportunity for dramatic shots. Just make sure your camera is rock steady so that you don’t induce camera shake into your photograph.
One last comment regarding sunset photography; our minds are trained to “fill-in-the-blanks”. We know through education that the sun is large; we see it as large in our minds. But a camera sees the sun as it really is, which is why we’re often disappointed when it appears so tiny in our images.
A telephoto lens adds a lot to your capabilities when shooting a sunset. It doesn’t have to be an extravagant telephoto lens, even something in the 135mm range (or longer) works nicely.
Another way to help give that size a boost is to include an object of a known size in the foreground.This helps establish scale.
Let’s sum up our sunset photography tips:
- Shoot in the Ten Minute window – especially if there is no cloud cover.
- Shoot in The Golden Hour if you have cloud cover.
- Take your meter reading from an area of sky adjacent to the sun; don’t include the sun in the frame.
- Bracket your exposures.
- Utilize HDR if you have that capability and there is no movement within the scene.
- Break up the intensity of the light by waiting for cloud cover or introducing an object in front of the sun.
- Use gradient filters sparingly and never on a wide angle lens.
- Consider alternatives to shooting directly into the sun.
- Look to the sides and behind you for other images being lit by the golden light of the setting sun.
- Use a medium to long telephoto if you want that orb to be large.
Good luck! Shooting sunsets is fun and rewarding. Remember to keep a creative eye open and look behind you.


