


The beauty of photography is that there really is no right or wrong way to take pictures (excluding any technical camera issues).
It is such a subjective medium – what someone may consider a bad photograph, others might consider artistic.
There are many different styles of photography, be it dark and moody versus light and bright, or HDR and oversaturated versus desaturated and selective coloring, and many more.
But no matter your imaging preference, there is bound to be a market for that particular style of photography.
Having said that, personally I gravitate toward images that have a clean natural look.
My aesthetic style lends itself toward light, soft pastels and bright images that have a sense of freshness.
I find that I am my most creative self when I put myself in situations that give me the ability to photograph in this way.
The beauty of photography is that there really is no right or wrong way to take pictures
Give me a dark room, or a scene with lots of bold warm colors and tons of contrast, and I feel mentally bogged down, almost to the point that I start to feel claustrophobic with all that color and contrast.
Now perhaps this might seem a little silly, but that is my personal preference.
It also goes back to my earlier comment about photography being a very subjective art form.
I get asked quite frequently about how I achieve this “light, pastel, and airy” look in my photographs.
It’s actually not that hard, and it boils down to a few simple tips.
These tips will help you to better visualize your intended photograph, and thus help you to achieve the light, pastel look.
Here is what you will learn:
- You will learn the type of lighting needed for the “light and airy” look of photography.
- You will learn where to find that type of lighting.
- You will get some tips on the positioning of models and the camera.
- You will also get some tips on how to deal with bad lighting.
- You will learn how to use rim lighting, including an industry secret.
- You will learn about the best backgrounds for the light and airy look.
- We will talk about exposure, and I will give you my favorite exposure tip when photographing people for the light and airy look.
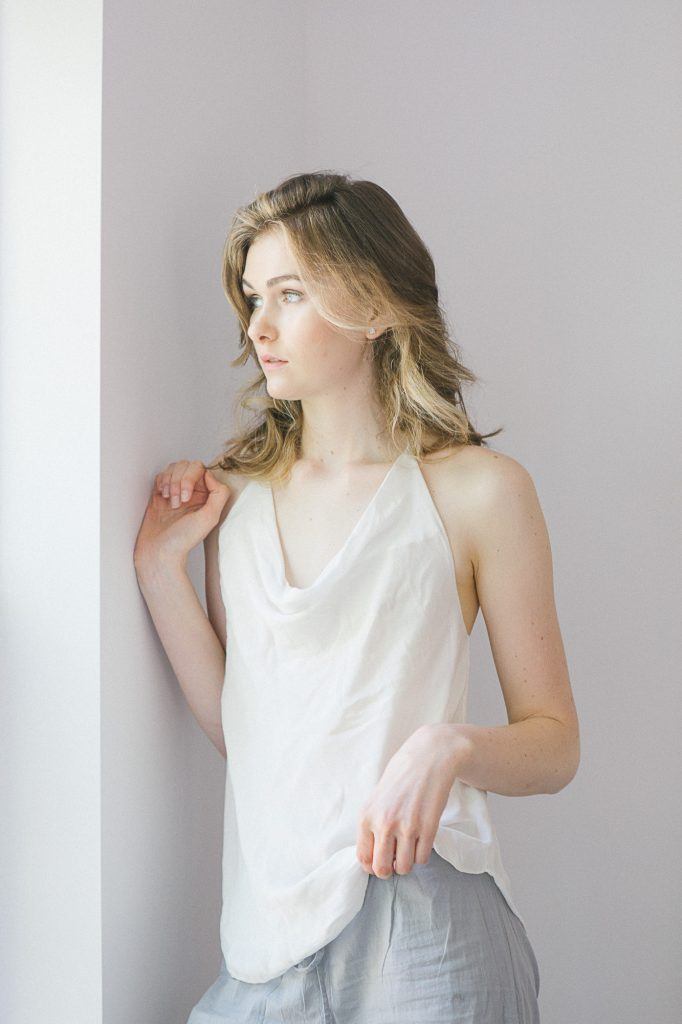
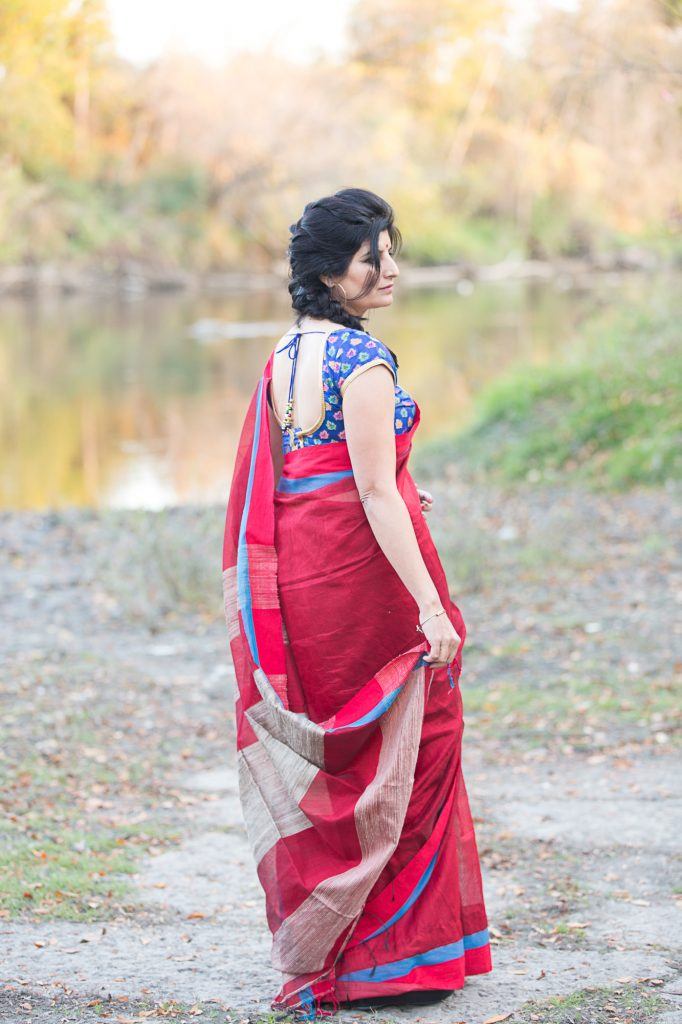
Photo by Karthika Gupta Photography
Lighting
I can’t stress enough how important the lighting is when using it to achieve a certain look for your photography.
Not all lighting is equal.
Sometimes the light is perfect – that warm, soft glow that translates beautifully in pictures.
Other times, the lighting is harsh and strong. I wouldn’t say that type of lighting is always bad; it is just not the same every time.
Once you train your eye to read the different types of light, and what the light can do to your images, you will be able to analyze your imagery better and get photos closer to the style you like without wasting too much time in post-processing.
No amount of editing can really fix an image taken in poor lighting.
Recommended Reading: If you’re particularly interested in learning more about light and how you can use it to improve your photography, grab a copy of Photzy’s bestselling tutorial series, Understanding Light Book One and Understanding Light Book Two.
Golden Hour Light
For outdoor photography, if you want those warm, creamy tones, then scheduling your photo sessions as close to sunset as possible will be your best option.
That last hour, the Golden Hour as we all know it, is when you will get some of the best light.
This is because as the sun sets closer to the horizon, the range of light is broad and it spreads more evenly.
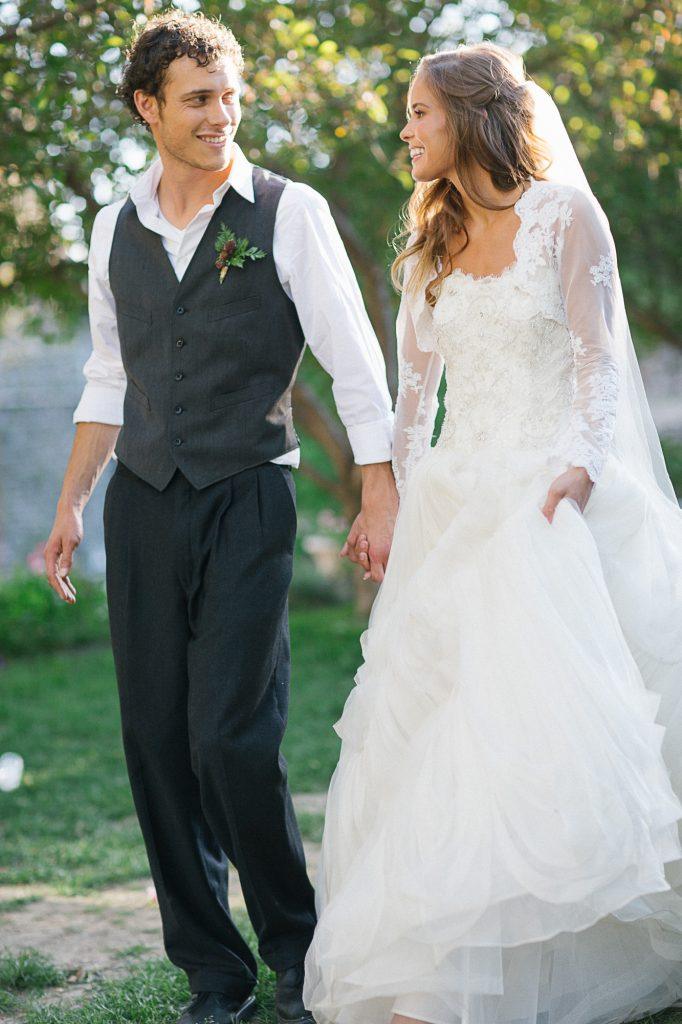
Photo by Karthika Gupta Photography
This type of light also lends itself well to the light, bright, and airy look that so many of us love in photographs.
Tip: When you are using the Golden Hour lighting (a.k.a. shooting around sunset), make sure that you don’t photograph directly into the setting sun. This leads to a lot of sun flare entering your frame, and can also make the shot appear muddy and blown out to the point of not being able to see the subjects clearly, as shown in the image below.
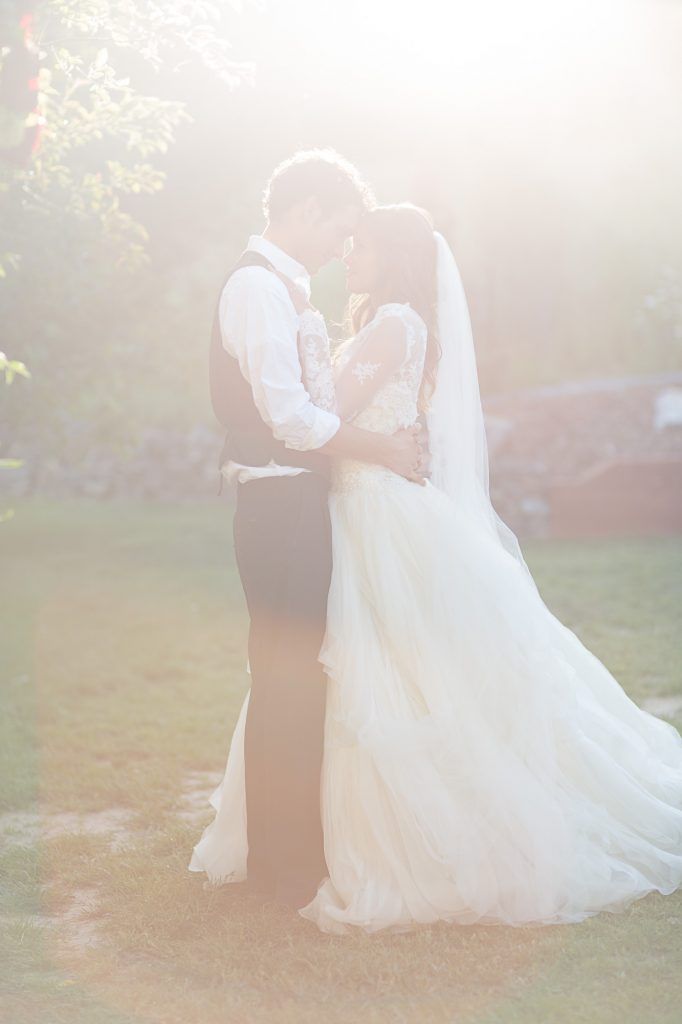
Photo by Karthika Gupta Photography
Soft Morning Light
This is another favorite lighting scheme of mine, because the light is subtle and soft.
Morning light tends to be more eventoned than when the sun is high up in the sky.
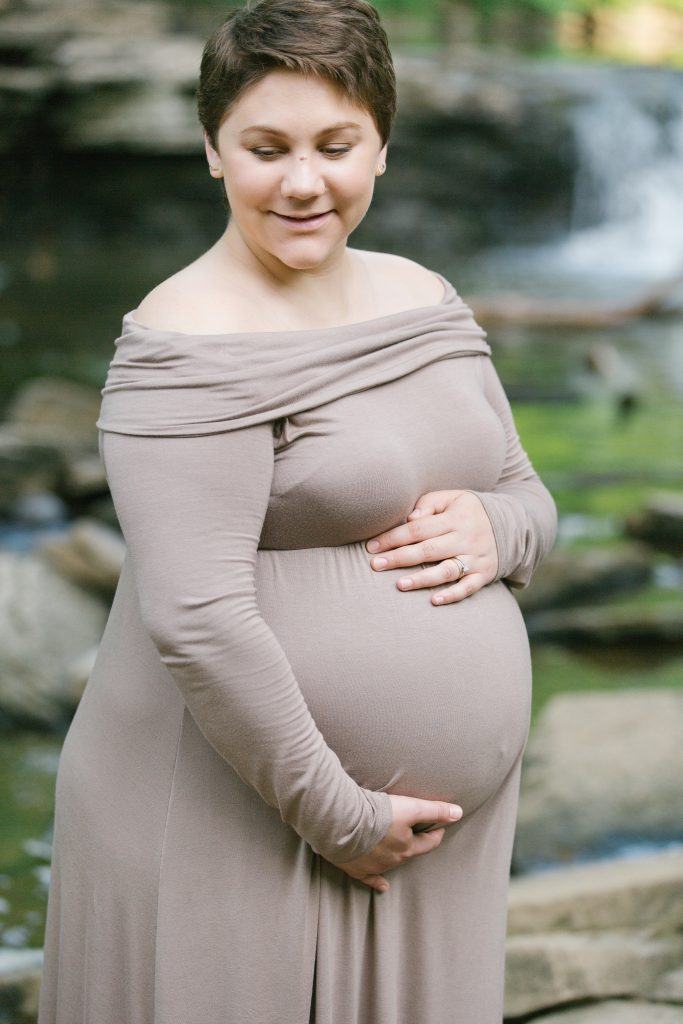
Soft morning light added to the glow of motherhood for my lovely client! Photo by Karthika Gupta Photography
Harsh Midday Sunlight
High noon lighting can be thought of as a spotlight directly over your head.
This overhead lighting tends to create unflattering shadows. These shadows result from the angles and protrusions on your face, like your nose and eyebrows.
If you wait until the sun hits the horizon, you will be pleasantly surprised to see how soft the tones are and how nice and even the lighting is.
Photo by Karthika Gupta Photography
At this time of day, you can open up your aperture to smooth out the background.
Sometimes when you are traveling, or taking landscape shots, you cannot always control the time of travel.
Here, you must make the best of the lighting situation. Photograph scenes that will lend themselves to the light and airy look when tweaked in post-processing.
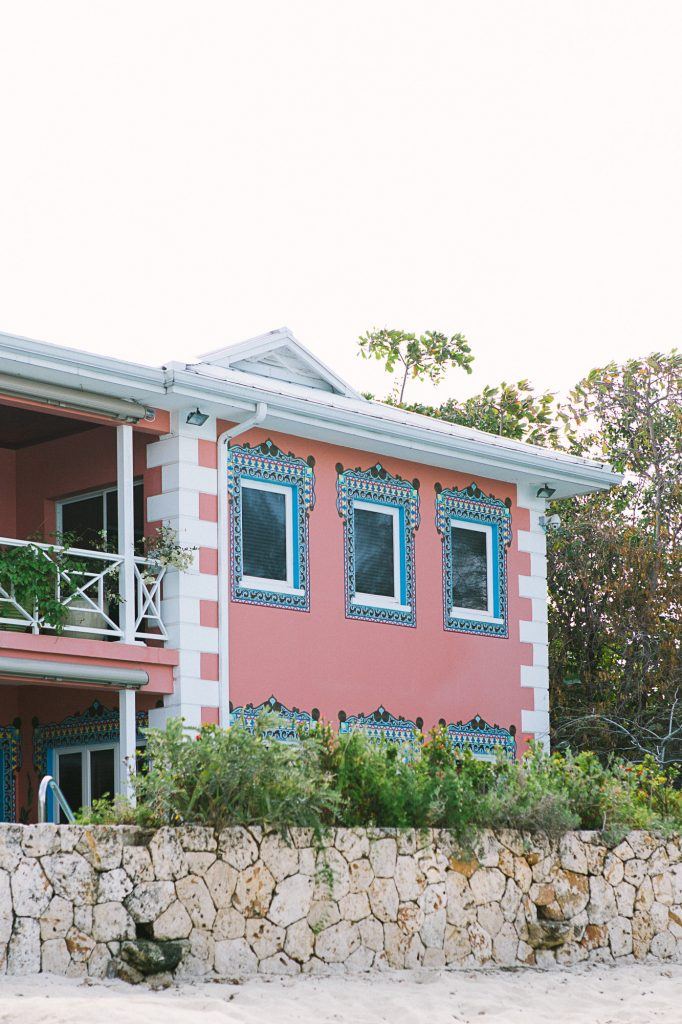
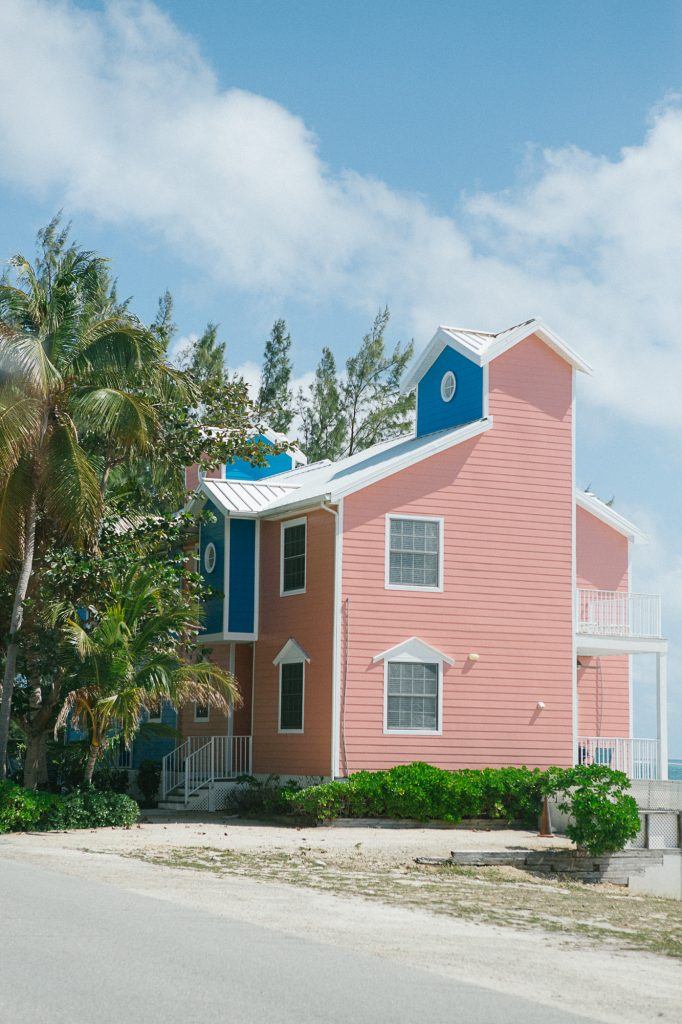
I had to let the sky blow out a little here in order to get enough details in the shadows. This location shoot included this beautiful house, on the beach, in the Cayman Islands, on a very overcast and cloudy day! Even with the help of the overcast day, the contrast was a bit much. Photo by Karthika Gupta Photography
Backlighting/Open Shade Lighting
The bright, even lighting of open shade plays well into the light and airy style of photography, but playing with backlit sunlight is another way to get that bright, fresh look.
Light and airy photographers will shoot backlight about 80% of the time.
This means the sun is somewhere behind the subject.
Now, this is the tricky part. It’s more than just having the sun behind them. If you only do this, you’ll find that your images will have a lot of sun flare – to the point of haze – and your camera autofocus may have trouble grabbing focus, resulting in out-of-focus shots.
The trick here is to block the sun from actually hitting your lens.
My favorite trick here is the use of trees. The branches and leaves act as a type of diffuser in that it filters the sun’s light rays from actually hitting your lens.
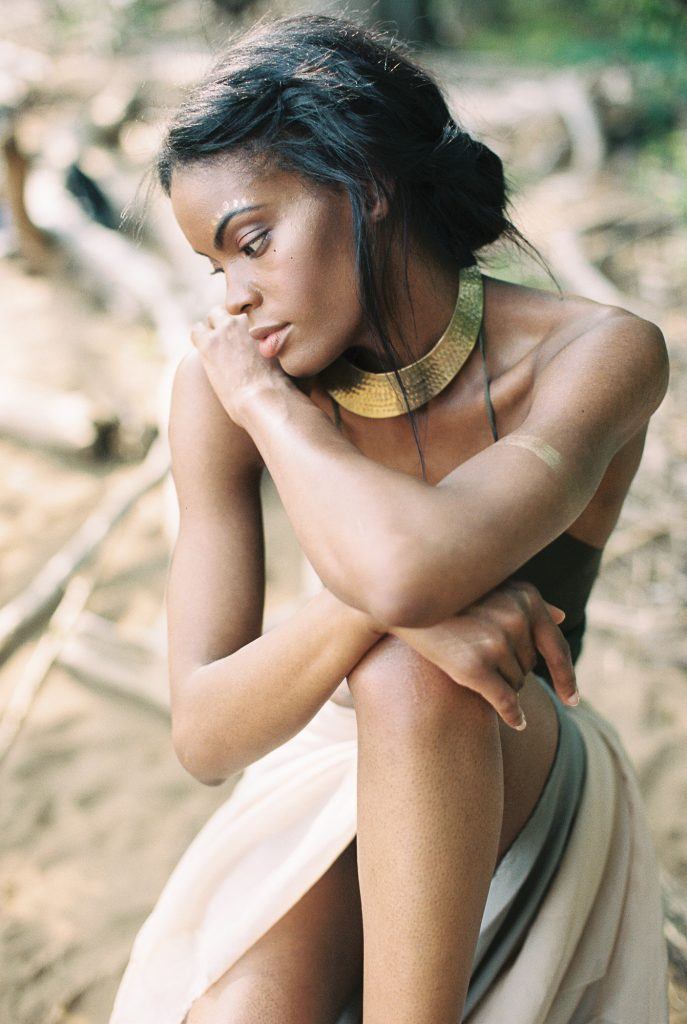
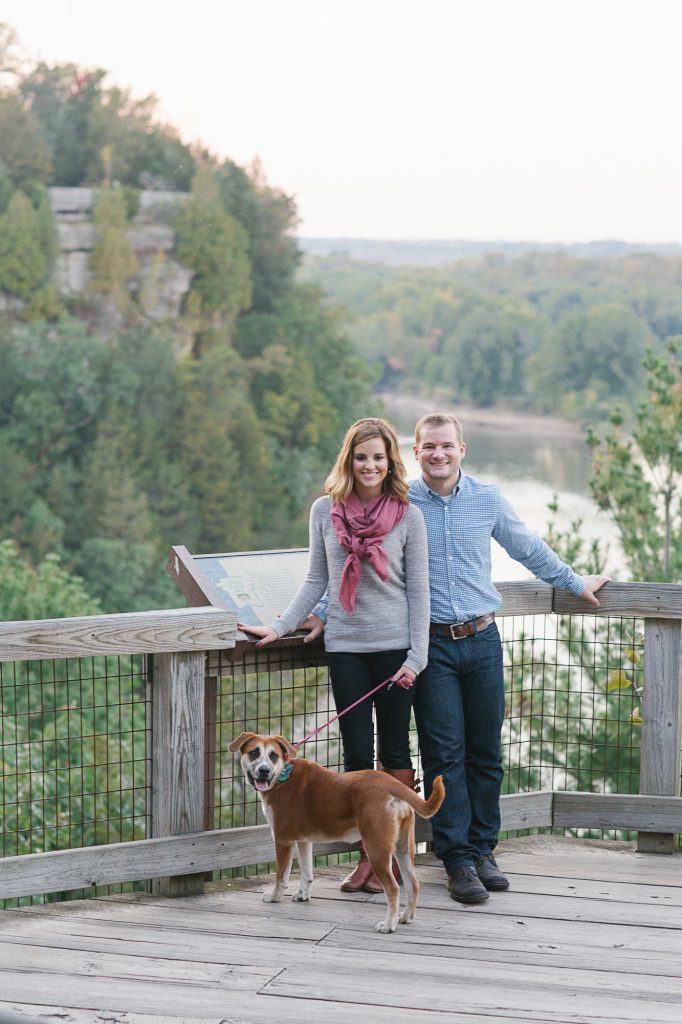
Take notice of the slight rim lighting on the subject’s hair. This was taken under some tree cover with the light falling onto her head. The light source was located slightly above the boundary of the frame. Photo by Karthika Gupta Photography
What you will get is called rim light (also known as hair lighting) from the rear of your subject, and in the front of your subject you will achieve an even un-shadowed lighting scheme.
Another trick is to overexpose the skin tones by at least half a stop.
Your highlights may blow out a little, but your subjects’ skin tones will look great.
Of course, if you have a very interesting sky that you want to retain, then you may not be able to overexpose your image.
Most light and airy style photographers are okay with blowing out the details in the sky, because this slight overexposure lends itself to a brighter image that is part of the light and airy look.
If the background is important, you must consider that in your exposure calculations.
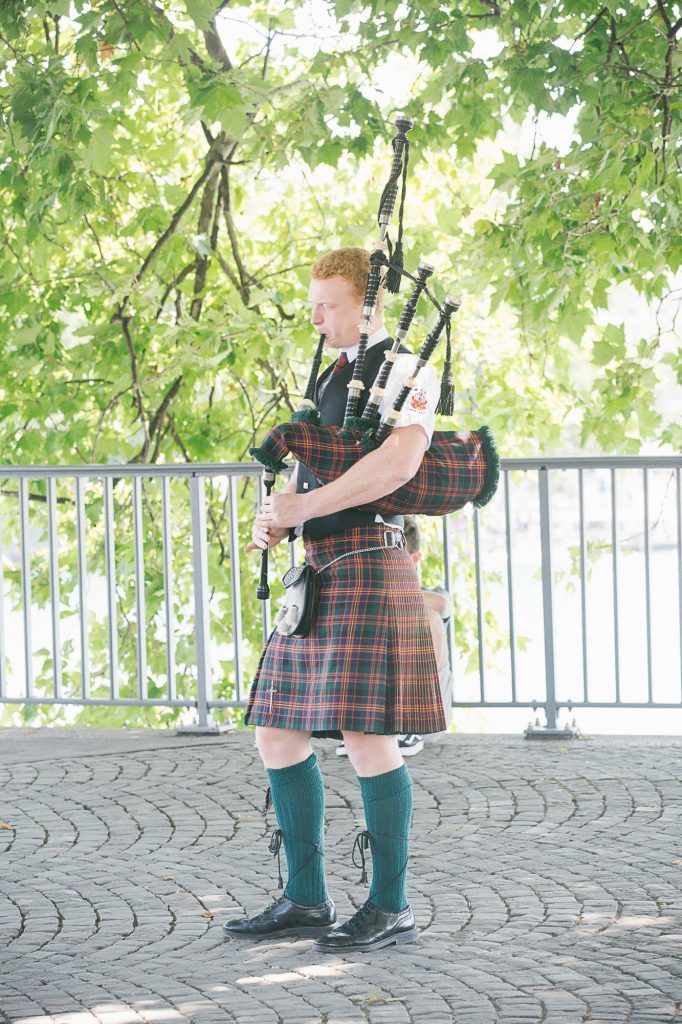
Photo by Karthika Gupta Photography
This bagpiper was standing under a huge tree, and he was in perfect open shade for a photograph! You can see some pockets of more intense light filtering through the trees and hitting the ground next to his feet.
Recommended Reading: If you’re particularly interested in learning more about light and how you can use it to improve your photography, grab a copy of Photzy’s bestselling tutorial series, Understanding Light Book One and Understanding Light Book Two.
Scenery/Background
Personally, I feel like scenery, or background, is as important as the lighting for a great image, no matter what the style.
Gorgeous mountainous backdrops with tall pine trees will definitely look more majestic than a messy backyard with overgrown grass and a swing set in the shot.
Personally, I feel like scenery, or background, is as important as the lighting for a great image, no matter what the style.
But don’t let a simple background deter you from taking a shot. Every place has hidden treasures, and it is up to you as the photographer to seek them out.
I have been known to clear out a client’s home if I feel some furniture or clutter is getting in the way of the shot.
For outdoors and travel photos, I will wait patiently for the crowd to clear if I feel all the other elements are there to make a great shot.
This image was taken around 1:00pm. You can see the sun was high up in the sky by studying the shadows near the roof. Photo by Karthika Gupta Photography
Overcast Light/Diffused Light
This type of light is also great for images where you want an even tone.
The clouds act as a natural diffuser, and help to balance out the light falling from the sun.
Yes, this light does tend to be a little flat.
But the good news here is, when there is cloud cover or an overcast sky, you can shoot at any time during the day without worrying about harsh strong shadows.
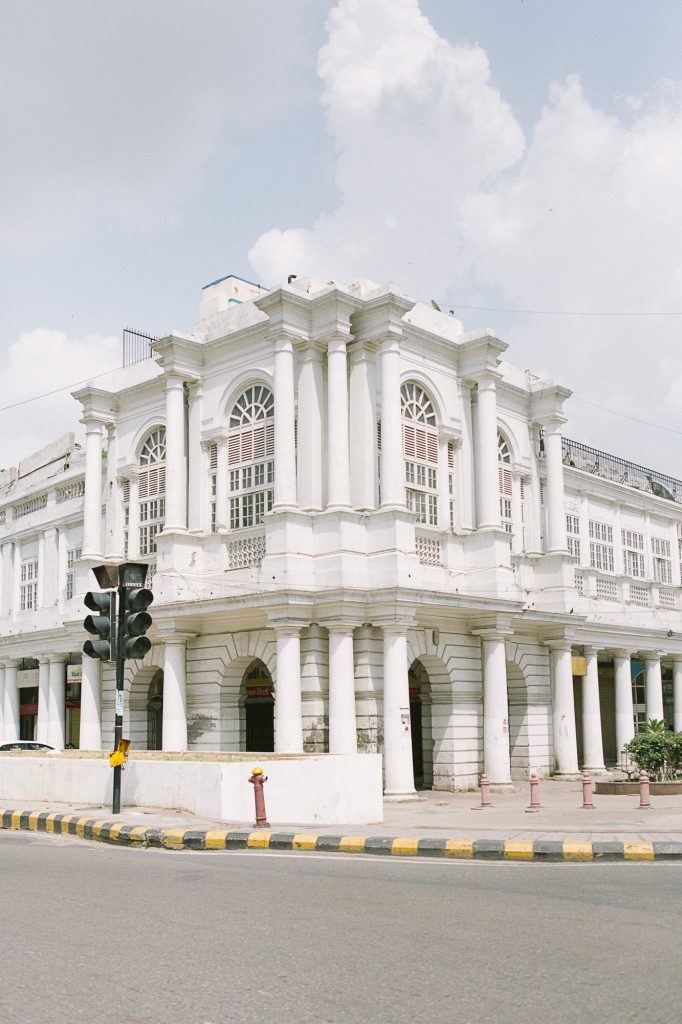
Photo by Karthika Gupta Photography
After you’ve established where the good lighting falls, you can then search for the pretty scenery.
For light and airy photos, I look for backgrounds that are white or have pastel colors.
I feel that the white, or lighter colored, background adds even more “airiness” to the image.
It is hard to achieve a light bright look if you have a dark/black wall in the background.
Remember that both the lighting and scenery combined make for a natural recipe to that “light and airy look” that you want to achieve in your image.
When in doubt, choose a clean neutral-colored background that can make the subject pop even more by eliminating any distractions! Photo by Karthika Gupta Photography
Details
Often times, as photographers, we tend to only focus on the lighting, location, and the subject.
We feel that once we have these three elements, all else will just magically fall into place. However, remember this: every single detail, which is a part of the frame, helps to make, or break, the image.
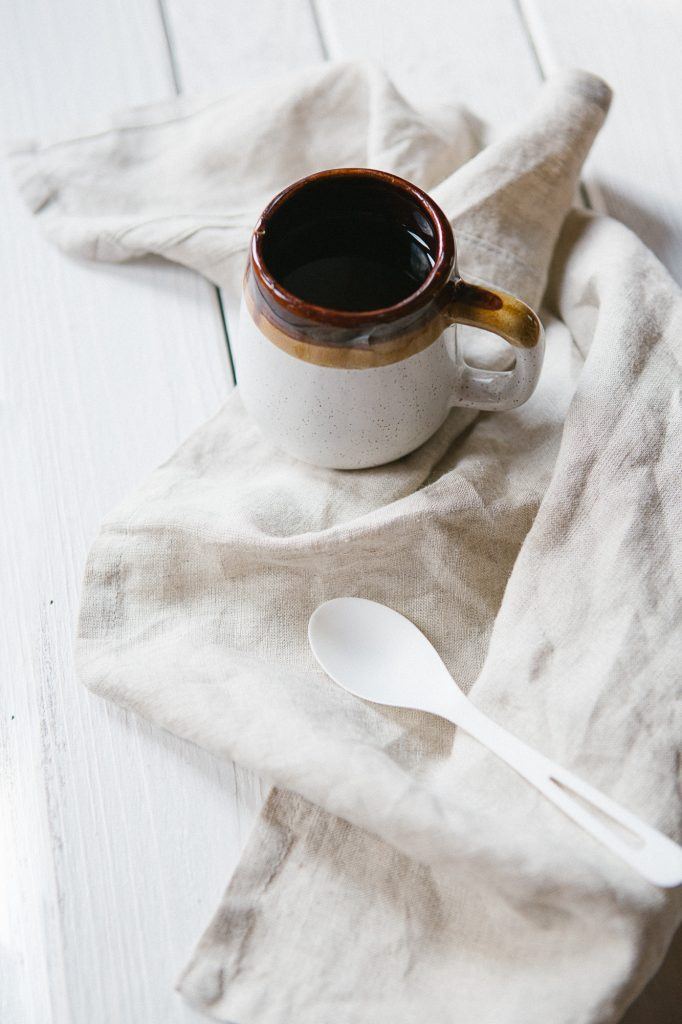
Props don’t have to be elaborate or expensive. Sometimes it is the little things like that simple off-white napkin that do the trick. Photo by Karthika Gupta Photography
If you have the perfect soft light, the perfect background, and the perfect subject, but they happened to show up wearing a graphic t-shirt with neon shoes, then that is not going to get you that light and airy image!
In fact, details like the clothing, accessories, and props play a huge part in the overall look and feel of an image.
I am not afraid to send clothing and accessory choices/recommendations to my clients. It is there for them to use if they need it, and it at least helps them understand my style preferences. Photo by Karthika Gupta Photography
For my portrait and editorial work, I am not afraid to send clothing and prop choices to my clients. This gives them an idea of “the look” that I am going for, and it helps me to get the images that I want for my portfolio based upon my style and my brand aesthetics.
Appropriate Camera Settings
If you are shooting digital and have a camera that allows you to photograph in the RAW format, then definitely do so. Images created in the RAW format retain a lot more of the original details than a .JPEG file format. The RAW file format also provides the most leeway for making edits to the image in postprocessing when looking to achieve a certain “look.”
Avoid extreme bright spots in your photograph by using the histogram feature on your camera. Digital images don’t handle the result of huge overexposure very well, so you’ll want to watch for that.
Avoid extreme bright spots in your photograph by using the histogram feature on your camera.
Having said that, I tend to overexpose my images by about 1/2 a stop about 95% of the time.
I find that editing an underexposed image to the “light and airy look” is more difficult than adjusting a slightly overexposed image.
I am less concerned about blown-out highlights than I am about dense shadows.
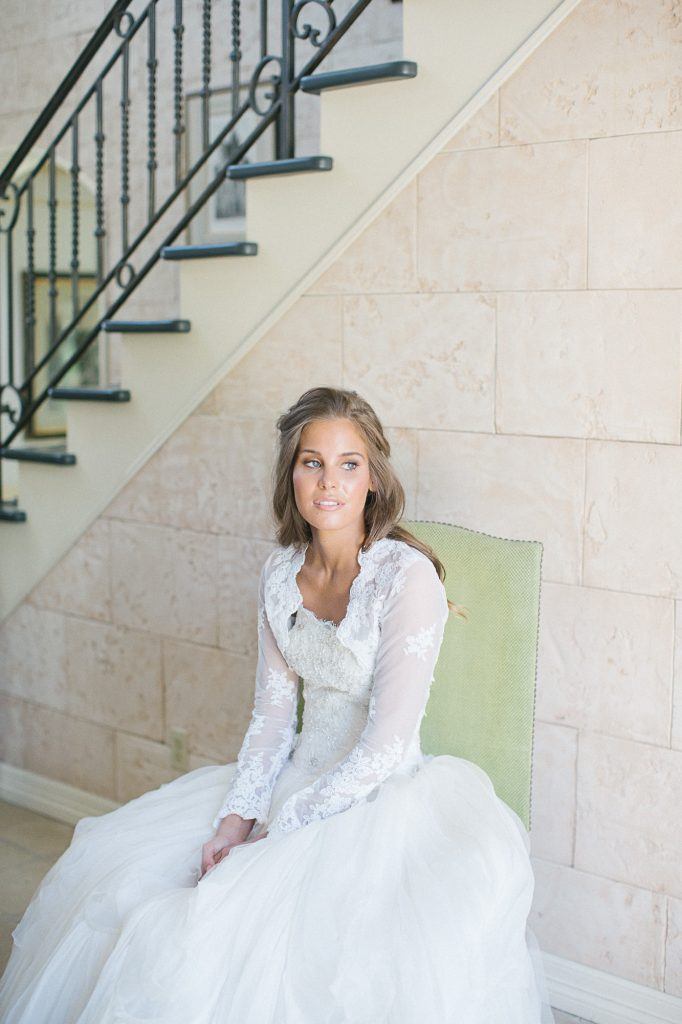
A slight overexposure, while photographing my lovely client, gave me a good starting point for my editing to create the style of imagery that I love: light, bright, and airy! Photo by Karthika Gupta Photography
Consistency in Photography and Editing
This is huge, and not something that too many photographers pay attention to.
Photographic style is developed over time.
It takes a lot of practice, constant shooting, and consistent editing procedure to realize that we like our pictures to look a certain way and convey certain emotions.
Recommended Reading: If you want to learn how to enhance your photos and create better images, grab a copy of Photzy’s The Ultimate Guide to Fundamental Editing.
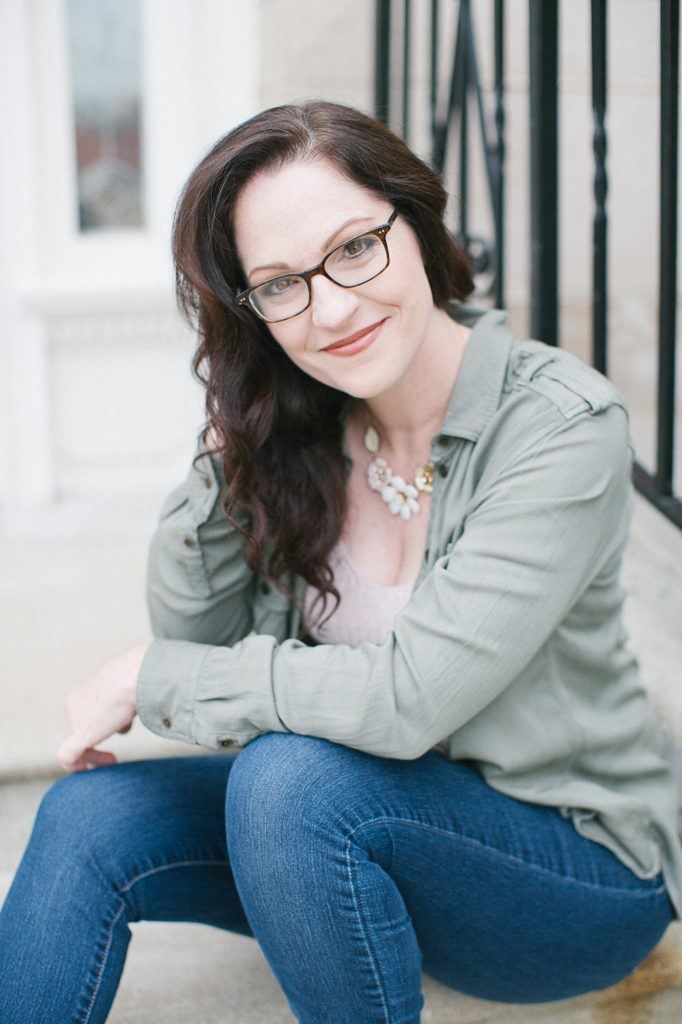
Photo by Karthika Gupta Photography
Most people jump on the latest editing bandwagon and are all over the place in terms of trying everything out there.
Tempting as it may be, I have found that it just leads to more frustration, and anxiety, in terms of finding one’s own style.
When you are just starting out, go ahead and try out all the different styles of photography. See what you like and dislike.
Once you have narrowed down your personal style, stick to it, so that it becomes second nature and helps you develop a consistent and strong portfolio.
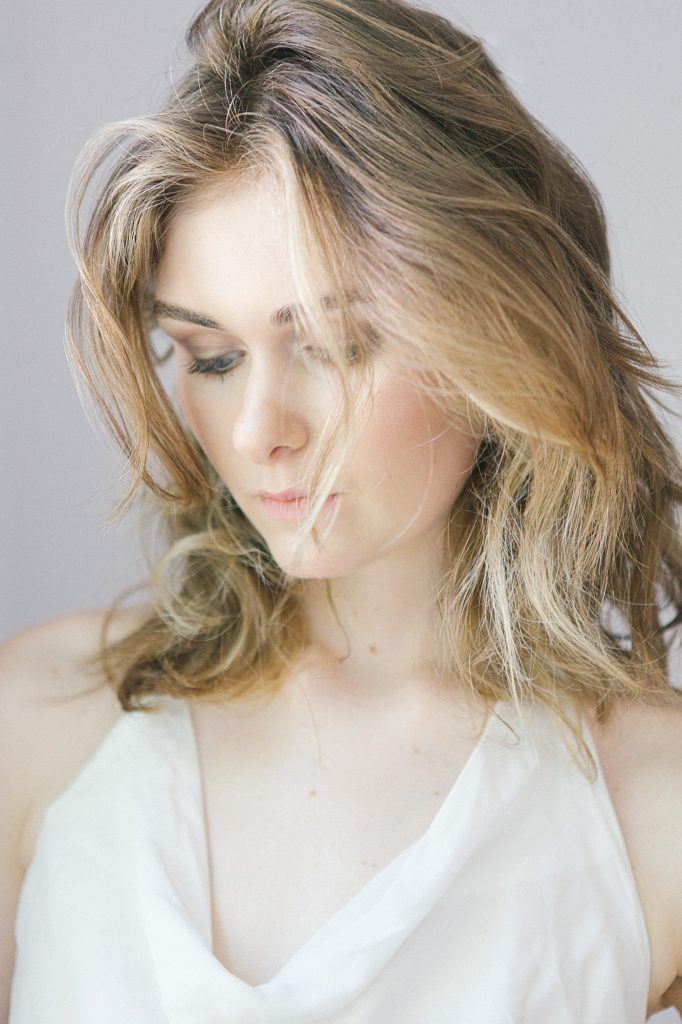
Photo by Karthika Gupta Photography
- Name two styles of photographic imaging.
- What type of lighting works best for the “light and airy” style of photography?
- Why is the lighting better during the Golden Hour?
- If you shoot directly into the sun during the Golden Hour, what bad things can result in your image?
- True or False: If you are forced to shoot under harsh midday light, you should look for subject matter that lends itself to adjustment in postproduction.
- Name one advantage of shooting on an overcast day.
- “Light and airy” will use what type of lighting 80% of the time?
- What “trick of the trade” can help you when using backlight for the “light and airy look?
- If you want the skin tones of your subject to look really good, what should you do to your exposure?
- When the lighting comes from behind the subject, what is this lighting scheme called?
- When shooting the “light and airy” style of photography, what type of background are you looking for?
- Why is consistency of production – both in shooting and post-processing – important to your advancement as a photographer?


