


For some people, life revolves around the beach — the water and waves, the sand, the marine life, the expansive horizon. Beaches are iconic places. They provide the setting for everything from family picnics to peaceful afternoon walks; they are a refuge for both surfers and curious children.
So it would make perfect sense to use the beach as a backdrop for portraits.
Beach photography, however, proves to be a tricky thing for many photographers. You’ve framed and composed your shot perfectly, your subject is dutifully holding her pose, and all your camera settings seem correct. You release the shutter, look at your LCD, and growl with frustration at your overexposed shot.
What’s with all the overexposed beach shots?
The main culprit boils down to something known as dynamic range.
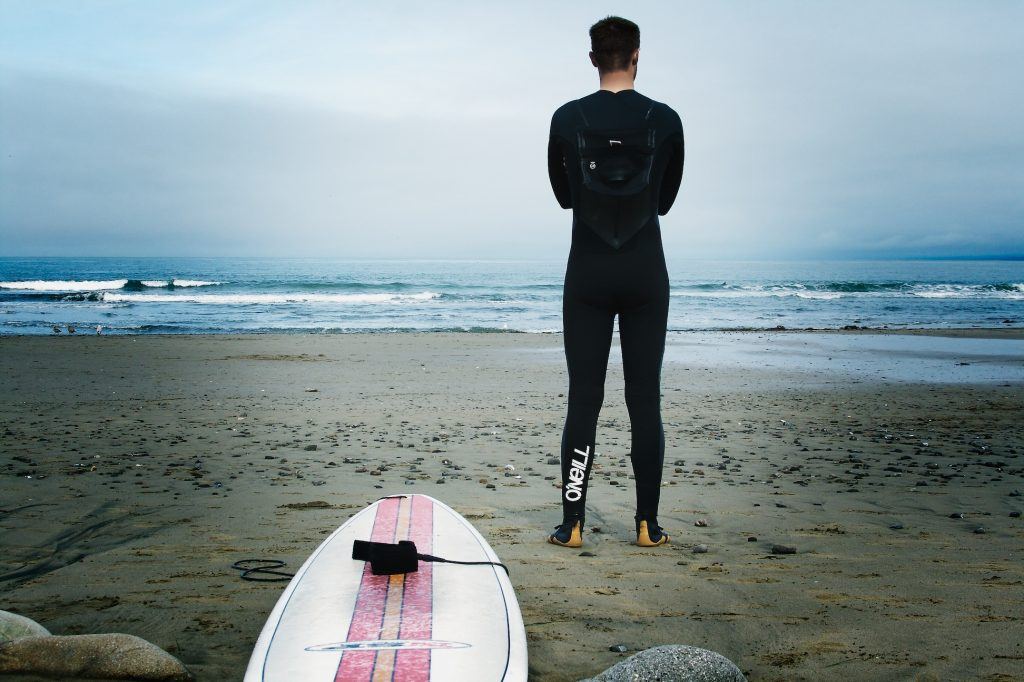
Photo by Jon Carr
A Little Bit About Dynamic Range
There are two important aspects of dynamic range as it relates to photography.
First, there is dynamic range as it applies to the actual scene you intend to capture with your camera; in this case, dynamic range is simply the range from the brightest object to the darkest object in any given scene.
Second, there is the dynamic range of the camera itself. This is the ratio between the lightest and darkest luminance values that your camera’s sensor can capture; more simply, it is a measure of how efficiently the sensor can simultaneously record black without losing detail and record white without blowing it out. The reason this matters so much is because it defines how much of a scene can be accurately reproduced within the context of an image’s black and white boundaries.
Of course, “black” and “white” shouldn’t be interpreted literally because in the real world we don’t experience true black or true white; everything we see represents a dizzying variation of light source intensity and subject reflectivity.
Beach scenes are ones that typically contain large swaths of brightness; on a sunny day, the dynamic range of a beach scene can easily represent the equivalent of 12 or more f-stops, while the average DSLR sensor is capable of recording only about 5 to 7 f-stops of detail. Given this information, it’s understandable how one could think that most DSLRs are clearly overmatched for such a task; this isn’t quite true, however.
Successful beach photography relies less on a structured, step-by-step how-to program — your portraiture skills are fully applicable here — and more on keeping in mind a few things that will help you overcome, or minimize, the challenge of dealing with dynamic range.
"Successful beach photography relies less on a structure, and more on keeping in mind a few things that will help you overcomethe challenge of dealing with dynamic range."
Be Mindful Of The Time Of Day
It’s a tried but true cliché: “timing is everything.” Most people become spur of the moment photographers when they’re at the beach; you carry your camera along for the trip just to shoot whatever interesting things crop up around you.
Planning ahead, however, can be valuable. If it is at all within the realm of possibility in your particular situation, plan your photo shoot for the hour or so before sunset (often referred to as the “golden hour”). By this point in the day, the light is softer and casts a beautiful, warm, golden glow on your subjects and scenery.
Beach photos aren’t possible during other times of the day because you have to deal with harsh overhead light. At other locations you would be able to use trees or other structures for shade. Not so at the beach.

Photo by Mike Baird
Modify The Light
If you can’t or don’t want to wait till evening light to shoot your portraits, there are steps you can take to make the glaring sunlight considerably less harsh.
- Reflector: You can use a reflector to create some fill light, and you don’t have to shell out a lot of money for one. Odds are you have things sitting idly by in your home that would serve admirably as reflectors, such as a roll of aluminum foil or a foam core panel.
- Scrim: Commonly used by magazine photographers on outdoor shoots with models, scrims are another method of modifying sunlight. A scrim is essentially a large neutral density filter that is held in place between the sun and the subject to diffuse the light. It’s portable shade. And if you’ve got a white bed sheet or any sheer, translucent material, you’ve got yourself a scrim panel.
Use A Filter
A polarizer and a neutral density filter are a couple of items that should always have a place in your photo bag. If you’re not a landscape photographer, it’s likely you won’t use either of these filters on a regular basis, but it is better to have one or both onhand than to have neither. They very well could save your hide on a sunny day.
- Polarizer: A polarizing filter helps minimize glare, flare, and reflections commonly associated with sunny conditions. A polarizer won’t eliminate hard shadows on human subjects, but you’ll likely be better off using one than not.
- Neutral density filter: A neutral density (ND) filter absorbs light as it enters the lens. These filters are available in a variety of density levels, with each increase in density blocking more light than the previous level. The impact this has on daylight photography should be quite apparent; you’ll be able to shoot at a wider aperture (great for portraits) — something that you wouldn’t be able to do without the filter, as you would end up with a severely overexposed image, especially when shooting on a beach.
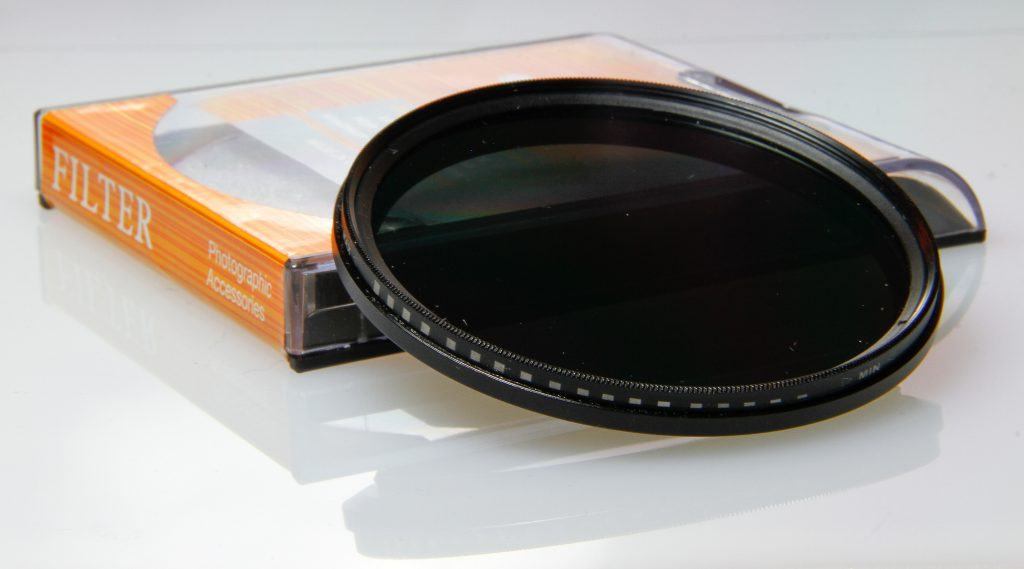
Photo by pulaw
Embrace Atmospheric Imperfections

Photo by Whitney Taylor
Location Matters
If you’re shooting in broad daylight, keep the sun behind your subject. Location awareness combined with a light modifier and/or a filter should have you well on your way to satisfying beach portraits.
Your Lens Hood…
Use it. It will serve as an additional enforcement against glare.
Use Fill Flash
To achieve professional-looking results, the use of on-camera flash is not typically recommended. But outdoors, under bright conditions, on-camera flash can work rather well as fill flash. With the sun serving as the main light, you can use on-camera flash to eliminate those hard shadows left by the sun.

Photo by Kalyan Chakravarthy
Meter And Expose “Correctly”
Improper exposure is, perhaps, the biggest factor for photographs in which dynamic range deficiencies are apparent. Once you learn to correctly expose the subjects of your images in relation to the dynamic range of your camera, you will virtually eliminate shots that suffer from washed-out highlights and detail-deficient shadows.
If necessary, exposure can be corrected in post-processing; detail in shadows can often be recovered at the expense of introducing some noise, whereas blown out highlights are as good as gone. In accordance with this logic, you might try underexposing your shot if you want to maintain the richness of colors in the scene.
"Once you learn to correctly expose the subjects of your images in relation to the dynamic range of your camera, you will virtually eliminate shots that suffer from washed-out highlights and detail-deficient shadows."
Furthermore, if you have to deal with backlighting, spot metering will be a most helpful ally. This will allow you to get your subjects properly exposed without the background exposure becoming a disaster.
Shoot Multiple Exposures
If you want to add a degree of certainty that you’re getting a good shot, set your camera to bracket the exposures — you will end up with three images: one image set at the original exposure, one image a given number of stops above the original exposure, and one image a given number of stops below the original exposure. Odds are one of them will be right. And bracketing will also give you the option of combining all three exposures in post processing to preserve the quality of the detail in both highlights and shadows.
Shoot RAW
One of the quickest and simplest things you can do to take maximum advantage of your camera’s dynamic range can be found right under your nose in the settings menu: shoot raw. As a matter of course, the JPEG format clips a certain amount of image data during the in-camera compression process. Raw, on the other hand, retains all the information recorded by the sensor. In this case, more is better.
Conclusion
Once you get the hang of how to approach the issue of dynamic range — that of both the camera and the environment — beach photography will be a breeze. Well, that may be a bit of an oversimplification; high dynamic range scenarios always pose a challenge, but knowing how to handle it makes all the difference. With practice, you’ll also see the Beach photography can difference in your beach photographs.
A Few More Examples
Remember to keep the sun at your subject’s back.

Photo by JL Stricklin
Silhouettes are always a viable option and work especially well during the golden hour. Use spot metering to meter for the background; this will underexpose your subject, thus creating the silhouette.

Photo by Patrik Jones
Take whatever conditions nature throws your way and use them to make art. You don’t have to be a stickler for rules all the time.

Photo by Al Ibrahim
An ISO of 1600 was used to capture this shot and the result is an overexposed sky. It’s an otherwise nice, moody scene that could have been enhanced by a more balanced exposure.

Photo by James MK


